Intuitive Shipping lets you create zones that determine which countries or geographical regions your products can ship to. With some countries, you have the ability to create more regionalize zones with either a single region or group of regions, such as provinces or states.
You can further localize your zones by creating sub-zones with postal codes or zip codes. This lets you restrict shipping or offer exclusive shipping options to sub-zones within a main zone. For example, if you’re based in the UK – or you ship to the UK – you can create sub-zones for specific areas within the UK, like the Scottish Highlands or the Isle of Wight.
How It Works
When you create a zone in Intuitive Shipping, you have the option to add one or more sub-zones to it. Sub-zones are created by adding one or more postal codes, or a range of postal codes.
For example, if you want to target local shipping to specific zip codes in New York City, you can enter individual zip codes, separated by comma, along with ranges, like ‘10001, 10005, 10012:10025, 10029’.
Every postal code between – and including – the first and last postal code is included in the range.
For example, a range entered as 10001:10005 covers every zip code between 10001 and 10005.
You can even enter postal code prefixes to make it even easier to set up.
For example, if you want to limit shipping to a specific district in downtown Toronto, you can add ‘M5B’ to your sub-zone instead of creating a full-format range like ‘M5B0A1:M5B6E1. By simply entering the prefix ‘M5B’, you’re including every postal code that starts with that prefix.
Unlike main zones, which can only include a country or region once, you can have multiple sub-zones with overlapping postal codes.
For example, you cannot have two main zones that include the state of California. If California has been added to one zone already, it will no longer be selectable for new zones.
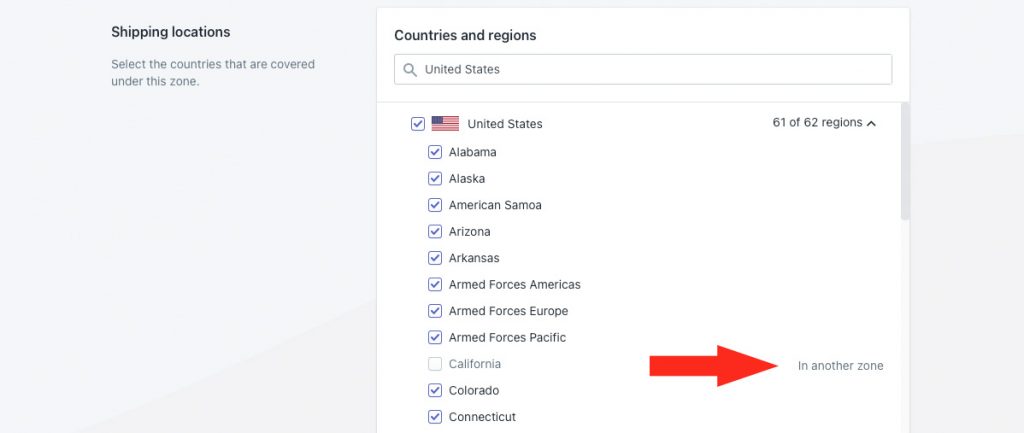
However, you can create multiple sub-zones within the zone containing California that include the same zip codes. This is useful if shipping methods apply to multiple sub-zones while others apply only to a single zone.
For example, you might have one shipping method with the same shipping rate for both Malibu and Topanga, but others with a shipping rate that is exclusive to Malibu.
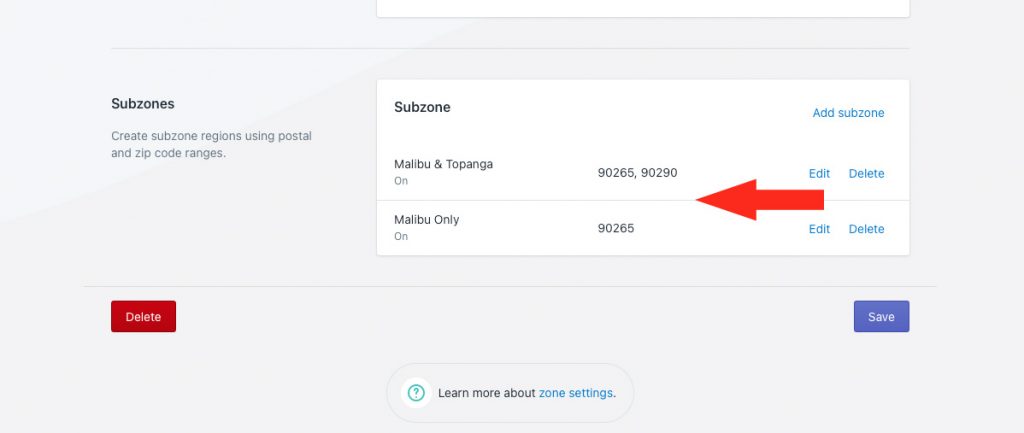
Once you’ve added sub-zones to your main zones, they’ll be selectable each time you create a shipping method. You only need to select the sub-zone.
For example, if you have a sub-zone covering Scotland – or parts of it – in your UK zone, you only need to select the ‘Scotland’ sub-zone when creating your shipping method. This will limit the rates for the shipping method to Scotland only. Customers who don’t live in any of the postcodes covered by your sub-zone will not get rates from that shipping method.
Add A Sub-Zone
Sub-zones must be added to the main zone where their postal codes or zip codes reside. That means, you cannot add UK postcodes to a zone that doesn’t include the UK.
A sub-zone can only be added to a zone. If you haven’t created any zones, you’ll have to complete that setup first.
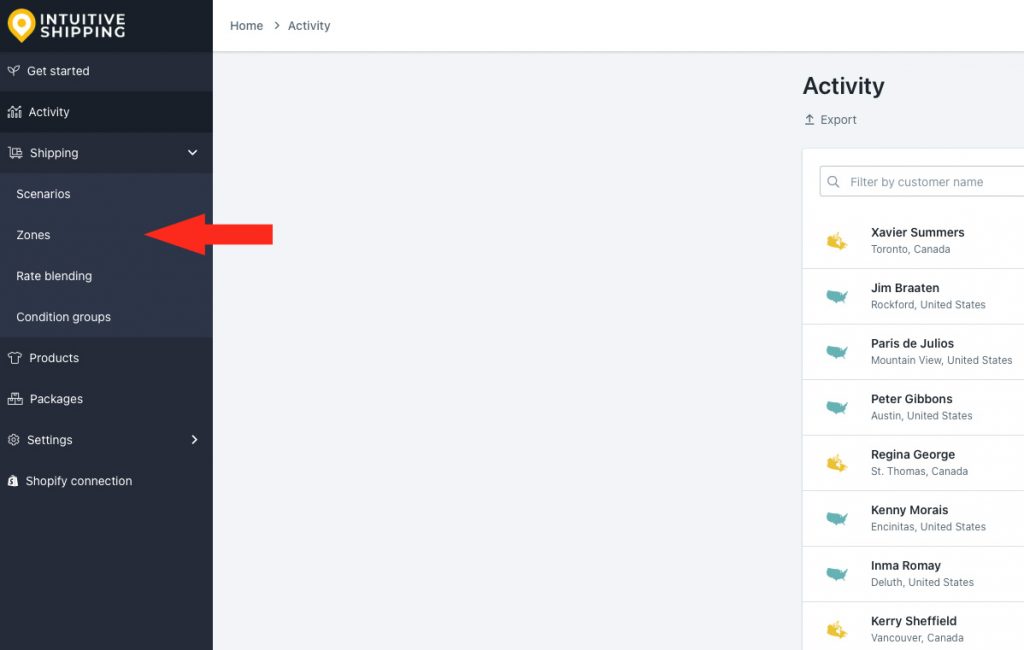
1) Click Shipping on the main menu, then select Zones from the drop-down list.
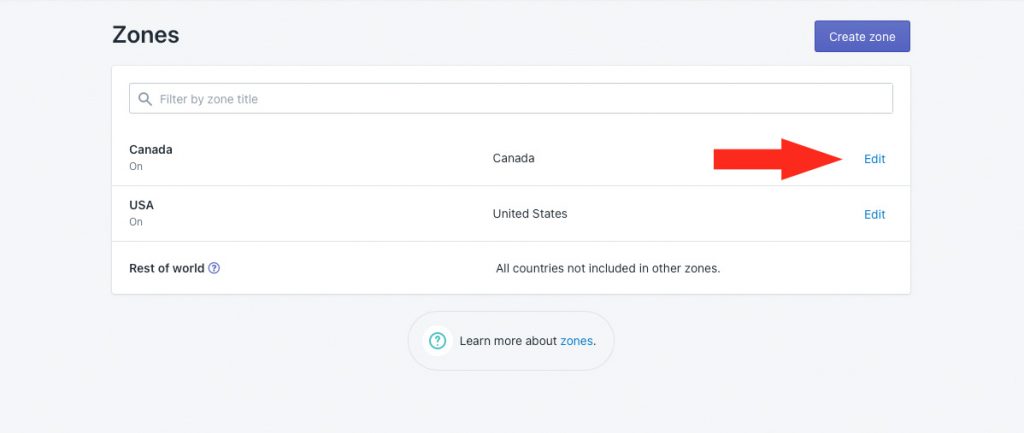
2) Click Edit beside the zone you wish to add the sub-zone to.
3) Scroll down to the Subzones section, then click Add subzone.
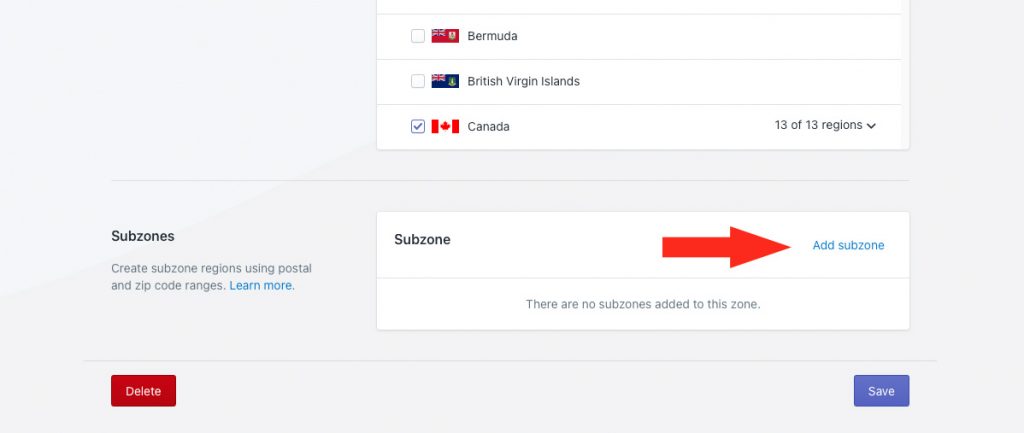
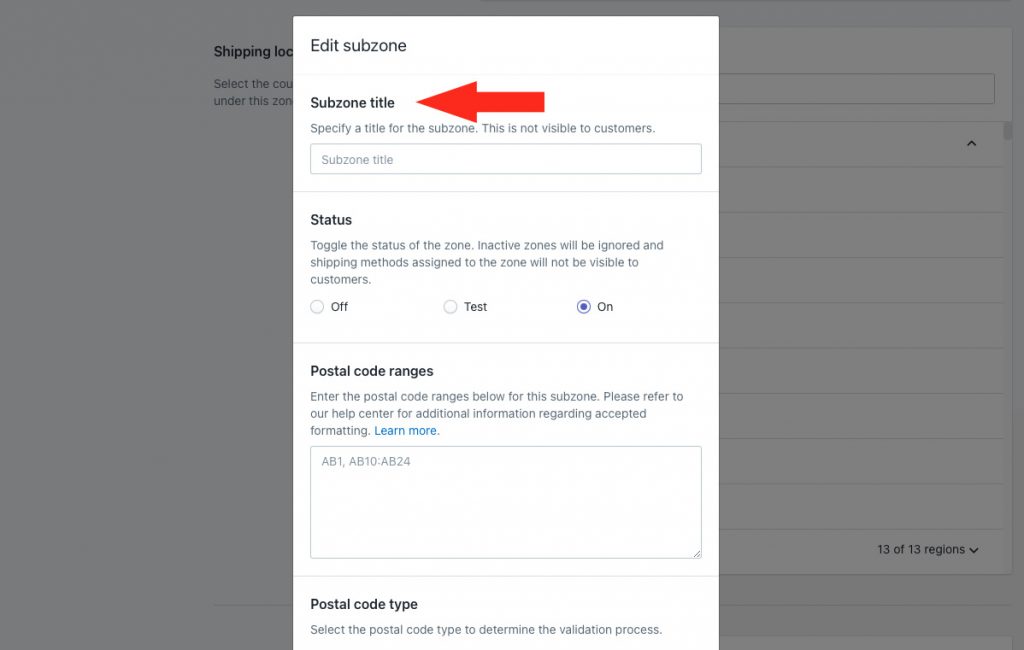
4) Enter a sub-zone title. We recommend naming your sub-zone after the local region (or regions) covered by the postal codes entered in Step 6.
5) Set the sub-zone status.
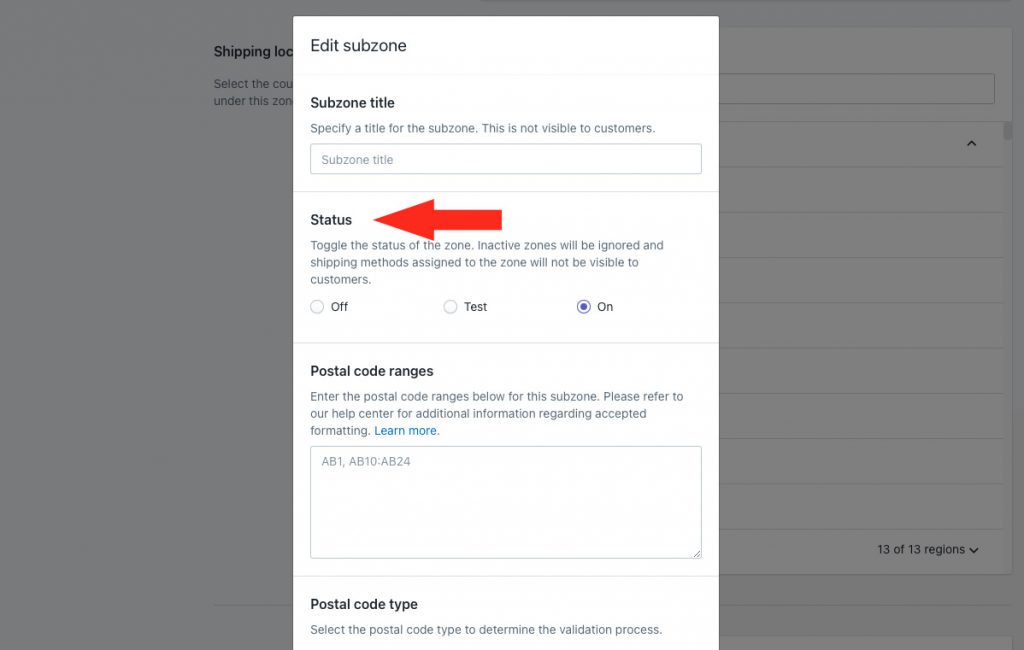
You have three (3) settings to choose from:
Off – the sub-zone will be ignored. Shipping methods will not be visible at checkout for addresses in the sub-zone, even in Sandbox mode.
Test – shipping methods will be visible at checkout for addresses in the sub-zone only when you use the word ‘Intuitive’ as either the customer’s first or last name.
On – shipping methods will be visible at checkout for addresses in the sub-zone. This is the default setting.
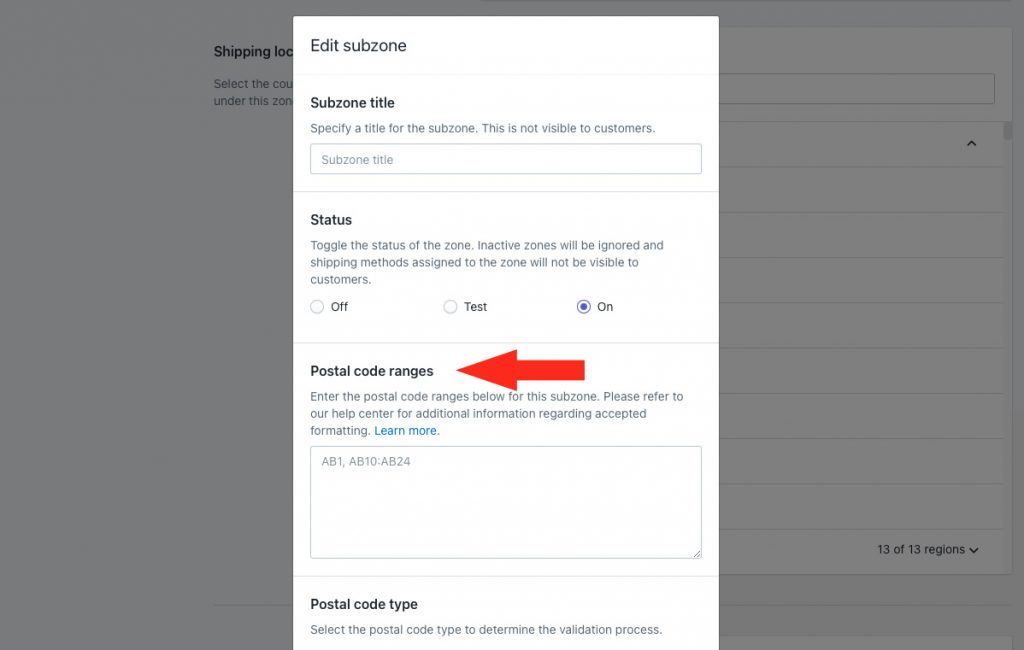
6) Enter the postal code or postal code ranges for your sub-zone. See Postal Code Formatting for more details on what is acceptable formatting.
7) Select the postal code type.
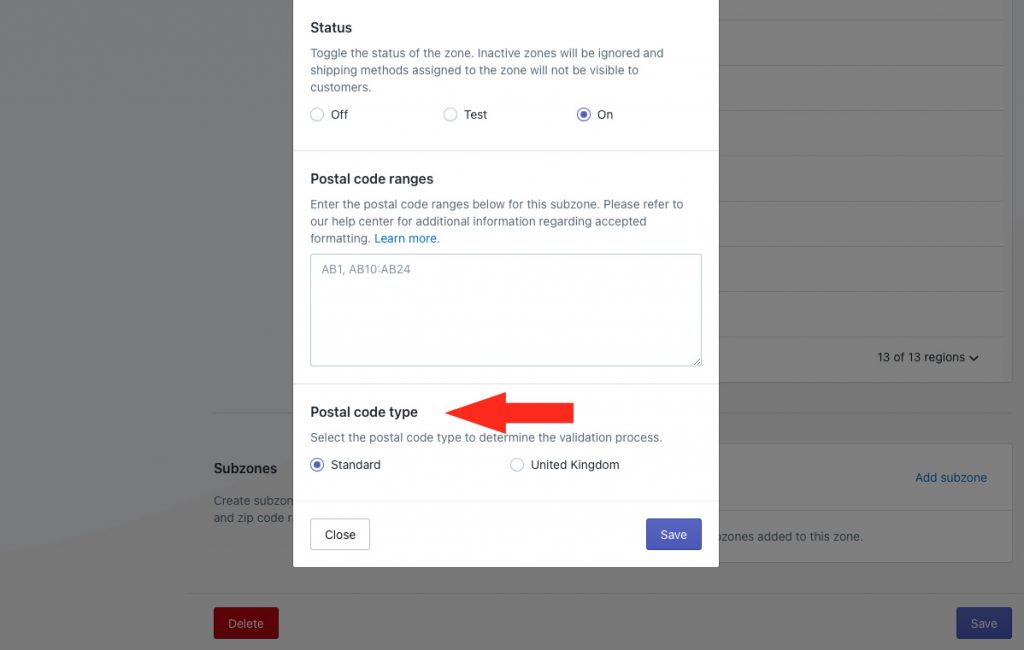
You have two (2) settings to choose from:
Standard – any postal code or zip code that is not in the UK.
United Kingdom – UK postcodes only.
The UK has unique formatting for postcodes which requires a special lookup by Intuitive Shipping to confirm that the postcode is formatted correctly.
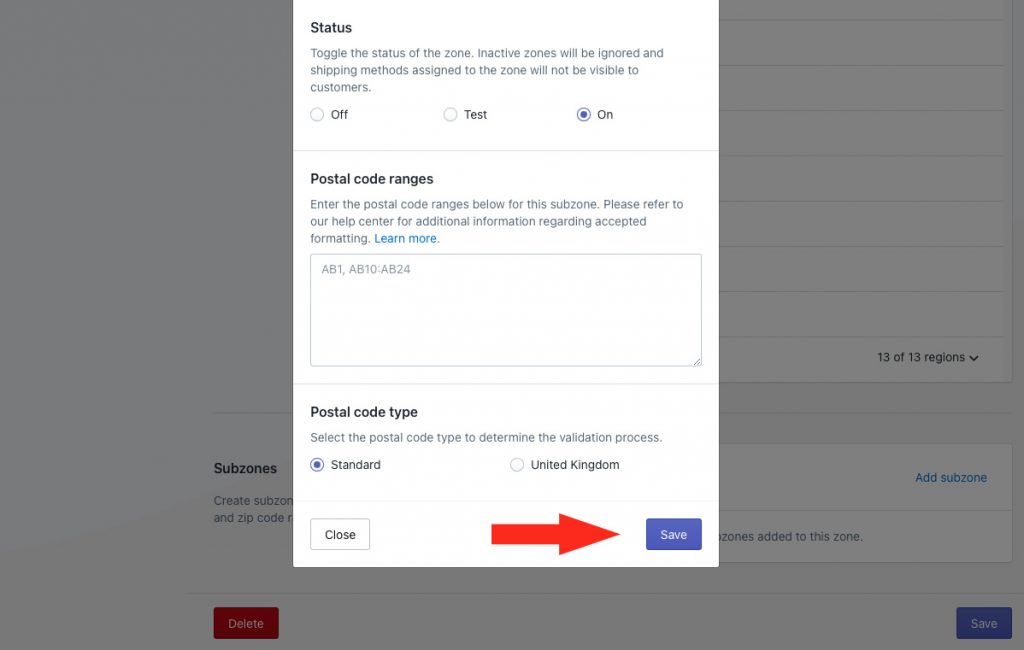
8) Click the Save button to save your sub-zone
The sub-zone is added to your main zone, and can be edited or deleted at any time, without affecting the main zone.
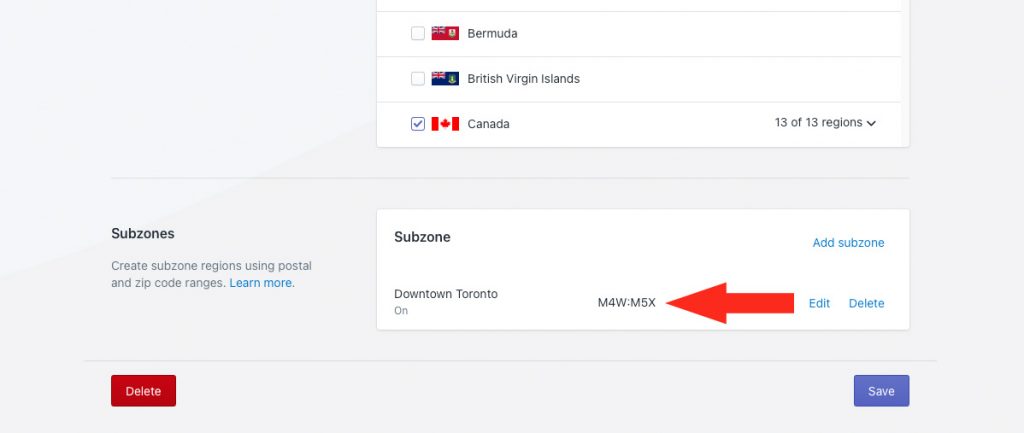
9) Repeat Steps 1 to 8 to add even more sub-zones to the zone.
Postal Code Formatting
In order to ensure that the sub-zone functions properly, you must use the correct formatting for your postal codes or zip codes.
Standard (Non-UK) Postal Codes and Zip Codes
When you select ‘Standard’ as the postal code type, Intuitive Shipping does not verify the formatting. That means, if you drop a character or add an extra one, you can still save the sub-zone.
For example, if you want to create a sub-zone for Toronto that includes the postal code ‘M5J 2X2, but you accidentally enter it as ‘M5J2X’ (without the second ‘2’), you can complete the save. However, even though you can save the sub-zone, the postal code is not formatted correctly, and will result in rate calculating failures or errors.
Spaces are not required, and are filtered out when you save the sub-zone.
For example, if you enter the postal code as ‘M5J 2X2’, with a space between the prefix and suffix, Intuitive Shipping will remove the space and automatically format the postal code as ‘M5J2X2’.
Similarly, Intuitive Shipping will remove any excess spaces before or after commas.
For example, if you enter ‘M1B , M5A’, with a space to the left of the comma and two spaces to the right of the comma, Intuitive Shipping will remove the excess spaces.
UK Postcodes
When you select ‘United Kingdom’ as the postal code type, Intuitive Shipping performs a validation check before you can save the sub-zone to ensure that the postcodes are formatted correctly
For example, you can enter either ‘EH1’ or ‘EH10’ – or both – prefixes. Intuitive Shipping can distinguish between the two. And, when entering a full postcode, if you accidentally enter ‘EH11A’ instead of the correct ‘EH11AD’, you will be unable to save the sub-zone.
Unlike Standard postal code types, you cannot save sub-zones with postal codes or zip codes from other countries once you’ve selected the ‘United Kingdom’ postal code type.
For example, you cannot enter the US zip code ‘90210’ as part of a UK sub-zone. The UK postcode must be formatted correctly, whether it’s the prefix or the full format.
Case Sensitivity and Special Characters
Regardless of which postal code type you select, alpha characters will always be entered in upper case, regardless of your keyboard settings.
Special characters entered in error, such as @ or %, are not accepted and you will be unable to save the sub-zone until the special characters are removed.
Check out more common setups or look at additional setups.
