Offering Free Shipping is a great way to increase your Average Order Value. This guide teaches you how to create a custom service shipping method with a free shipping rate using conditions to limit when free shipping is available at checkout.
If you prefer to set up an unconditional shipping method that is always free, create a custom service shipping method and follow the steps to select a free shipping service.
Add A Free Shipping Scenario
Scenarios let you add conditions that control when shipping methods are displayed at checkout. In this setup, the condition will determine when free shipping is displayed.
For this example, we’ll use the product collection condition that references our Legacy collection. You can use other condition types to limit free shipping if.
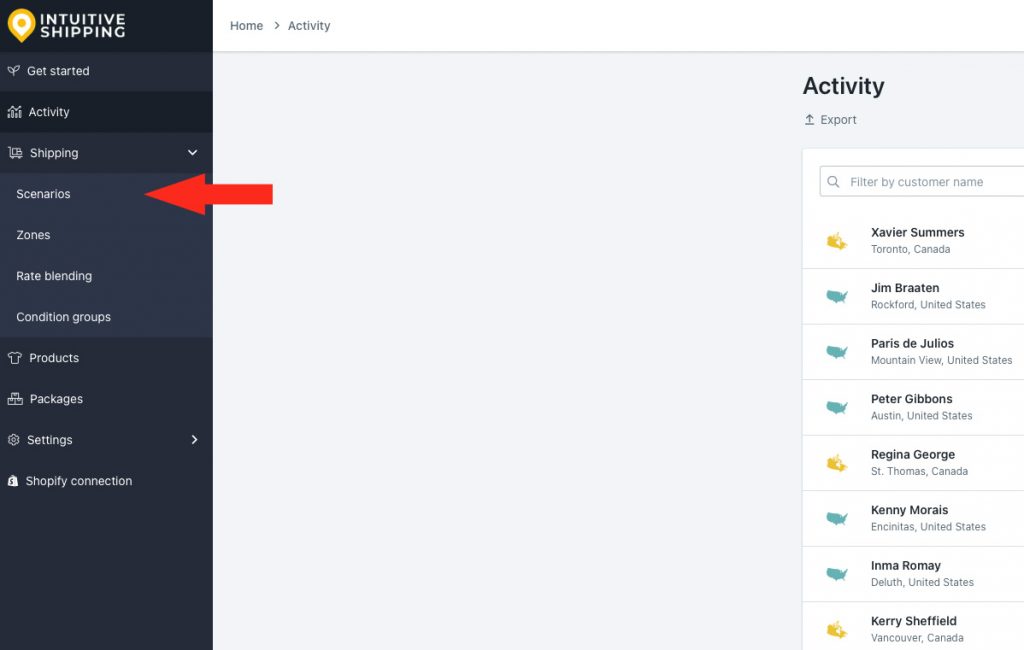
1) Click Shipping on the sidebar menu, then select Scenarios from the drop-down list.
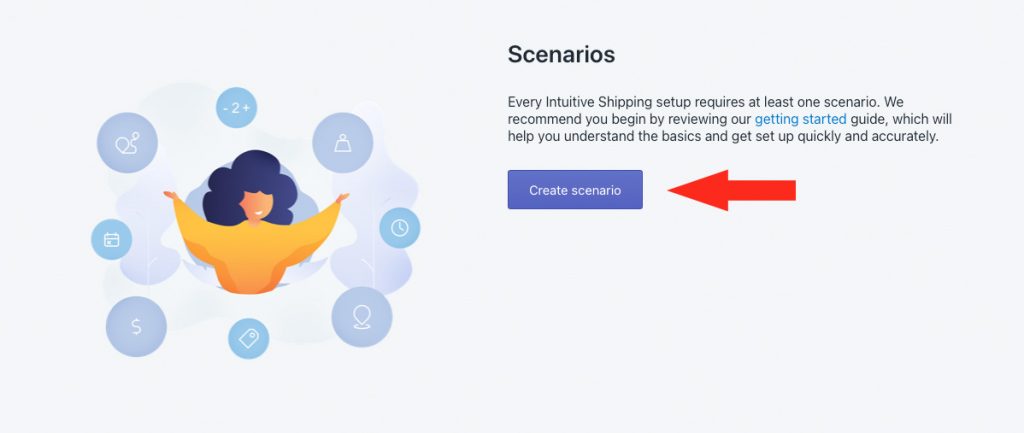
2) Click the Create scenario button.
General Settings
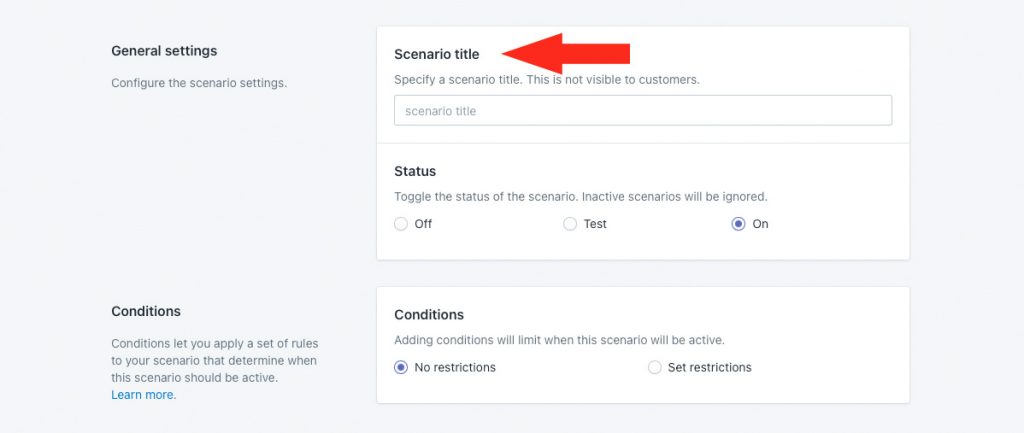
1) Enter a Scenario title, like ‘Free Shipping – Legacy’.
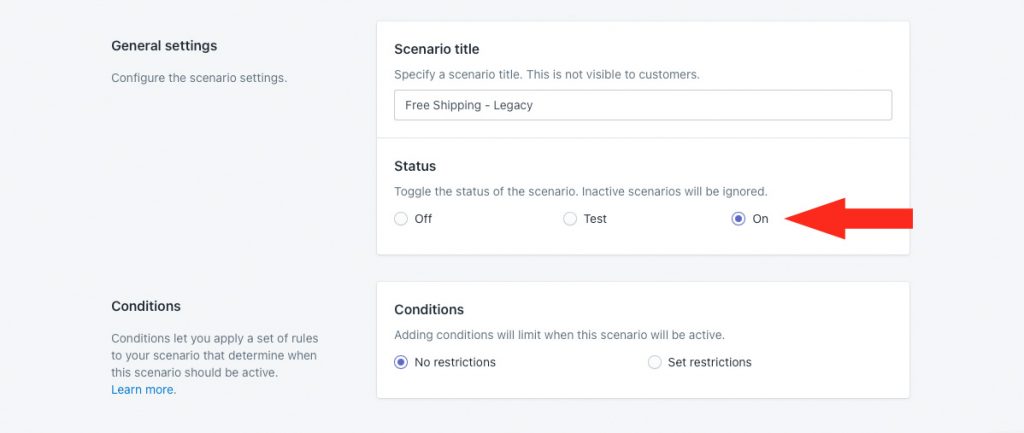
2) Leave the status set to ‘On’.
Conditions
1) Select Set restrictions.
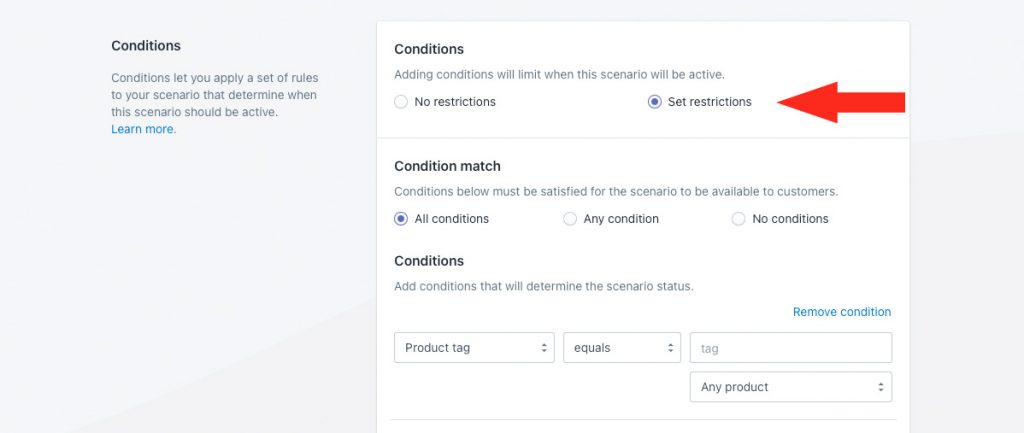
2) Leave Condition match set to All conditions.
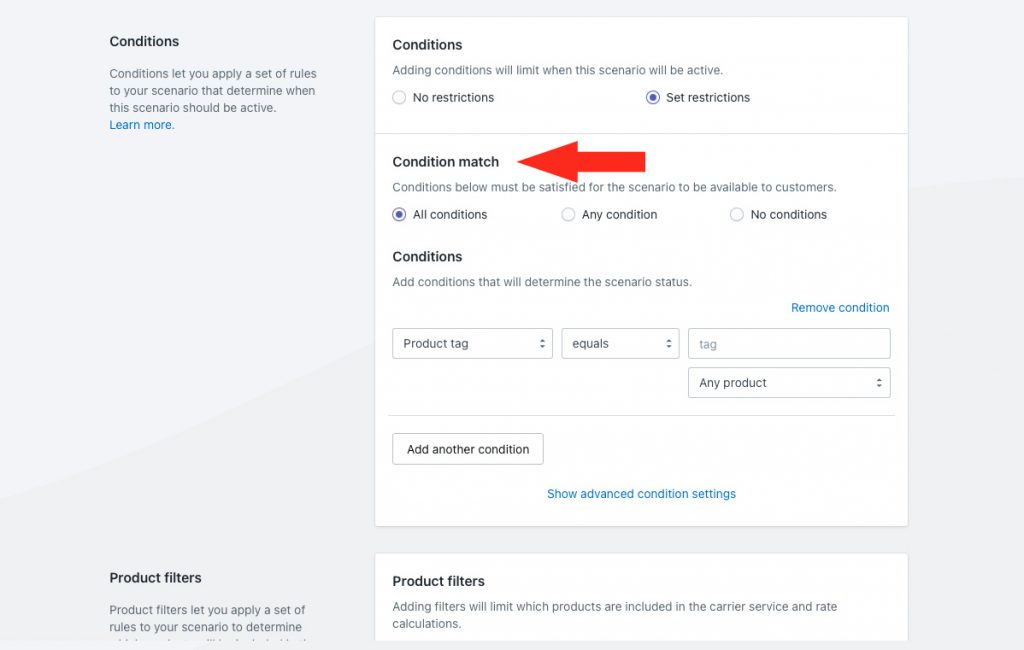
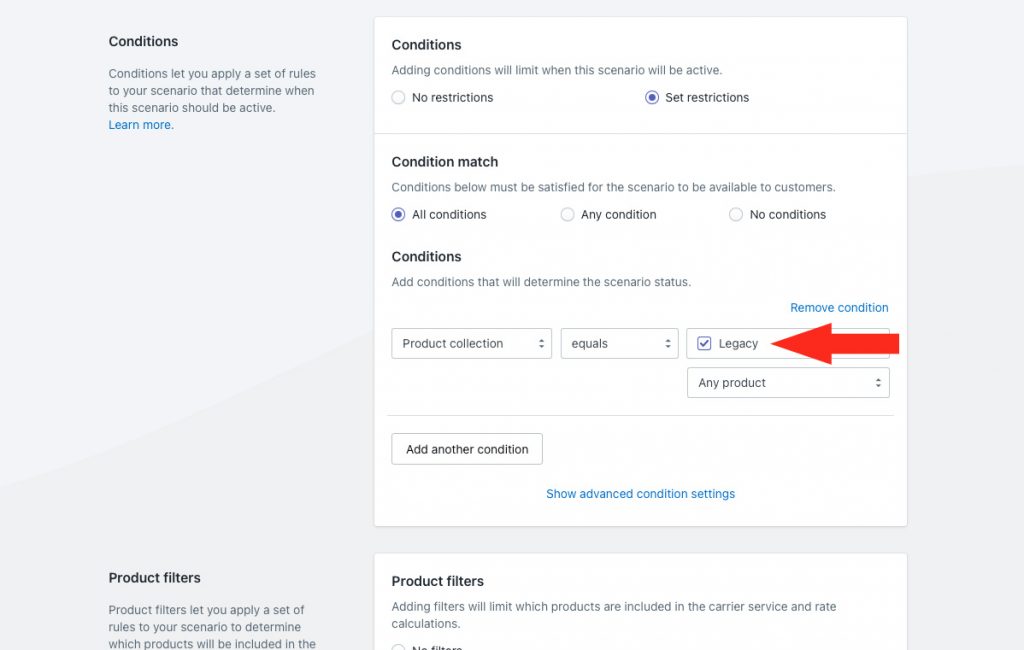
3) Select a condition type. For this example, we’ll select Product collection, but you can use any condition type to restrict free shipping.
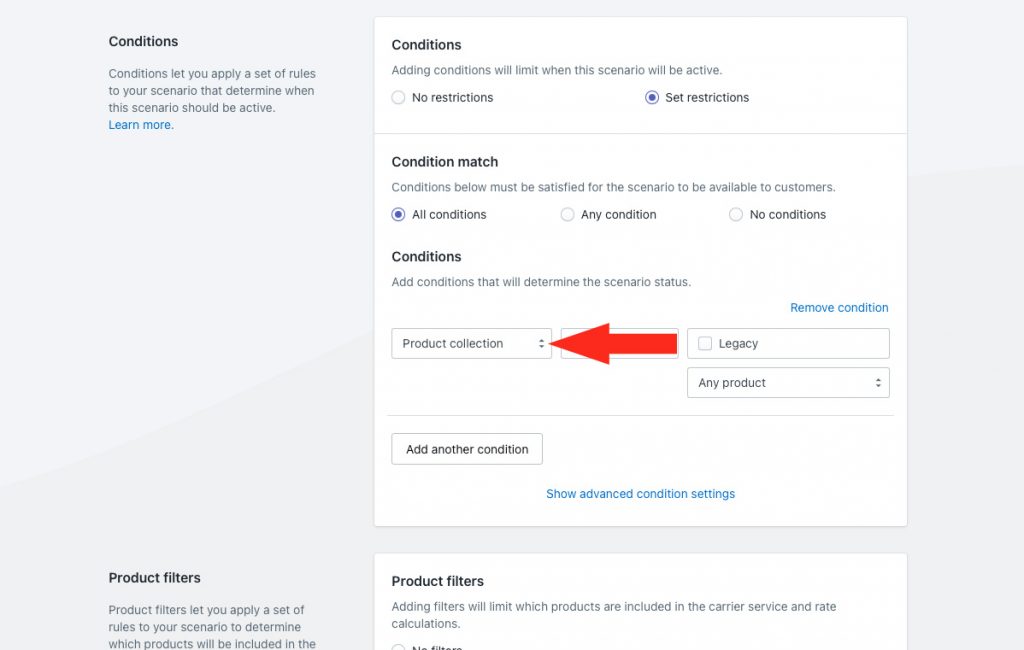
4) Select the condition logic. For this example, we’ll leave it set to equals. Logic options may change depending on the condition type selected in Step 3.
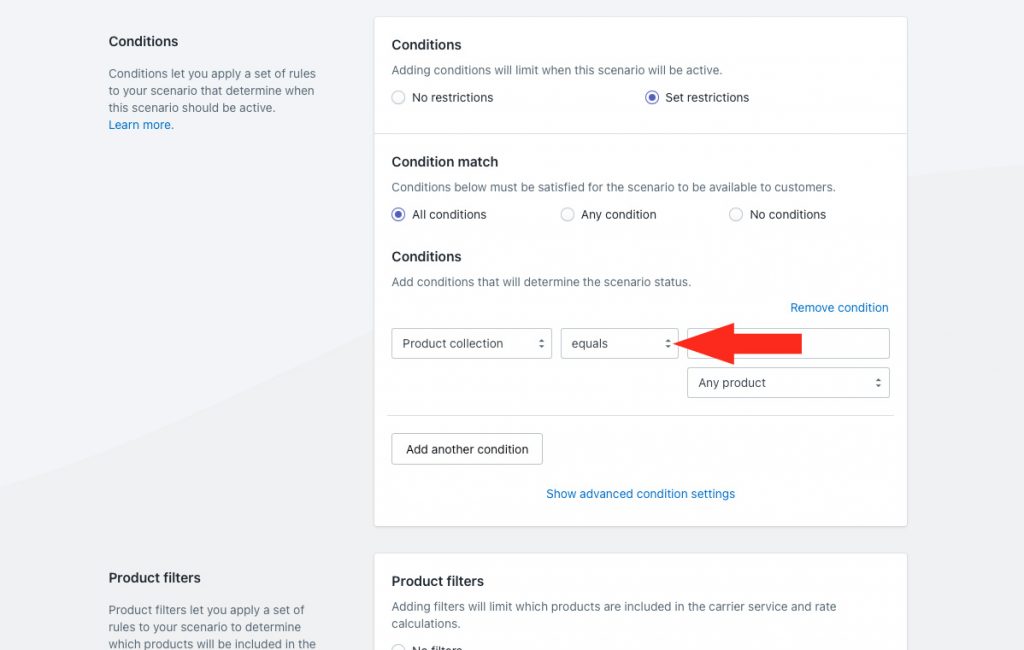
5) Enter the condition value. Some values need to be entered manually. Others require a selection. For this example, we’ll select Legacy from the list of product collections in our store.
Product conditions require an additional setting not needed by other condition types. If you did not add a product condition in Steps 3 to 5, this setting is not displayed, and you can skip ahead to Product Filters. If you did add a product condition, continue to the next step.
6) Choose the appropriate additional product setting for your free shipping Scenario.
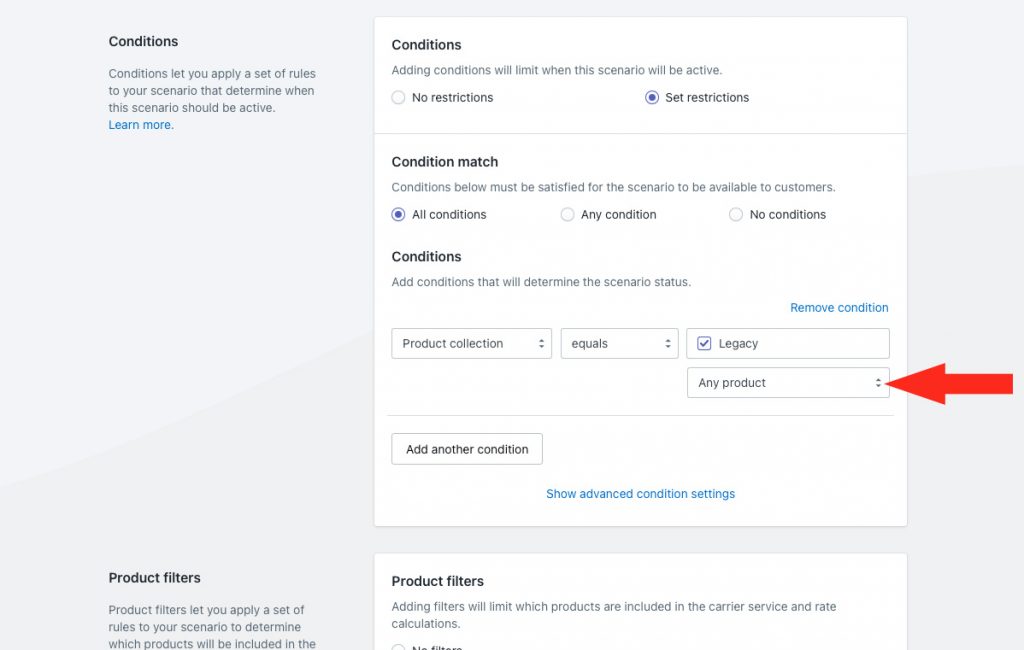
You have three (3) settings to choose from:
Any product – At least one product in the cart must satisfy the condition.
All products – All products in the cart must satisfy the condition.
No products – None of the products in the cart must satisfy the condition.
For example, if you select ‘Any product’, then, in our example, free shipping will be displayed at checkout as long as at least one item in the cart is from the Legacy collection. Whereas, if you select ‘All products’, free shipping will only be displayed if every item in the cart is a Legacy product. And, if you select ‘No products’, then free shipping will be displayed when the cart contains anything but Legacy products.
Product Filters
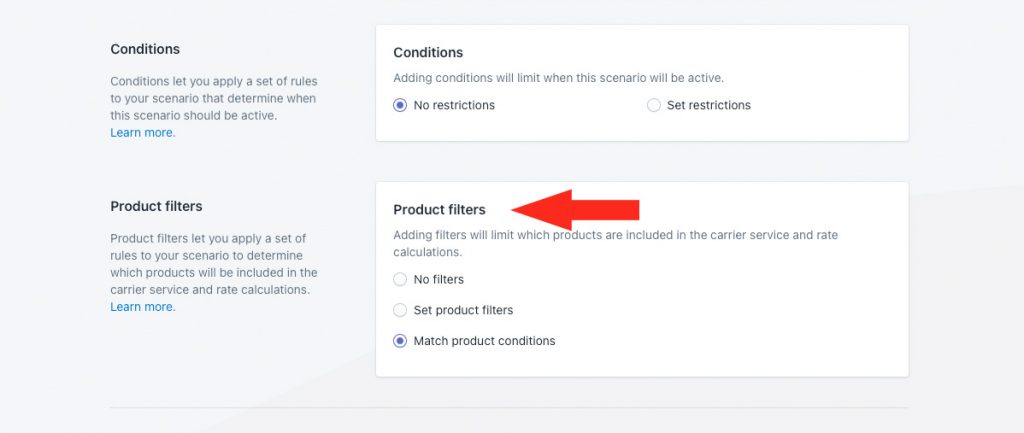
1) Leave Product filters set to Match product conditions for this example.
Product filters determine which products are included in the shipping method rate calculation. If you did not add a product condition in the previous section, ‘Match’ is treated the same as ‘No filters’. If you added a product condition, like our collection example, in the vast majority of cases ‘Match’ is the preferred setting.
Save Your Settings
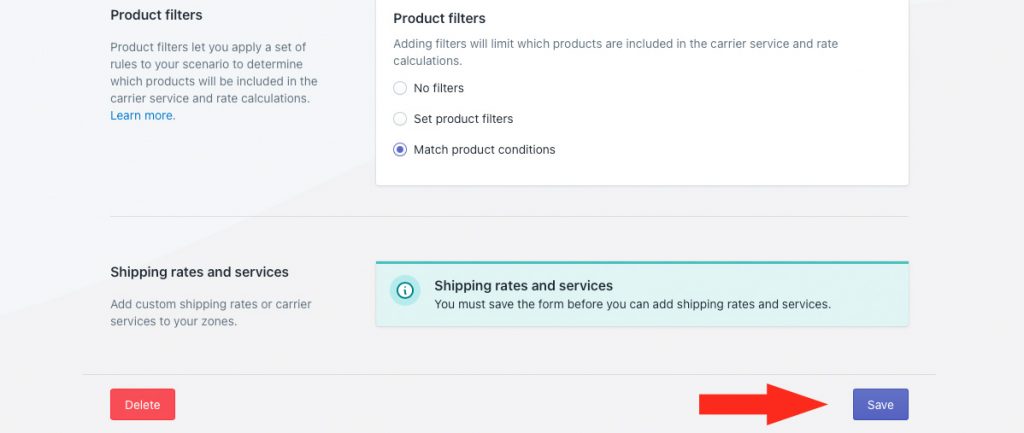
1) Click the Save button to save your conditional free shipping Scenario
Add A Free Shipping Method
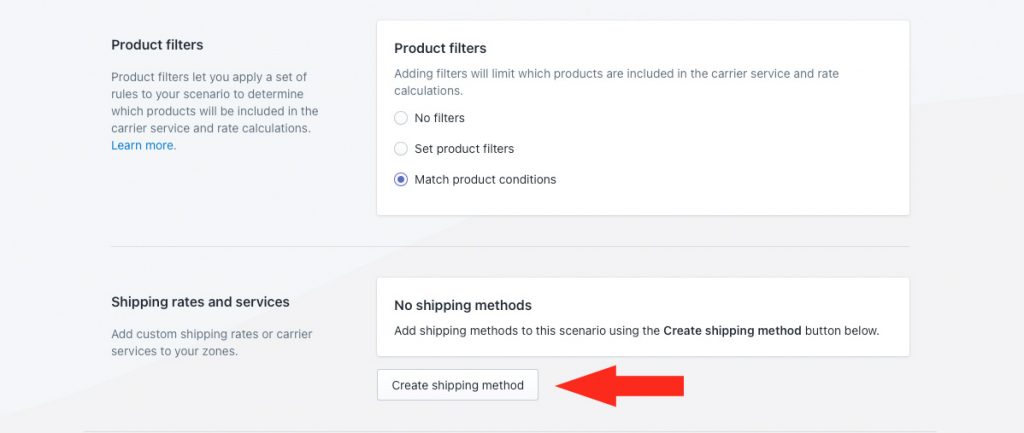
1) Click the Create shipping method button to add a free shipping method.
Select A Free Shipping Service
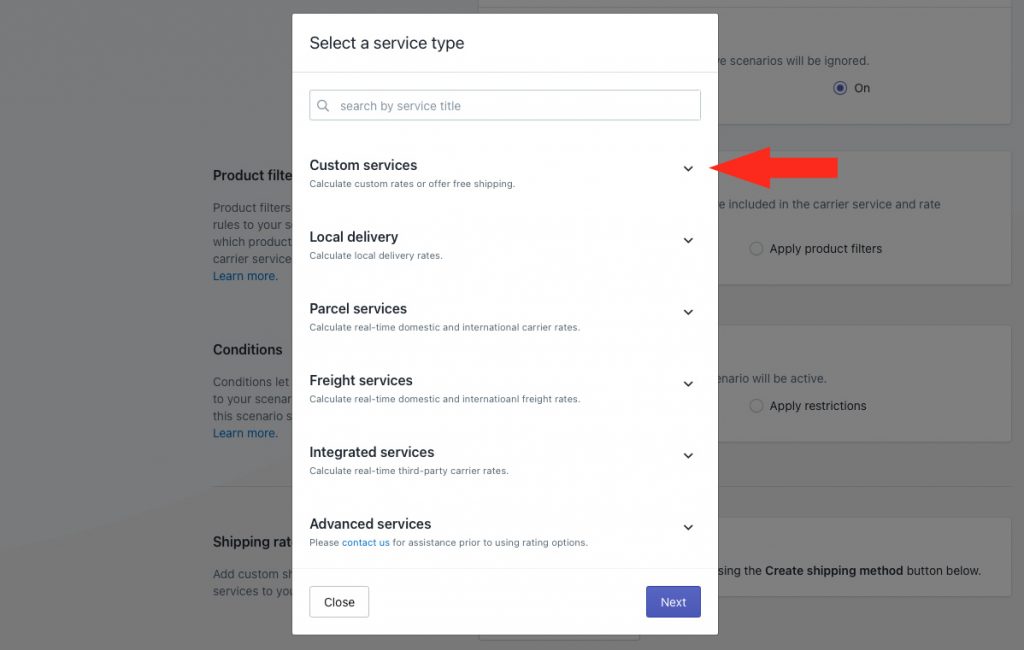
1) Click the downward arrow beside Custom services to display a list of options.
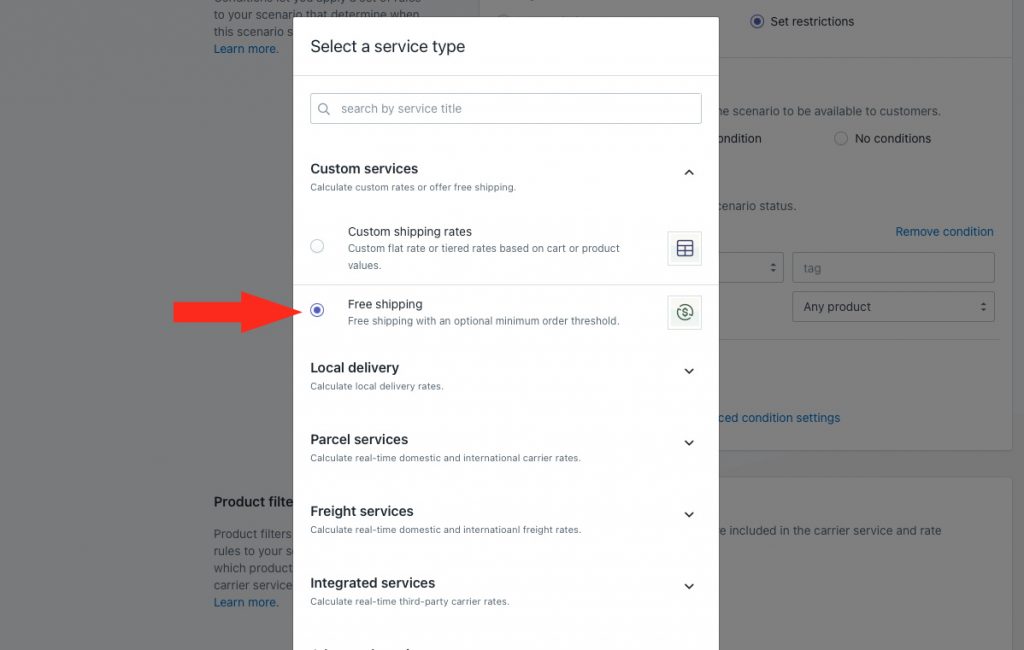
2) Select Free shipping from the list.
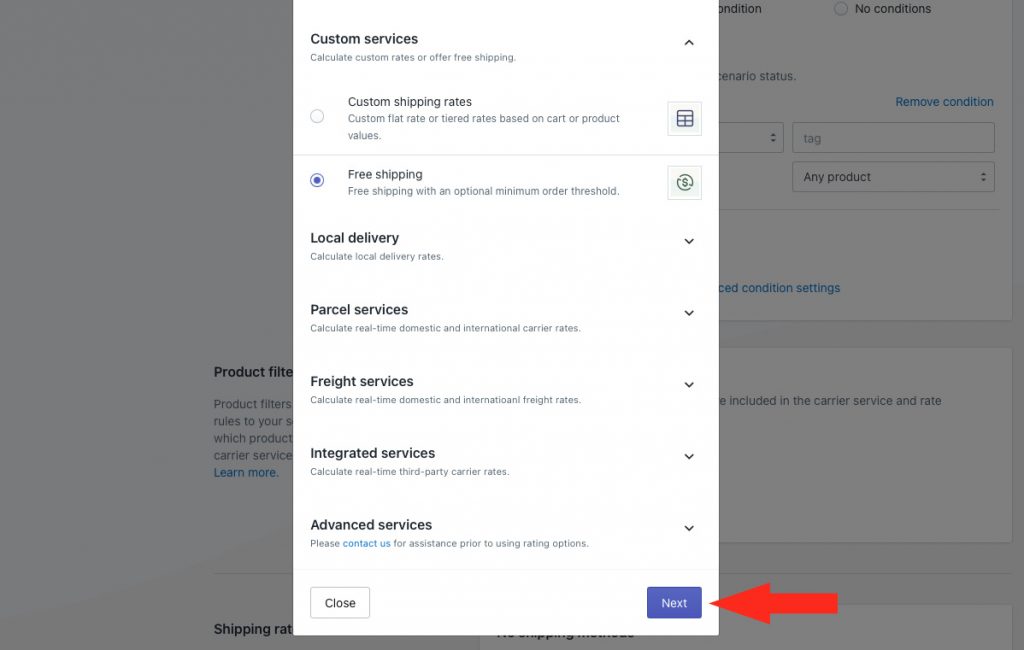
3) Click the Next button.
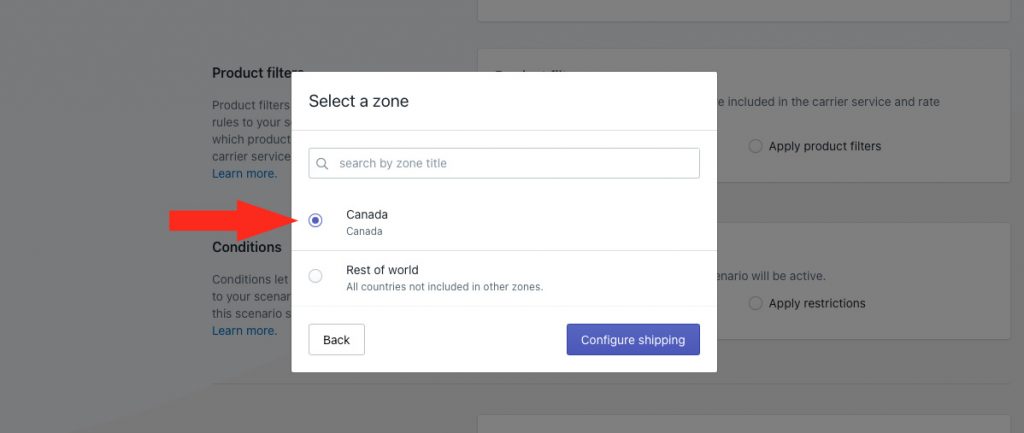
4) Select a Zone.
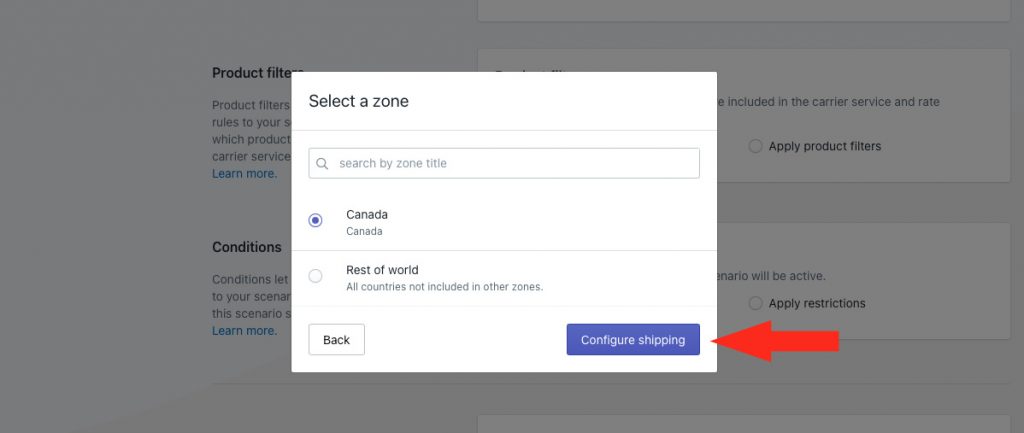
5) Click the Configure shipping button.
General
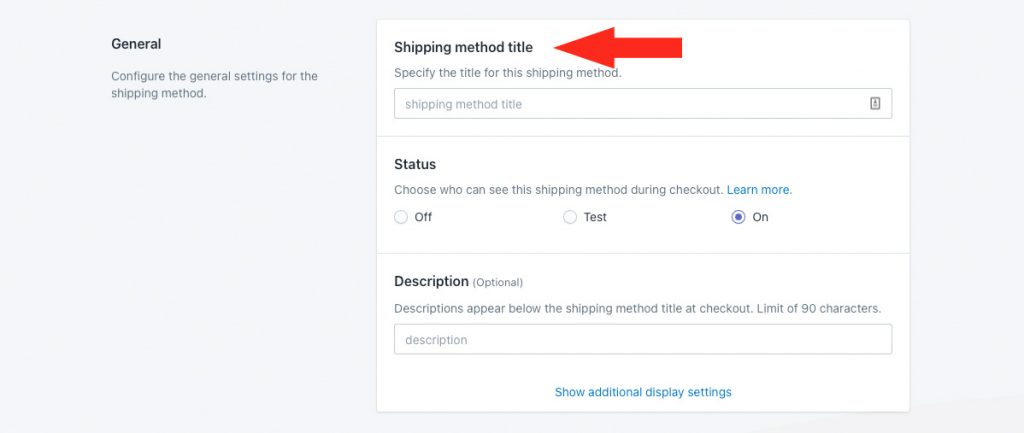
1) Enter a shipping method Title, like ‘Free Shipping’. The title entered here will be visible to customers.
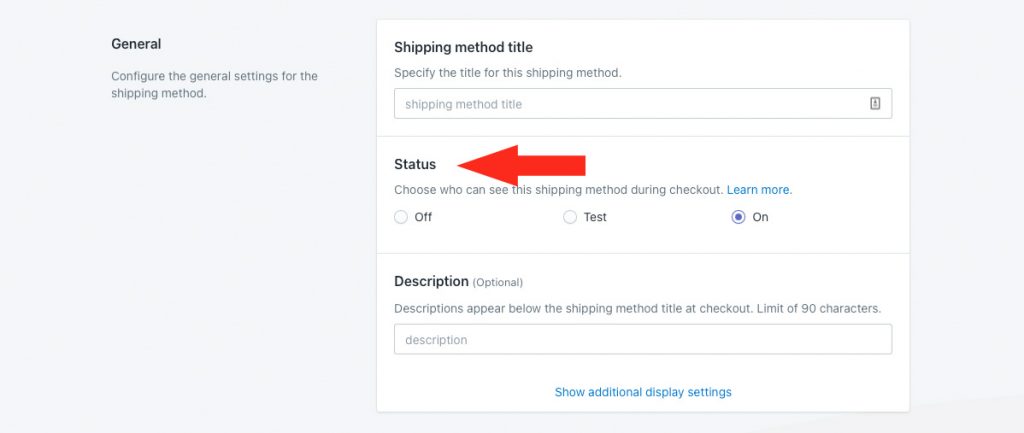
2) If you want the free shipping method to be available right away, leave the status set to On. If you want to test it first before making it public, set it to Test.
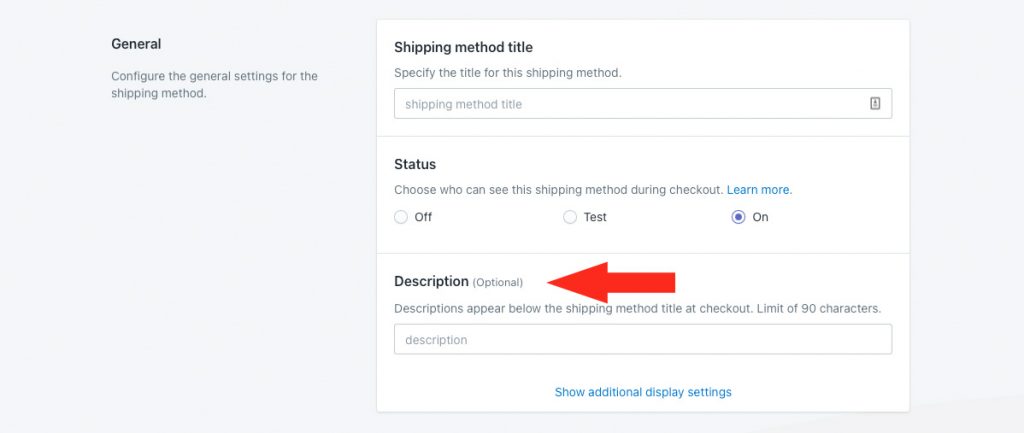
3) If desired, enter a description for your free shipping method. We recommend limiting your description to 90 characters or less to ensure it displays properly on the checkout page.
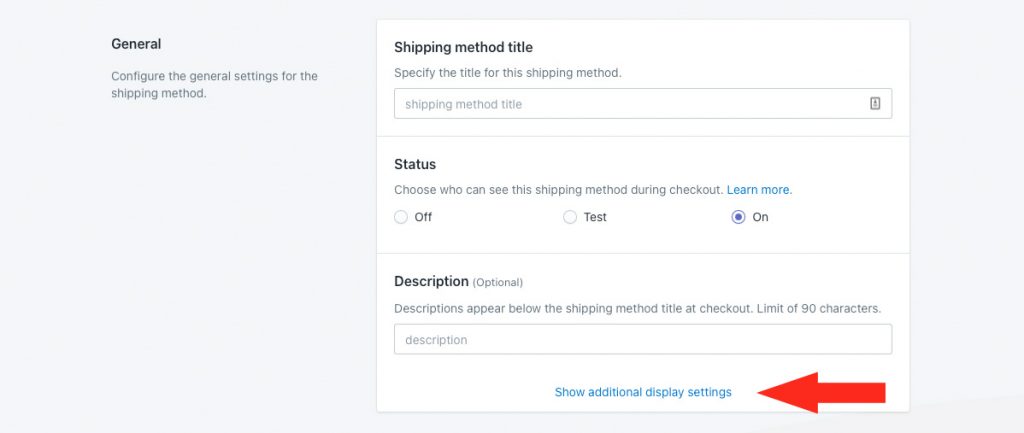
Additional display settings are available for delivery times, order processing times and service codes. If you do not need to adjust these settings, skip ahead to Minimum Order Threshold. Otherwise, continue to Step 4.
4) If desired, click Show additional display settings, then configure delivery time, order processing and service code settings as needed.
Minimum Order Threshold
You can limit when free shipping is activated by setting a minimum threshold. This is useful if you have a minimum order quantity that must be met, or if you have a weight limit that cannot be exceeded, for customers to qualify for free shipping.
1) Choose if you want to set a free shipping threshold.
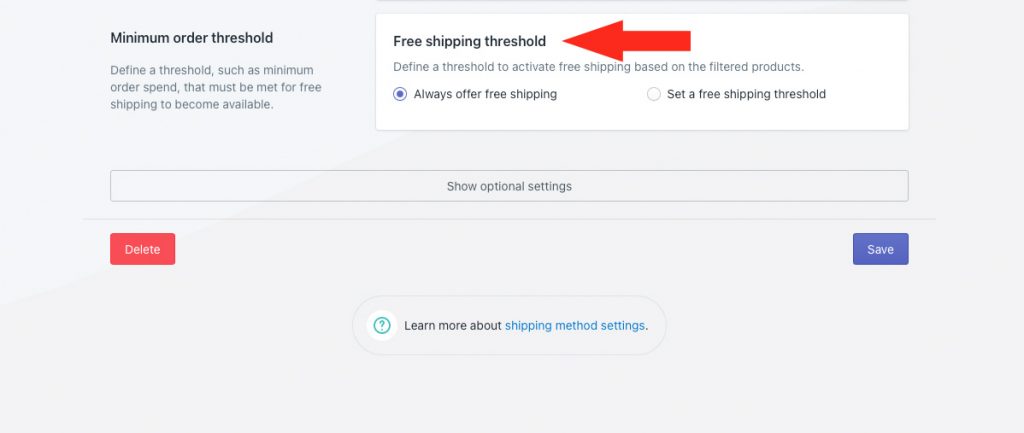
You have two (2) settings to choose from:
Always offer free shipping – the free shipping method will always be displayed to customers as long as the Scenario conditions are met.
Set a free shipping threshold – the free shipping method will only be displayed to customers when the Scenario conditions are met and the threshold is exceeded.
If you selected ‘Always offer free shipping’, skip ahead to Optional Settings. Otherwise, continue to Step 2.
2) Select a free shipping threshold type.
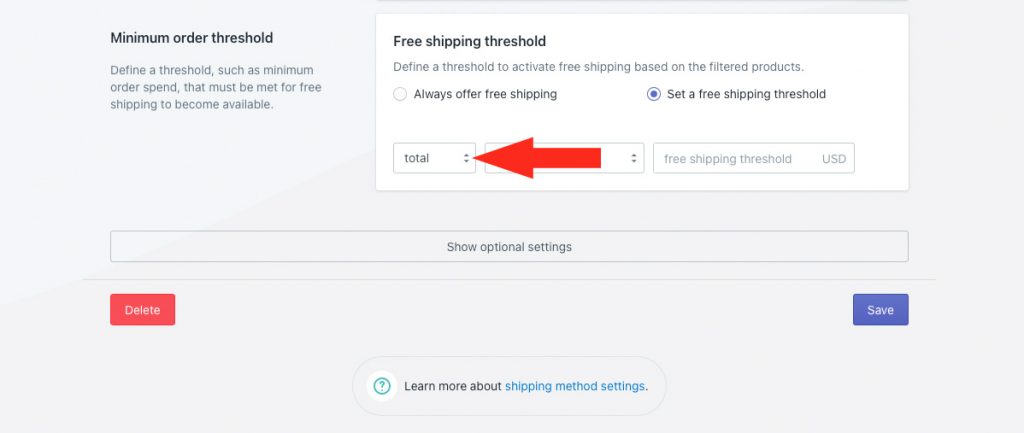
You have three (3) settings to choose from:
Total – the free shipping method will be activated based on the total value of items in the cart.
Quantity – the free shipping method will be activated based on the total number of items in the cart.
Weight – the free shipping method will be activated based on the total weight of items in the cart.
3) Select a free shipping threshold logic.
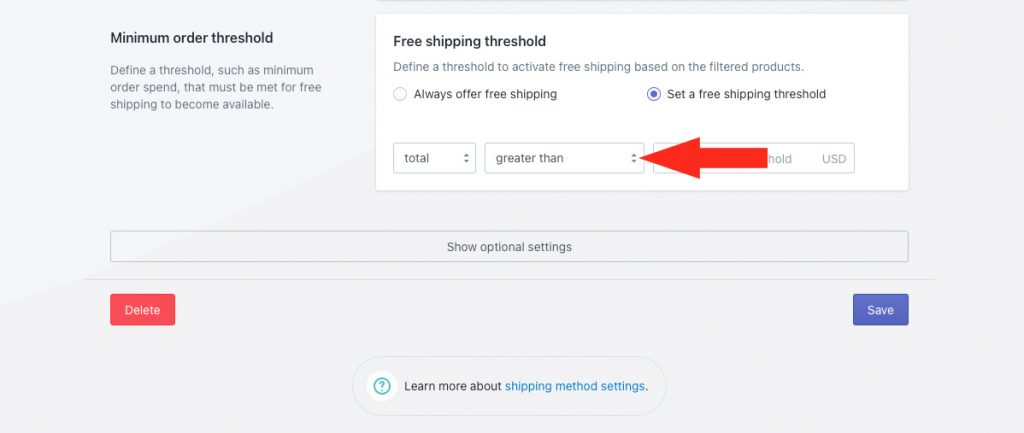
You have six (6) options to choose from:
Greater than – free shipping will activate when the actual cart value is more than the value entered in Step 4.
Greater than or equals – free shipping will activate when the actual cart value is equal to or more than the value entered in Step 4.
Less than – free shipping will activate when the actual cart value is less than the value entered in Step 4.
Less than or equals – free shipping will activate when the actual cart value is equal to or less than the value entered in Step 4.
Equals – free shipping will activate when the actual cart value is exactly the same as the value entered in Step 4.
Does not equal – free shipping will activate when the actual cart value is anything but the value entered in Step 4.
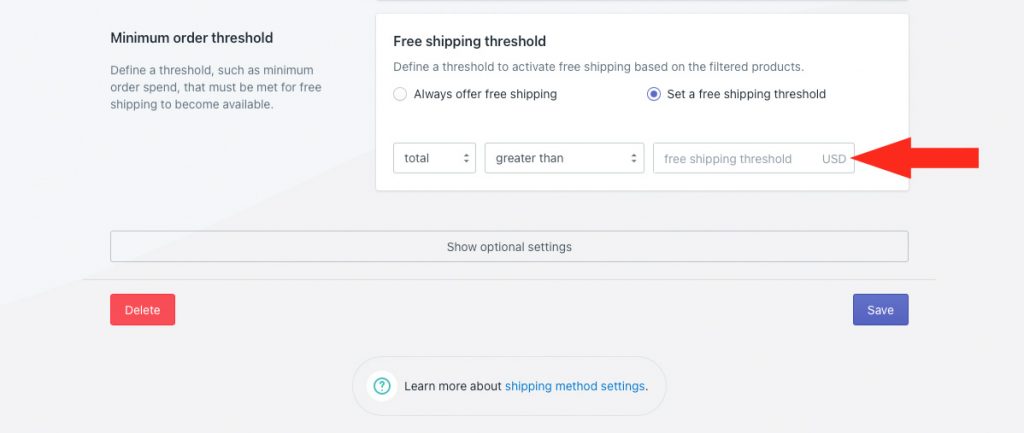
4) Enter the free shipping threshold value. Free shipping will activate when this threshold is exceeded, depending on the settings selected in Steps 2 and 3.
Optional Settings
Settings for custom shipping blending and rate blending give you further control of how shipping is calculated at checkout.
These settings are not required for this setup. If you’re not blending any rates with your free shipping, and you don’t need to adjust these settings, skip ahead to Save Your Settings.
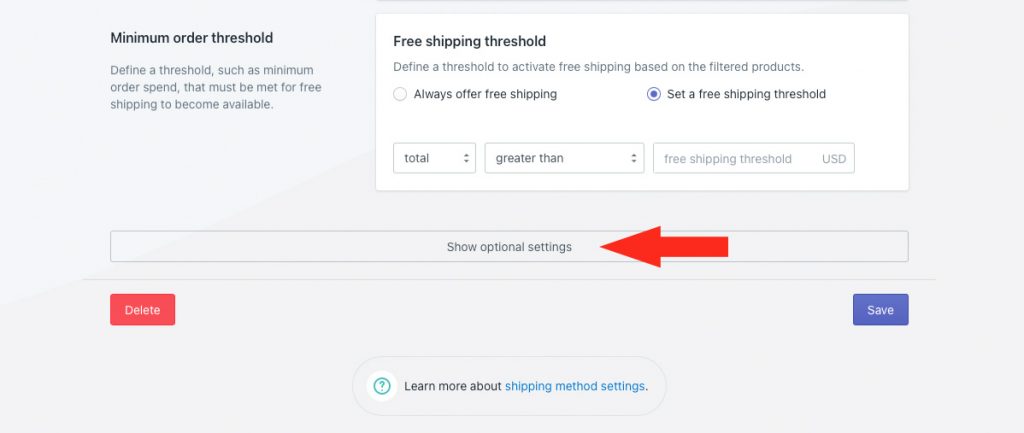
1) If desired, click Show optional settings, then configure Custom Shipping Blending and Rate Blending settings as needed.
Save Your Settings
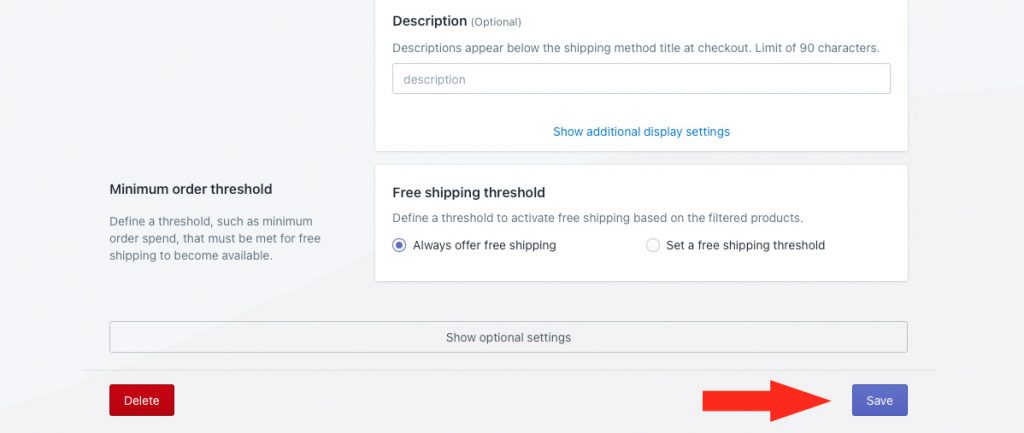
1) Click the Save button to save your parcel service shipping method.
Copy Free Shipping To Multiple Zones
If you ship to multiple zones, and you want to offer condition free shipping to all of them, you can easily copy the free shipping method you just created into your other zones.
If you just finished saving your shipping method, and you’re still on the shipping page, skip ahead to Step 4. Otherwise, continue to Step 1.
1) Click Shipping on the sidebar menu, then select Scenarios from the drop-down list.

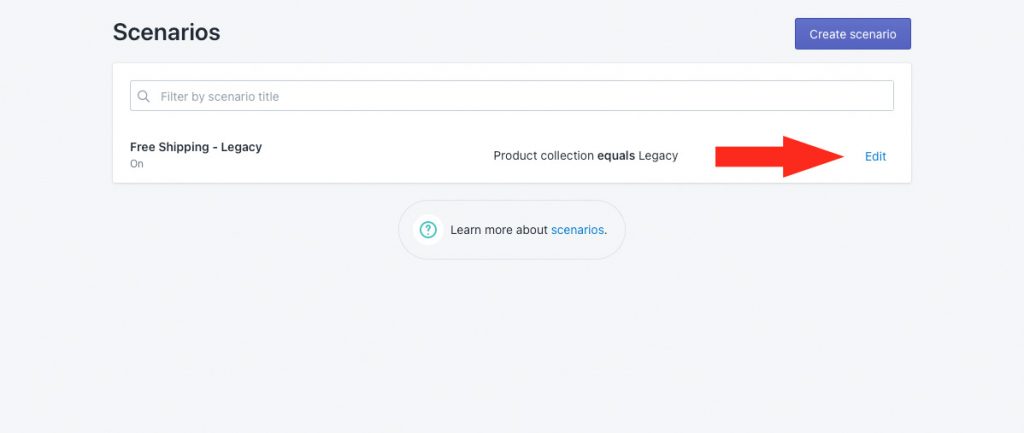
2) Click Edit beside the conditional free shipping Scenario you created earlier.
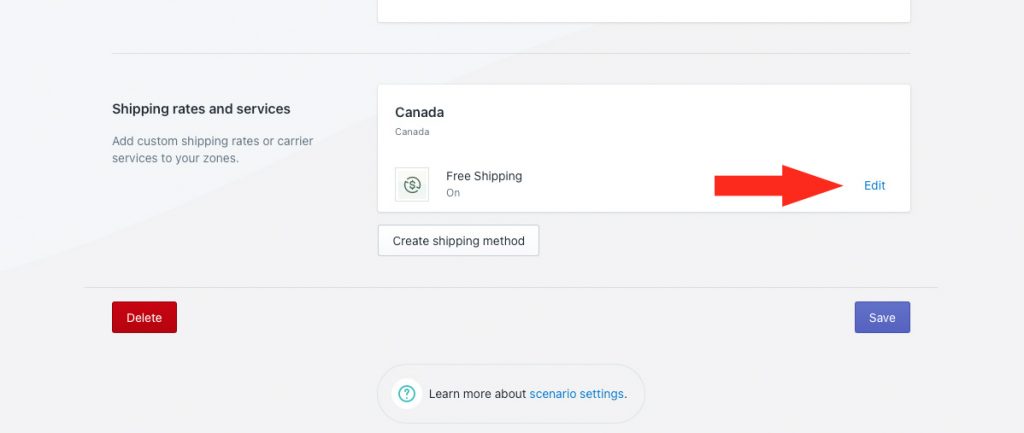
3) Scroll to the bottom, then click Edit beside the free shipping method.
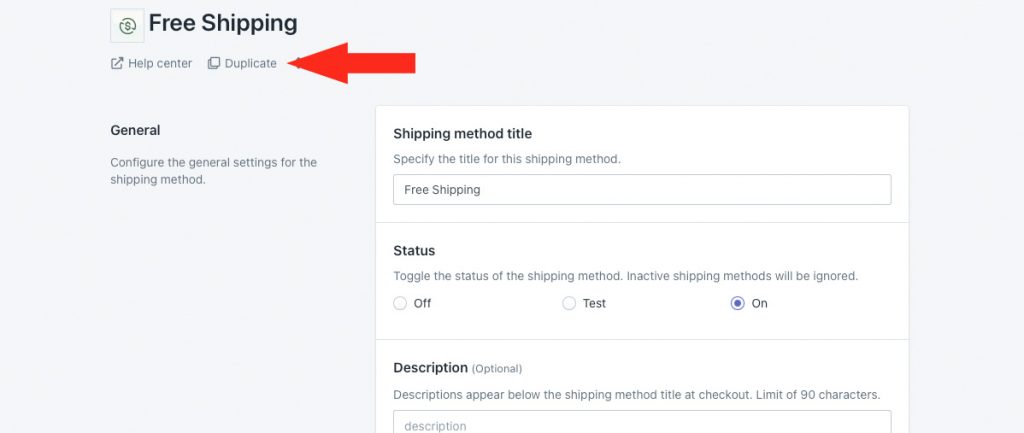
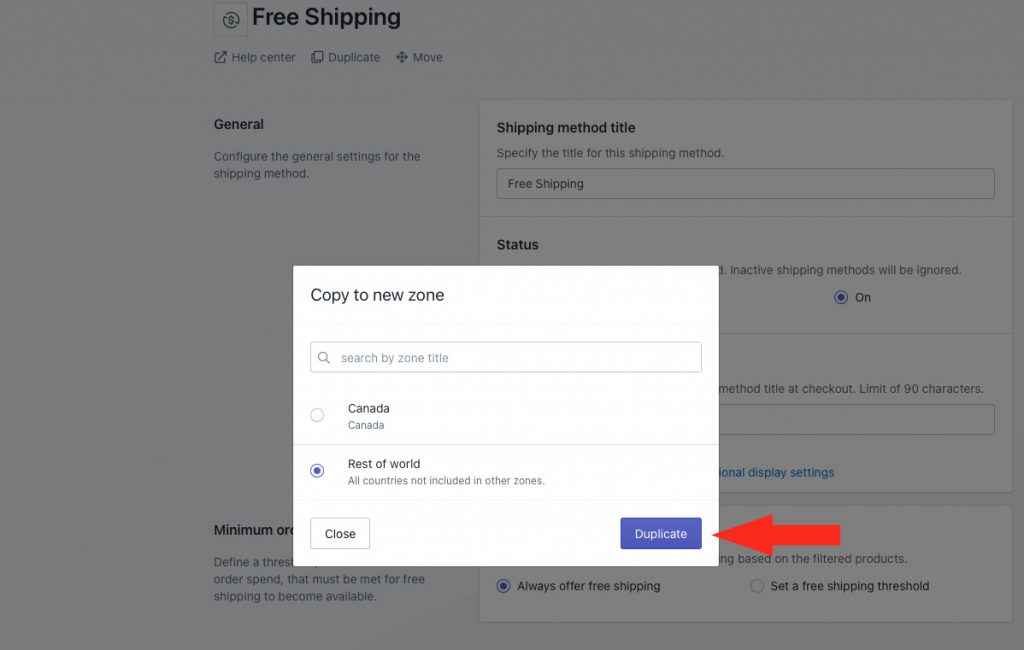
4) Click Duplicate below the ‘Free Shipping’ header at the top of the shipping method page.
5) Select a different zone than the one you originally assigned free shipping to.
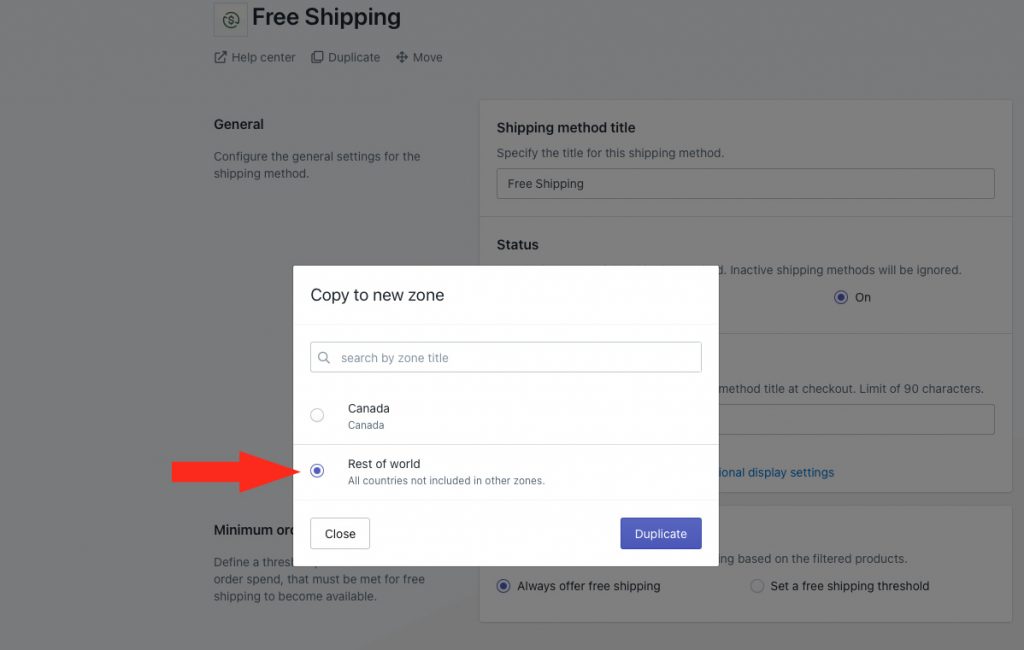
6) Click the Duplicate button.
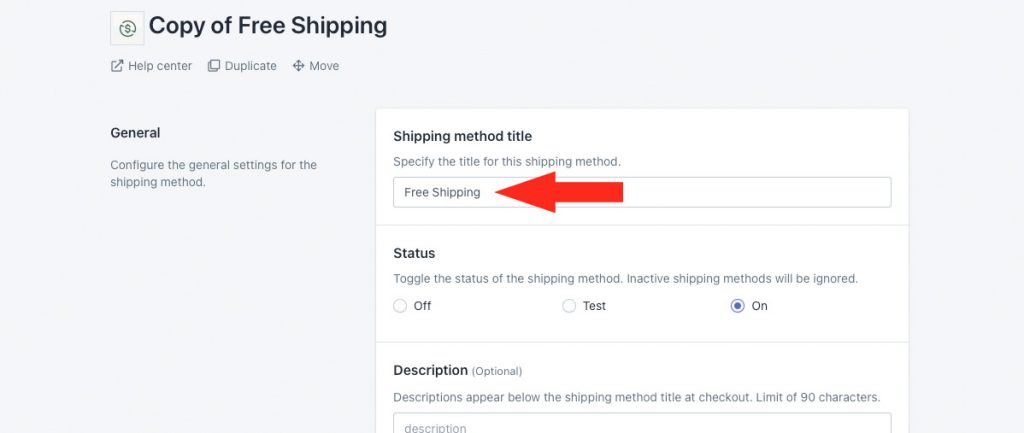
7) Change the title of the duplicated shipping method from ‘Copy of [original shipping method title] to something else. You can use the same title if desired, such as ‘Free Shipping’, since they reside in different zones and won’t conflict with each other.
8) Scroll to the bottom, then click the Save button to save the copied shipping method to the other zone.

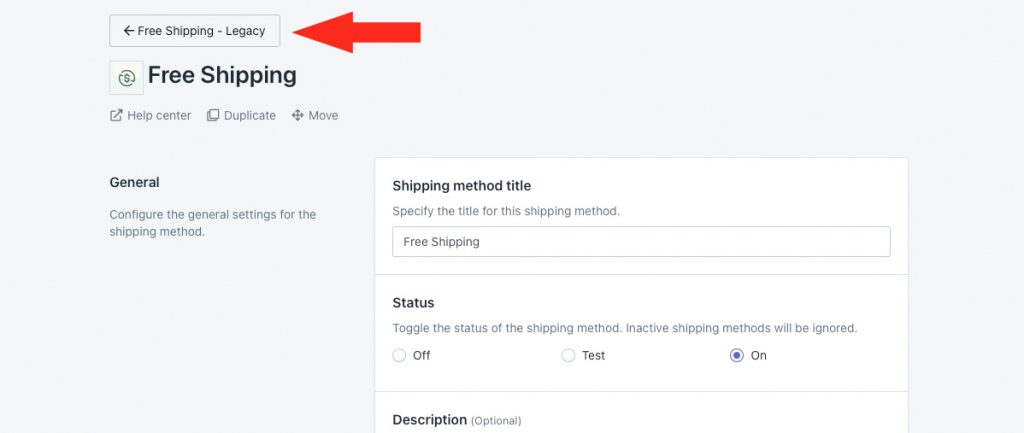
9) Click the back button at the top of the page to return to the Edit Scenario page.
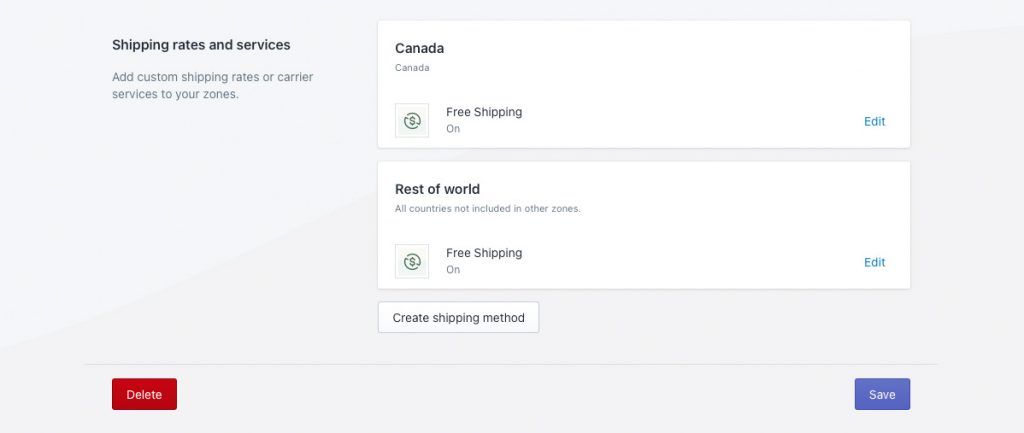
You should now see the free shipping method in more than one zone.
10) Repeat Steps 1 to 9 for each additional zone you ship to.
Update Paid Shipping Scenarios
If you have other paid Scenarios, then depending on the condition type you used to limit free shipping, and how that condition was configured, you will likely need to set an opposing condition in your other Scenarios so that either free or paid shipping is displayed, not both.
Let’s say your conditional free shipping Scenario has a product collection condition like our example above, and you set it to ‘Any product’, meaning as long as there is at least one qualifying collection product in the cart, the customer will get free shipping.
If your paid shipping Scenarios don’t have an opposing product condition, they may also be displayed at checkout when a product from the ‘free shipping’ collection is in the cart, and the customer will see both free and paid shipping options. This may be acceptable. If it isn’t, follow the steps below to display only one or the other.
1) Click Shipping on the sidebar menu, then select Scenarios from the drop-down list.

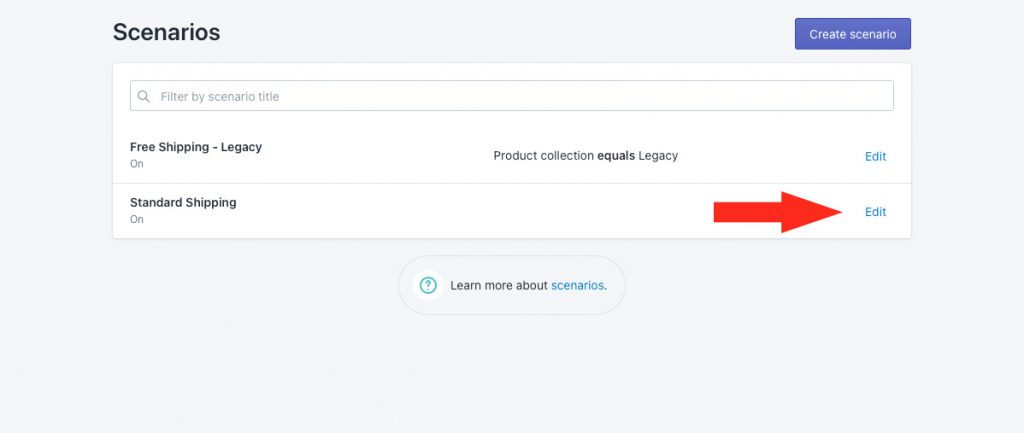
2) Click Edit beside an existing paid shipping Scenario.
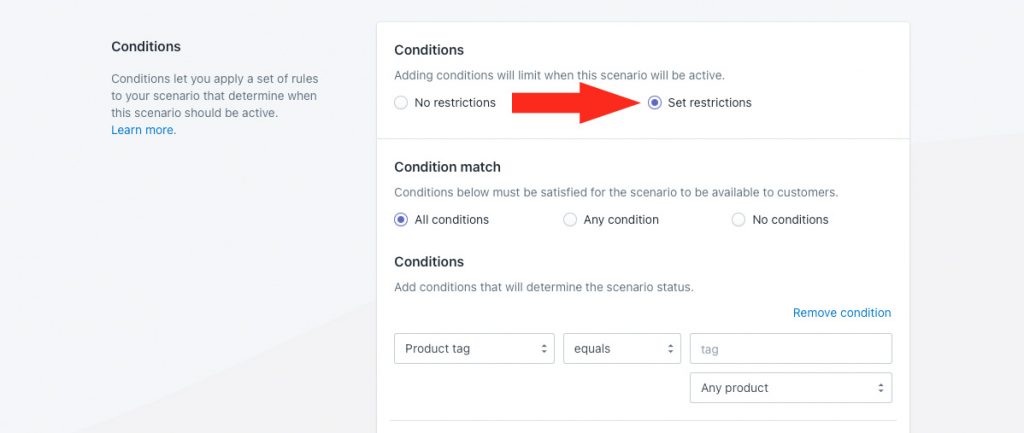
3) If your paid shipping Scenario currently has no conditions, select Set restrictions in the Conditions section.
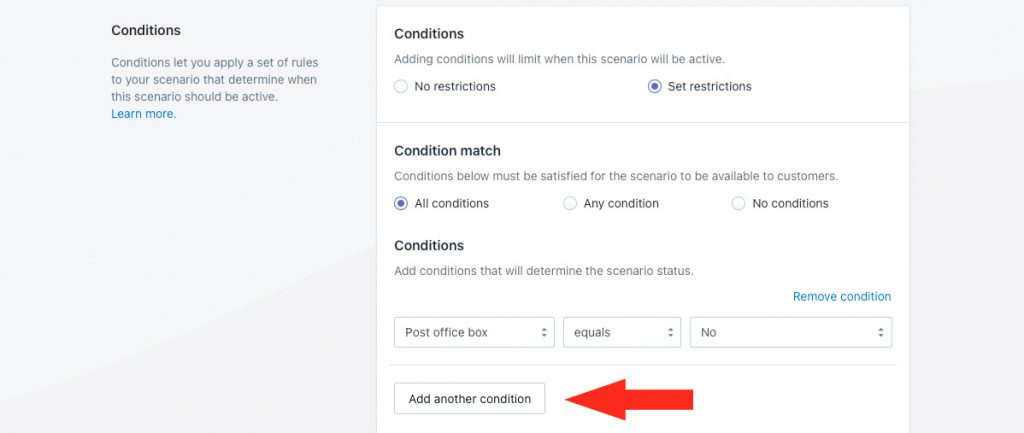
Or, if your paid shipping Scenario has conditions already, click the Add another condition button.
4) Select the same condition type you used in your conditional free shipping Scenario. For this example, we’ll again select Product collection.

5) Select the opposite condition logic used in your conditional free shipping Scenario For this example, we’ll change it to does not equals. Logic options may change depending on the condition type selected in Step 3.
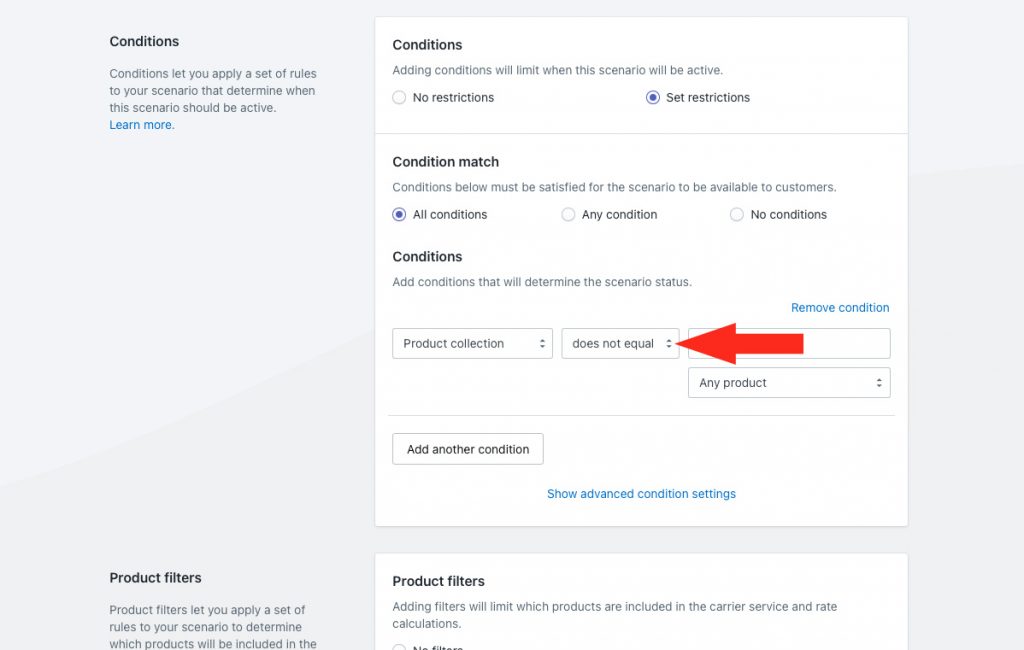
6) Enter the same condition value used in your conditional free shipping Scenario. Some values need to be entered manually. Others require a selection. For this example, we’ll select Legacy from the list of product collections in our store.
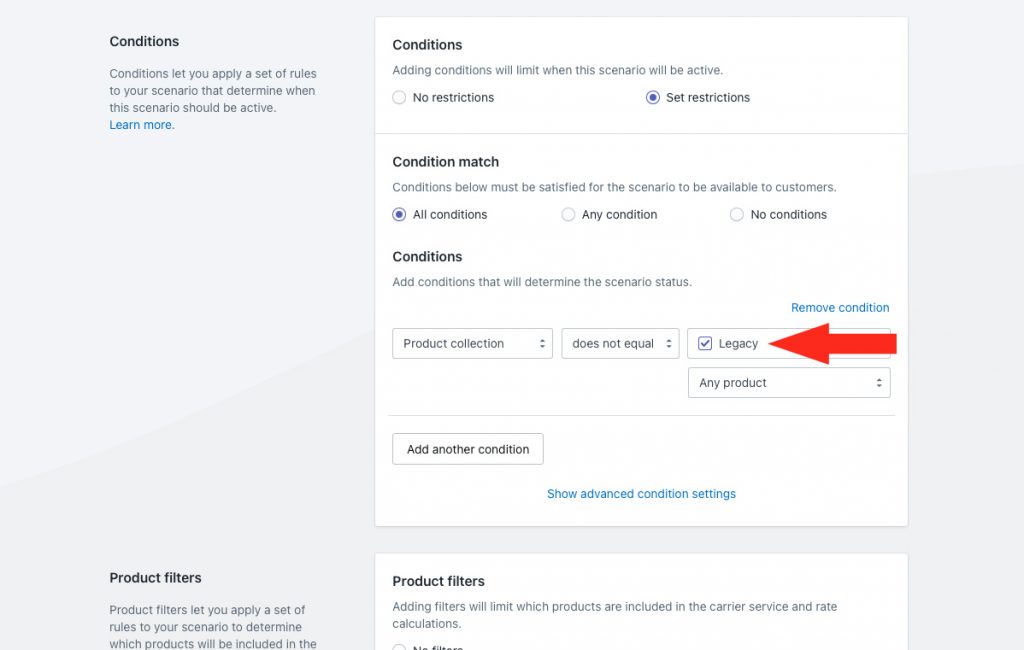
Product conditions require an additional setting not needed by other condition types. If you did not add a product condition in Steps 4 to 6, this setting is not displayed, and you can skip ahead to Save Your Settings. If you did add a product condition, continue to the next step.
If your conditional free shipping Scenario included a product condition set to ‘Any product’, select All products from the drop-down list.
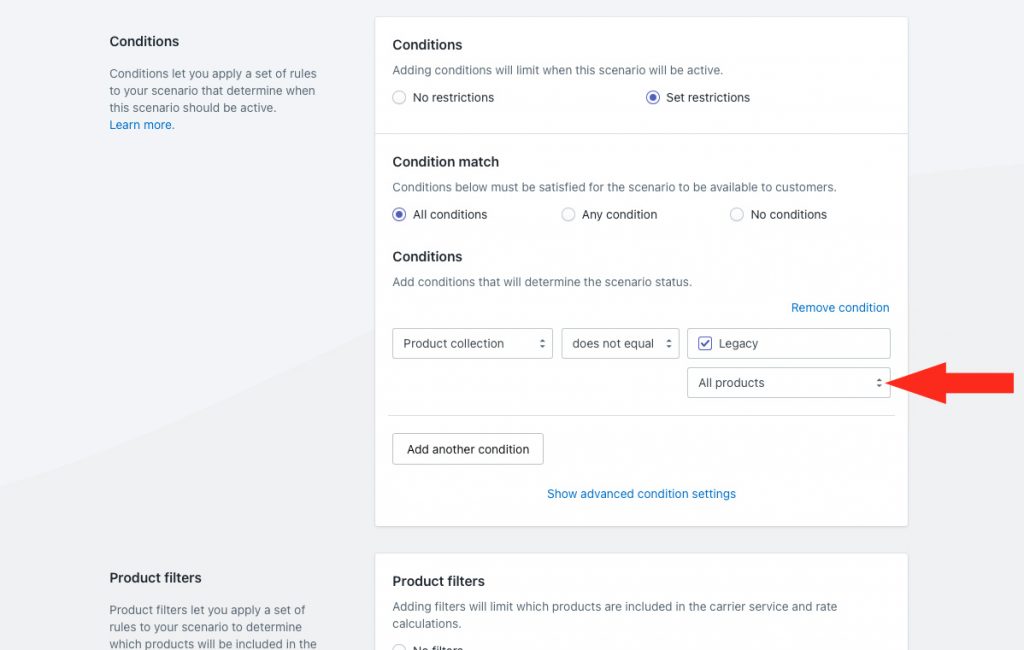
This means that paid shipping method (or methods) assigned to this Scenario will only be displayed when there are no products from the collection in the cart.
Save Your Settings
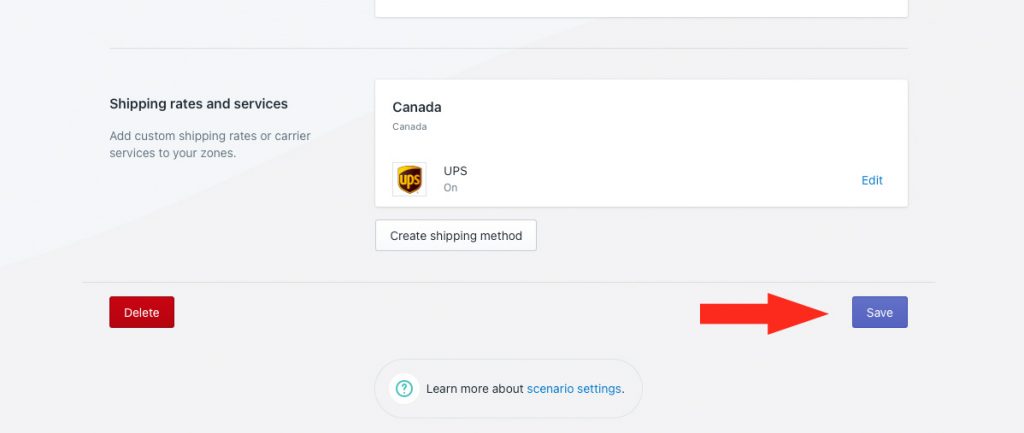
1) Scroll to the bottom, then click the Save button to save your updated paid shipping Scenario.
Check out more common setups or look at additional setups.
