When you installed Intuitive Shipping, you were automatically put into Testing Mode. Intuitive Shipping is free to use in Testing Mode, and it doesn’t count towards your free trial. Your free trial doesn’t begin until you activate a billing plan.
You can continue to use Intuitive Shipping indefinitely, for free, in Testing Mode, so take as much time as you need to complete your setup. After you finish setting up Shipping Scenarios and shipping methods – and any other things you might need, like custom shipping prices by product and combined shipping methods, you can easily test Intuitive Shipping without making your setup live to customer.
Test Your Setup
1) Go to your store’s website, add products to the cart, then proceed to your store’s Checkout page.
2) Use Intuitive Shipping as the customer’s first and last name. This will allow your Intuitive Shipping rates to appear as your customer will see them when you activate your account.
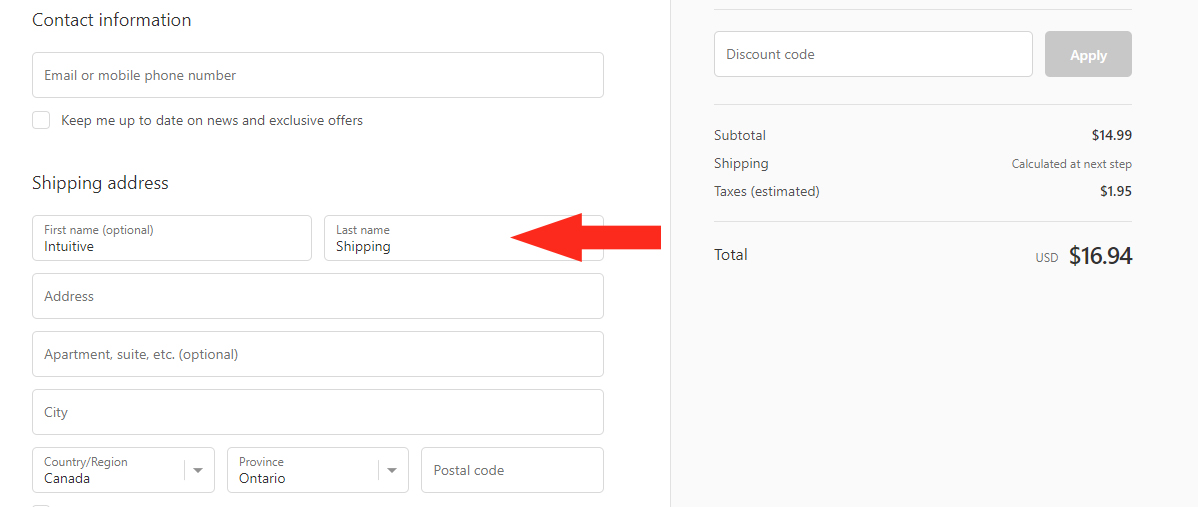
3) Complete the Shipping address form by adding a test address.
You can use a real or fake street address as long as the Postal code or Zip code is authentic.
This is normal. Only you can see the rates generated by Intuitive Shipping while you’re in Testing Mode. Your customers cannot see rates from our system and will continue to see rates coming from Shopify – or another third-party rate provider if you’re using one – until your Intuitive Shipping account has been activated.
Enable Carrier-Calculated Rates
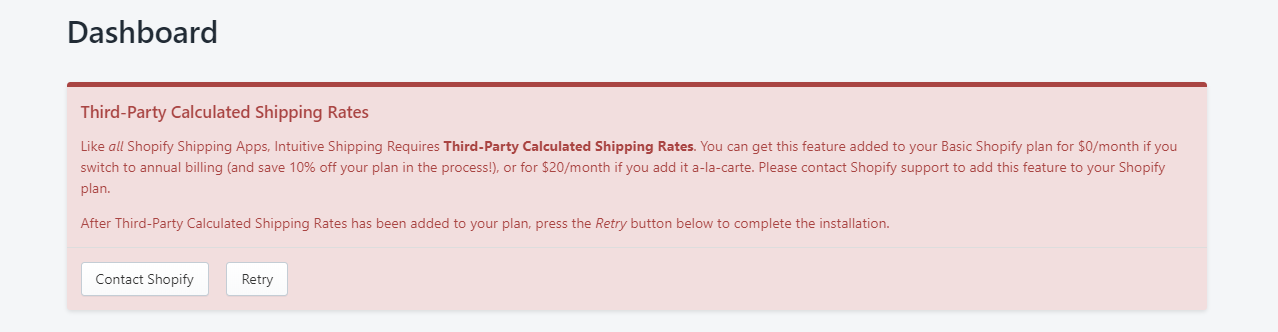
When testing new or updated Shipping Scenarios, you’ll need to make sure that Shopify’s third-party carrier-calculated shipping rates feature is enabled on your Shopify account. If it isn’t enabled, your shipping rates will not appear at checkout, even in Testing Mode. In addition, you’ll see a red banner on the Intuitive Shipping Dashboard.
In certain cases, the red banner will not appear even when the carrier-calculated shipping rates feature is not enabled. This sometimes happens if the feature had been enabled, but has been inadvertently disabled.
To confirm the status of carrier-calculated shipping rates:
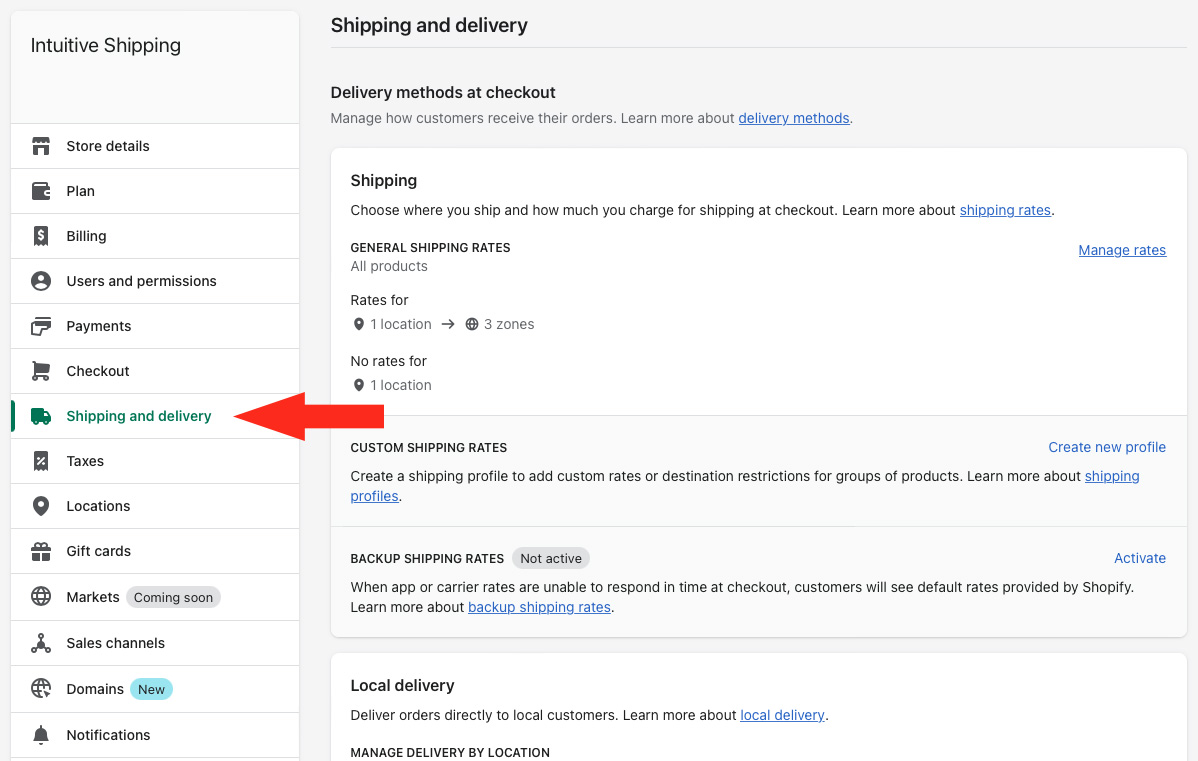
1) Go to the Shopify admin page, then click Settings on the admin sidebar menu.
2) Click on Shipping and delivery in the Settings sidebar menu.
3) Scroll down to the bottom, then click Manage integrations in the Accounts and integrations section.
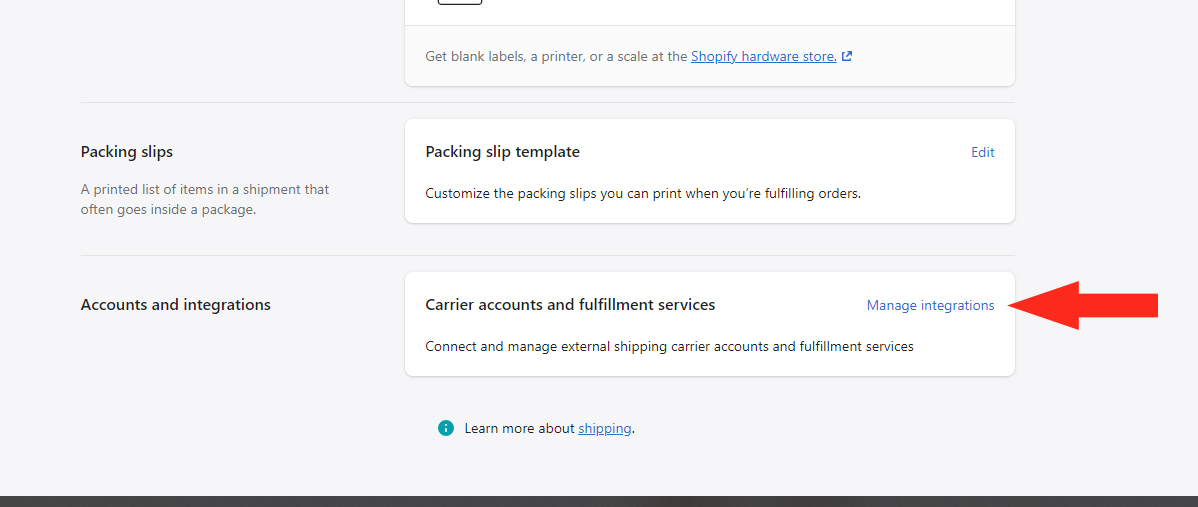
Instead, your Carrier accounts and Custom order fulfillment settings may be accessible directly from the Shipping and delivery page.
In either situation, if you are prompted to Enable third-party calculate rates at checkout on the screen, the feature has not yet been enabled.
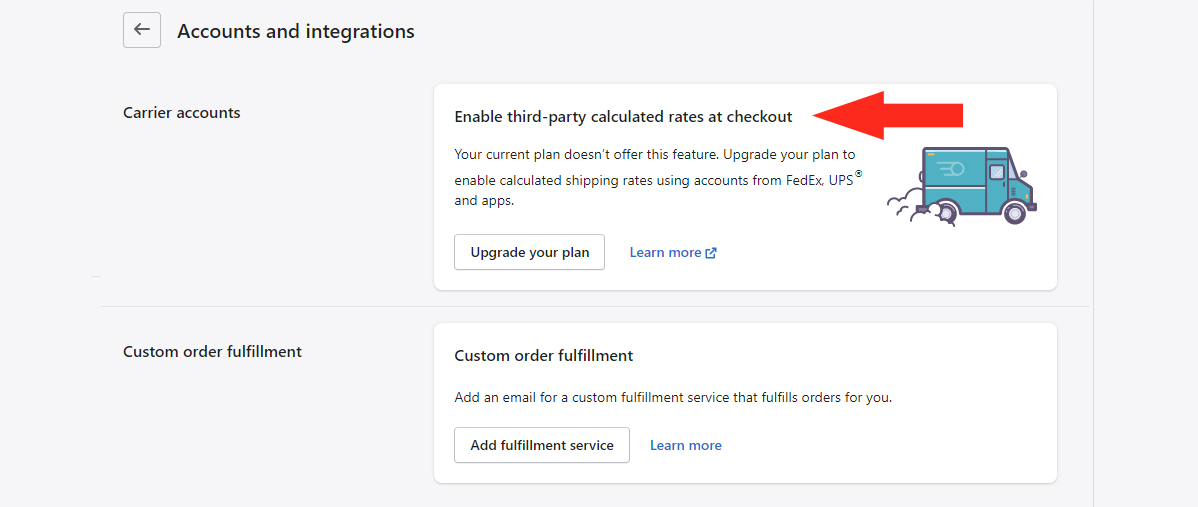
Enabling third-party calculated rates at checkout is a Shopify requirement if you are using any third-party rate calculator, including Intuitive Shipping, even if you’re not planning to connect Intuitive Shipping to a live rate carrier – e.g. FedEx, UPS. The feature is USD $20.00 per month if you are on the ‘Shopify’ plan. If you change your plan to annual billing, Shopify will add the feature at no additional cost – and they will discount your plan by 10%.
To learn how to enable carrier-calculated shipping rates, click Learn more where prompted to be taken to Shopify’s Help Center guide. You will need to contact Shopify directly to have this feature enabled.
If you’re on the ‘Lite’ or ‘Basic’ plan, this feature is no longer available as a paid add-on and you must upgrade to the ‘Shopify’ plan. However, if you are already on one of these plans and had the feature enabled, it has be grandfathered in.
If you are on the ‘Advanced’ plan or higher, the feature is already included with your plan and enabled. No further action is required.
Clear the Shopify Cache
When testing updated Shipping Scenarios or shipping methods, you may need to clear the Shopify checkout cache in order to see updated rates.
Let’s say you want to run a new test checkout immediately after a change has been made in Intuitive Shipping. Before you re-run the test calculation, change the street address slightly.
For example, if you used the street address ‘123 Main St.’, change it to ‘1234 Main St.’
If you need to use the exact same address from an earlier test, you must then alter the cart contents. You can either –
- increase or decrease the quantity of an item, or
- add or remove a product.
As long as the type or total quantity of items in the cart is different, the cache will be cleared.
Once you’ve finished testing your setup in Testing Mode, you’ll need to activate your account to start using Intuitive Shipping for live checkouts.
Hide Intuitive Shipping From Customers
After selecting a monthly billing plan and activating your account, you can later hide your Intuitive Shipping from your customers at any time. This is useful if you want to conduct further testing on your entire setup without altering the Visibility settings of individual Shipping Scenarios.
That means, you may need to temporarily add a shipping rate to your Shopify settings so your customers can continue to check out while you test Intuitive Shipping. Be sure to remove this rate from Shopify when you’re ready to re-enable Intuitive Shipping. Otherwise, customers will see both.
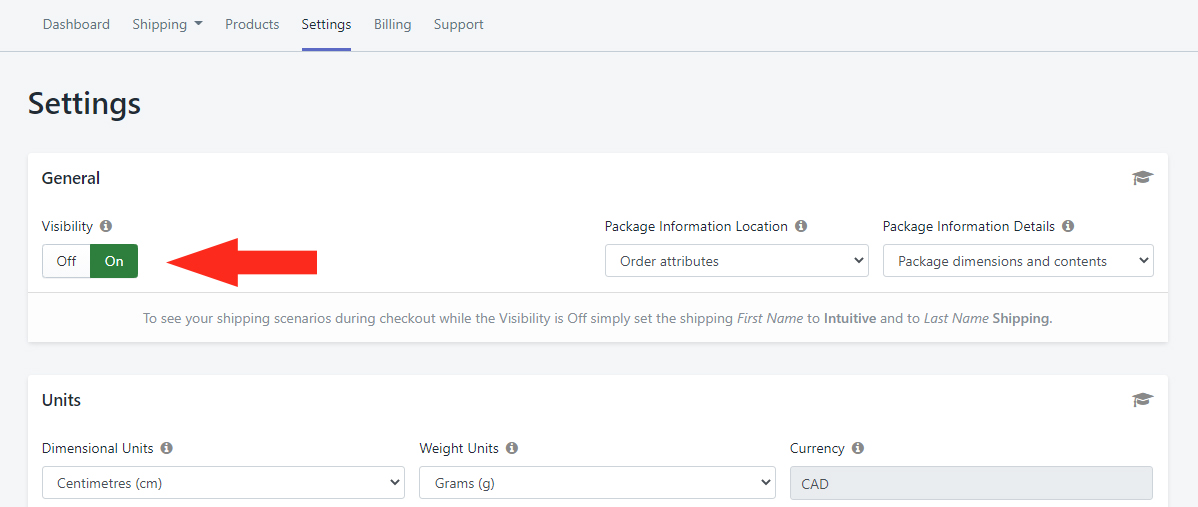
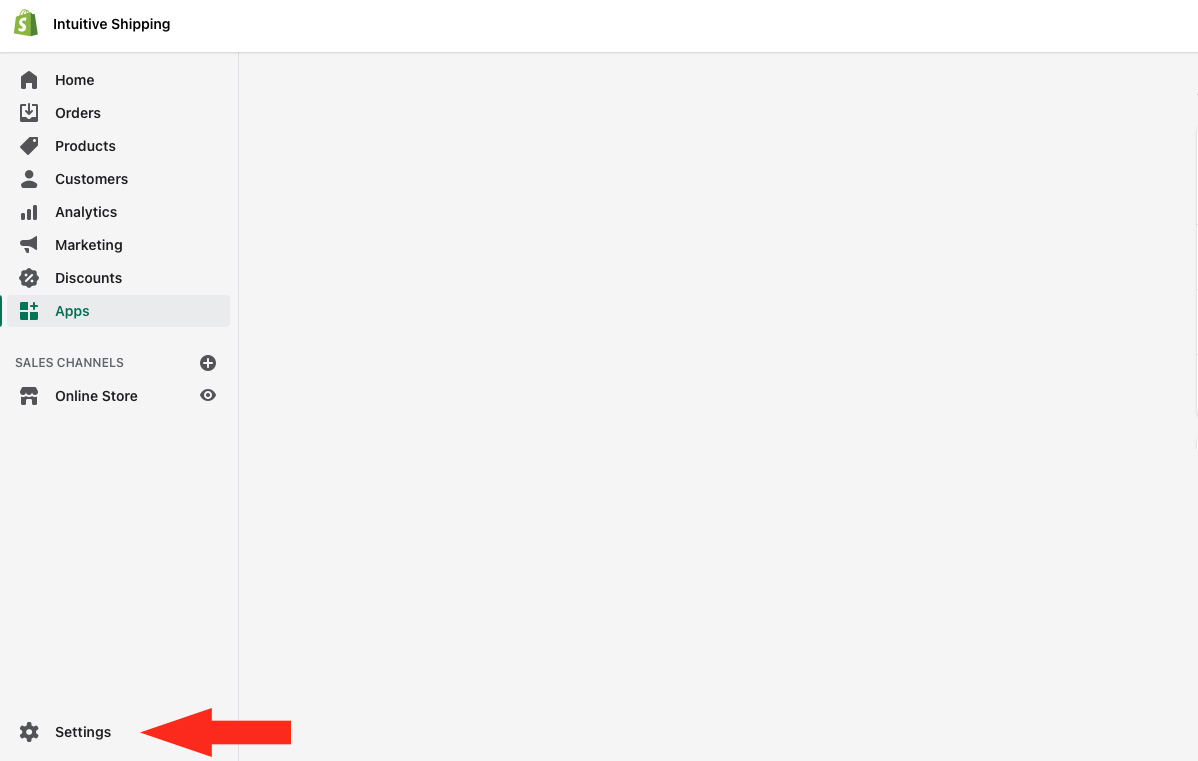
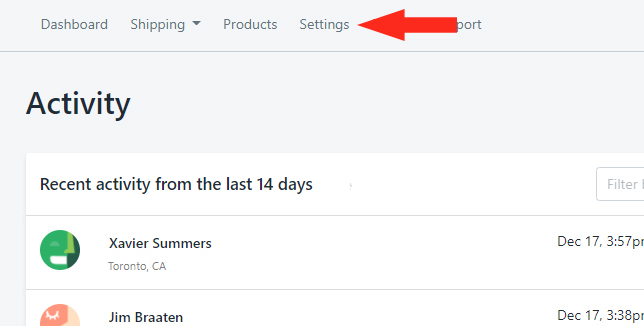
1) Click Settings on the menu.
2) In General, set Visibility to Off (green). This will make all of your Shipping Scenarios invisible to your customers.
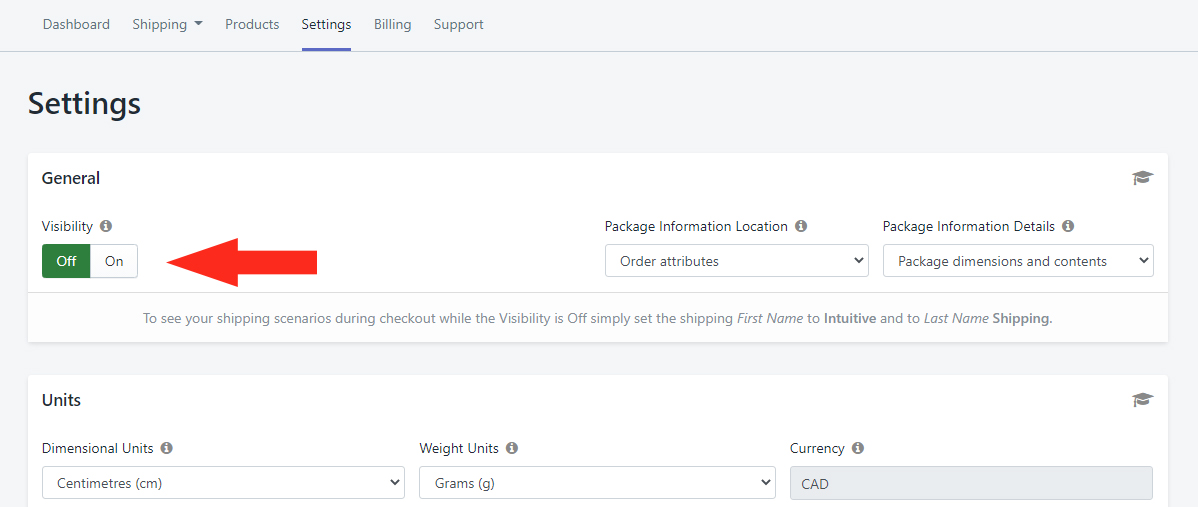
3) Click the Save button to save your Visibility settings.
4) Follow the steps at the beginning of this article to Test Your Setup – including using ‘Intuitive Shipping’ as the customer’s name. This will allow you to bypass the Visibility setting.
5) When testing is completed, set Visibility to On again to make Intuitive Shipping available to your customers.