Intuitive Shipping condition groups let you package multiple conditions together as a single set. Then, you can add the condition groups to a Scenario the same way you add a single, stand-alone condition. This process lets you create fewer Scenarios, saving you time during setup, and making it easier to maintain on an ongoing basis.
It also lets overcome situations where stand-alone conditions might otherwise conflict, making them impossible to add to a Scenario without a condition group.
If you want to offer ‘next day’ shipping options with variable cut-off times – meaning the cut-off time to get ‘next day’ is different from one day or a group of days day to another, condition groups let you do this.
How It Works
Let’s say you want to offer next-day shipping Mondays through Thursdays as long as an order is placed the previous day before 2:00 PM. For next-day shipping on Fridays, you want the order to be placed on Thursday before noon.
Adding multiple, individual conditions to a Scenario won’t work for this setup because those conditions can only be ‘All’ – meaning every condition must be met – ‘Any’ – meaning any condition can be met – or ‘None’ – meaning no condition can be met.
That means, you cannot simply add 4 conditions like these to a Scenario:
- Current day of the week > equals > Sunday, Monday, Tuesday, or Wednesday
- Current time of the day > less than > 14:00 (2:00 PM)
- Current day of the week > equals > Thursday
- Current time of the day > less than > 12:00 (noon)
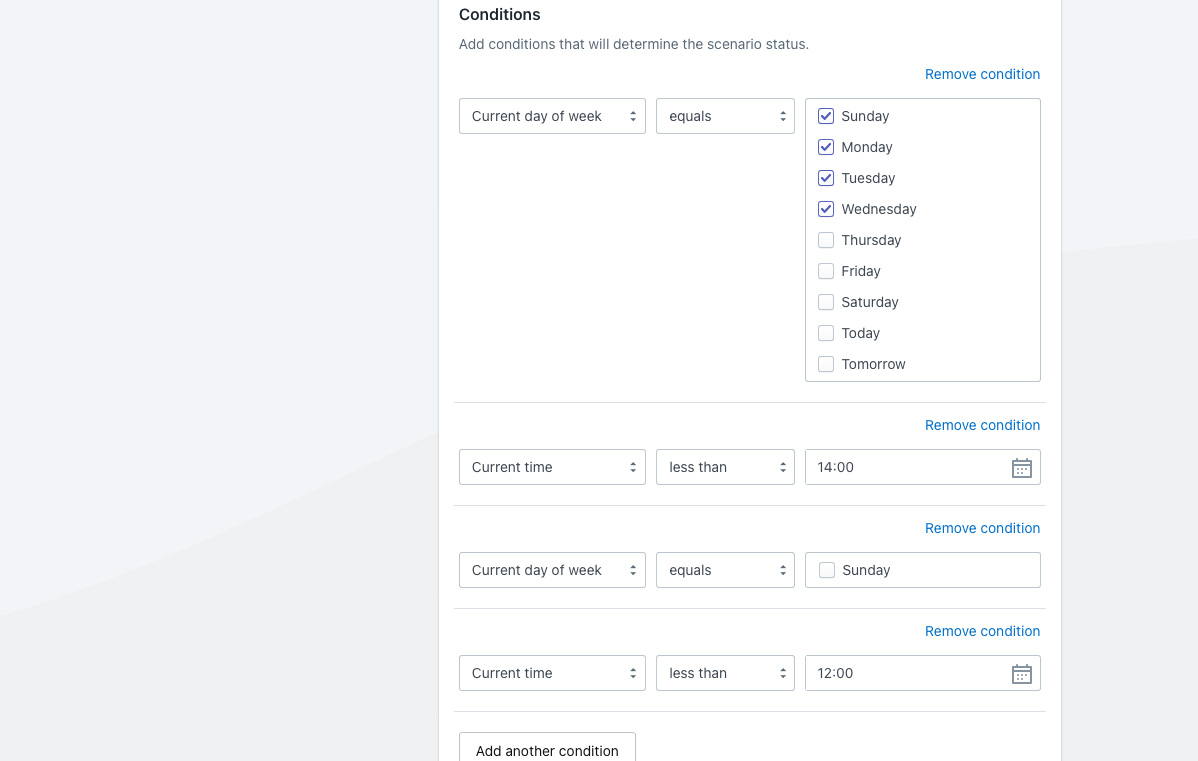
That’s because there are conflicts among these individual conditions.
By default, Scenarios check to see if all conditions are met. In this case, a customer would be unable to complete their checkout because the first and third conditions conflict. The order would have to be placed on a Sunday or Monday or Tuesday or Wednesday and a Thursday, which is impossible.
Changing the setting to any condition wouldn’t allow the restrictions to apply in the way they are intended because only one of the four conditions then needs to be met for the Scenario to work. A customer could place their order on a Sunday, Monday, Tuesday, Wednesday or Thursday, regardless of the time of day, and the shipping method would be displayed. Or, they could place their order on any day, including Friday or Saturday, either before 2:00 PM or before noon, and the shipping method would be displayed.
Using the no conditions setting would mean the restrictions are being applied in the opposite way they are intended. A customer could only place their order on a Friday or Saturday, after 2:00 PM for the shipping method to be displayed.
To ensure the conditions in this example are being applied as intended, you need to set up two (2) condition groups – one group to check if the current day of the week is a Sunday, Monday, Tuesday or Wednesday and the time of day is before 2:00 PM, and a second group to check if the day of the week is a Thursday and the time of day is before noon.
Both condition groups can then be added to a ‘next day shipping’ Scenario the same way you add stand-alone conditions, and the condition match setting can be configured to look for any condition.
At the end of this guide, we’ll also show you how to combine this setup with an alternative 2-day shipping option that is available at any time, any day of the week, giving your customers even more choice.
Create The First Condition Group
This condition group will allow customers to choose next day shipping for Monday, Tuesday, Wednesday or Thursday when they order before 2:00 PM on Sunday, Monday, Tuesday or Wednesday respectively.
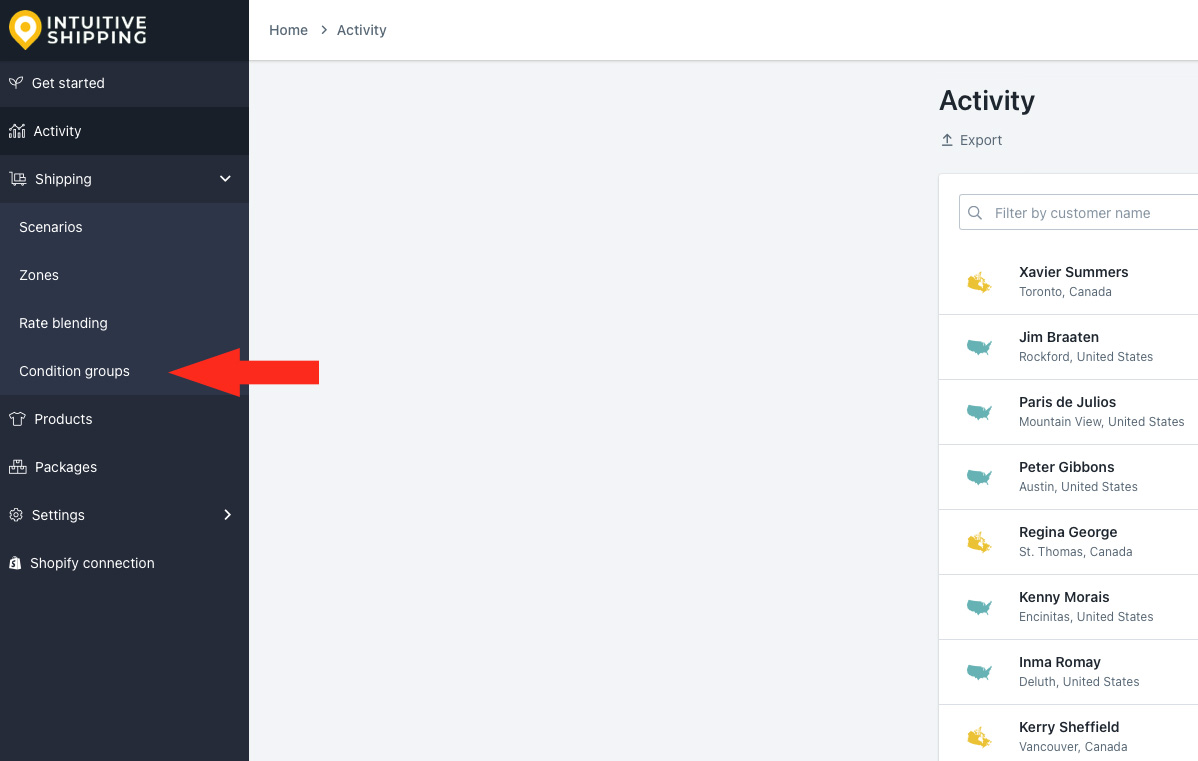
1) Click Shipping on the sidebar menu, then select Condition groups from the drop-down list.
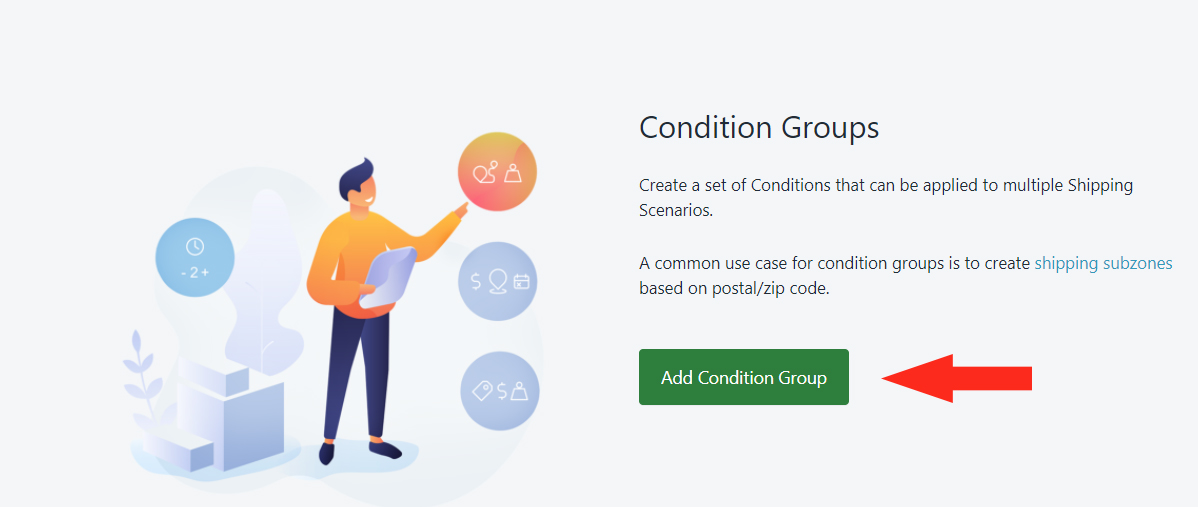
2) Click the Add Condition Group button.
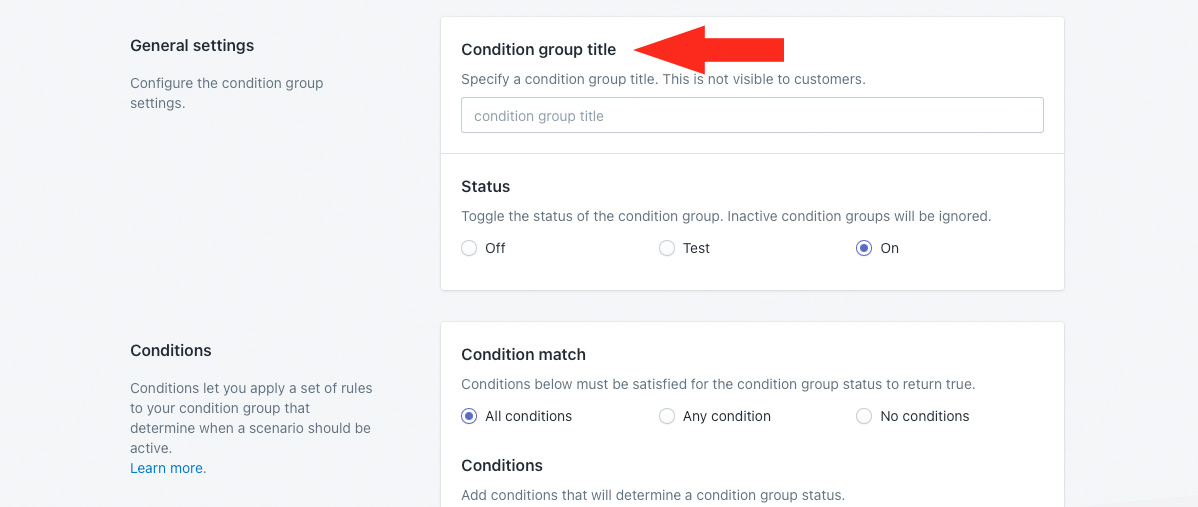
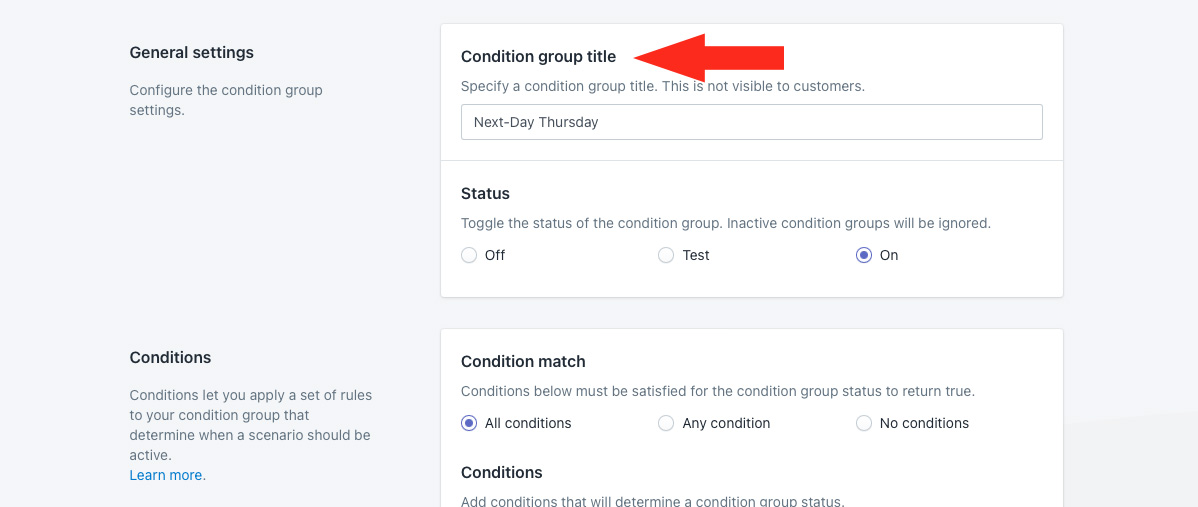
General Settings
1) Enter a condition group title, like ‘Next-Day Sunday to Wednesday.
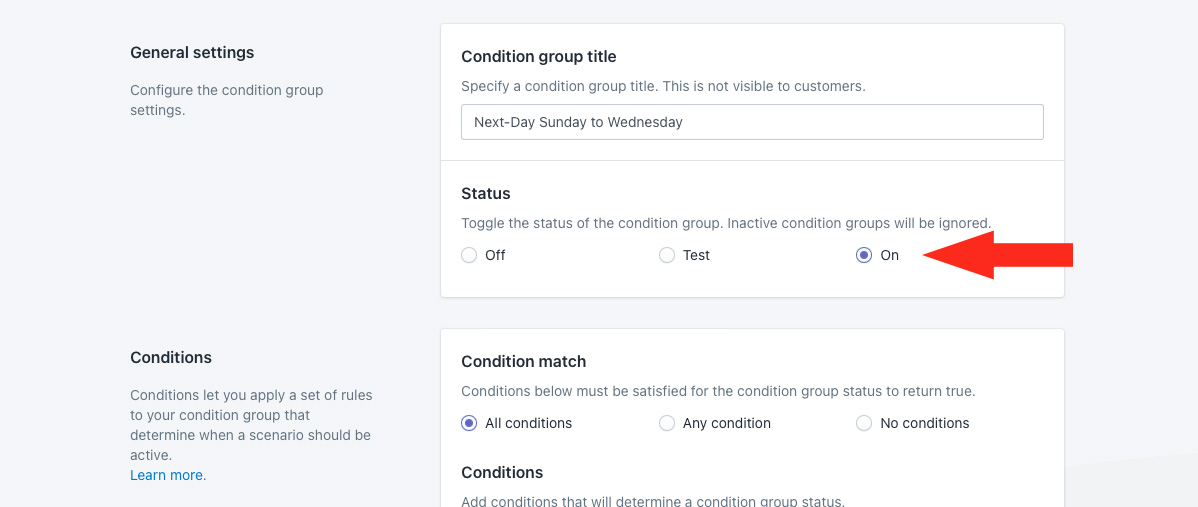
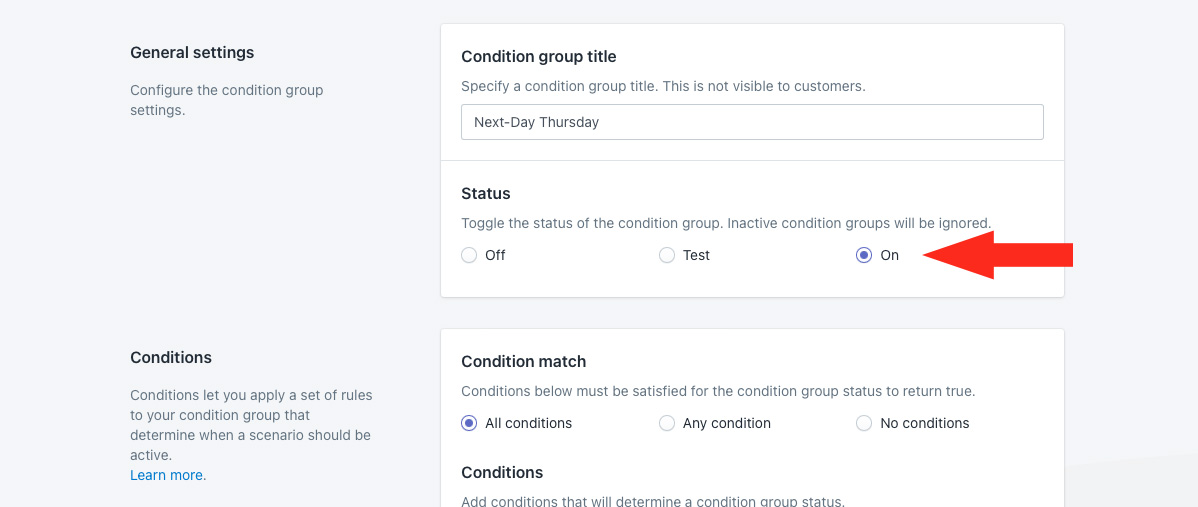
2) Leave the condition group status set to ‘On’.
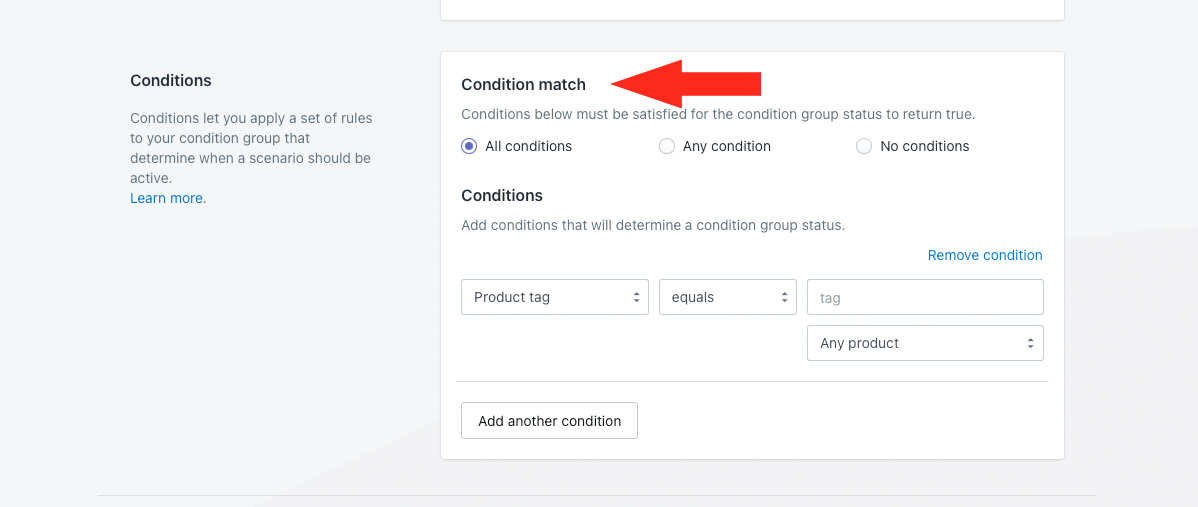
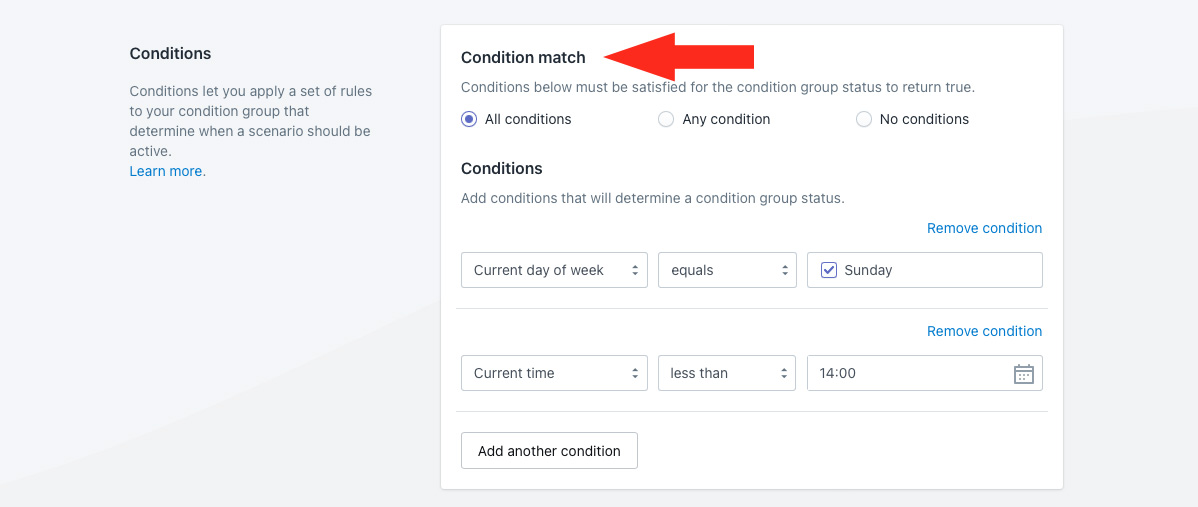
Conditions
1) Leave Condition match set to ‘All conditions’.
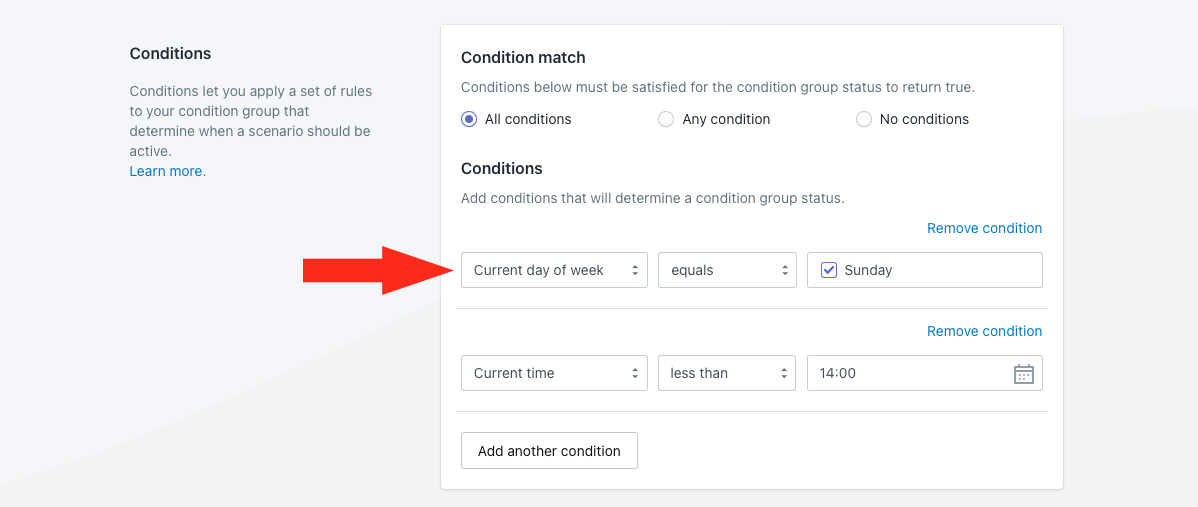
2) Select ‘Current day of the week’ as the condition type.
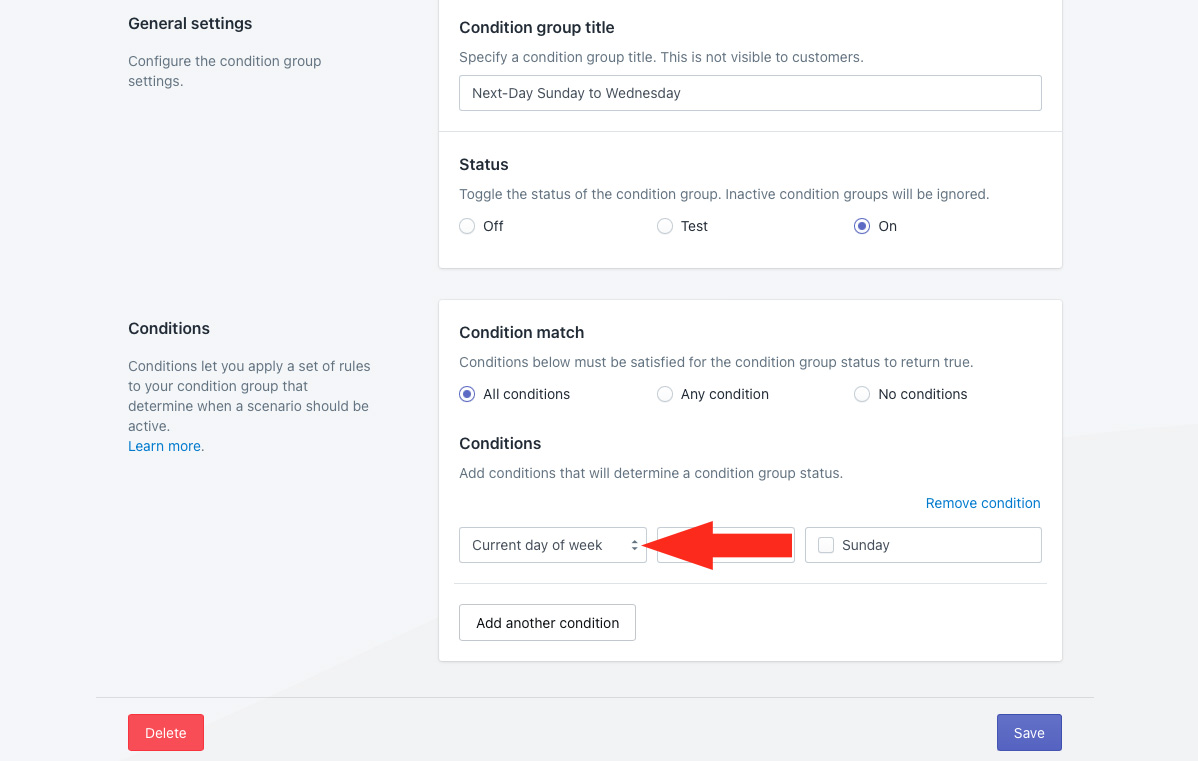
3) Leave the condition logic set to ‘equals’.
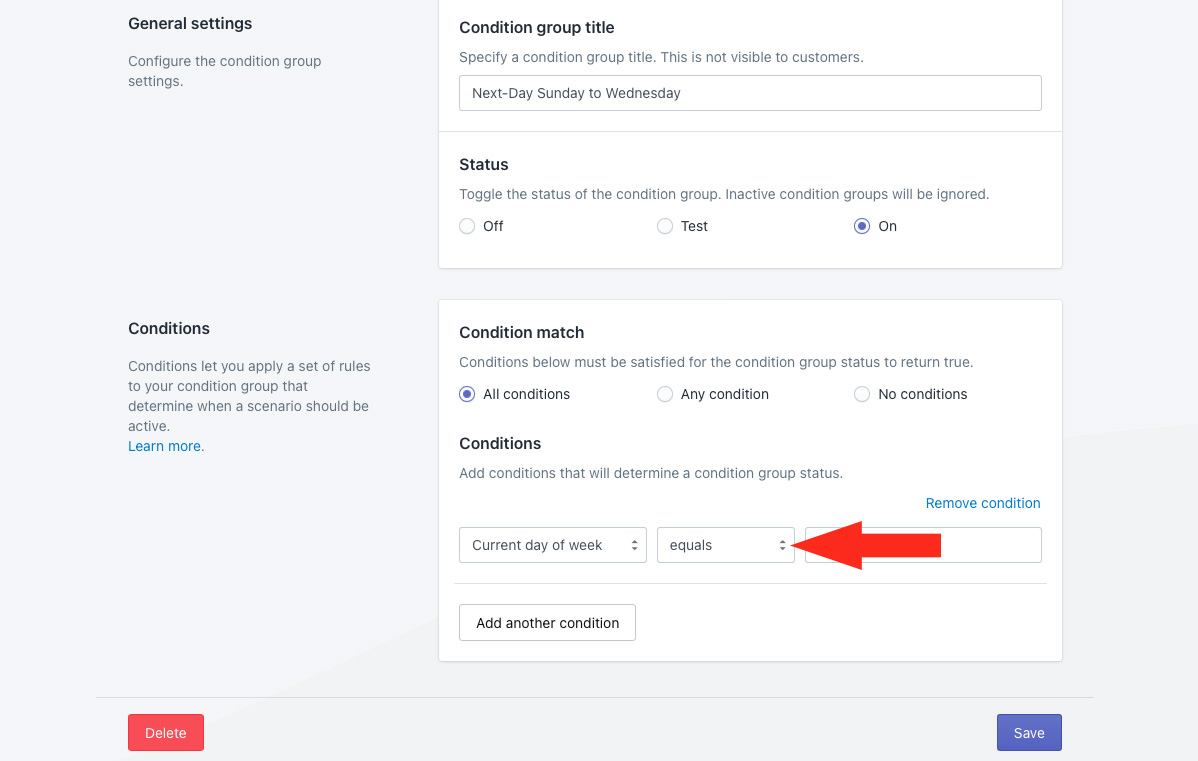
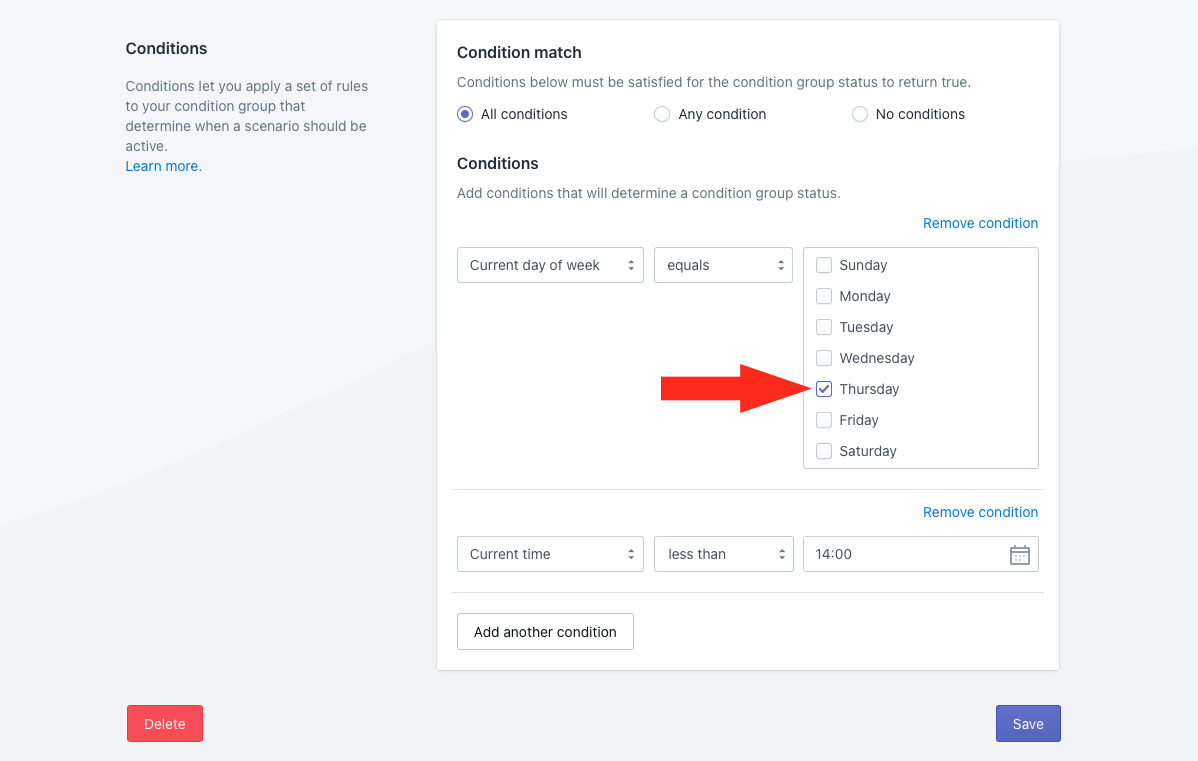
4) Select each day that will have the first cut-off time as the condition value. For this example, we’re selecting Sunday, Monday, Tuesday and Wednesday.
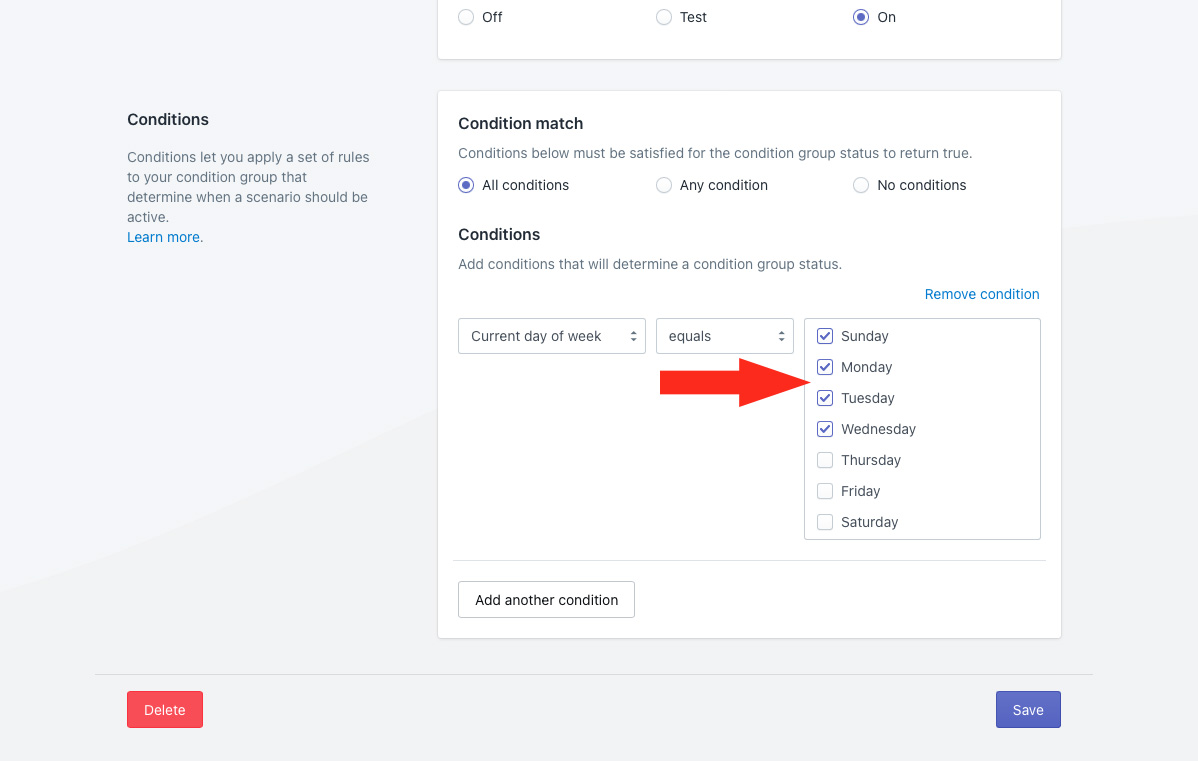
That means, the condition group will be applied only when customers place orders on one of these days of the week.
5) Click the Add another condition button.
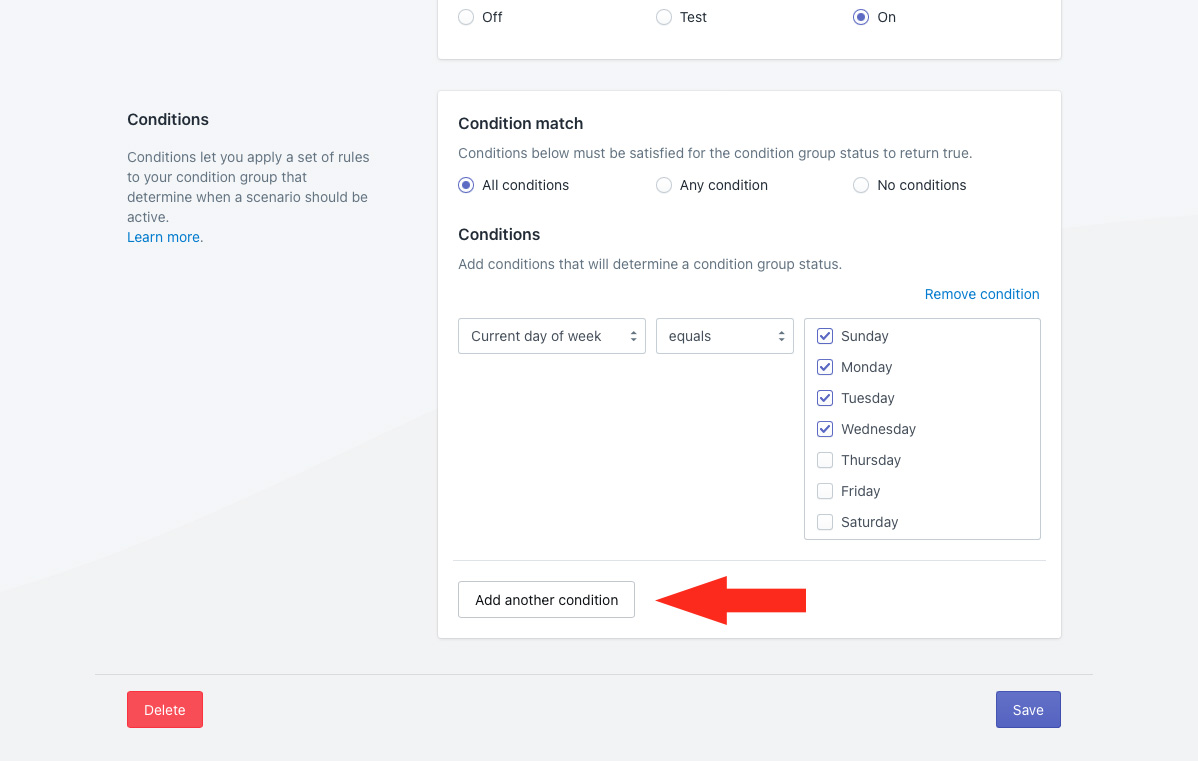
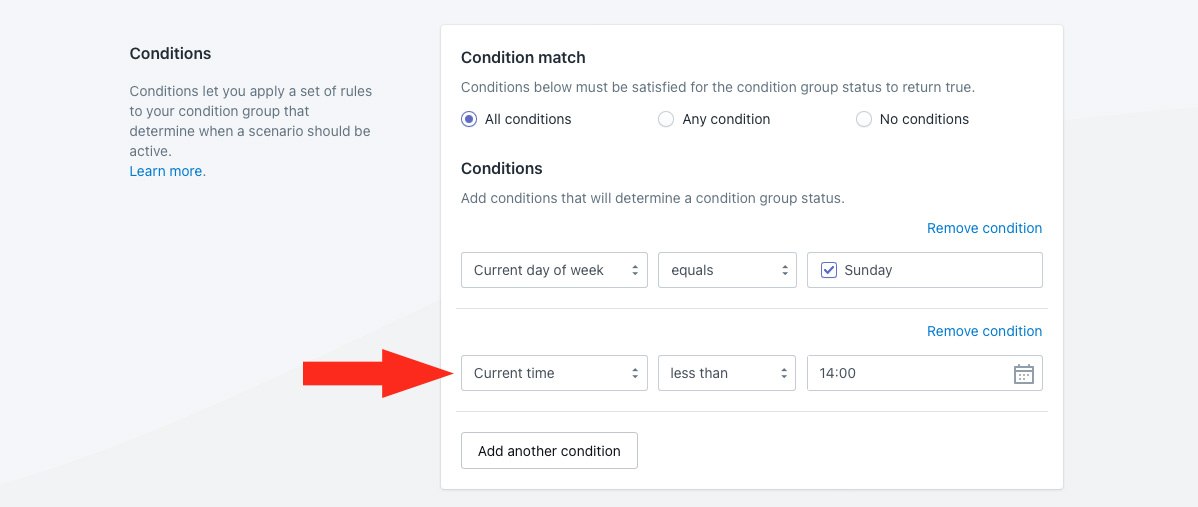
6) Select ‘Current time’ as the second condition type.
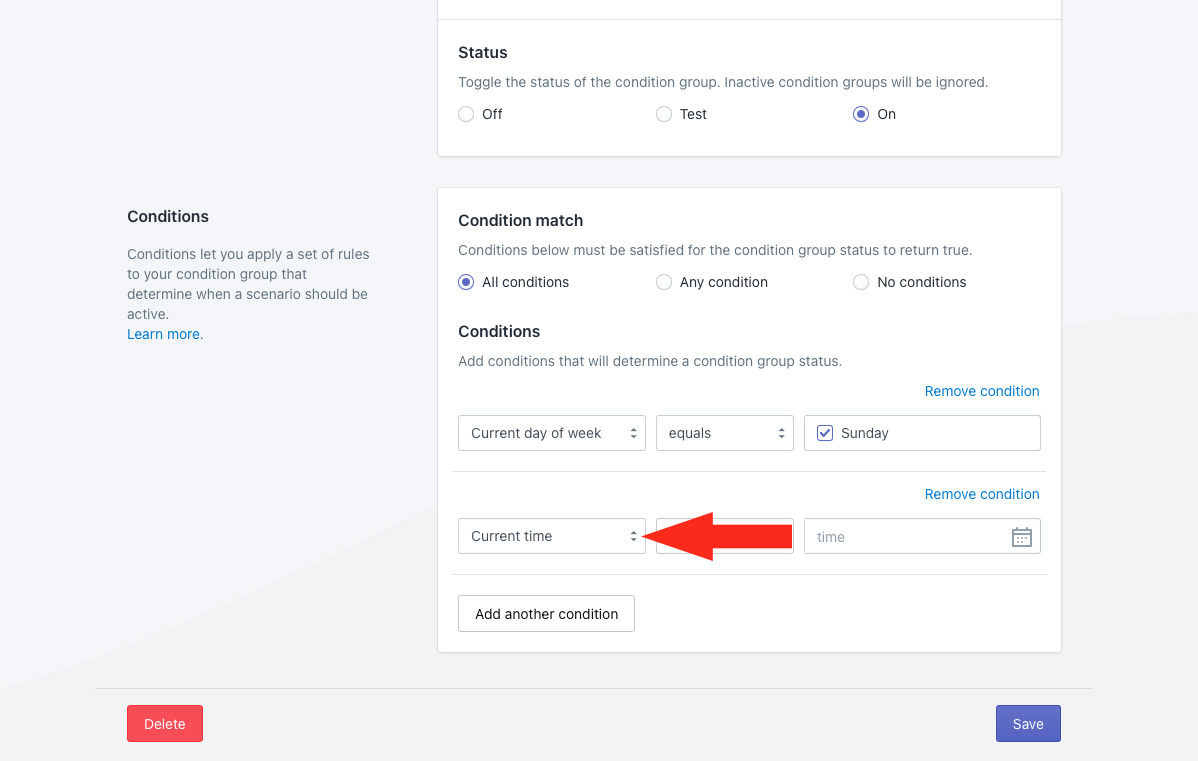
7) Set the condition logic to ‘Less than’.
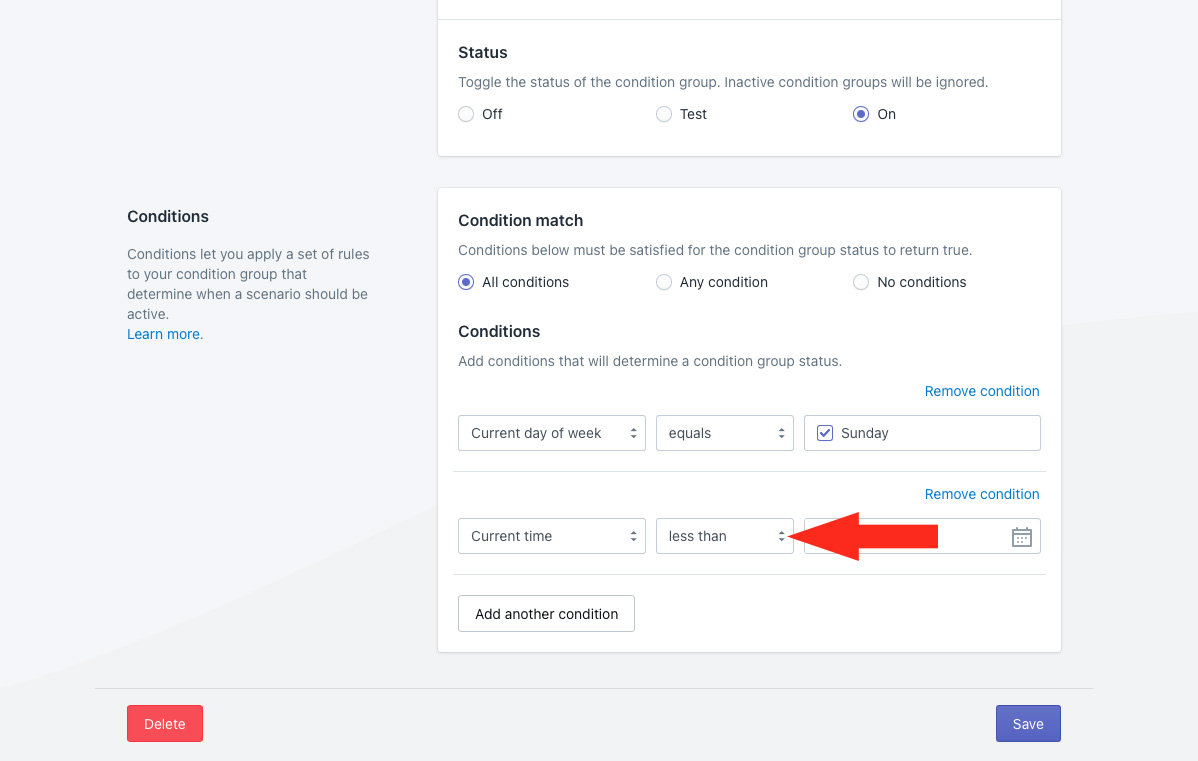
That means, the condition group will be applied only when customers place orders before the time selected in Step 8. Alternatively, you can select ‘Less than or equals’ if you want the cut-off time to be before or at the time selected in Step 8.
8) Select the cut-off time for the days of the week selected in Step 4 as the condition value. For this example, we’re selecting 14:00 (2:00 PM).
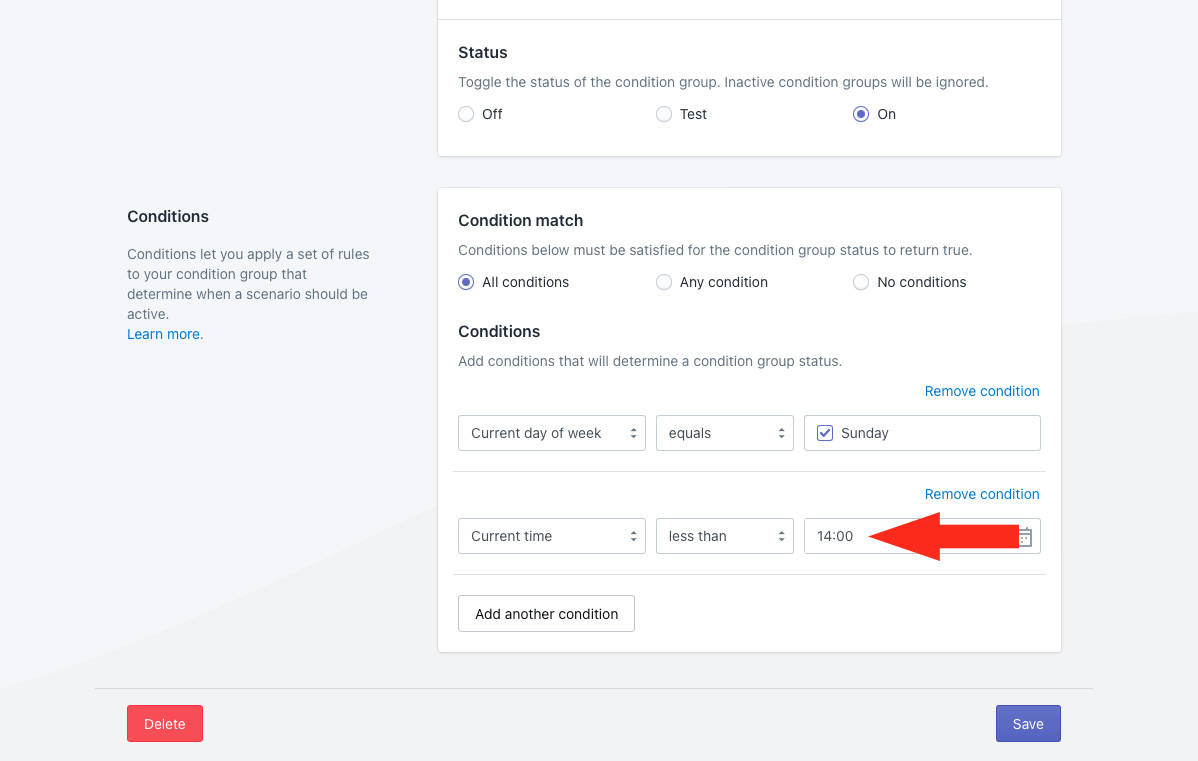
That means, the condition group will be applied only when customers place orders before this time of day on any of the days of the week selected in Step 4.
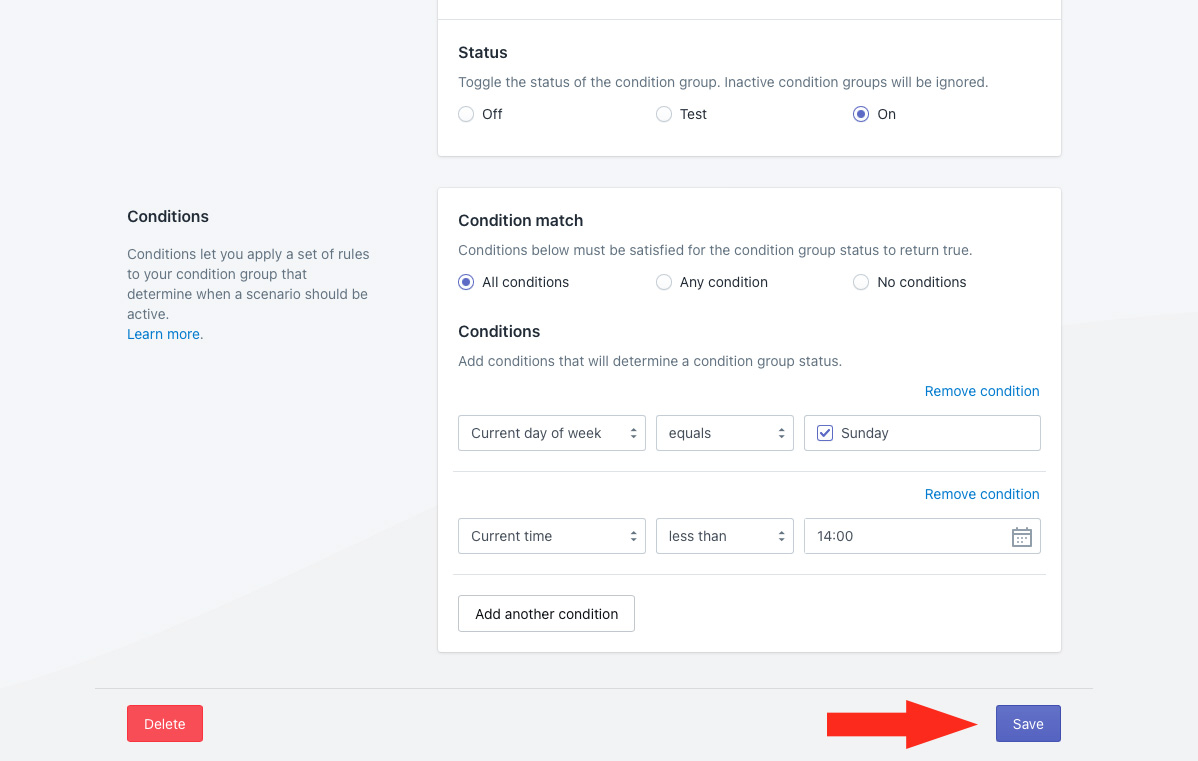
9) Click the Save button to save your first condition group.
Create The Second Condition Group
This condition group will allow customers to choose next day shipping for Friday when they order before 12:00 noon on Thursday.
To simplify the process, you can make a duplicate of your first condition group, then make minor adjustments to the condition settings rather than creating a new group from scratch.
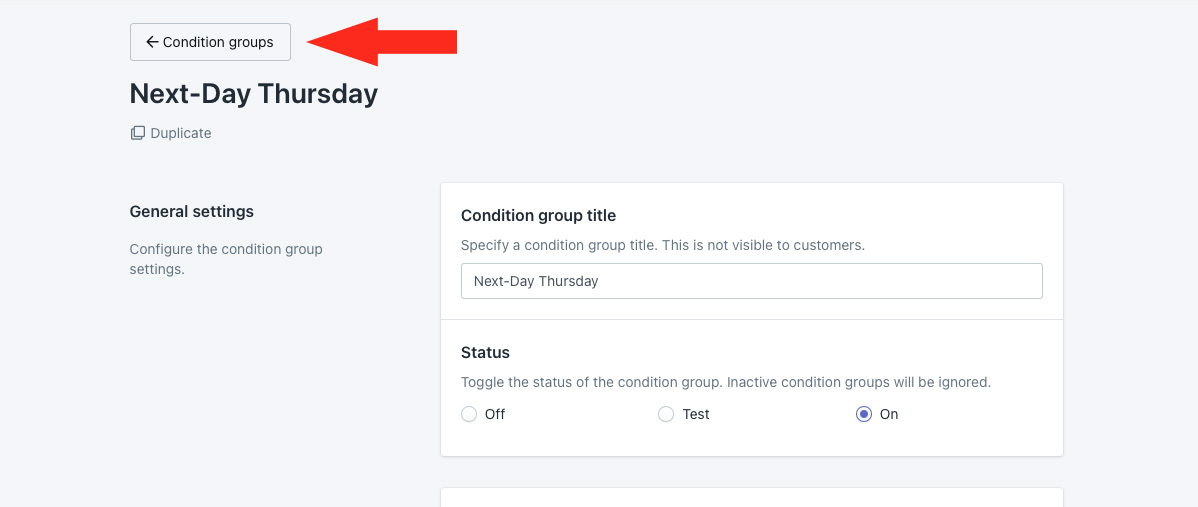
1) After saving your first condition group, scroll to the top of the page, then click Duplicate below the condition group heading.
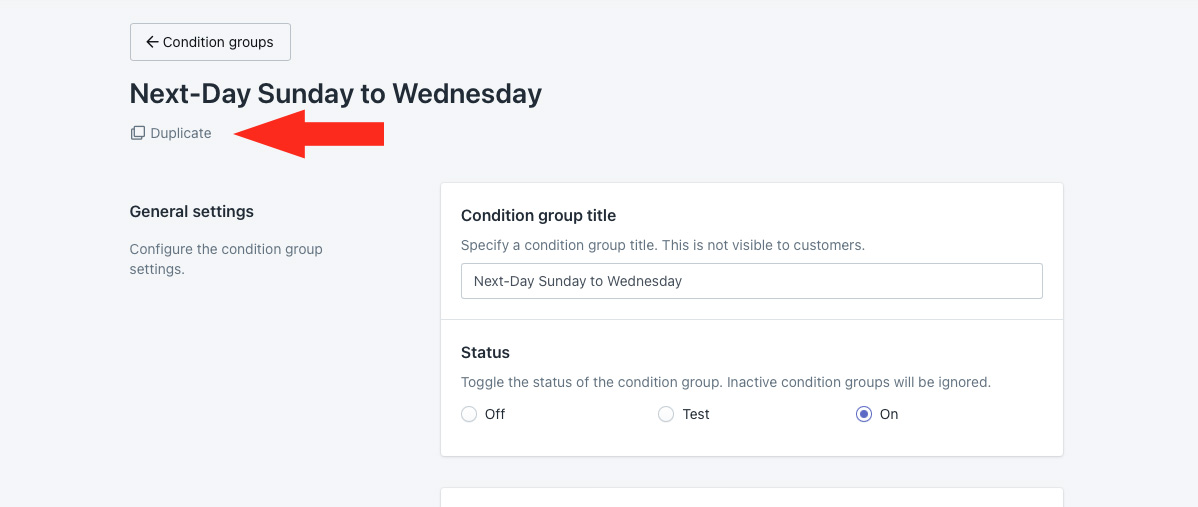
2) Change the condition group title from ‘Copy of [the original title]’ to something else, like ‘Next-Day Thursday’
3) Leave the status set to ‘On’
Conditions
1) Leave Condition match set to ‘All conditions’
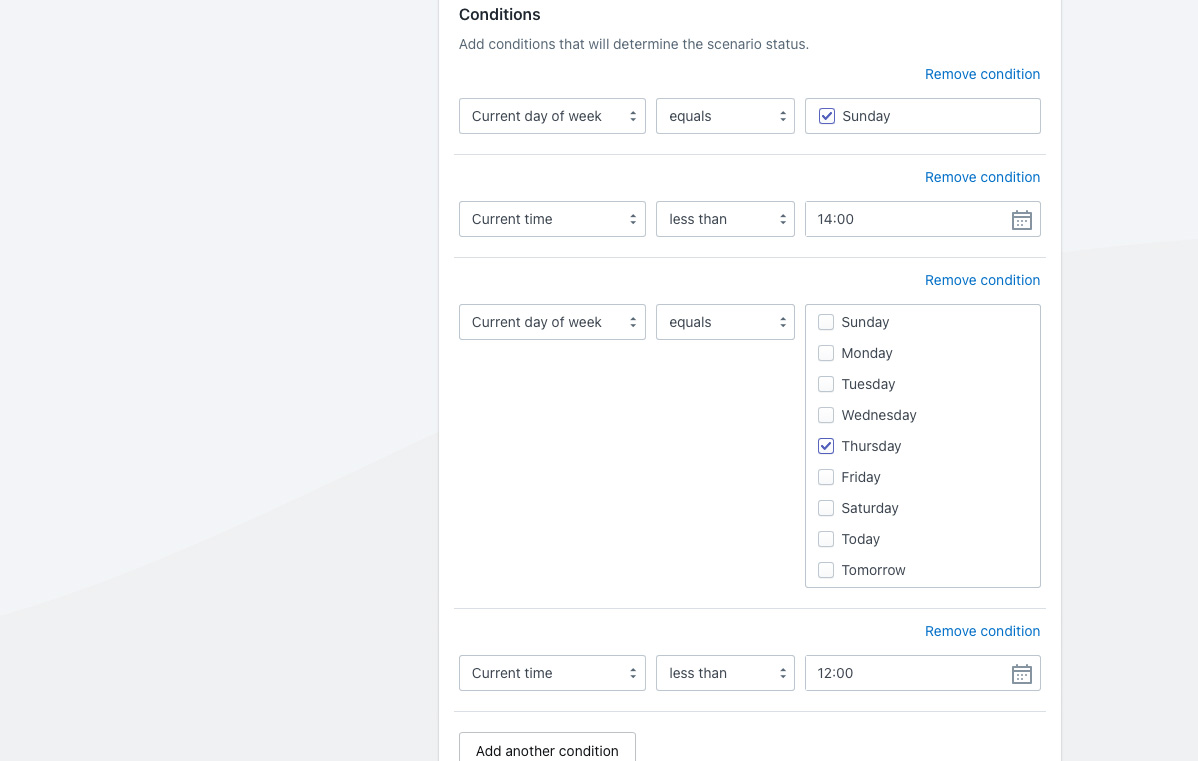
2) For the first condition copied over from the original condition group, leave the condition type set to ‘Current day of the week’ and leave the condition logic set to ‘equals’.
3) Deselect all of the days that were selected for the original condition group, then select the days that will have the different cut-off time as the value. For this example, we’re selecting only Thursday.
That means, the condition group will be applied only when customers place orders on this day of the week.
4) For the second condition copied over from the original condition group, leave the condition type set to ‘Current time’ and leave the condition logic set to ‘less than’.
That means, the condition group will be applied only when customers place orders before the time selected in Step 5. Alternatively, you can select ‘Less than or equals’ if you want the cut-off time to be before or at the time selected in Step 5.
5) Change the cut-off time for the days of the week selected in Step 3 as the condition value. For this example, we’re changing to 12:00 (12:00 noon).
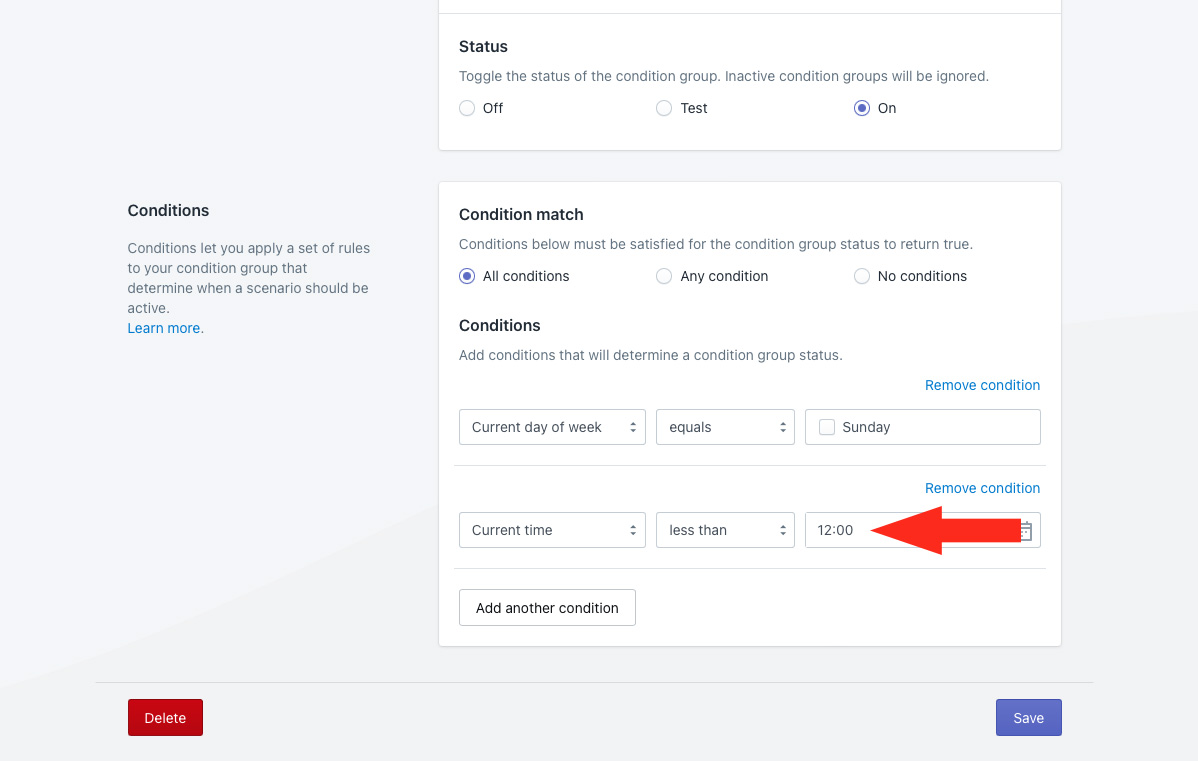
That means, the condition group will be applied only when customers place orders before this time of day on the day of the week selected in Step 3.
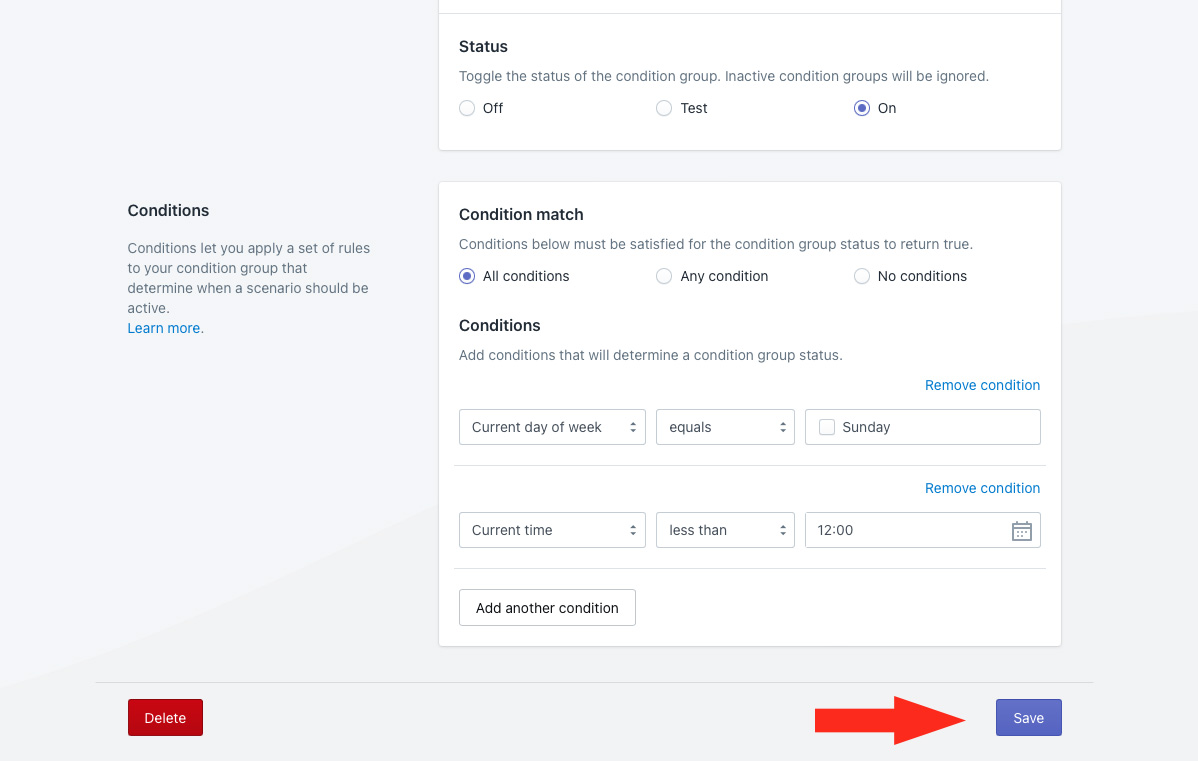
6) Click the Save button to save your second condition group.
7) After saving your second condition group, scroll to the top of the page, then hit the back button above the condition group heading.
You should now see two (2) condition groups. One for your first set of days and their cut-off time, and one for your second set of days and their cut-off time. For this example, we created one condition group for Sunday through Wednesday at 2:00 PM and a second condition group for Thursday at 12:00 noon.
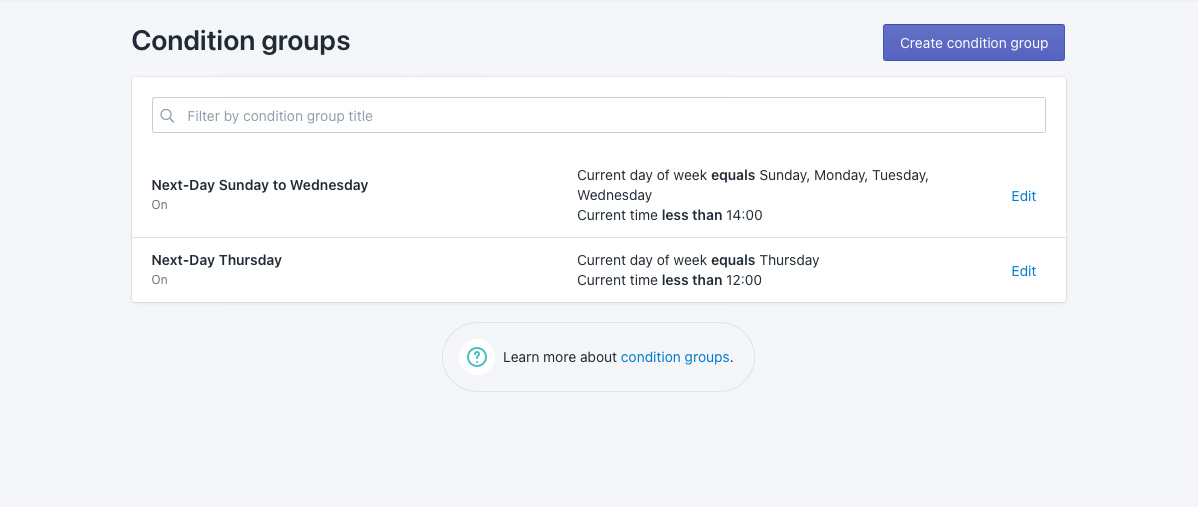
These conditions groups will now be available as ‘conditions’ in your Scenarios.
Create A Next Day Shipping Scenario
1) Click Shipping on the sidebar menu, then select Scenarios from the drop-down list.
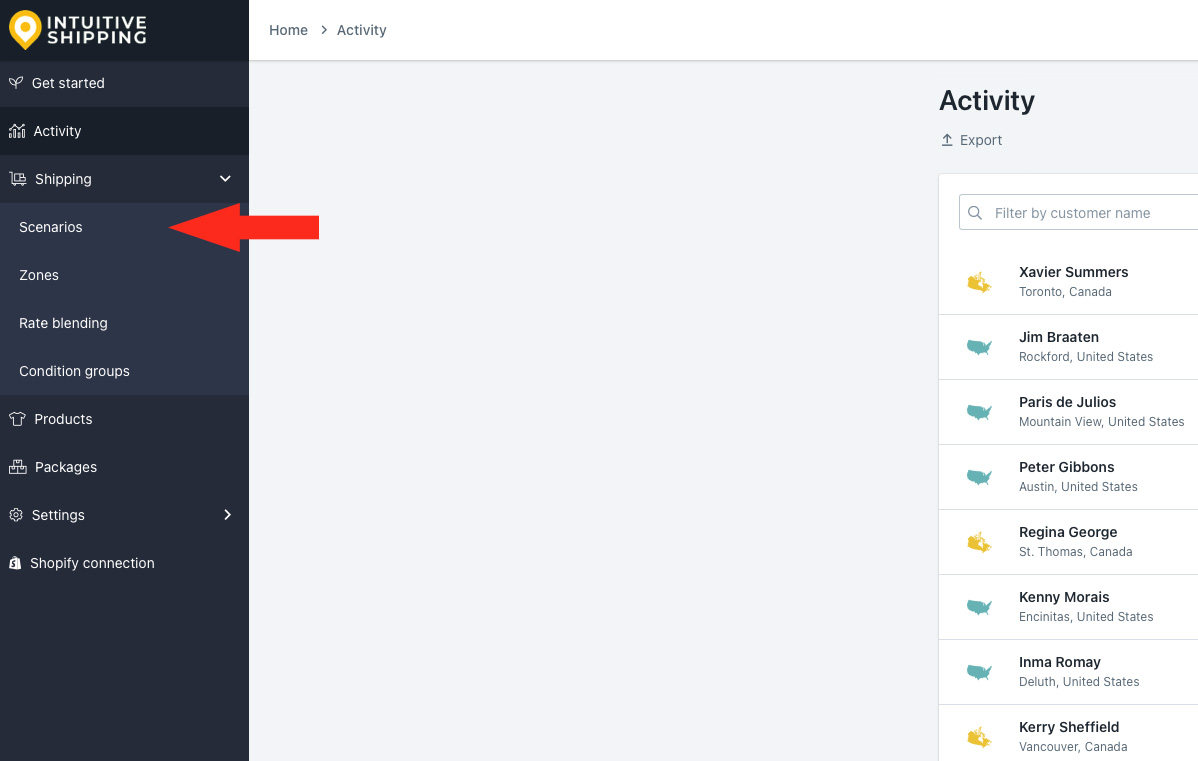
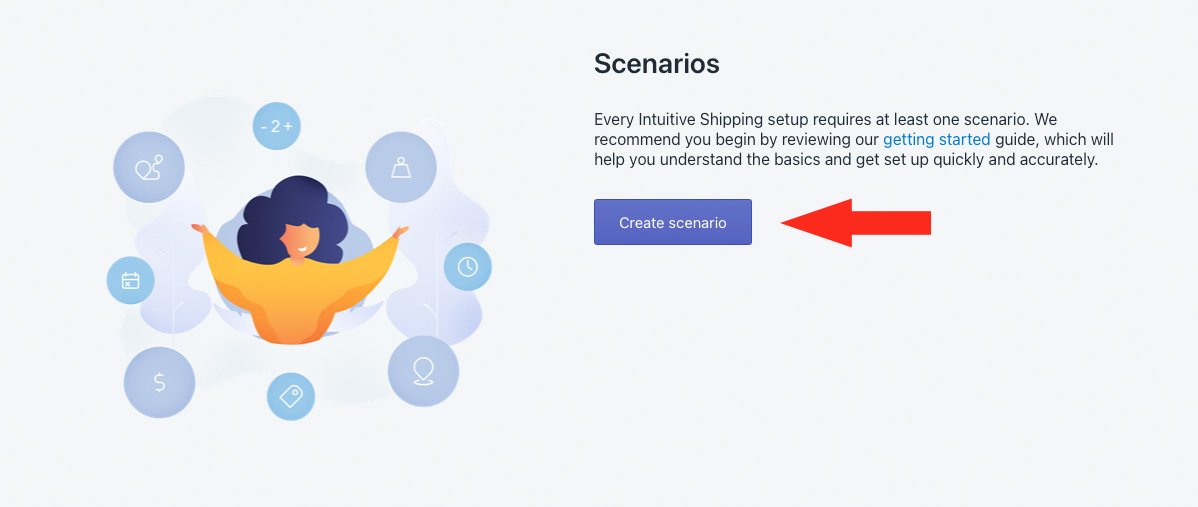
2) Click the Create scenario button.
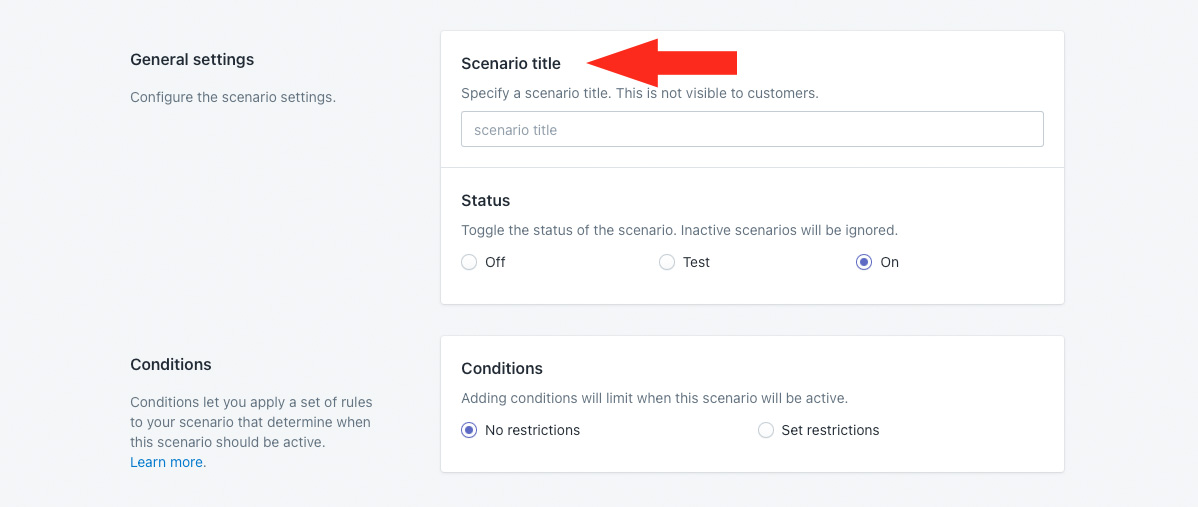
General Settings
1) Enter a Scenario title, like ‘Next Day’.
2) Leave the status set to On.
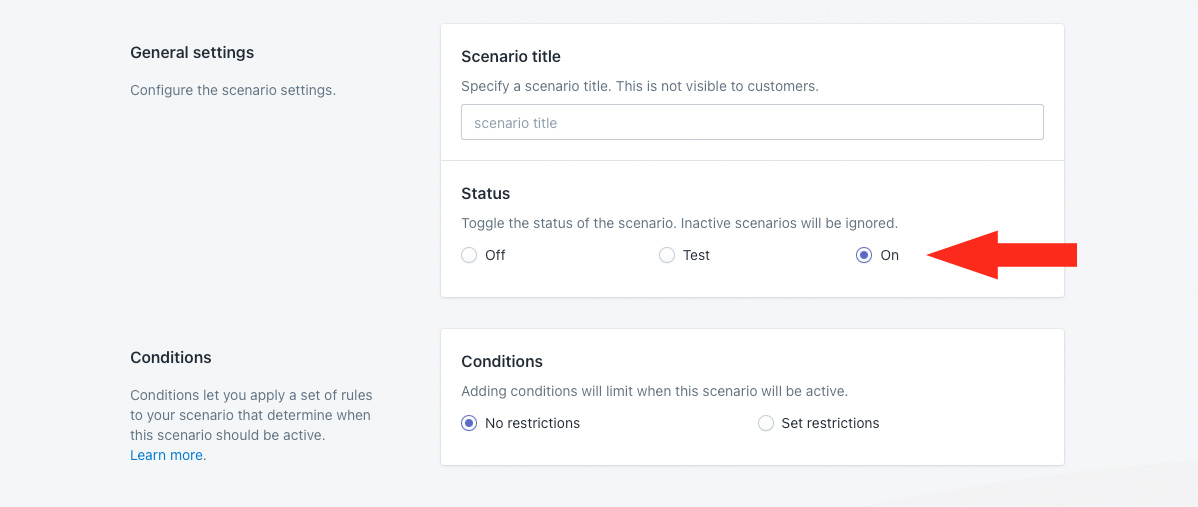
Alternatively, you can set the status to ‘Test’ if you want test your next day shipping method before making it live to customers.
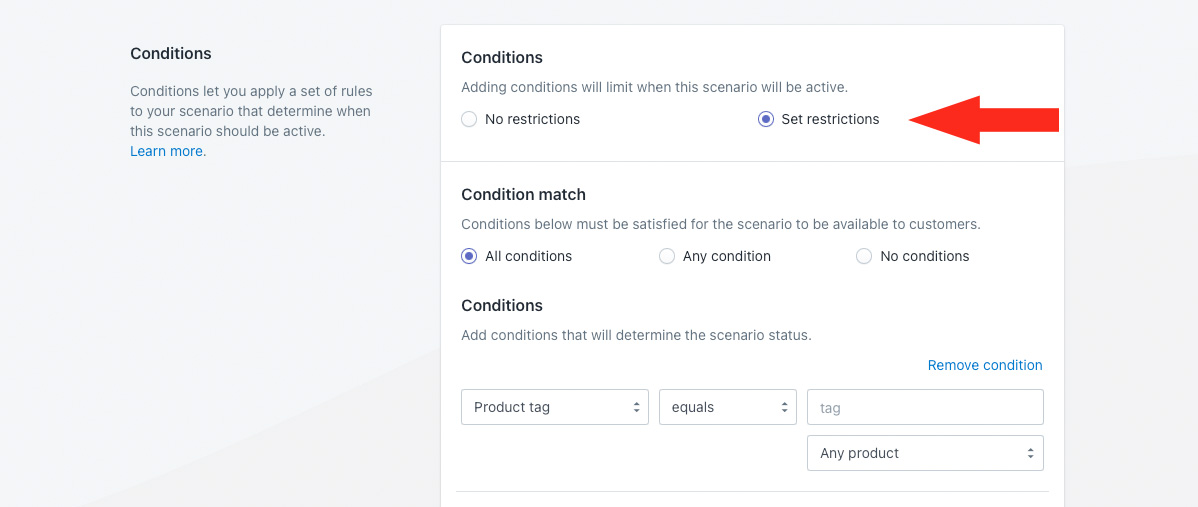
Conditions
1) Select Set restrictions.
2) Set Condition match to ‘Any condition’.
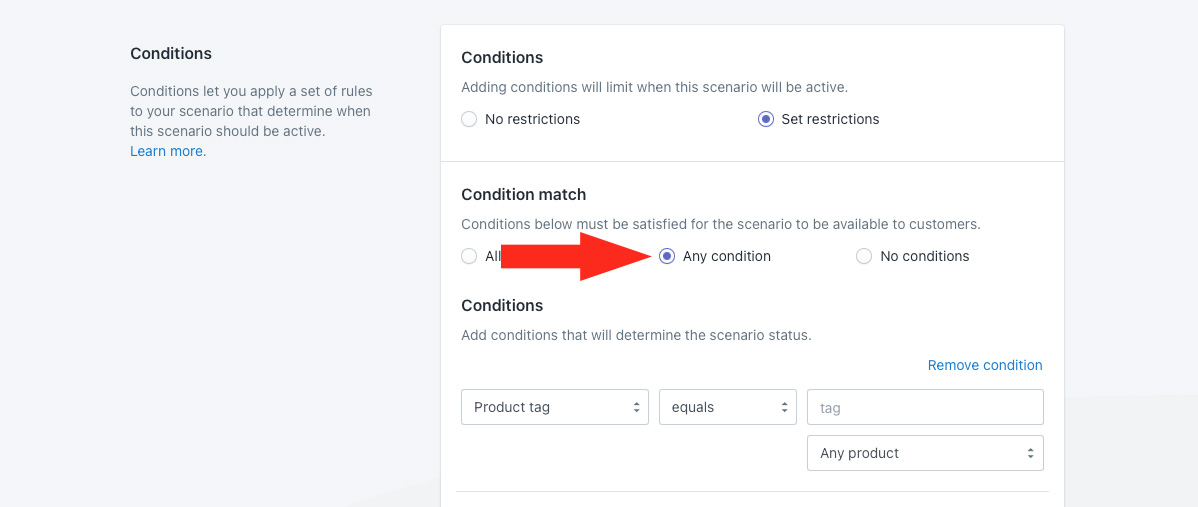
3) Select the first condition group you created earlier as the condition type. For this example, we’re selecting ‘Next-Day Sunday to Wednesday’ which includes a cut-off time 2:00 PM for orders placed on any of those days.
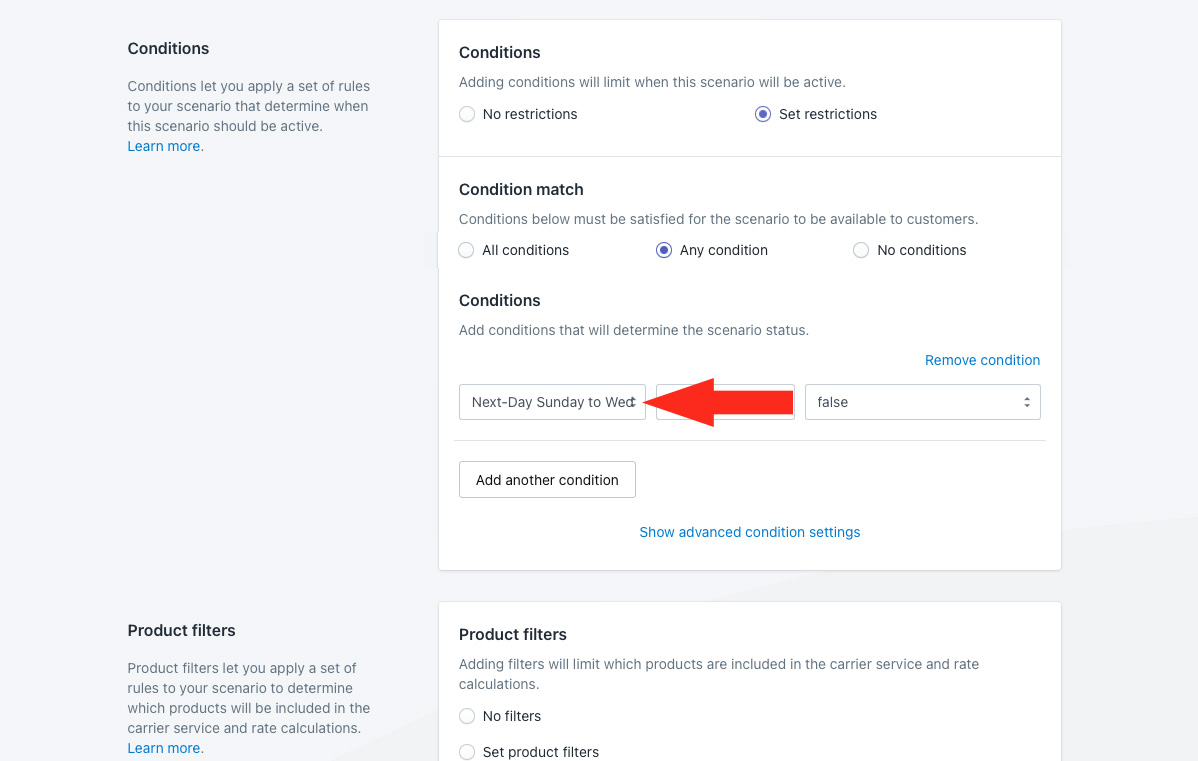
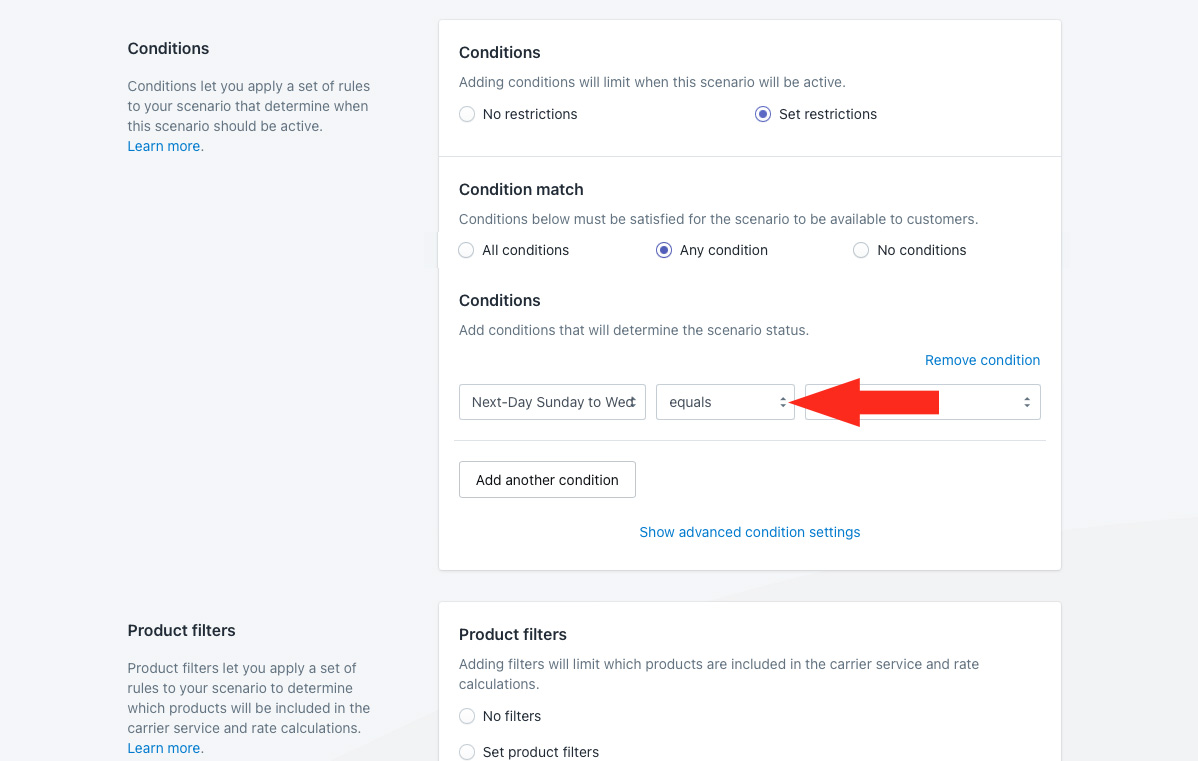
4) Leave the condition logic set to ‘equals’.
5) Select ‘true’ as the condition value.
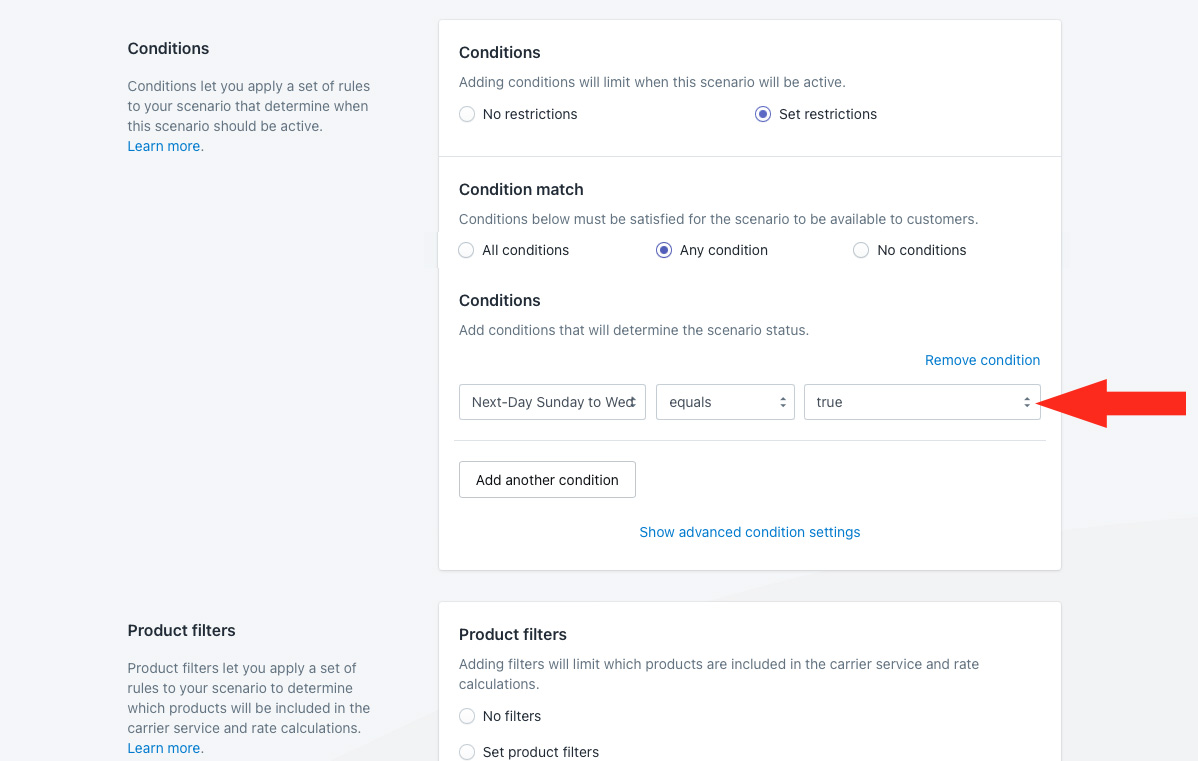
That means the conditions within the condition group must be met. For this example, a customer must place their order on a Sunday, Monday, Tuesday or Wednesday before 2:00 PM.
6) Click the Add another condition button.
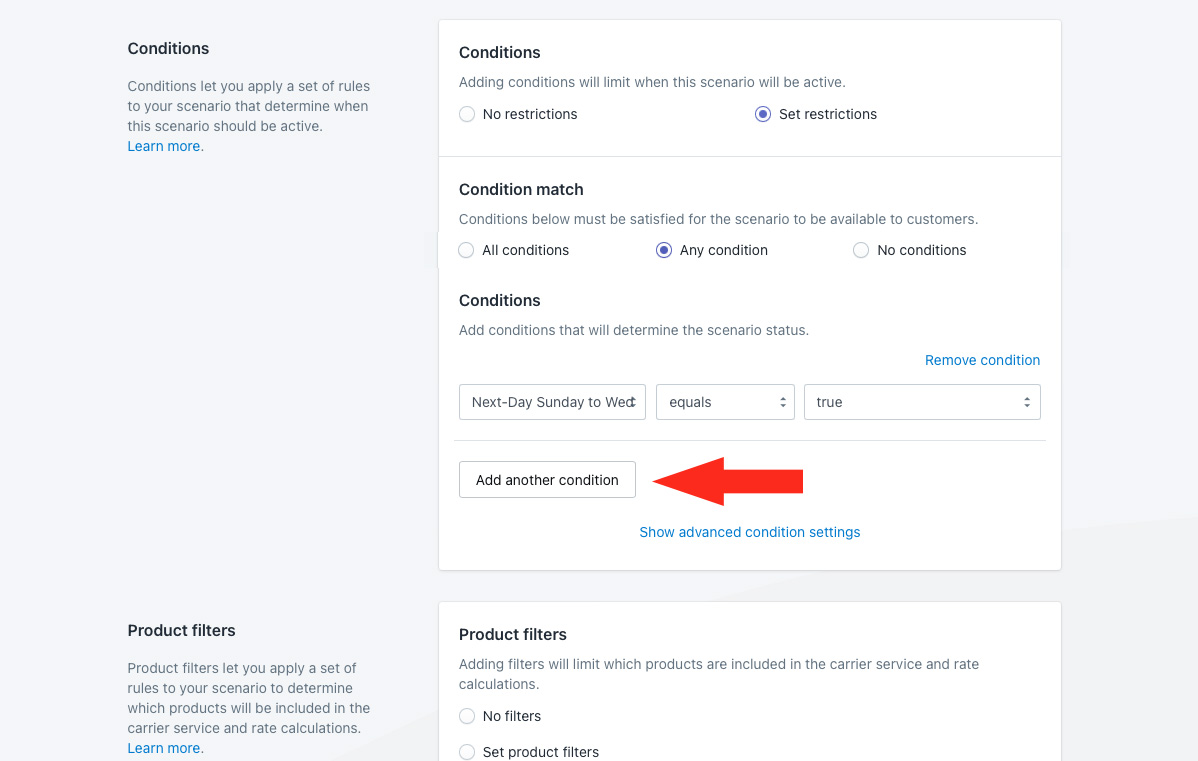
7) Select the second condition group you created earlier as the condition type. For this example, we’re selecting ‘Next-Day Thursday’ which includes a cut-off time 12:00 noon for orders placed on any of that days.
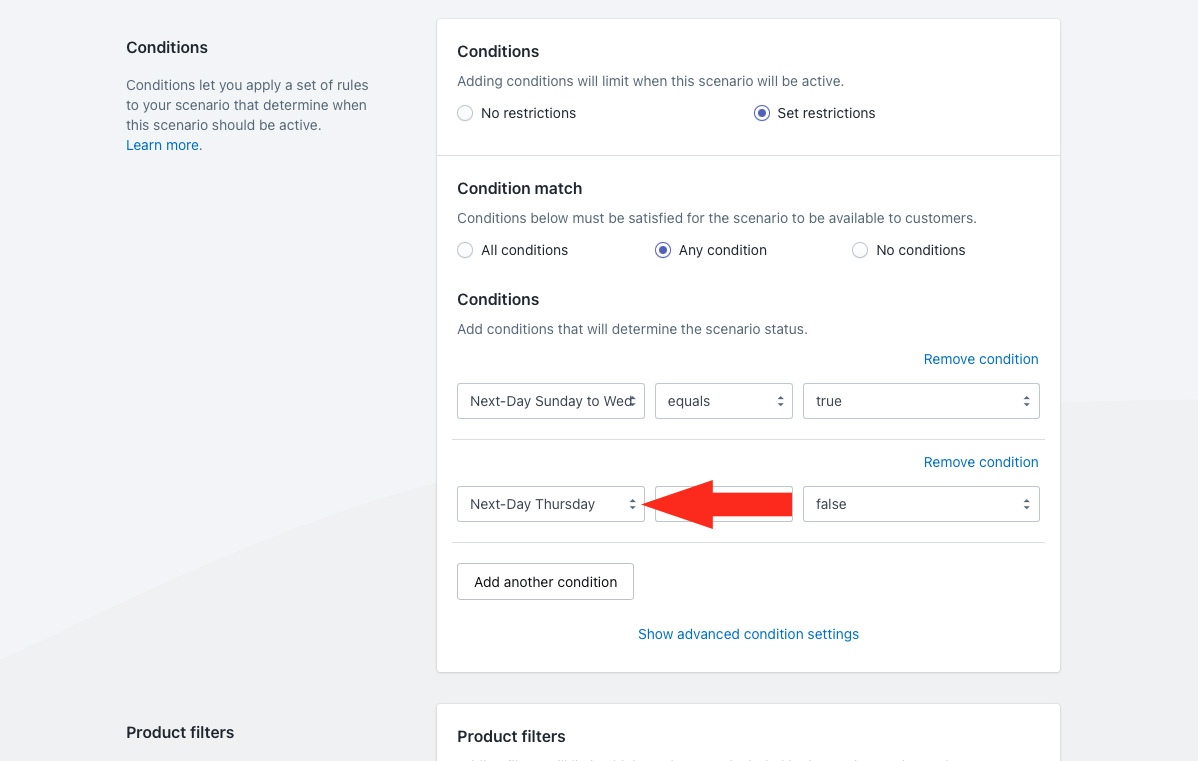
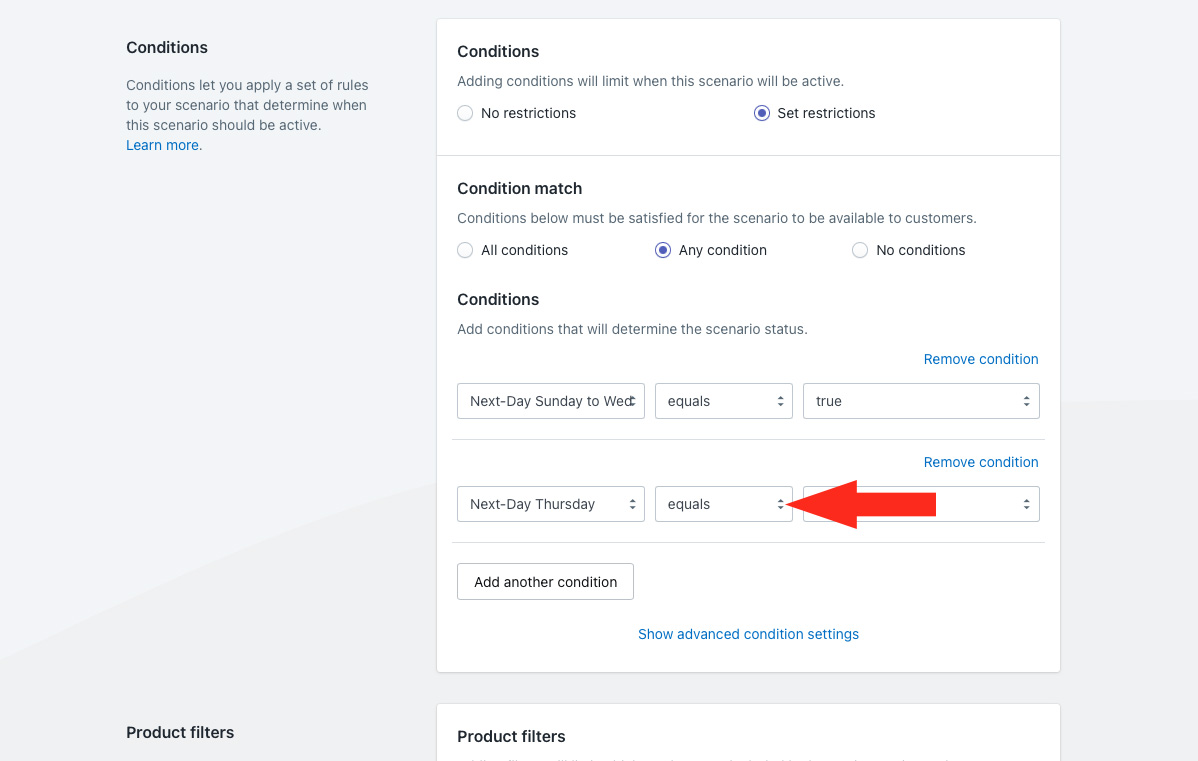
8) Leave the condition logic set to ‘equals’.
9) Select ‘true’ as the condition value.
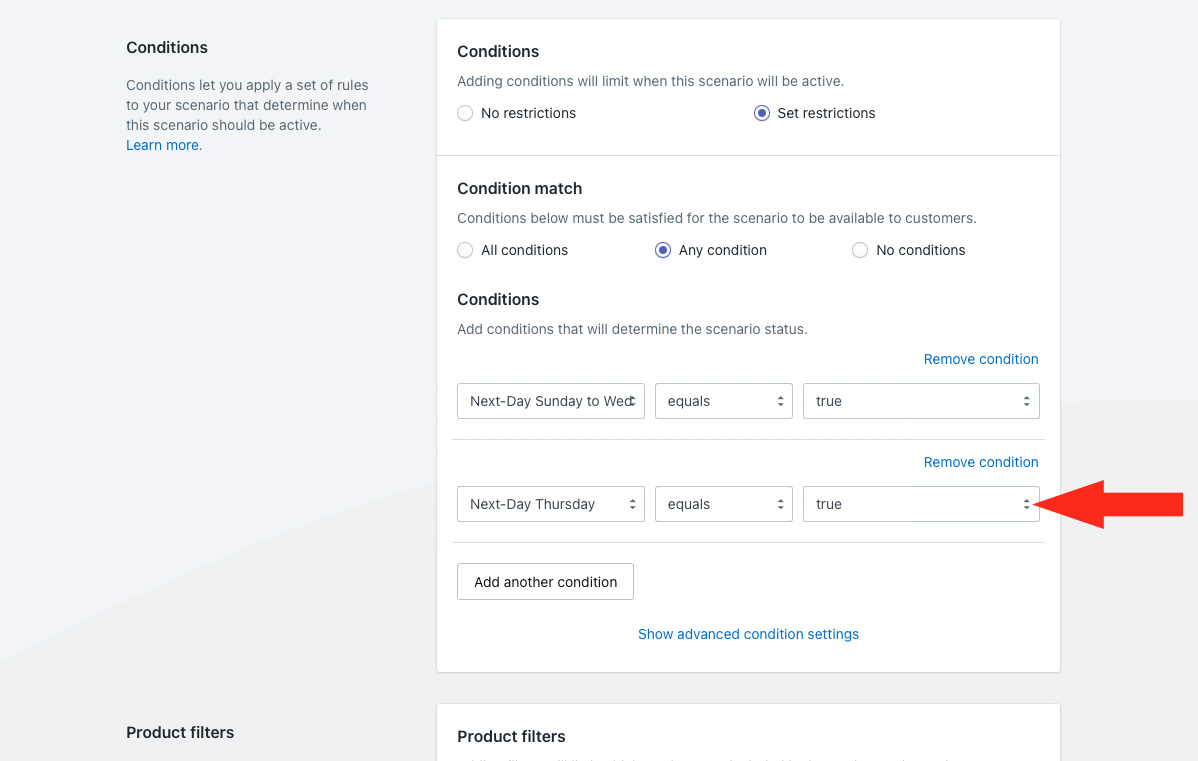
That means the conditions within the condition group must be met. For this example, a customer must place their order on a Thursday before 12:00 noon.
And, because Condition match was set to ‘Any condition’ in Step 2, it means that the conditions within either condition group must be met. For this example, a customer must place their order on a Sunday, Monday, Tuesday or Wednesday before 2:00 PM or on a Thursday before 12:00 noon to get Next Day shipping.
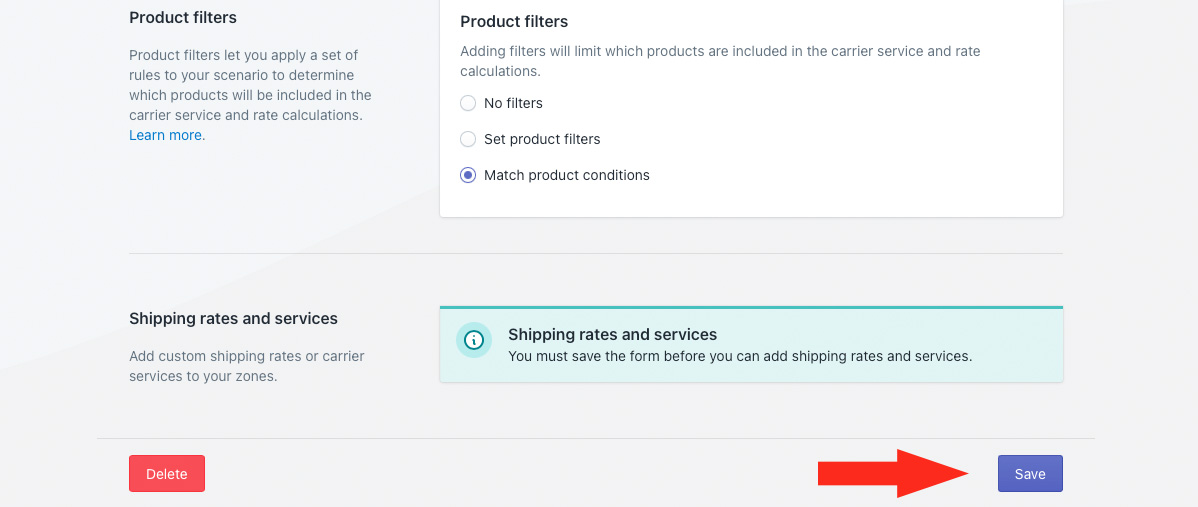
Product Filters
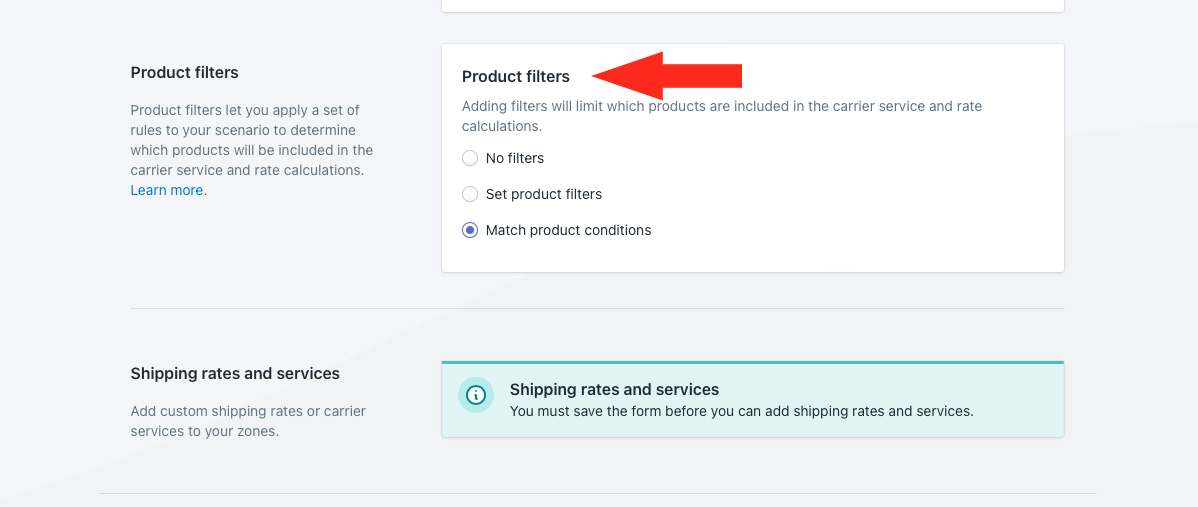
1) Leave Product filters set to Match product conditions.
Because there are no product conditions in this setup, this setting is ignored regardless of how it is set.
Save Your Settings
1) Click the Save button to save your next day delivery Scenario.
Choose How Next Day Shipping Will Be Restricted
Next Day shipping options are typically offered to local customers only. To limit the next day option to your local customers, you can use one of the following options:
- Distance-based
- Postal code/ zip code-based
- City-based
For this example, we’re using a Local delivery service shipping method which uses distance to determine if customers are local.
For distance-based, follow the steps below in Add A Local Delivery Service.
If you have not created a Google API account, you will need to do so before proceeding with the example setup below.
For postal code/ zip code-based, you will first need to create a sub-zone that includes all of the postal codes – or a range of them – in your local next day delivery area. Then, you will need to add a custom service shipping method to this Scenario and assign the sub-zone to it when prompted.
For city-based, you can add a ‘City’ customer condition to the Scenario conditions. Simply click the ‘Add another condition’ button below the two Condition group conditions, then add the condition ‘City > equals > [your next day delivery city or cities]’. Separate multiple city names with a comma. Then, you will need to add a custom service shipping method to this Scenario.
If you require assistance to set up either of the other two options (postal code/ zip code-based or city-based), please feel free to book a demo with one of our team members who can walk you through the rest of the setup process.
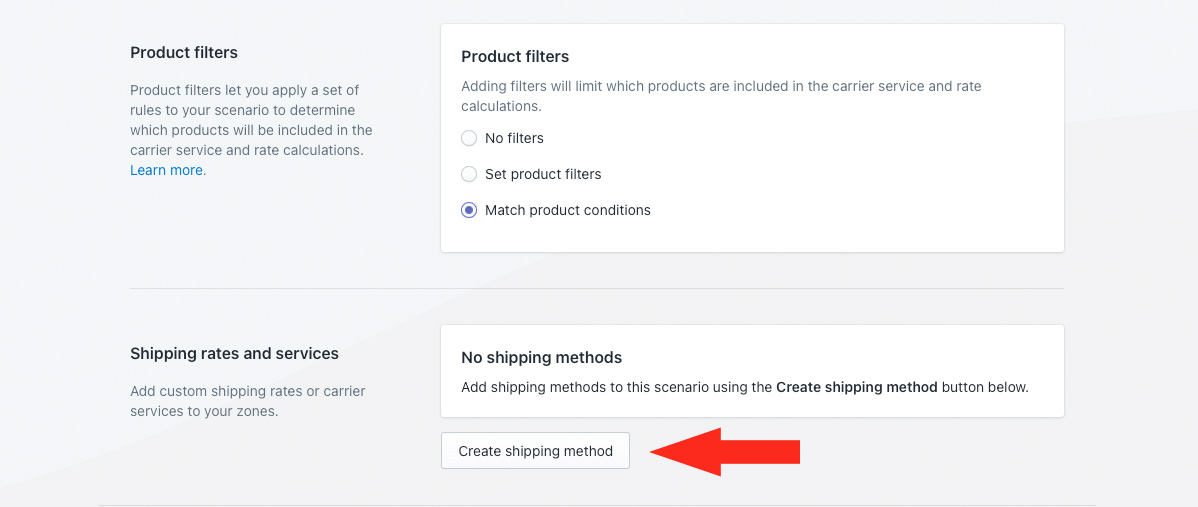
Add A Local Delivery Service
1) Click the Create shipping method button.
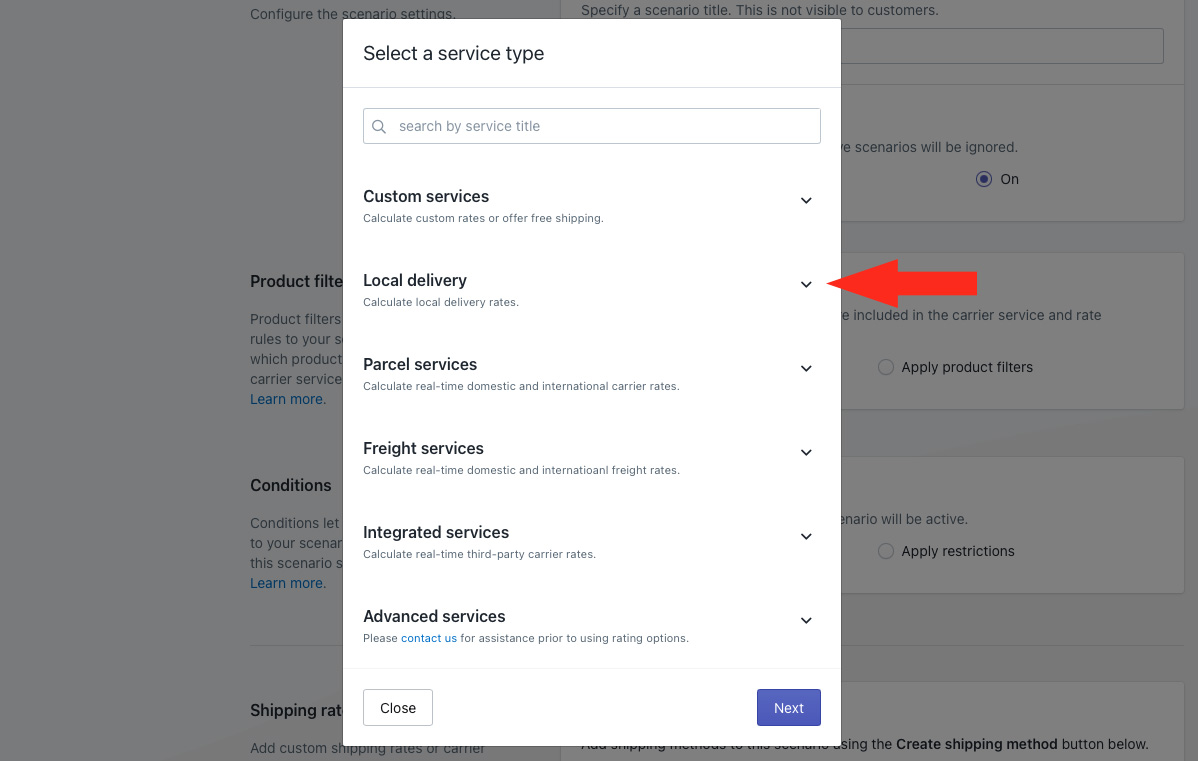
2) Click the downward arrow beside ‘Local delivery’ to display a list of options.
3) Select Local delivery from the list.
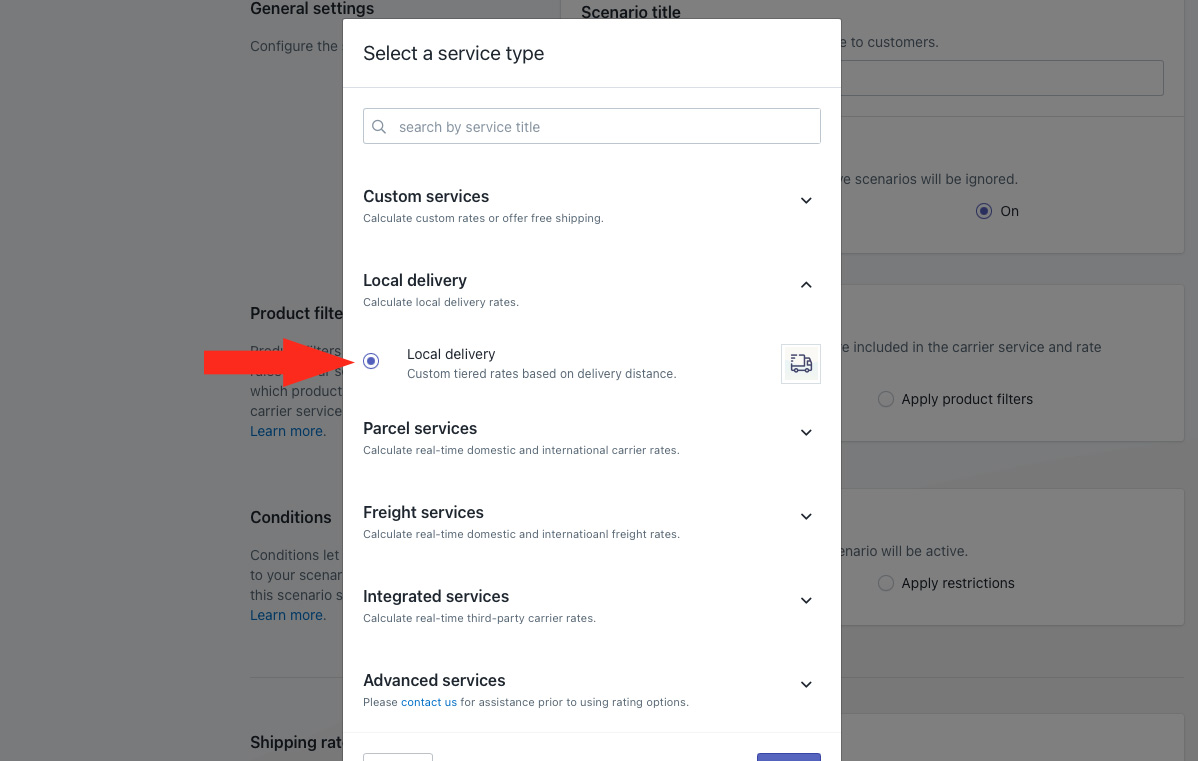
4) Click the Next button.

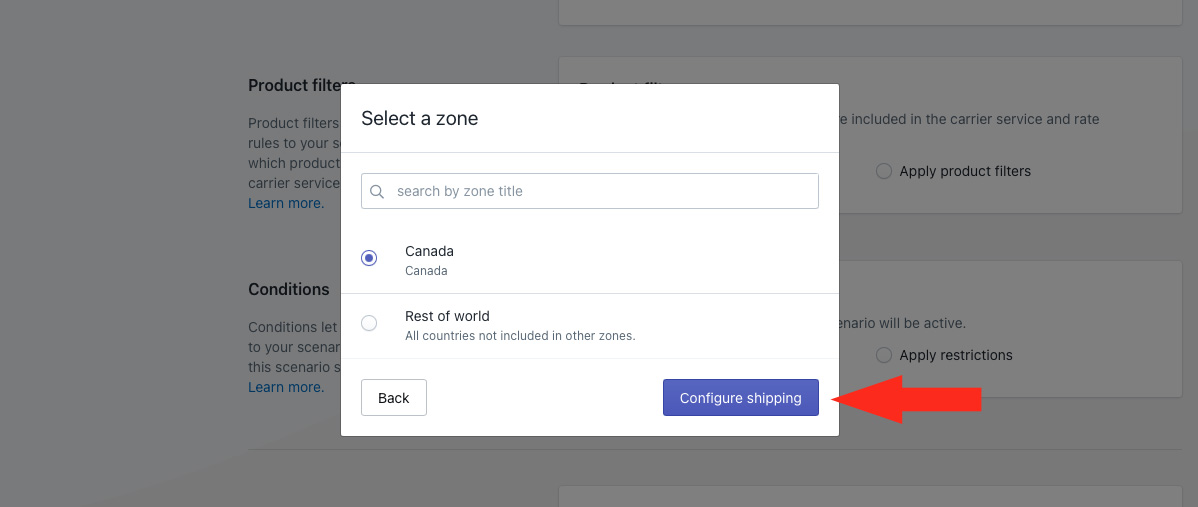
5) Select a Zone.
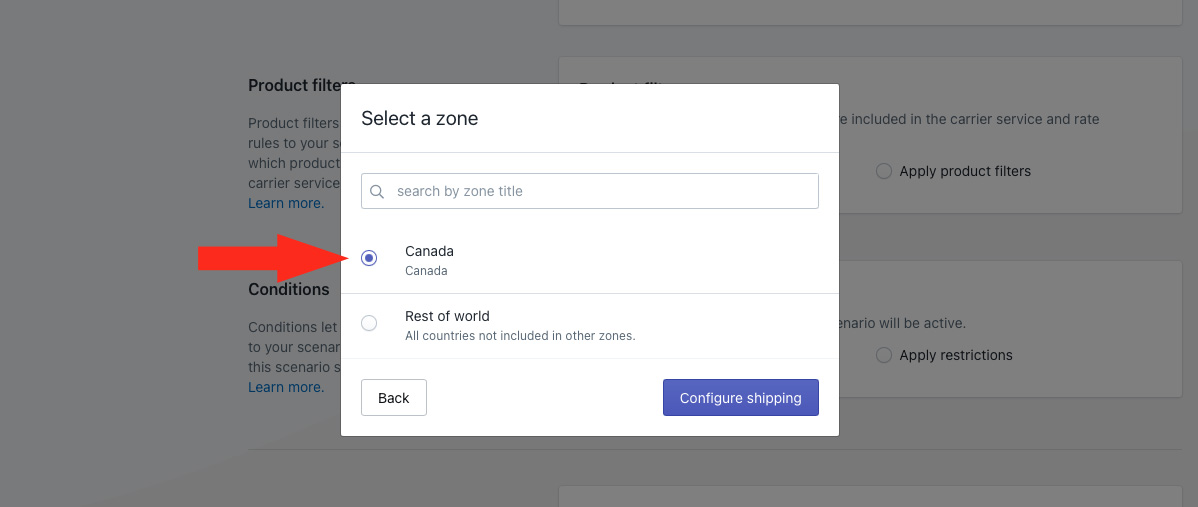
6) Click the Configure shipping button.
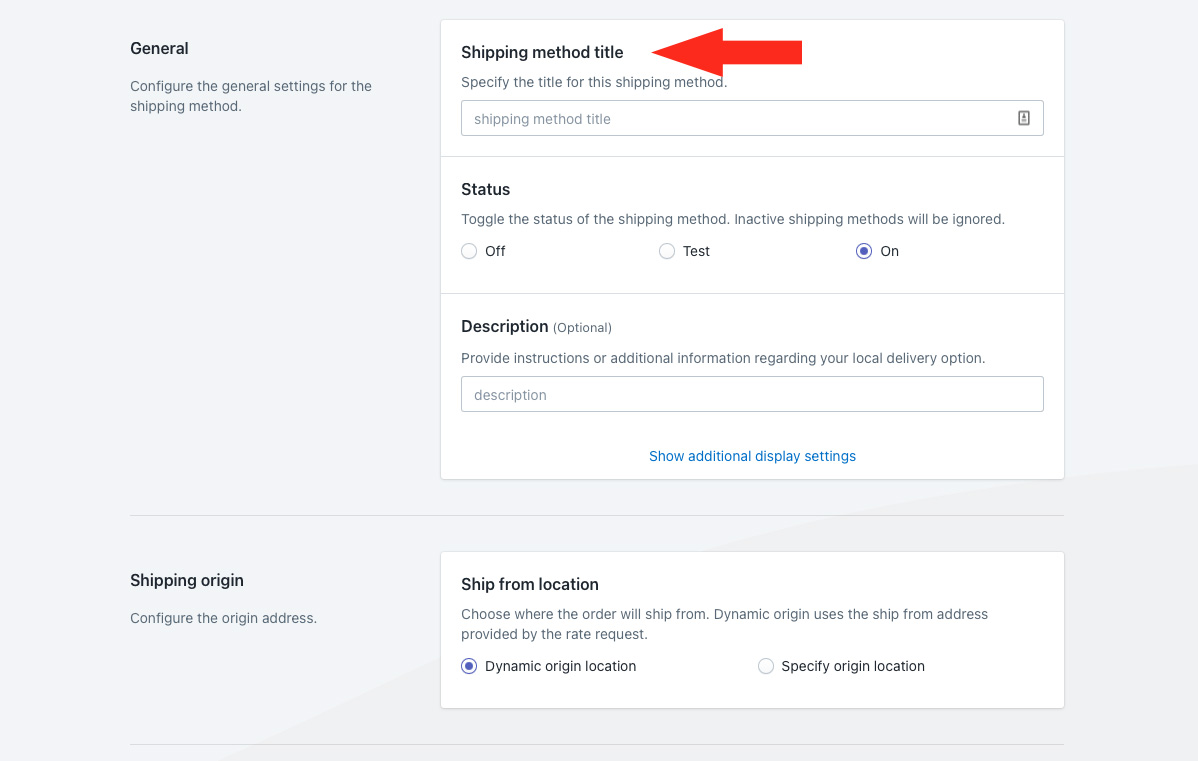
General
1) Enter a shipping method title, such as ‘Next Day Delivery’. The title entered here will be visible to customers.
2) Choose the shipping method status.
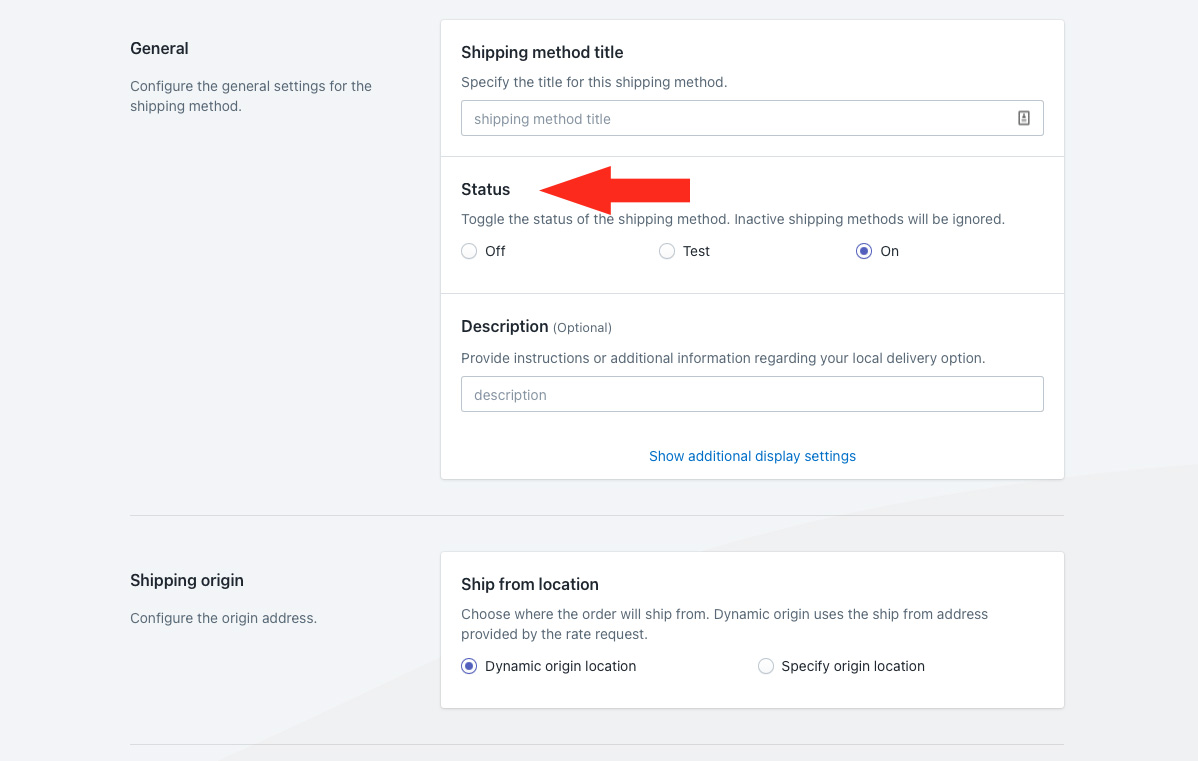
You have three (3) settings to choose from:
Off – The local delivery shipping method will be ignored by the Scenario it is assigned to, even if the Scenario conditions or condition groups are met. The shipping method will not be displayed at checkout, even in Sandbox mode.
Test – The local delivery shipping method will only be visible at checkout when you use the word ‘Intuitive’ as either the customer’s first or last name.
On – The local delivery shipping method will be visible to customers. If the Scenario conditions or condition groups are met, the shipping method will be displayed at checkout. This is the default setting.
3) If desired, enter a description for your shipping method, such as ‘Delivery between 1-6 PM’. We recommend limiting your description to 90 characters or less to ensure it displays properly on the checkout page.
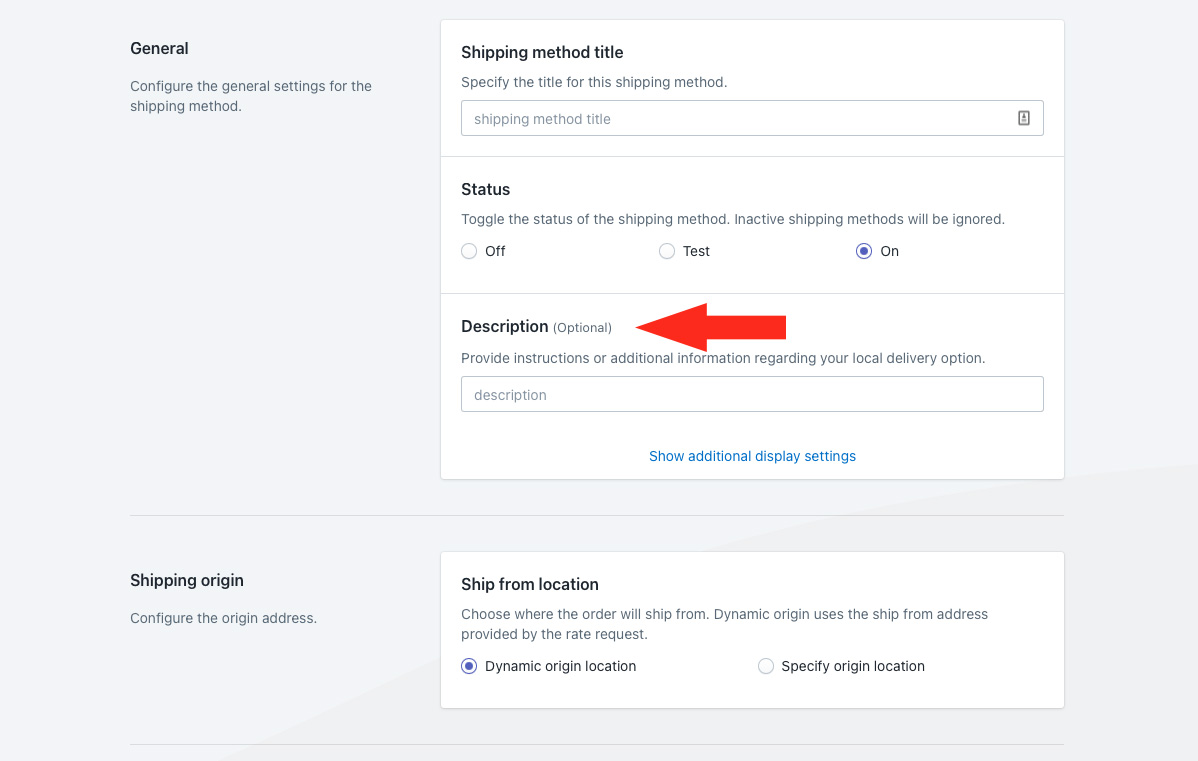
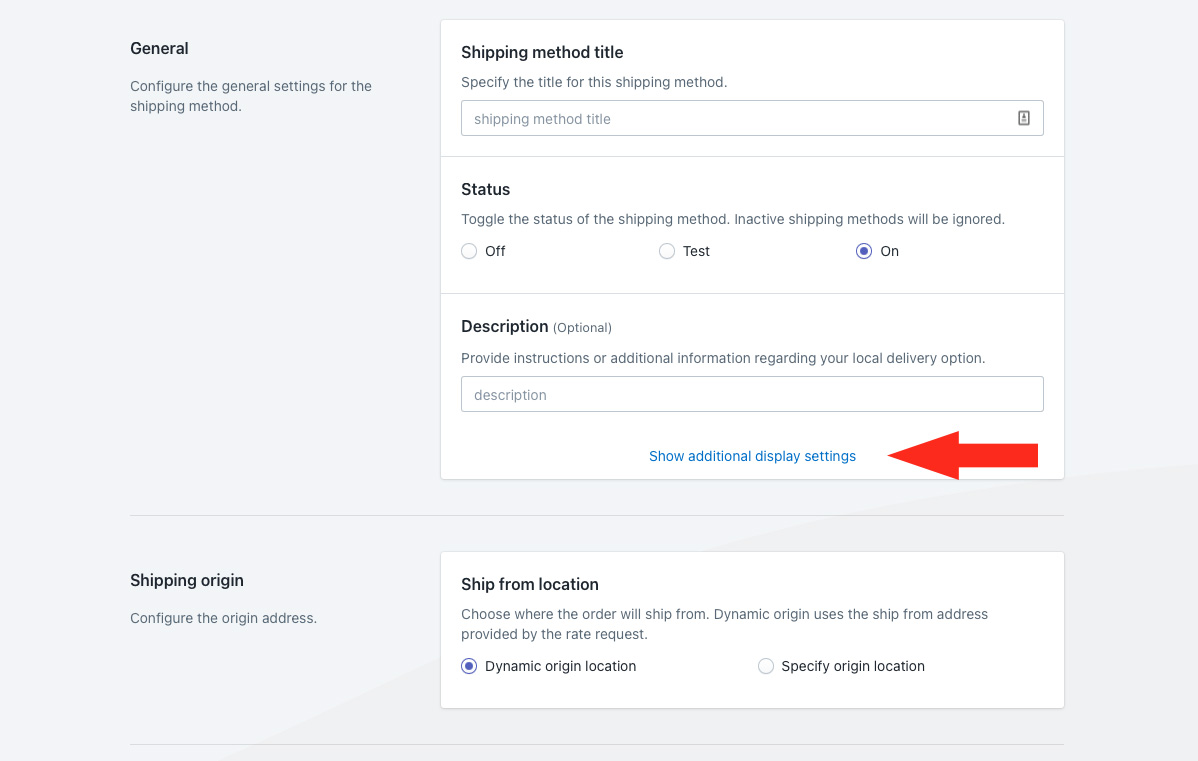
Additional display settings are available for delivery times and service codes. If you do not need to adjust these settings, skip ahead to Shipping Origin. Otherwise, continue to Step 4.
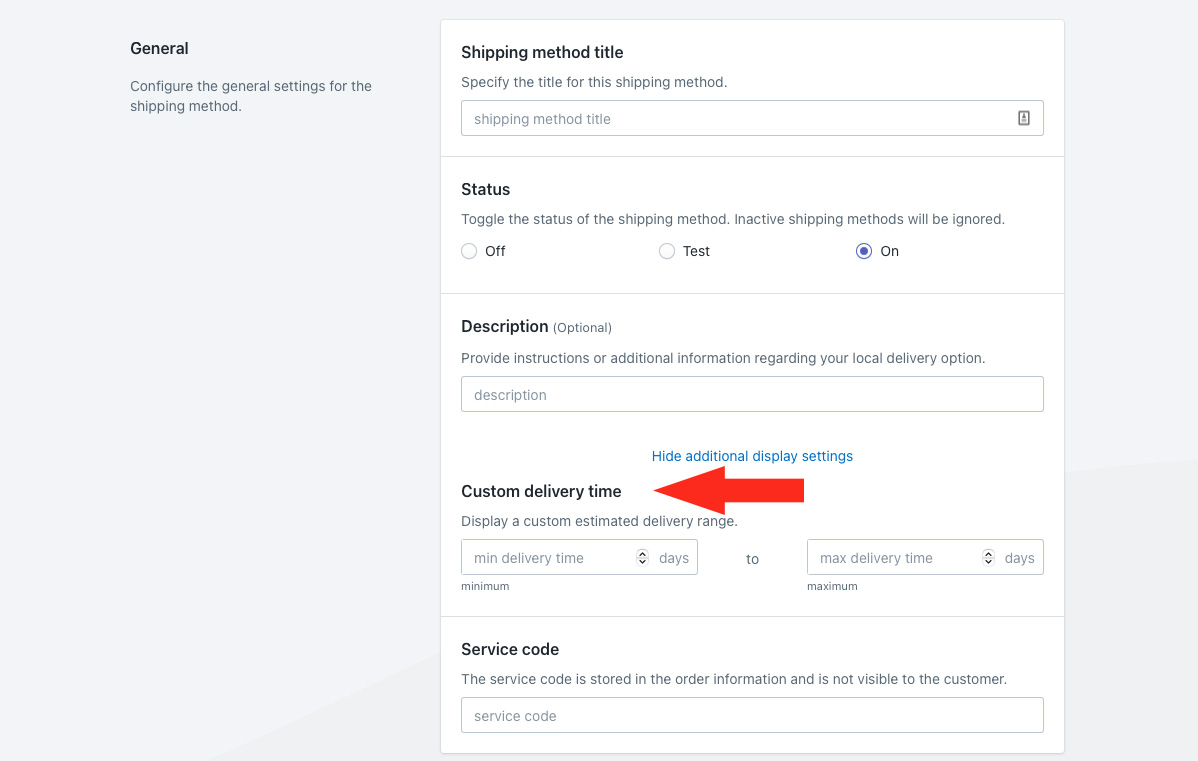
4) Click Show additional display settings.
5) If desired, enter 1 (1 day) as min delivery time. The delivery time is displayed as ‘1 business day’ at checkout along with the rate.
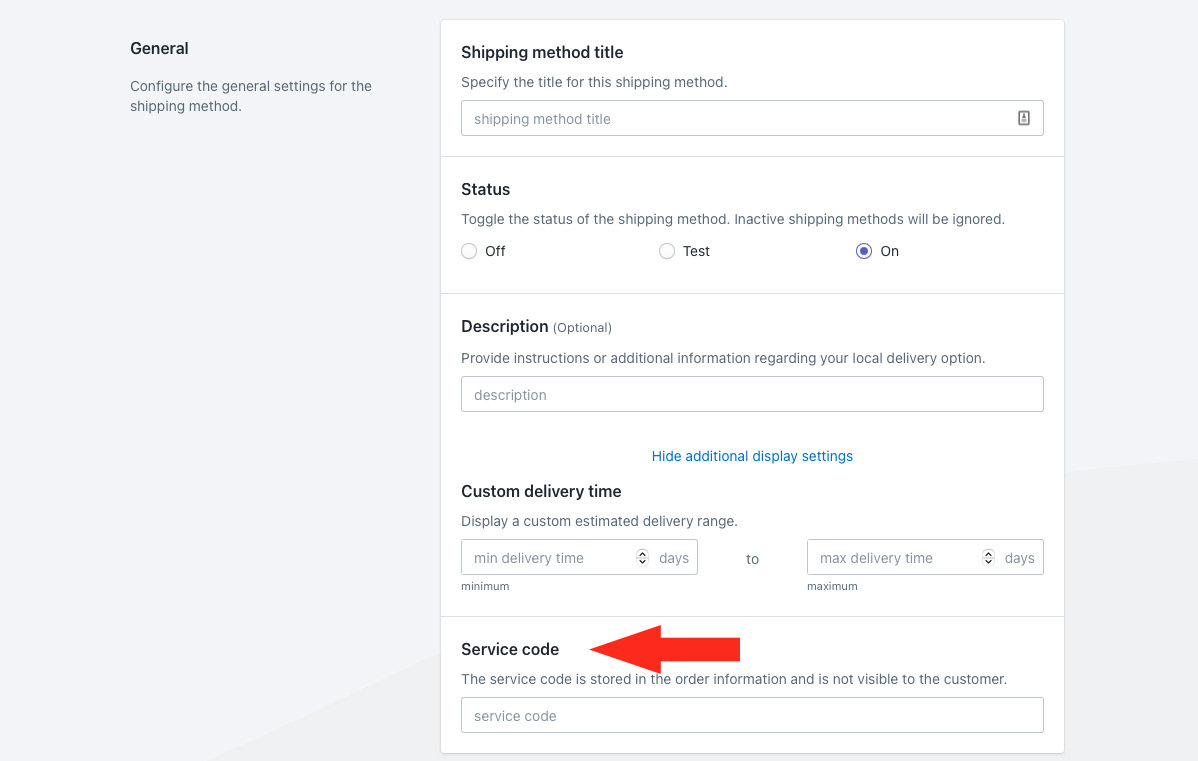
6) If desired, enter a custom service code, such as ‘NEXT’. The service code is pushed to your fulfillment service (if applicable) when a customer successfully completes their checkout.
Shipping Origin
Distance can be calculated using the primary location set up in Shopify, or a custom shipping origin location.
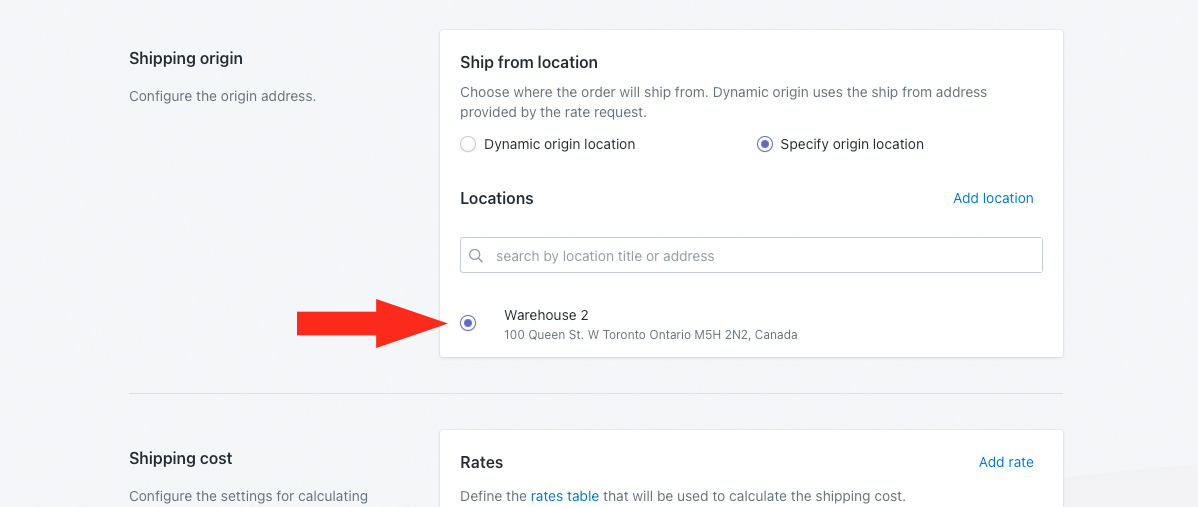
1) Select the ship from location.

You have two (2) settings to choose from:
Dynamic origin location – shipping rates will be calculated based on the distance between the customer’s address and your primary Shopify location address. This is the default setting.
Specify origin location – shipping rates will be calculated based on the distance between the customer’s address and the address specified in Step 6.
If you selected ‘dynamic’, skip ahead to Shipping Cost.
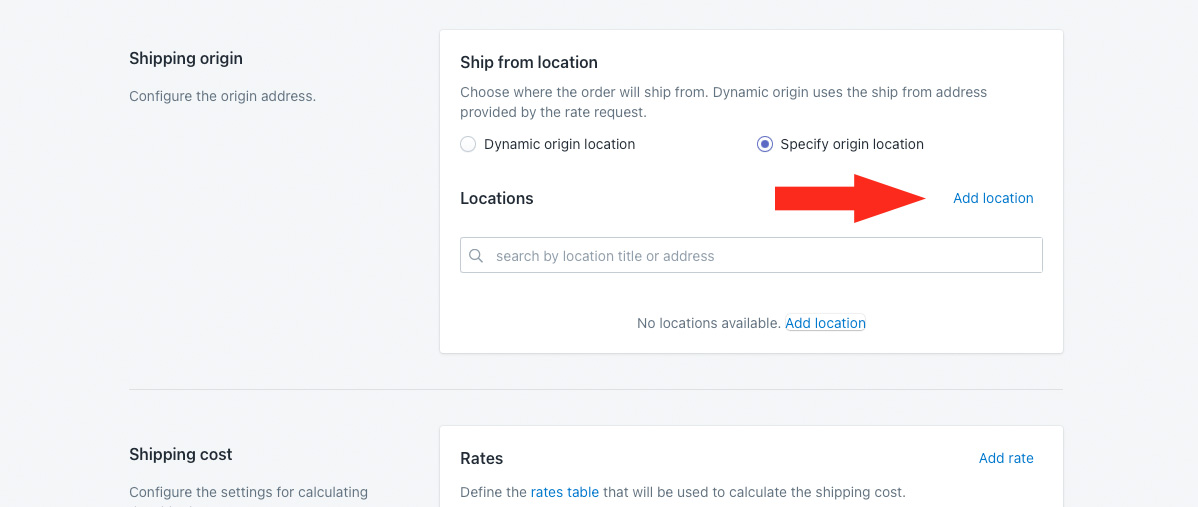
If you selected ‘specify’, an additional Locations section will appear on the screen.
All of the custom locations saved to your main Locations settings will be listed under Locations as selectable options. Or, you can add a location directly from the shipping method.
If the custom shipping origin you want to assign to the local delivery service is listed, skip ahead to Step 6. Otherwise, continue to Step 2.
2) Click Add location.
3) Enter a location title, such as ‘Warehouse 2’.
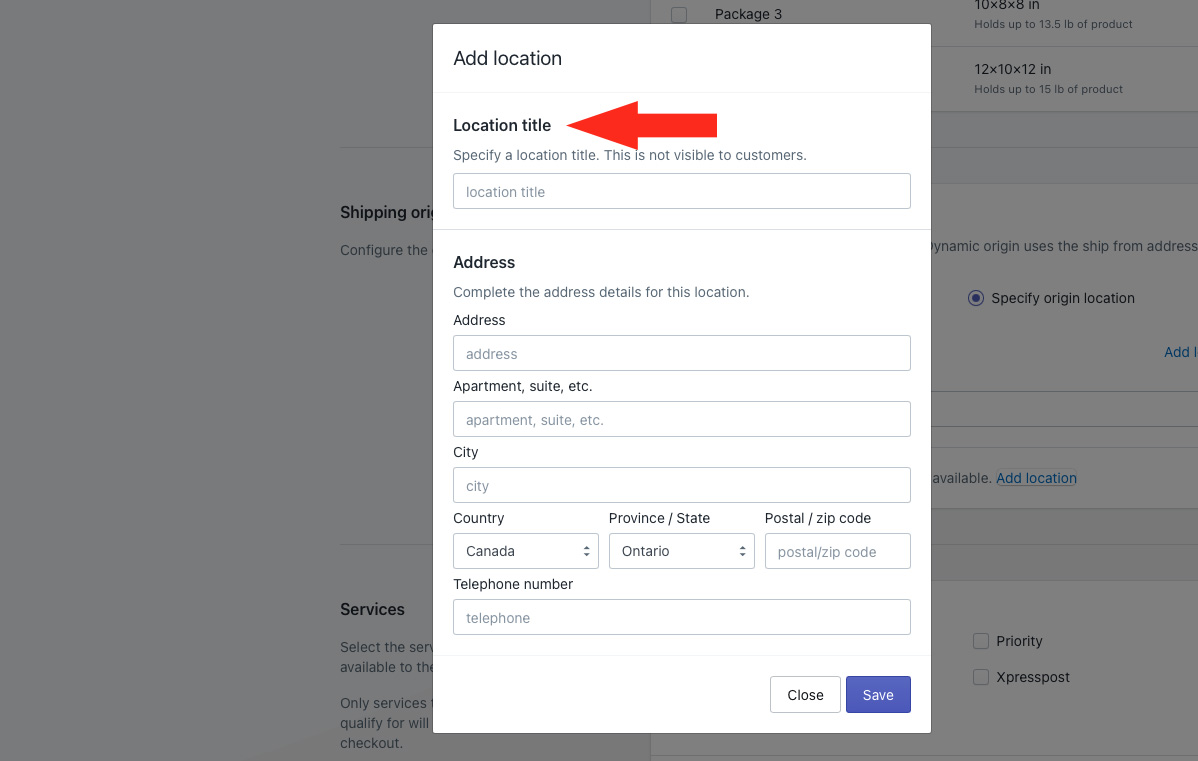
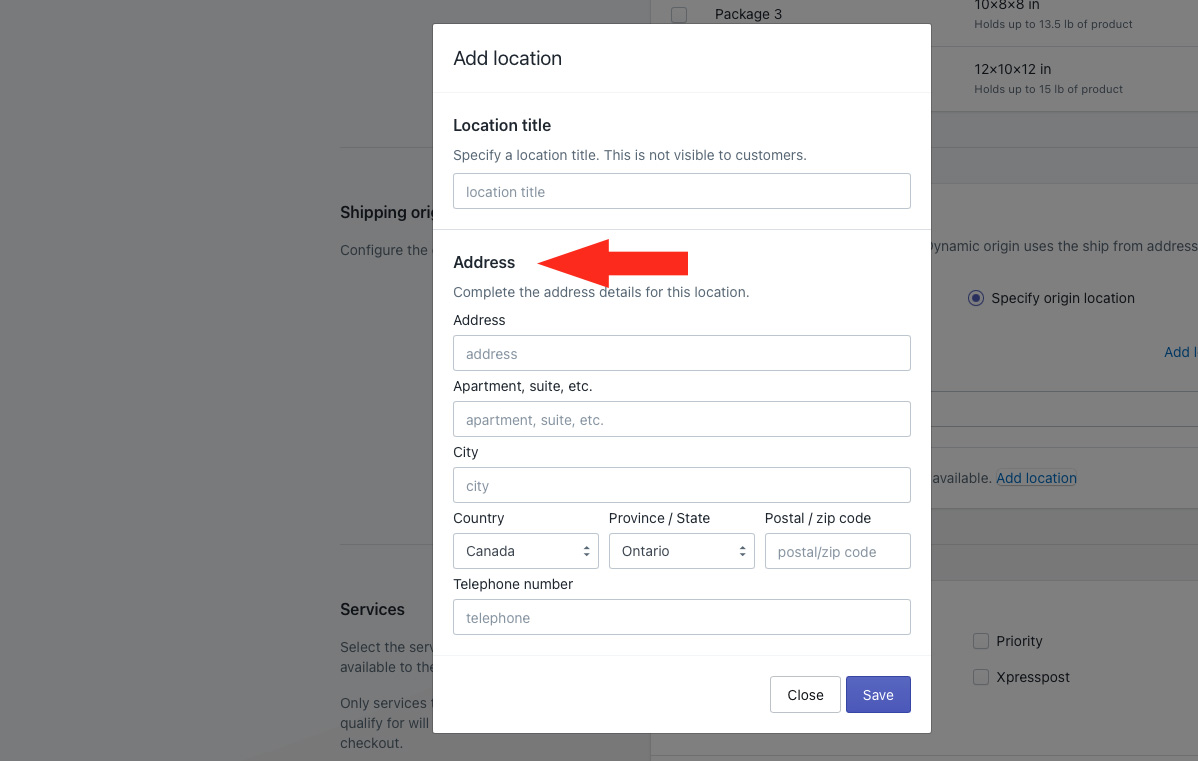
4) Enter the address for your custom ship from location.
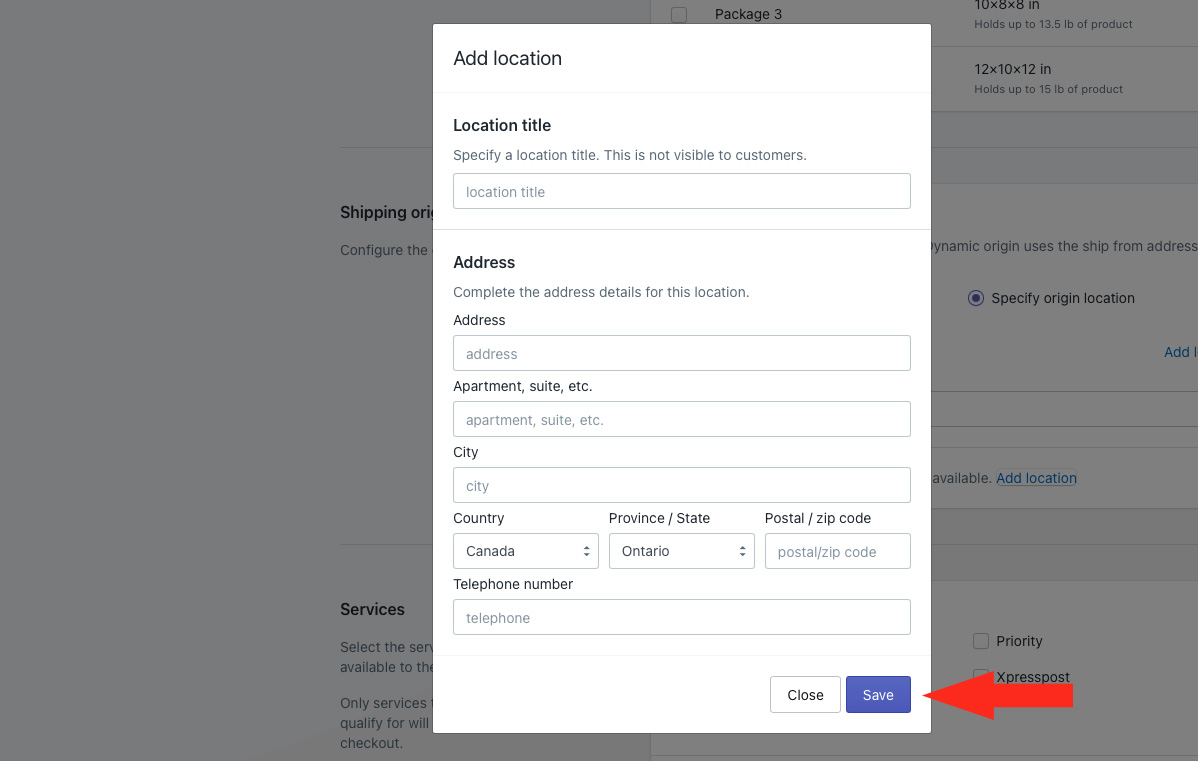
5) Click the Save button.
6) Select a location. This location will be used as the starting point for distance calculations in this shipping method.
Shipping Cost
1) Enter the shipping rate for your next day shipping service.
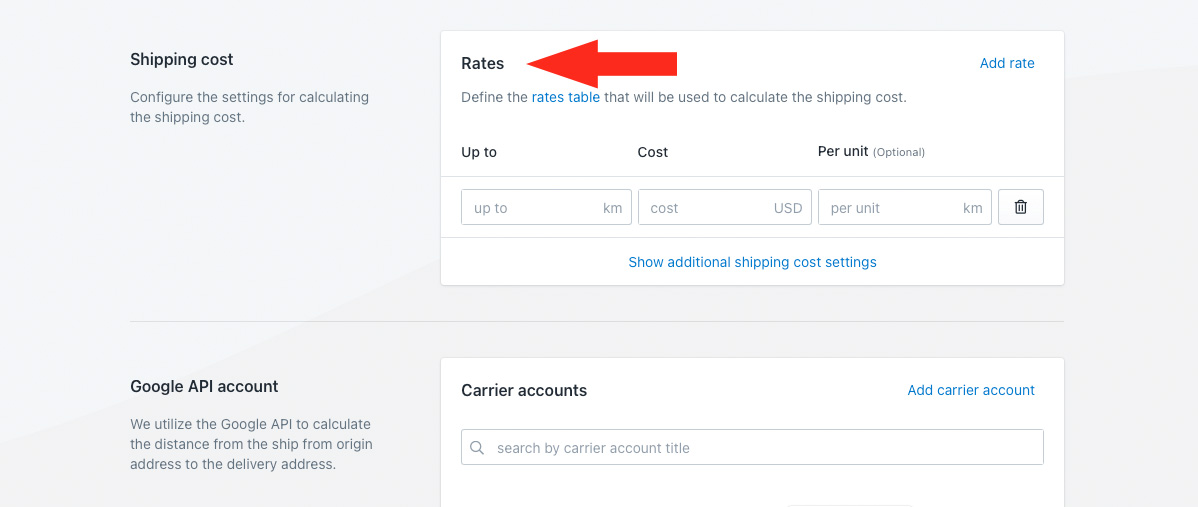
Up to – the upper limit for the cost in this Rate, in either miles or kilometres. If you’re offering a single flat rate, enter the maximum allowable distance for next day delivery.
Distance units are configured in your Intuitive Shipping General settings.
Cost – the cost of next day delivery. This is the cost the customer will see at checkout if their address is with the up to limit for this Rate row.
Per Unit – the cost in this Rate row will be applied on a per-unit basis. This is an optional setting.
For example, if you have a cost of $3.00 and a per unit value of 5 km, a customer who lives 15 km from your Shipping origin will be charged $9.00 for next day delivery at checkout.
If you’re setting up a single flat rate for next day delivery, skip ahead to Step 3. If you’re setting up a table of rates based on tiered distances, continue to Step 2.
2) Click Add rate to add another shipping cost, then repeat Step 1 to set up each additional distance-based cost.
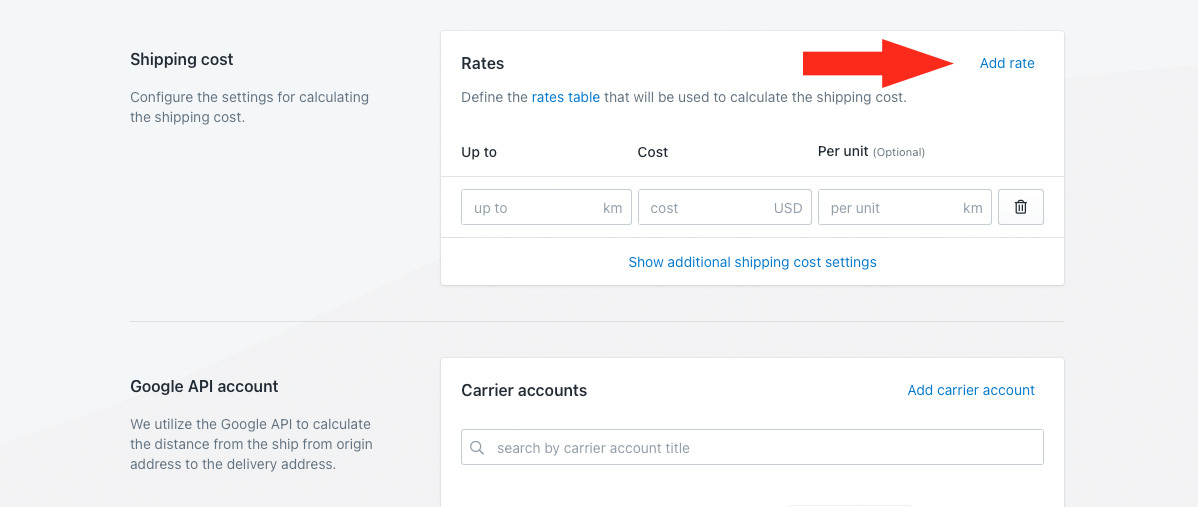
It doesn’t matter what order you enter additional rates. Intuitive Shipping will automatically sort multiple rates in descending order, from lowest ‘up to’ limit to highest ‘up to’ limit after you save the shipping method.
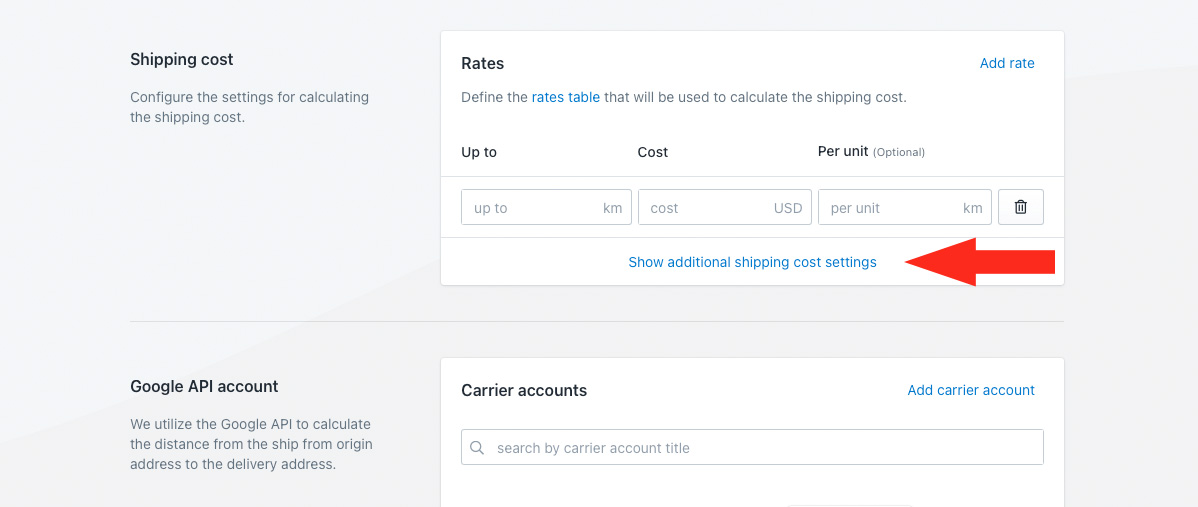
Additional settings are available for cart splitting and rate row blending. Cart splitting can be used for either single rates or tables. Rate row blending is intended to be used only with rate tables.
If you do not need to split the cart or blend multiple cost rows, skip ahead to Google API Account. Otherwise, continue to Step 3.
3) Click Show additional shipping cost settings.
4) It is strongly recommended that you leave cart splitting set to ‘Do not return a rate’, which is the default setting.
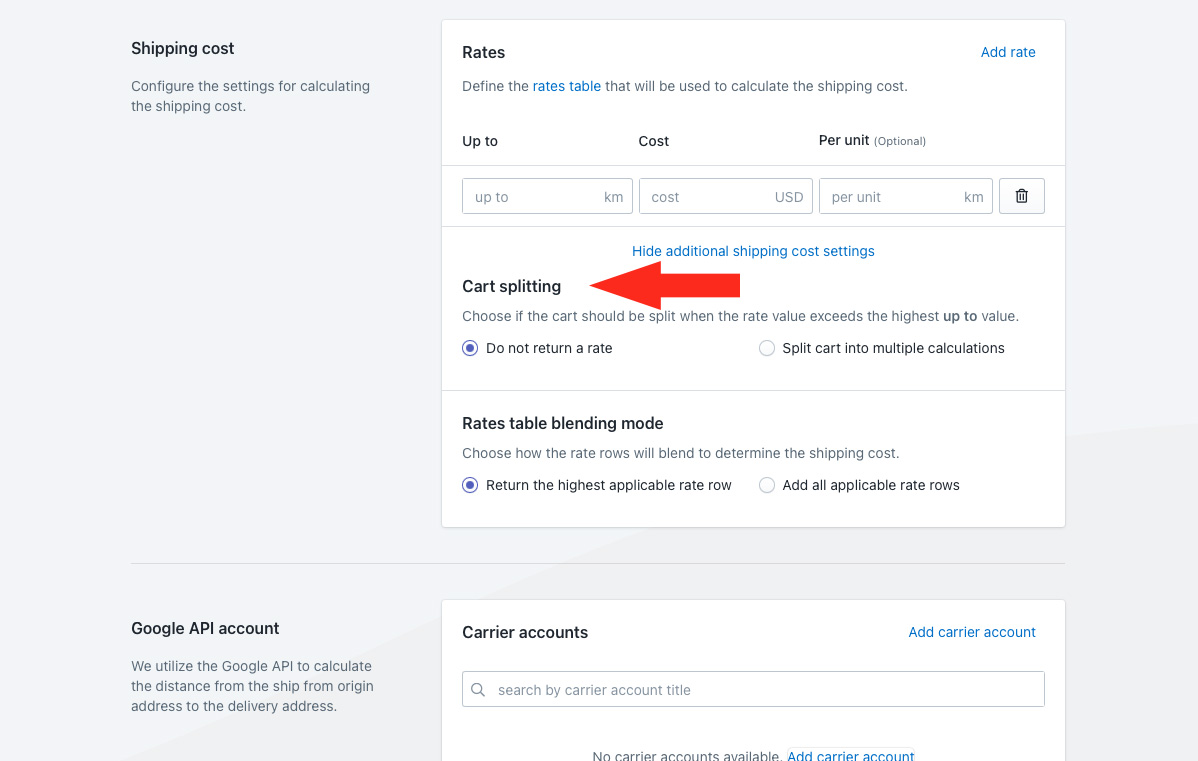
Using the alternative ‘Split car into multiple calculations’ setting means it is possible for a customer who lives any distance from your shipping origin location – as long as they live within the Zone – to get a rate.
For example, if you added two rate rows:
- Up to 10 km gets a $10.00 cost
- Up to 25 km gets a $20.00 cost
A customer who lives 30 km away would still be allowed to check out and would get a shipping cost of $30.00. Similarly, a customer who lives 100 km would also be allowed to check out and would get a shipping cost of $80.00.
By leaving it set to the default setting ‘Do not return a rate’, customers who live more than 25 km from your shipping origin address would be unable to check out.
5) Select a rate row blending mode. This setting applies only to rate tables with multiple rate rows. If you set up a single flat rate in Step 1, skip ahead to Google API Account.

You have two (2) options to choose from:
Return the highest applicable rate row – only the highest applicable cost is used to calculate the next day rate. This is the default setting.
Add all applicable rate rows – the highest applicable cost and all lower costs are added together. This setting is useful if you want to compound costs from your rate table.
For example, if you have three rate rows:
- Up to 10 km = $20.00
- Up to 25 km = $50.00
- Up to 50 km = $80.00
When the ‘Return the highest applicable rate row’ setting is used, a customer who lives 18 km from your Shipping Origin will be charged $50.00 for shipping at checkout, because they are within the highest applicable rate row (up to 25 km).
When the ‘Add all applicable rate rows’ setting is used, the same customer will be charged $70.00 for shipping at checkout because $50.00 is the highest applicable cost and $20.00 is the lower cost.
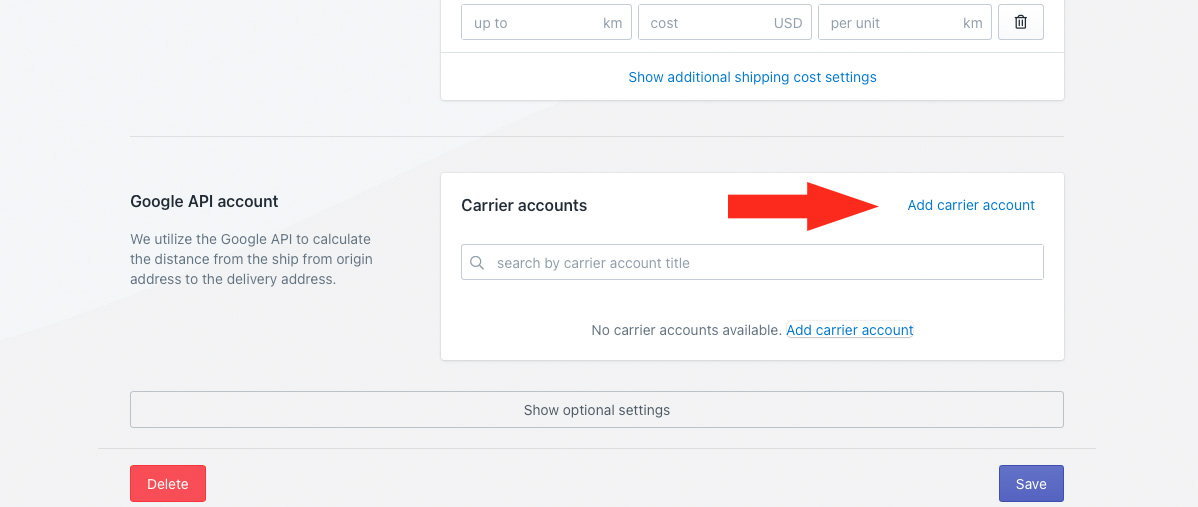
Google API Account
A Google API account is required to complete this setup. If you don’t have a Google API account connected to Intuitive Shipping, you will be unable complete this setup. You can either create a Google API account, or use one of the other options mentioned earlier (postal code/ zip code-based or city-based).
If you have not yet created an API billing account with Google, you must do so before proceeding.
Once your API account has been created, and you have obtained your API key, you can return here to finish connecting your account, starting at Step 1 below.
If you have already connected your Google API account to Intuitive Shipping, skip ahead to Step 5.
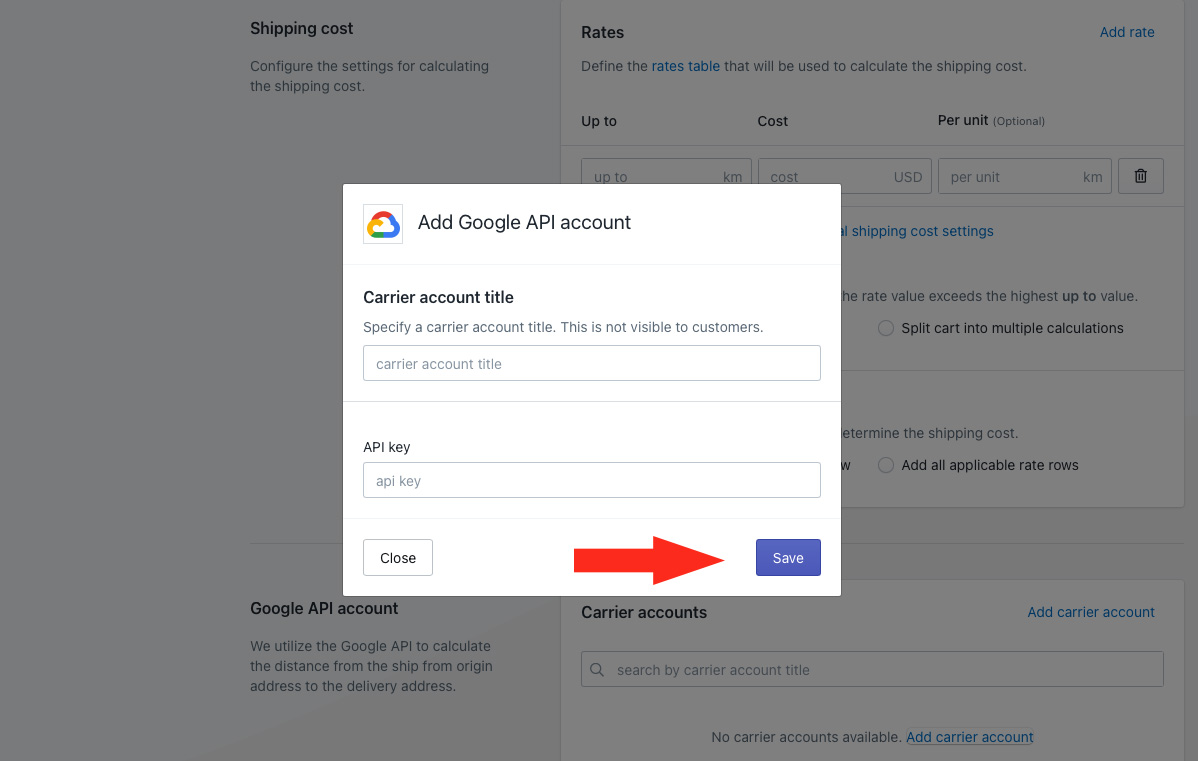
1) Click Add a carrier account.
2) Enter a carrier account title, such a ‘Google Distince’ or ‘Google API’.
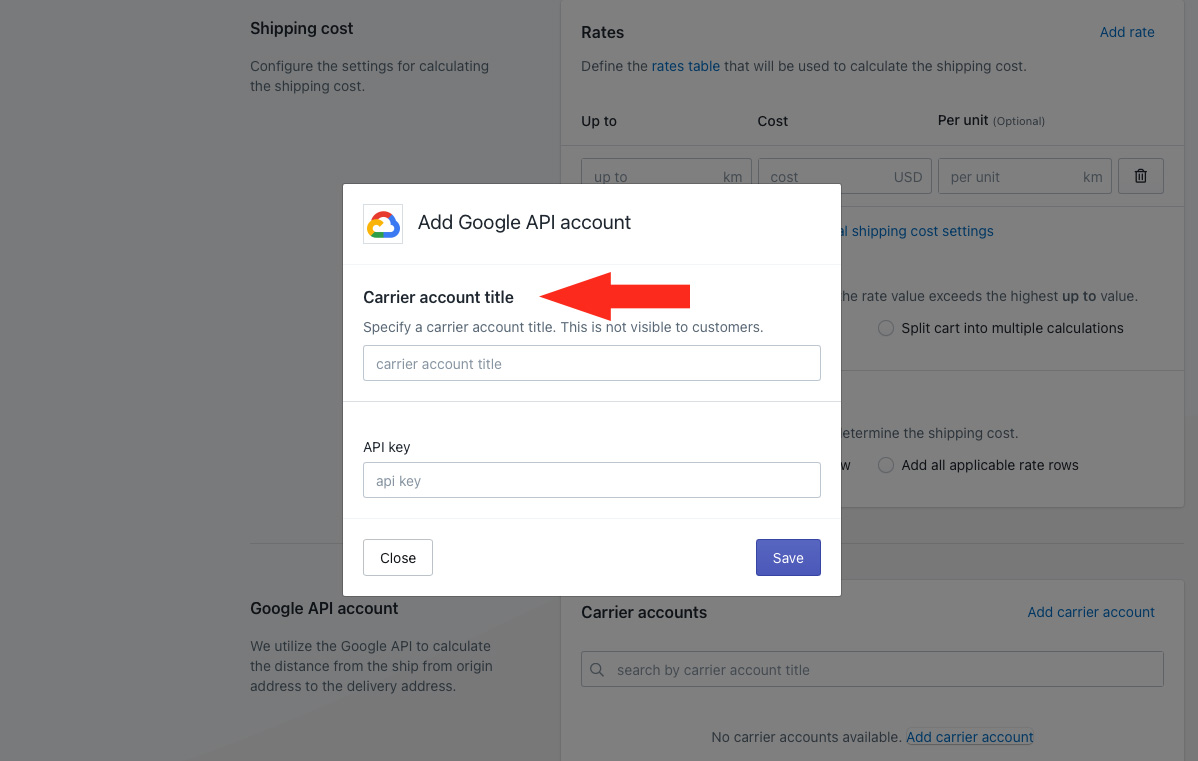
3) Enter your API key.
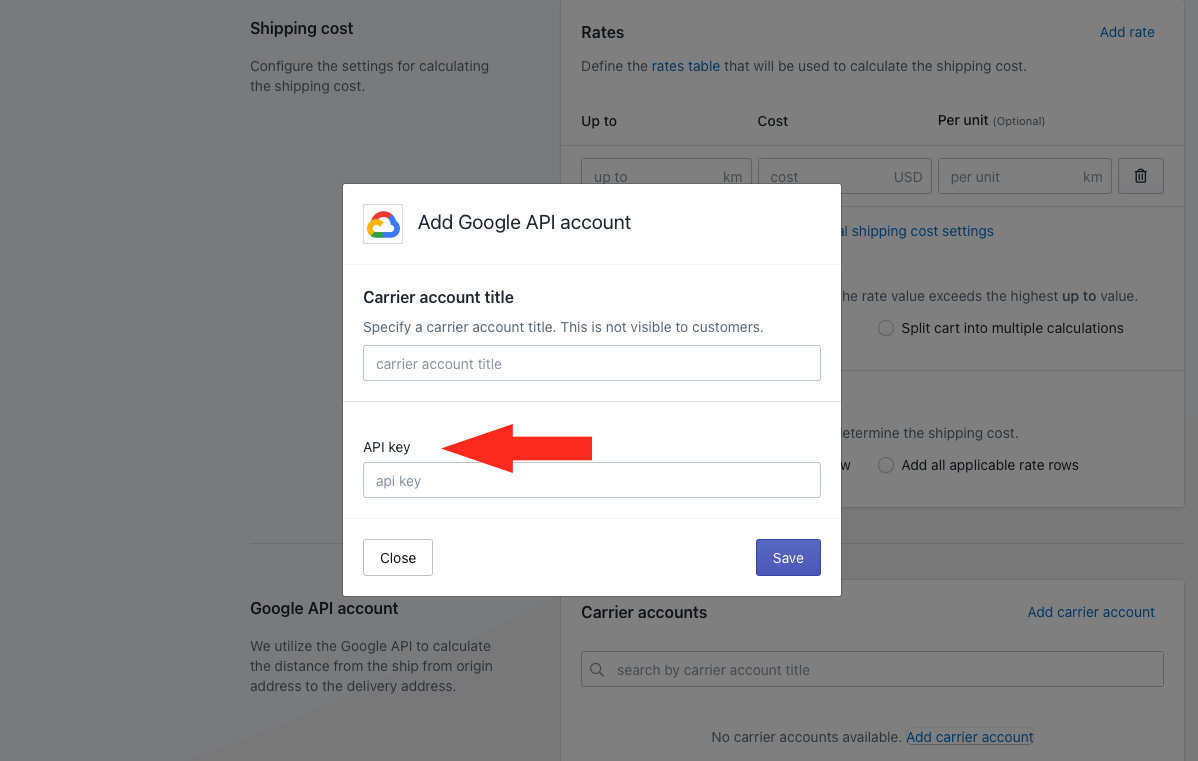
4) Click the Save button.
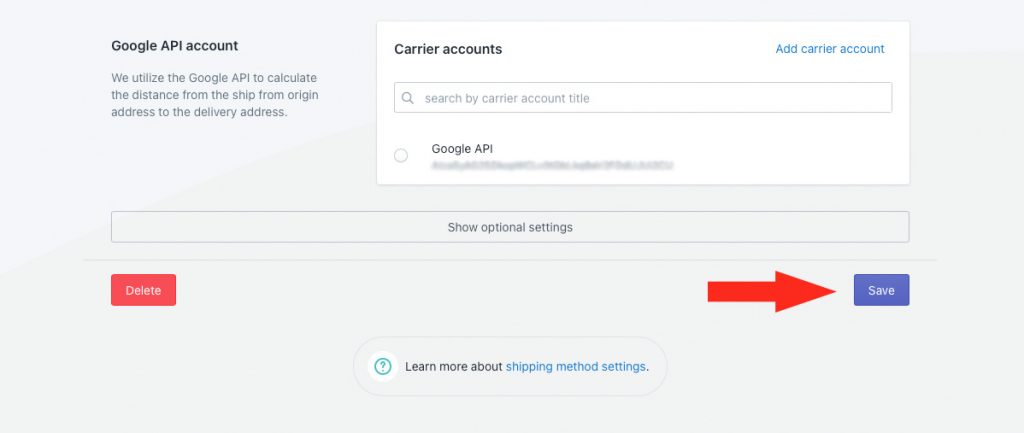
5) Select your Google account.

Optional settings are available for local delivery settings (these determine how we use your Google API Key to calculate distance), fallback rates when Google times out, cost adjustments, free shipping, custom shipping blending and rate blending.
1) If you need to adjust any of these settings, click Show optional settings, then adjust the settings as needed.
Save Your Settings
1) Click the Save button to save your distance-based next day shipping method.
Create An Alternative Shipping Method
You might already have standard shipping options that you offer to all customers, whether they are local or not. If so, those options will continue to appear at checkout instead of – or along with – your newly created next day shipping method.
You can also add an alternative shipping method for local customers who don’t want to pay a premium for next-day delivery, or who miss the cut-off time, such as a 2 Day shipping option that always appear for local customers, regardless of when the order is placed.
1) Click Shipping on the sidebar menu, then select Scenarios from the drop-down list.
2) Click the Create scenario button.
General Settings
1) Enter a Scenario title, like ‘2 Day’.
2) Leave the status set to On.
Alternatively, you can set the status to ‘Test’ if you want test your 2 day shipping method before making it live to customers.
Conditions
1) Leave Conditions set to ‘No restrictions’.
For this alternative Scenario, we won’t be using conditions or condition groups to restrict when the shipping method appears at checkout.
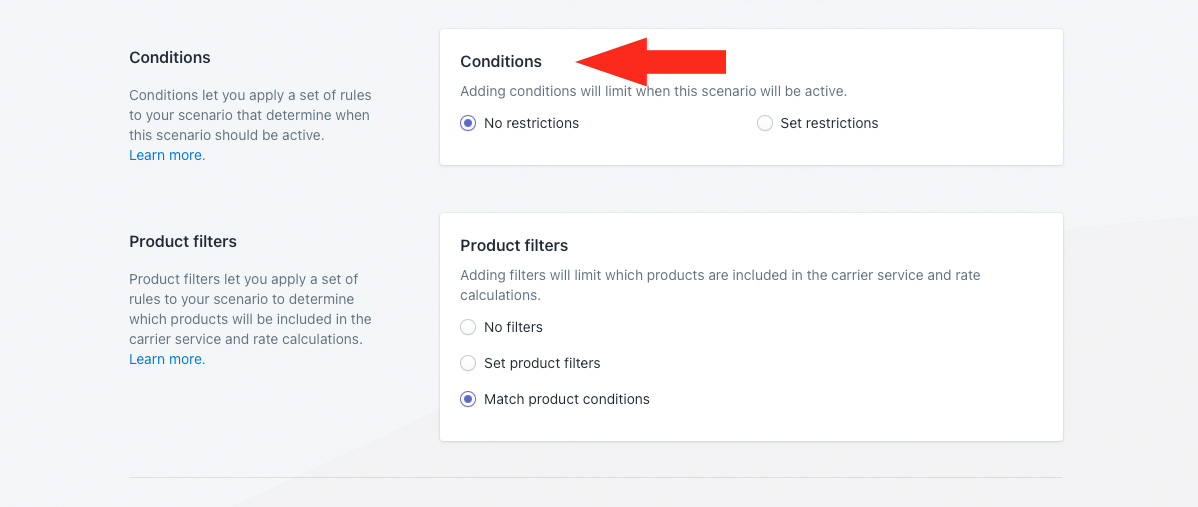
Product Filters
1) Leave Product filters set to ‘Match product conditions’.
Save Your Settings
1) Click the Save button to save your 2 day delivery Scenario.
Add An Alternative Local Delivery Service
1) Follow the steps from Add A Local Delivery Service earlier in this setup to create a Local delivery service shipping method based on distance, making changes to the settings as needed.
For example, your alternative local shipping method will have a different shipping method title, such as ‘2 Day Shipping’, and likely a different cost or cost table.
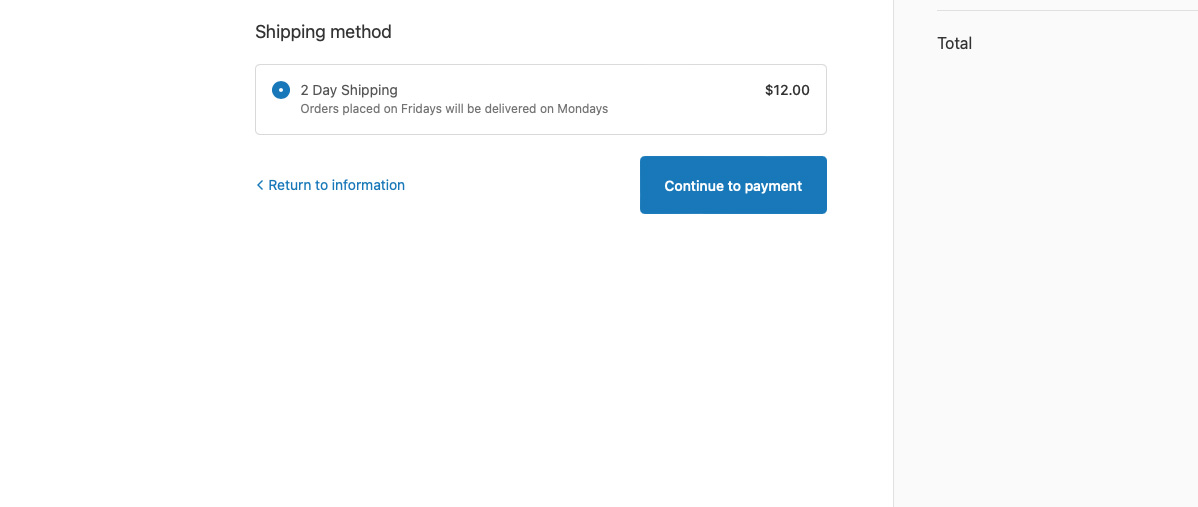
You might also consider using the custom description setting to provide any additional information to customers. For example, you might want to indicate that ‘Orders receive on Fridays will be delivered on Mondays’ so that customers ordering on a Friday don’t expect ‘2 Day’ to mean they’ll get their order on a Sunday.
Using this example, a local customer placing their order before the next day cut-off time will see two options:
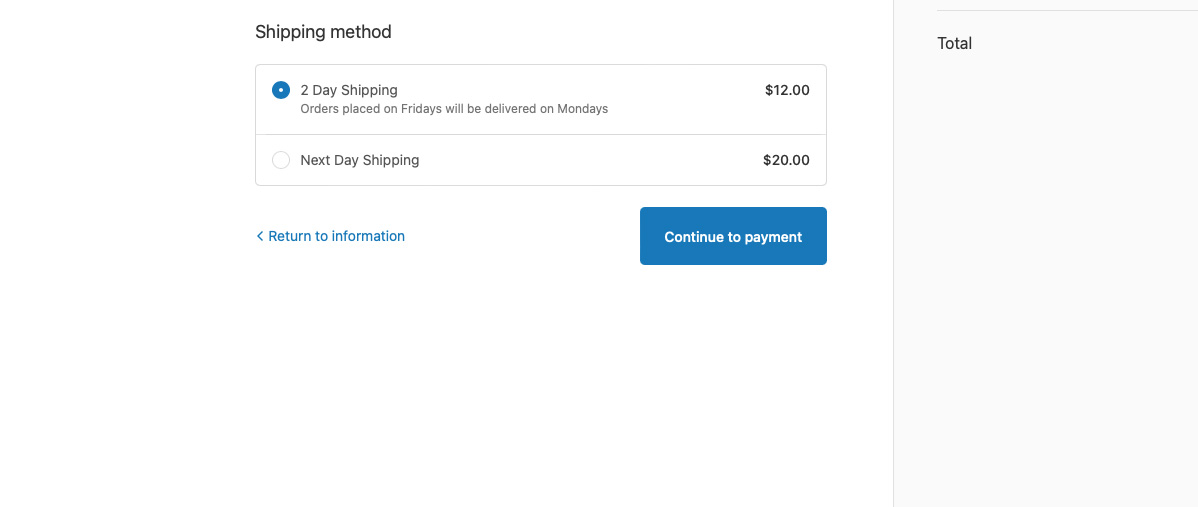
A local customer placing their order after the next day cut-off time will see only one option:
Check out more additional setups or look at common setups.