This guide is useful if you want to offer a free or flat-rate local delivery to customers who live within a certain radius of your store, or if you want to charge tiered rates based on the customer’s proximity to you.
To complete this guide, you’ll need to set up distance-based rate calculations.
If you have not created a Google API account, you will need to do so before proceeding with this setup.
If you don’t have a Google account, or you prefer not to use distance to restrict local deliveries, you can create a postal code sub-zone, then assign a custom service shipping method to the sub-zone.
Or, you can create a Scenario with a ‘City’ customer condition that restricts any shipping methods assigned to the Scenario to the city (or cities) in the condition.
Add A Local Delivery Service
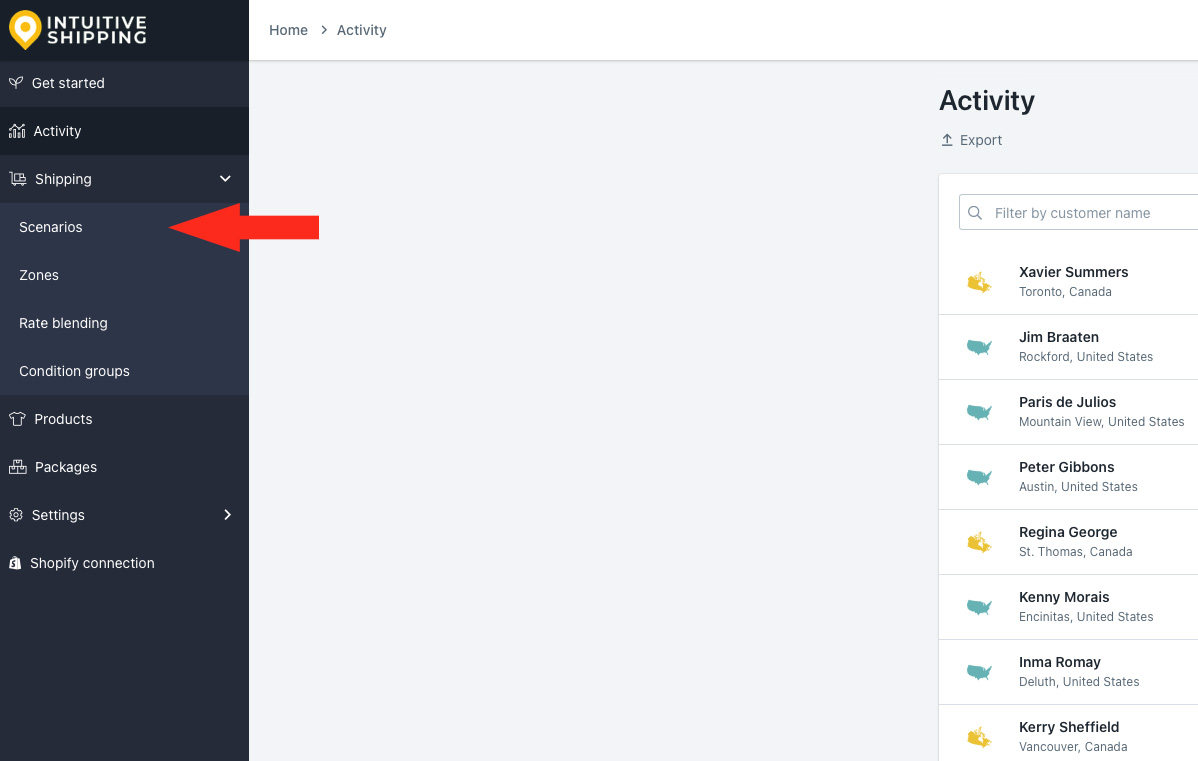
1) Click Shipping on the sidebar menu, then select Scenarios from the drop-down list.
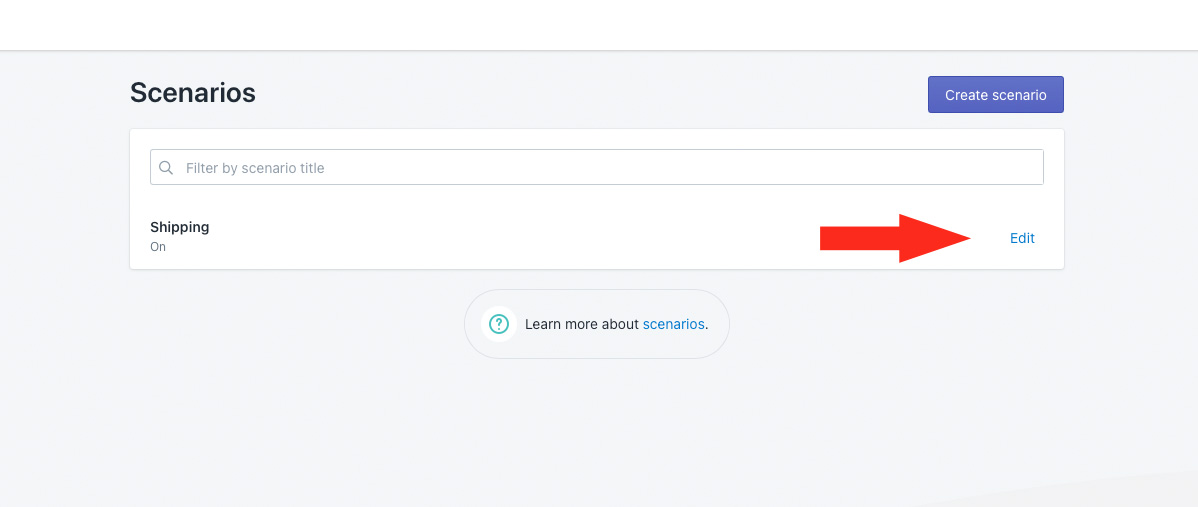
2) Click Edit beside the Scenario you wish to add the shipping method to. If you haven’t set up any Scenarios yet, you’ll need to create one to continue with this setup.
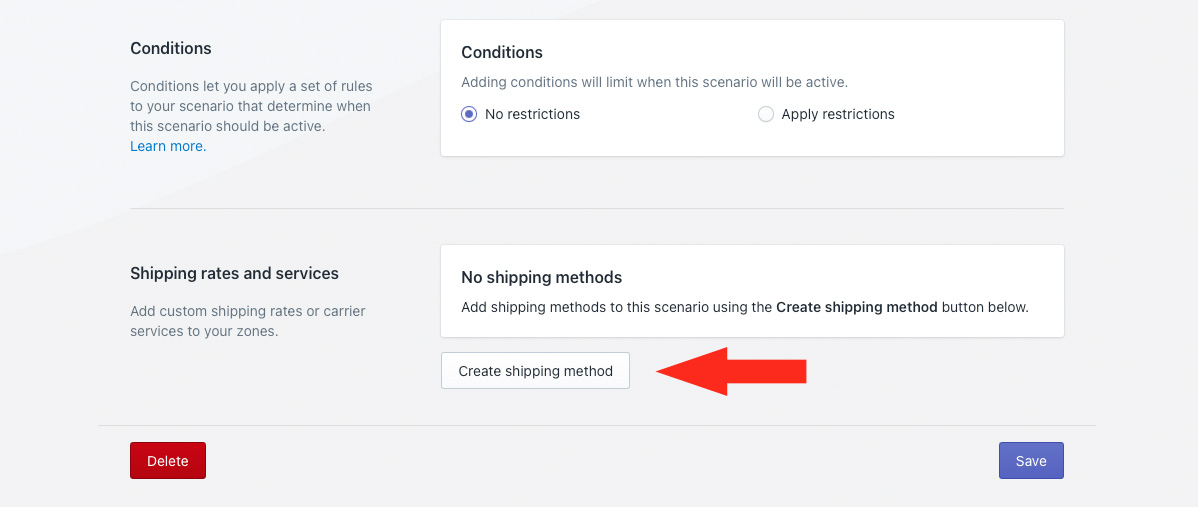
3) Scroll down to Shipping rates & services, then click the Create shipping method button.
Select Local Delivery Service
1) Click the downward arrow beside ‘Local delivery’ to display a list of options.
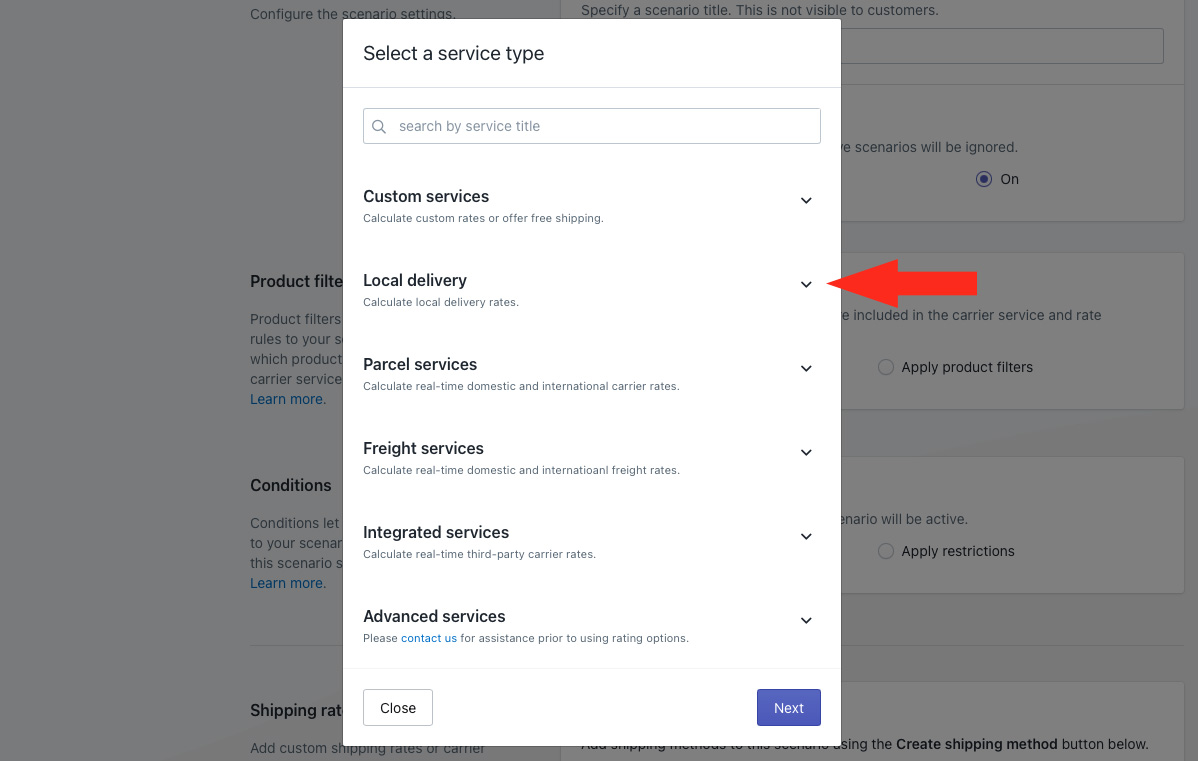
2) Select Local delivery from the list.
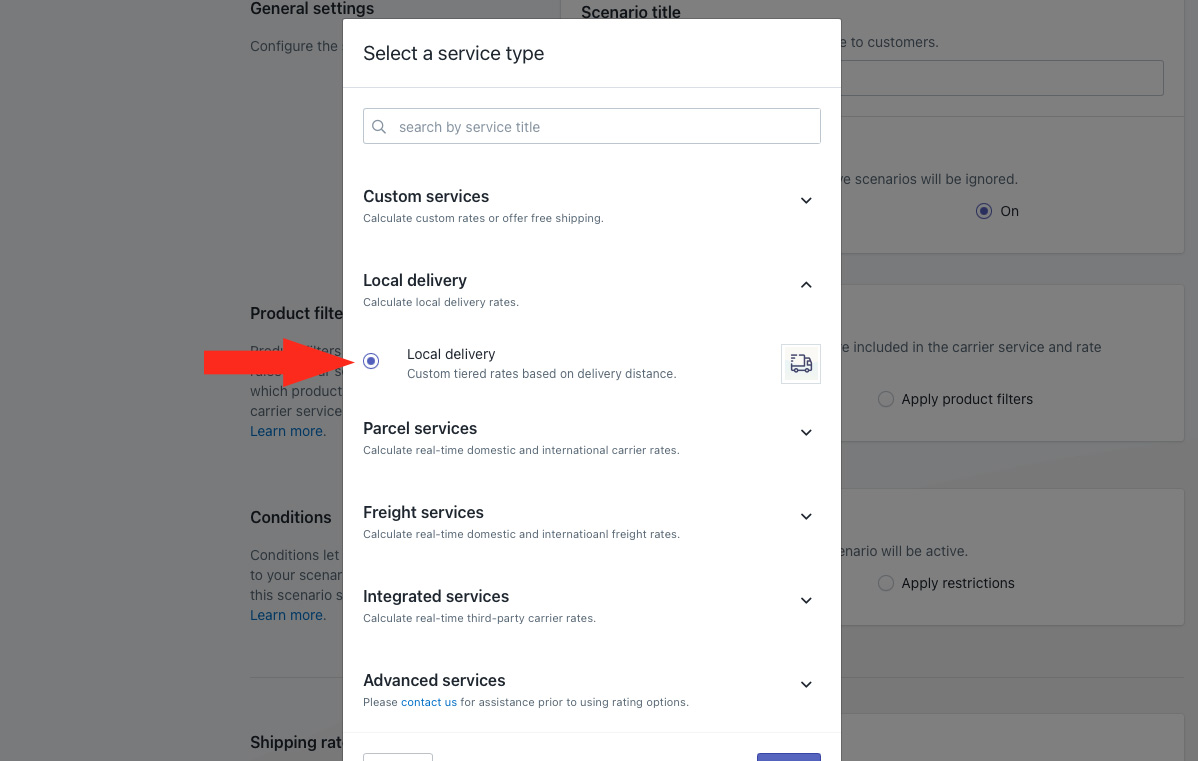
3) Click the Next button.

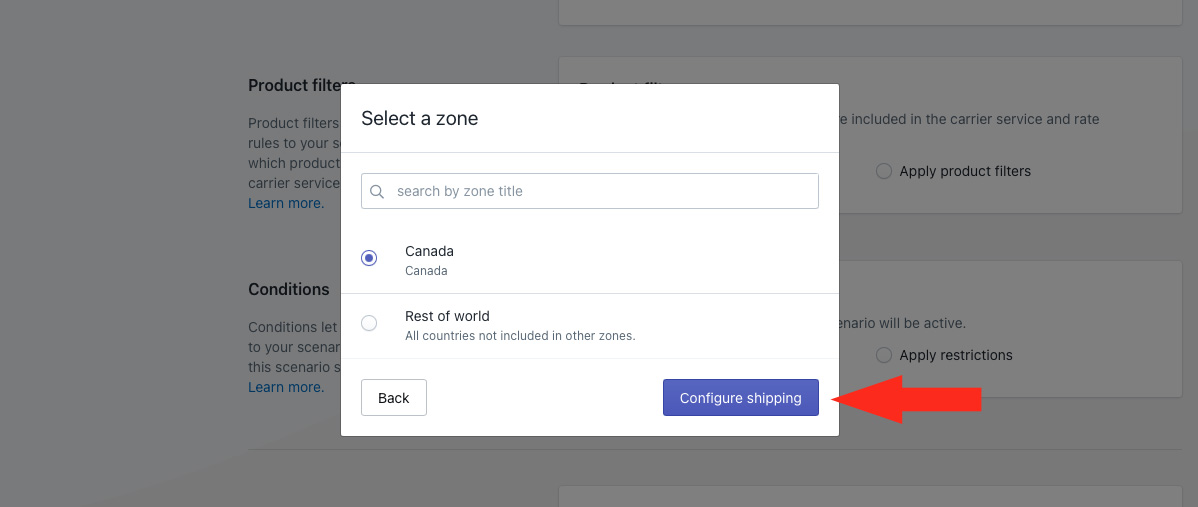
4) Select a Zone.
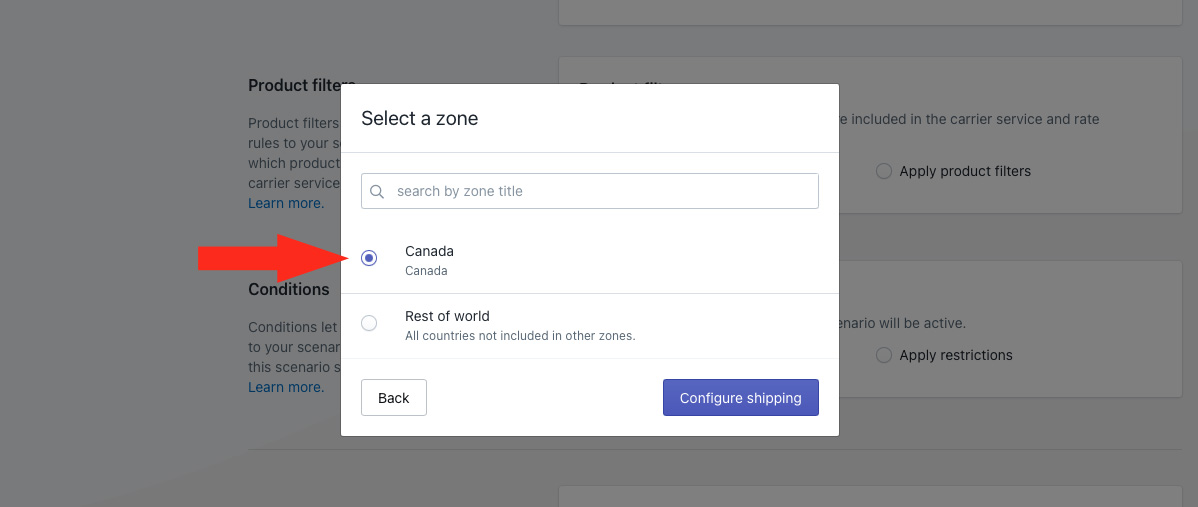
5) Click the Configure shipping button.
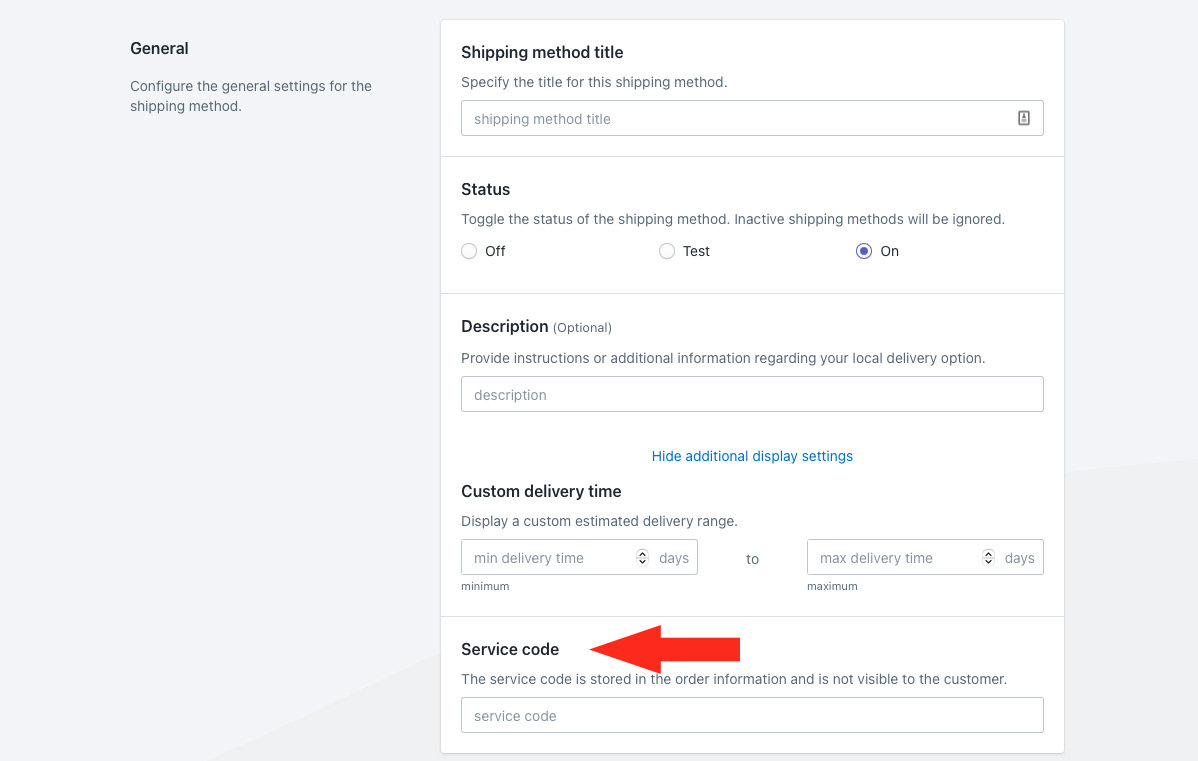
General
1) Enter a shipping method title, such as ‘Local Delivery’. The title entered here will be visible to customers.
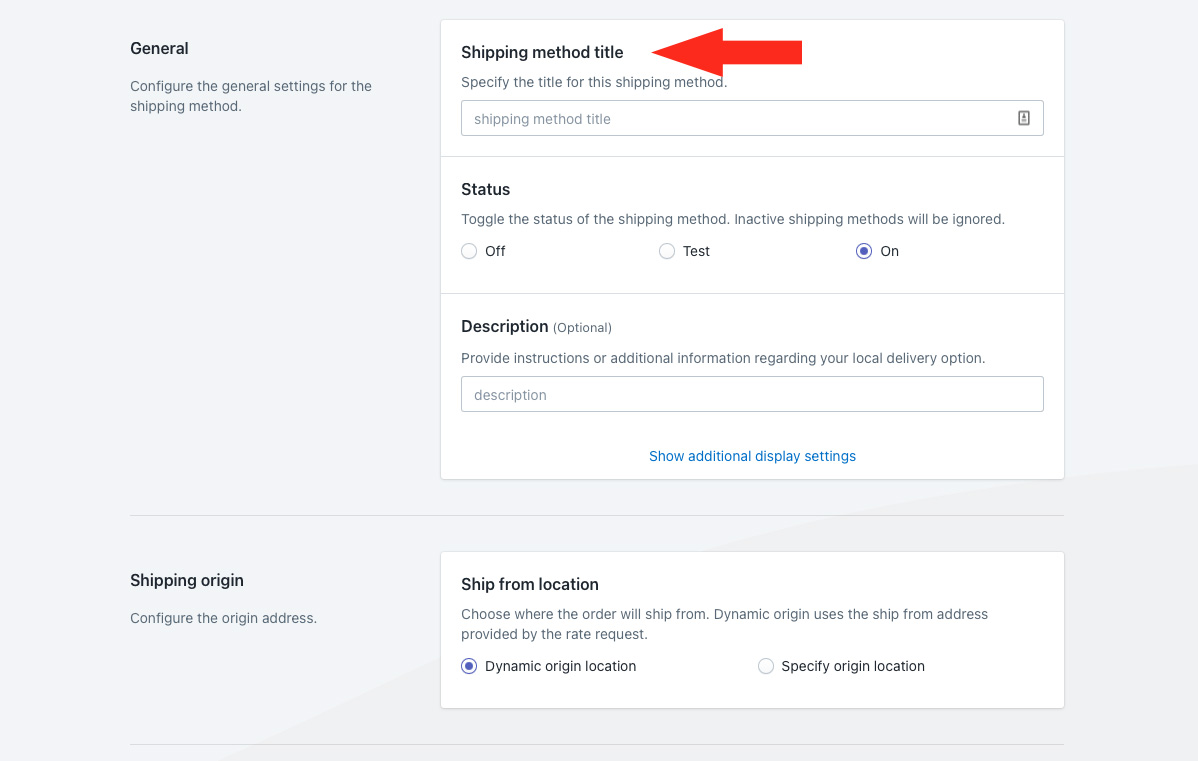
2) Choose the shipping method status.
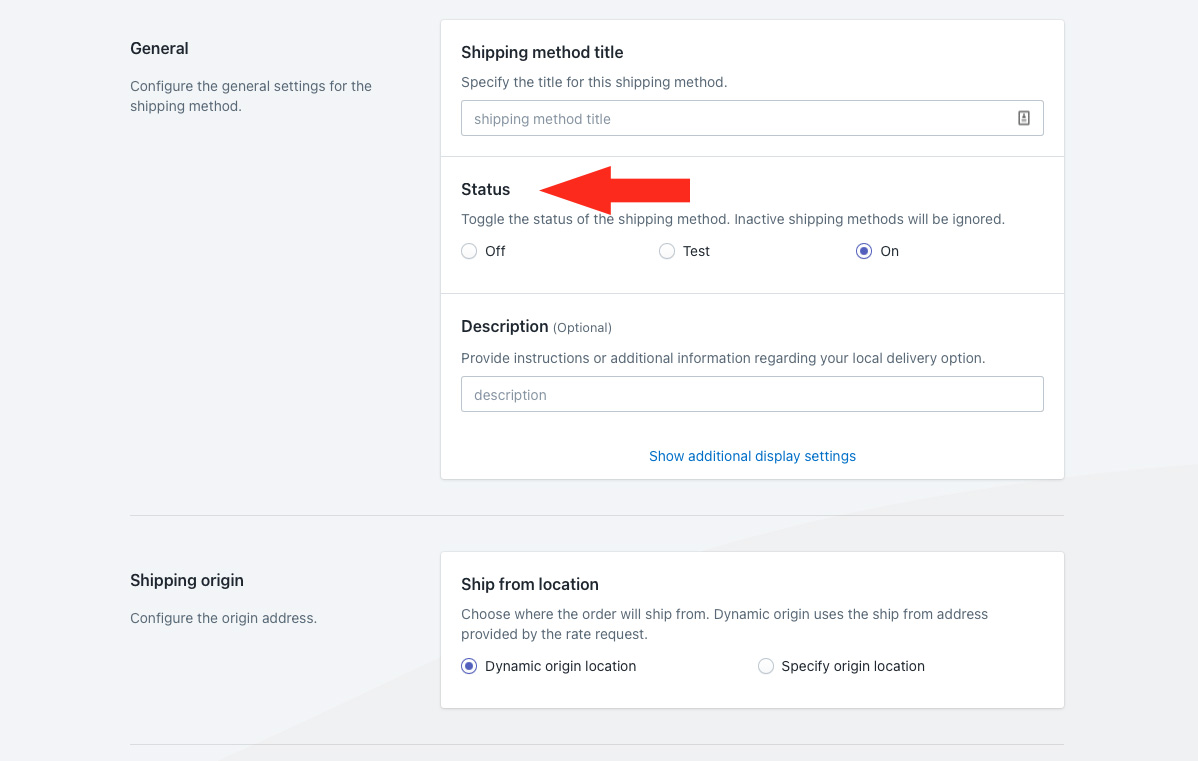
You have three (3) settings to choose from:
Off – The local delivery shipping method will be ignored by the Scenario it is assigned to, even if the Scenario conditions are met. The shipping method will not be displayed at checkout, even in Sandbox mode.
Test – The local delivery shipping method will only be visible at checkout when you use the word ‘Intuitive’ as either the customer’s first or last name.
On – The local delivery shipping method will be visible to customers. If the Scenario conditions are met, the shipping method will be displayed at checkout. This is the default setting.
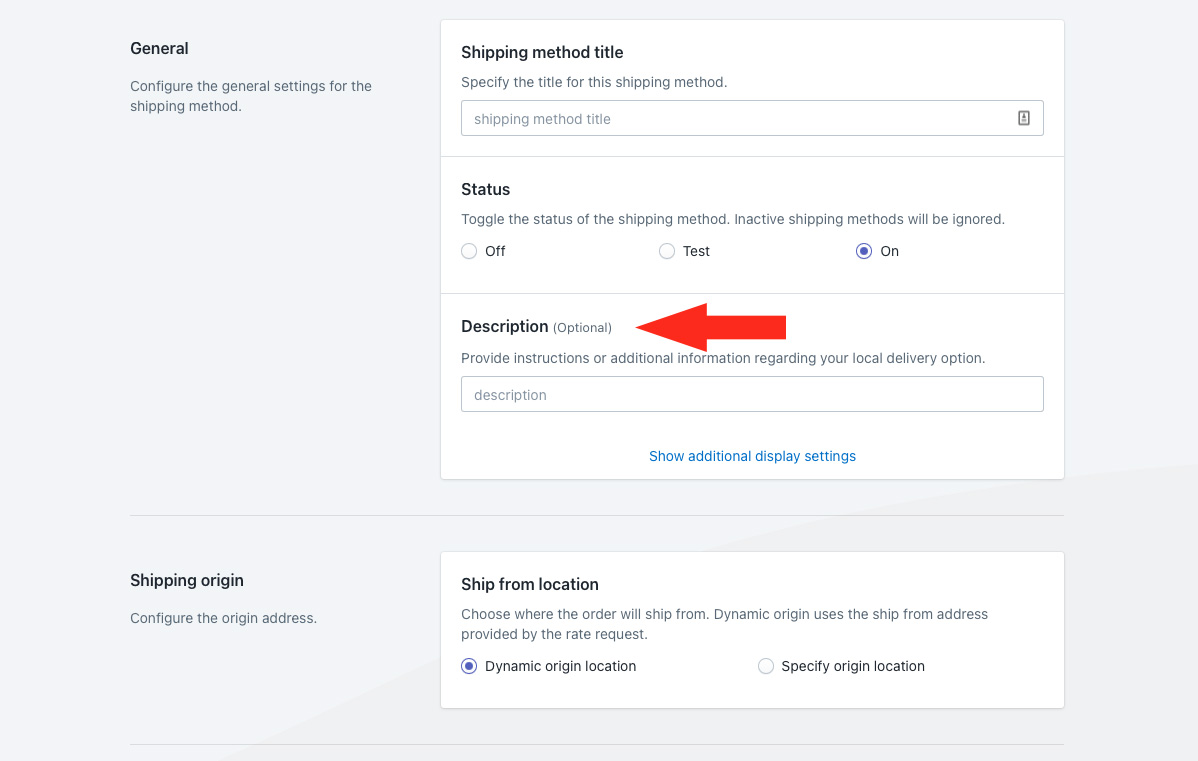
3) If desired, enter a description for your shipping method, such as ‘Delivery Mon-Thur 1-4 PM’. We recommend limiting your description to 90 characters or less to ensure it displays properly on the checkout page.
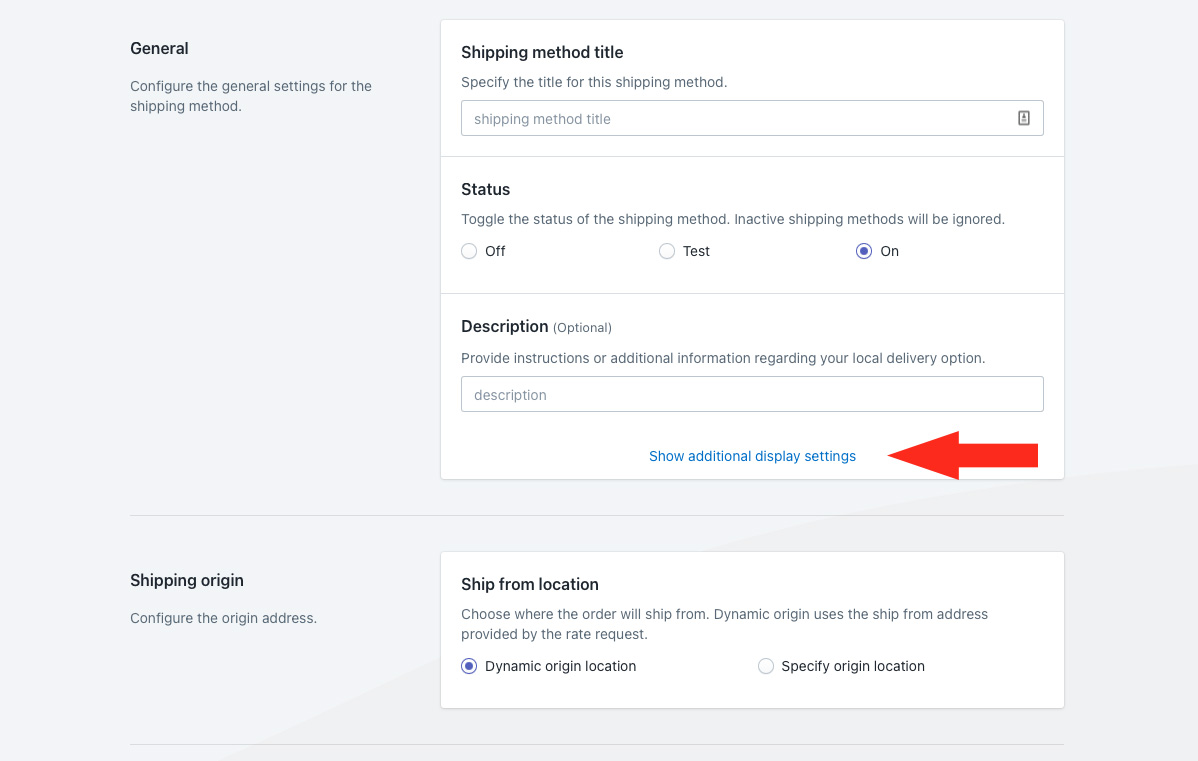
Additional display settings are available for delivery times and service codes. If you do not need to adjust these settings, skip ahead to Shipping Origin. Otherwise, continue to Step 4.
4) Click Show additional display settings.
5) If desired, enter a custom delivery time in days. The delivery time is displayed at checkout along with the rate.
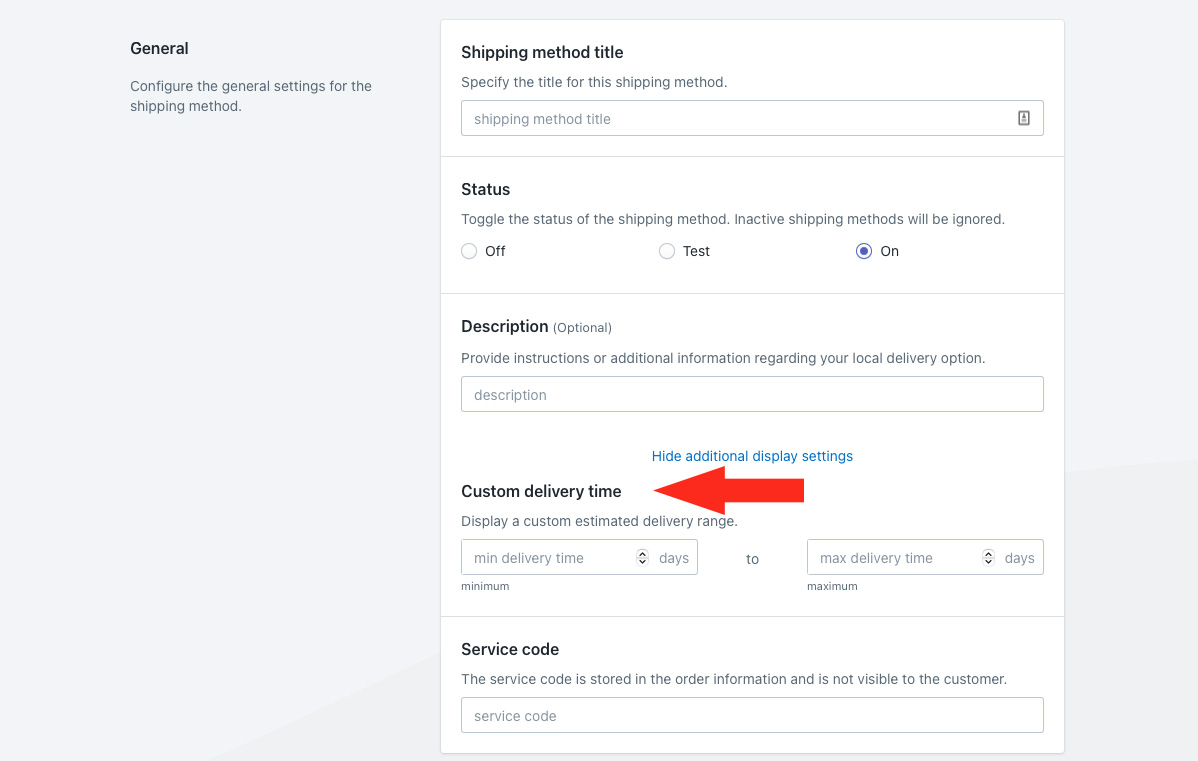
Min delivery time – enter the lower limit of your delivery time range.
Max delivery time – enter the upper limit of your delivery time range. When combined with the min setting, delivery times will be displayed like ‘3 to 5 business days’ at checkout.
For example, if you prefer to have delivery time displayed as ‘3 business days’ instead of ‘3 to 5 business days’, enter ‘3’ in either minimum ormaximum and leave the other field blank.
6) If desired, enter a custom service code, such as ‘LOCAL’. The service code is pushed to your fulfillment service (if applicable) when a customer successfully completes their checkout.
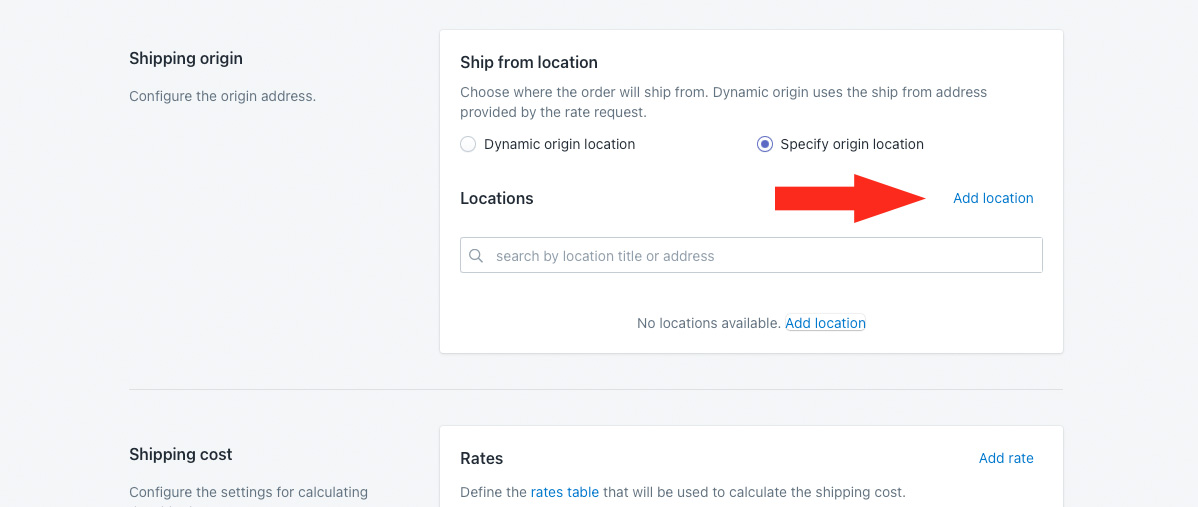
Shipping Origin
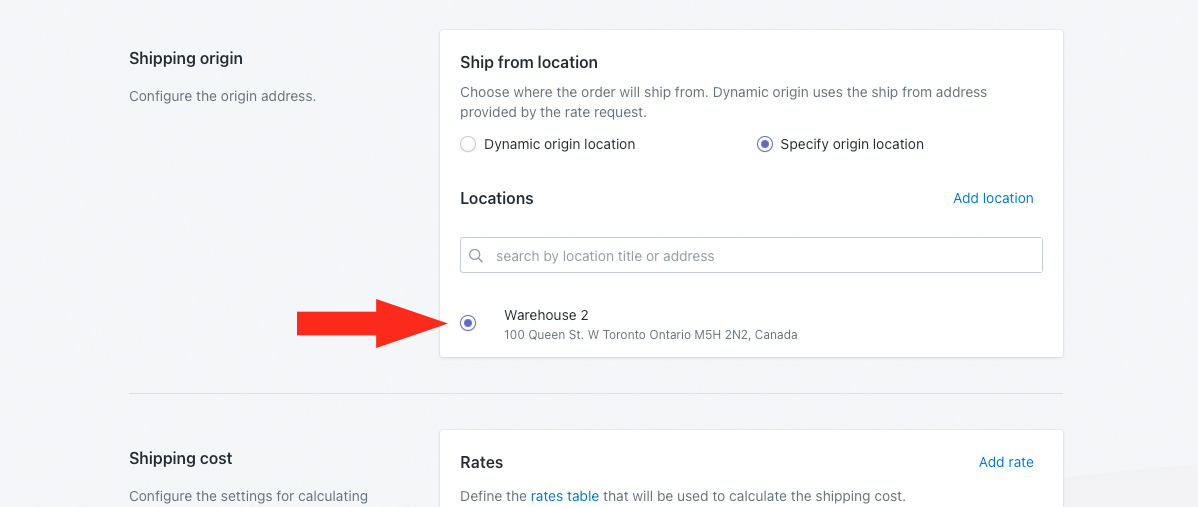
Distance can be calculated using the primary location set up in Shopify, or a custom ship-from location.
1) Select the ship from location.

You have two (2) settings to choose from:
Dynamic origin location – shipping rates will be calculated based on the distance between the customer’s address and your primary Shopify location address. This is the default setting.
Specify origin location – shipping rates will be calculated based on the distance between the customer’s address and the address specified in Step 6.
If you selected ‘dynamic’, skip ahead to Shipping Cost.
If you selected ‘specify’, an additional Locations section will appear on the screen.
All of the custom locations saved to your main Locations settings will be listed under Locations as selectable options. Or, you can add a location directly from the shipping method.
If the custom shipping origin you want to assign to the local delivery service is listed, skip ahead to Step 6. Otherwise, continue to Step 2.
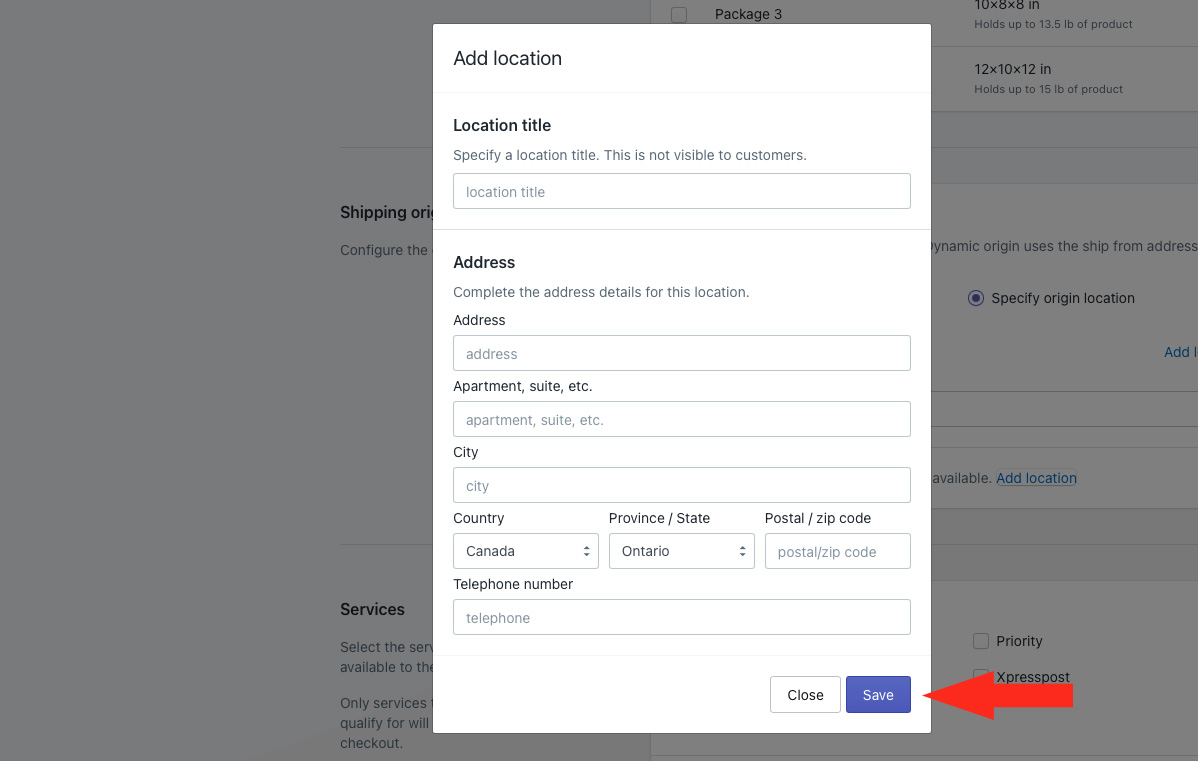
2) Click Add location.
3) Enter a location title, such as ‘Warehouse 2’.
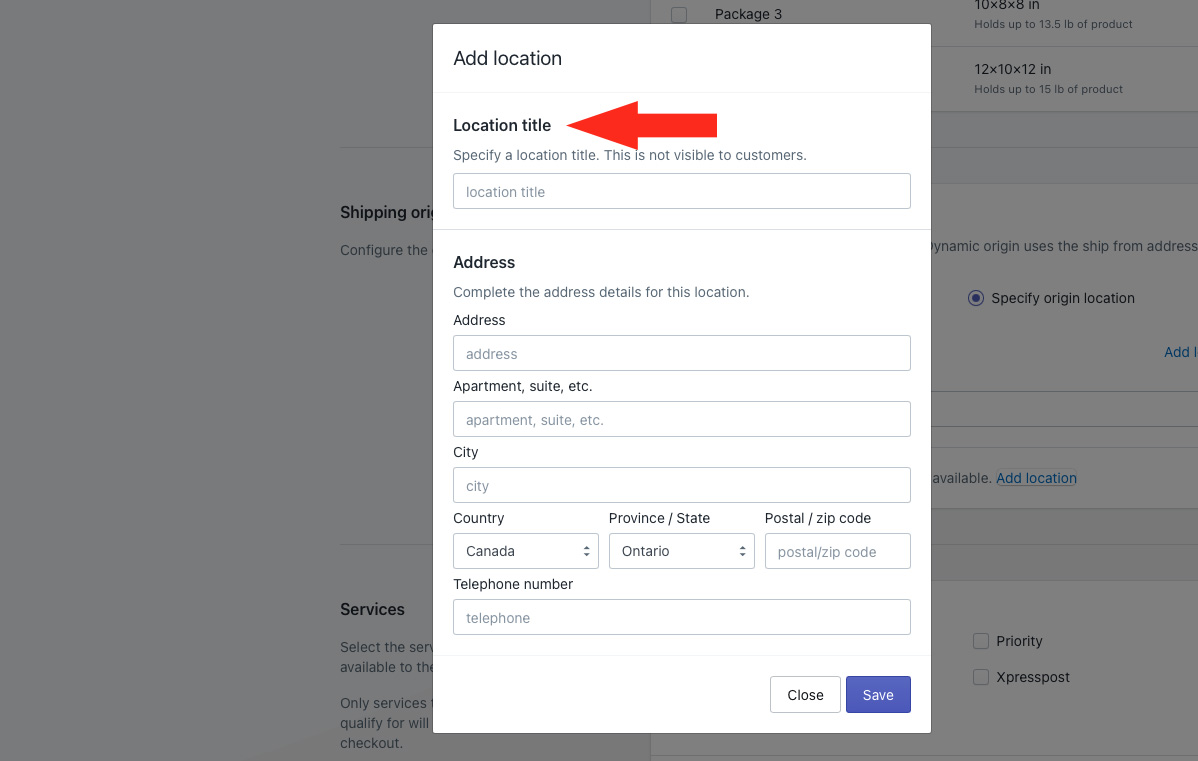
4) Enter the address for your custom ship from location.
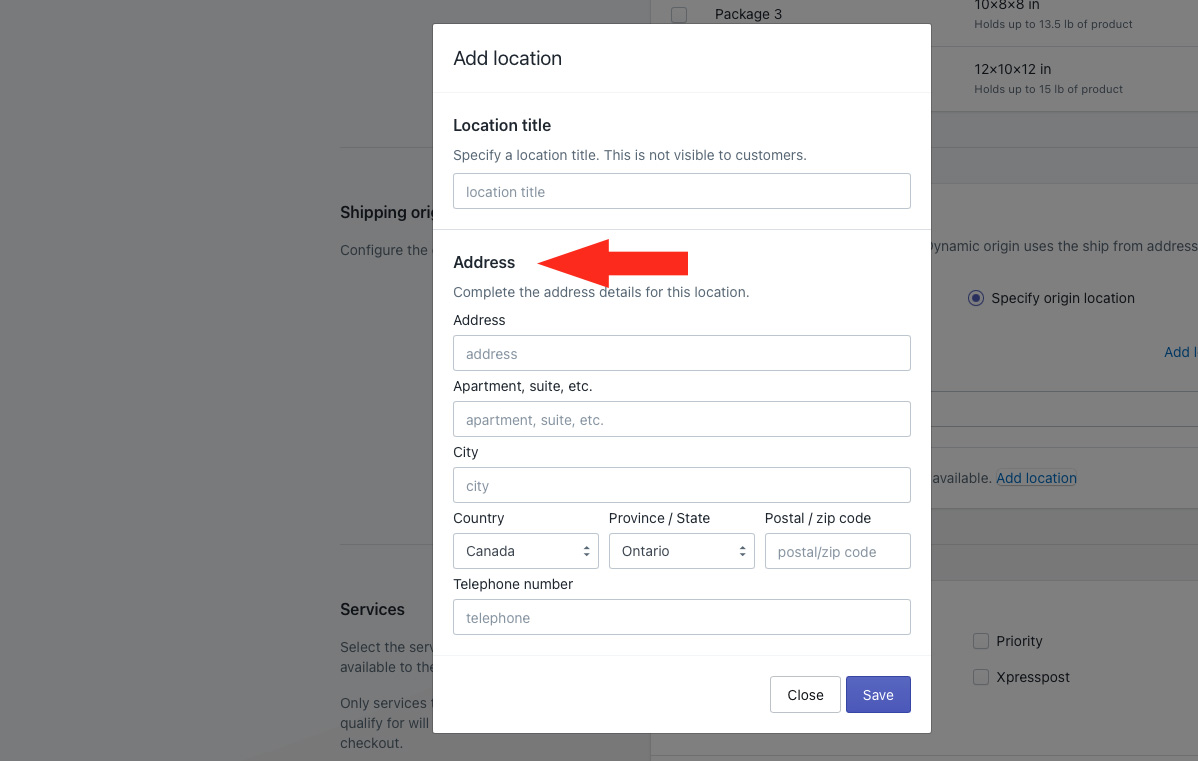
5) Click the Save button.
6) Select a location. This location will be used as the starting point for distance calculations in this shipping method.
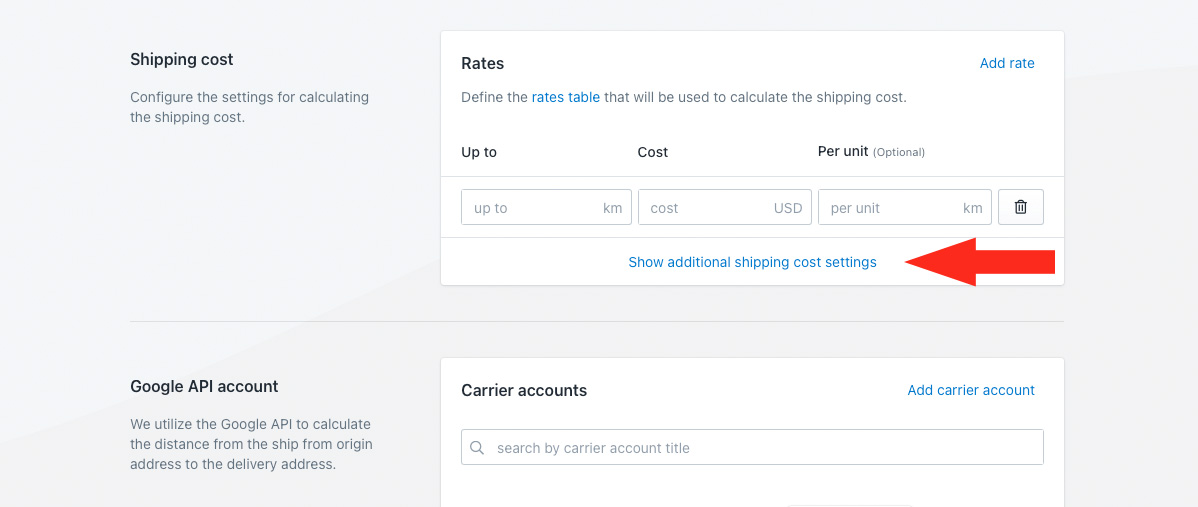
Shipping Cost
1) Enter a shipping rate.
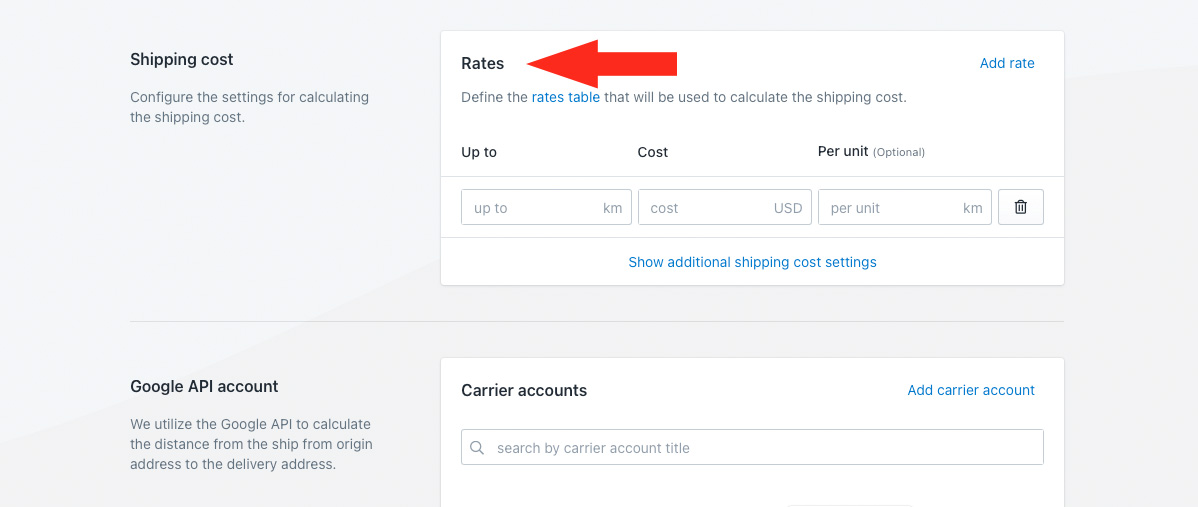
Up to – the upper limit for the cost in this Rate, in either miles or kilometres. If you’re offering a single flat rate, enter the maximum allowable distance for local delivery.
Distance units are configured in your Intuitive Shipping General settings.
Cost – the cost of local delivery. This is the cost the customer will see at checkout if their address is with the up to limit for this Rate row.
Per Unit – the cost in this Rate row will be applied on a per-unit basis. This is an optional setting.
For example, if you have a cost of $3.00 and a per unit value of 5 km, a customer who lives 15 km from your Shipping origin will be charged $9.00 for local delivery at checkout.
If you’re setting up a single flat rate for local delivery, skip ahead to Step 3. If you’re setting up a table of rates based on tiered distances, continue to Step 2.
2) Click Add rate to add another shipping cost, then repeat Step 3 to set up each additional distance-based cost.
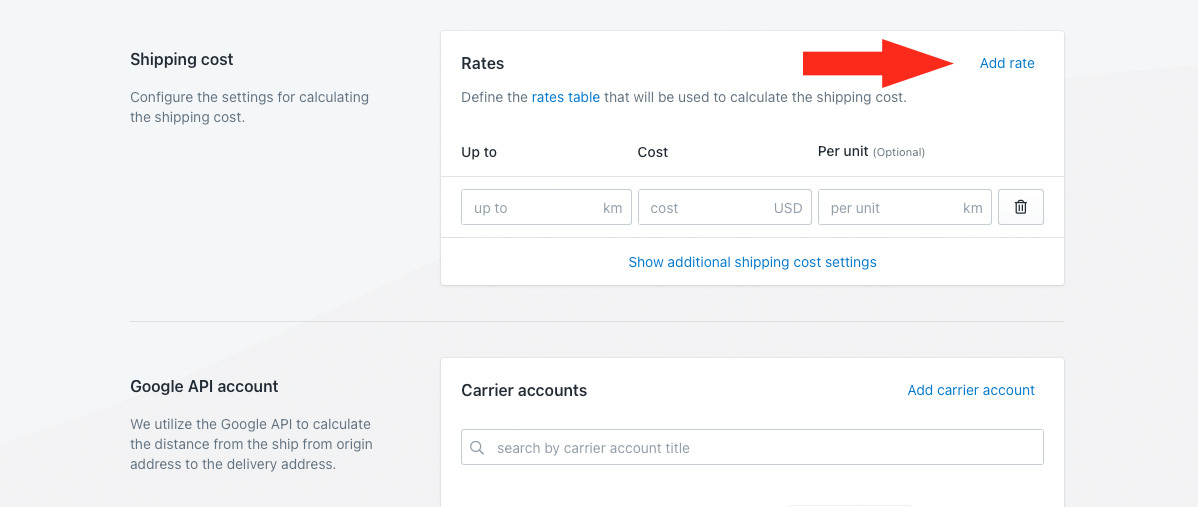
It doesn’t matter what order you enter additional rates. Intuitive Shipping will automatically sort multiple rates in descending order, from lowest ‘up to’ limit to highest ‘up to’ limit after you save the shipping method.
Within the Intuitive Shipping app, the ~ (tilde) symbol means ‘no limit’. You may have used this feature when setting up a regular custom service shipping method that has a flat rate for any cart value, such as cart quantity.
If you use ~ as an up to limit in a local delivery service, that means there is no limit to how far away a customer can be from your store, within the Zone the shipping method is assigned to. They’ll still get the local delivery rate – unless you have assigned this shipping method to a local postal code sub-zone, or you used a customer condition in your Scenario, such as city name, to restrict where customers can live.
Additional settings are available for cart splitting and rate row blending. Cart splitting can be used for either single rates or tables. Rate row blending is intended to be used only with rate tables.
If you do not need to split the cart or blend multiple cost rows, skip ahead to Google API Account. Otherwise, continue to Step 3.
3) Click Show additional shipping cost settings.
4) Choose if the cart should be split when the highest up to limit is exceeded.
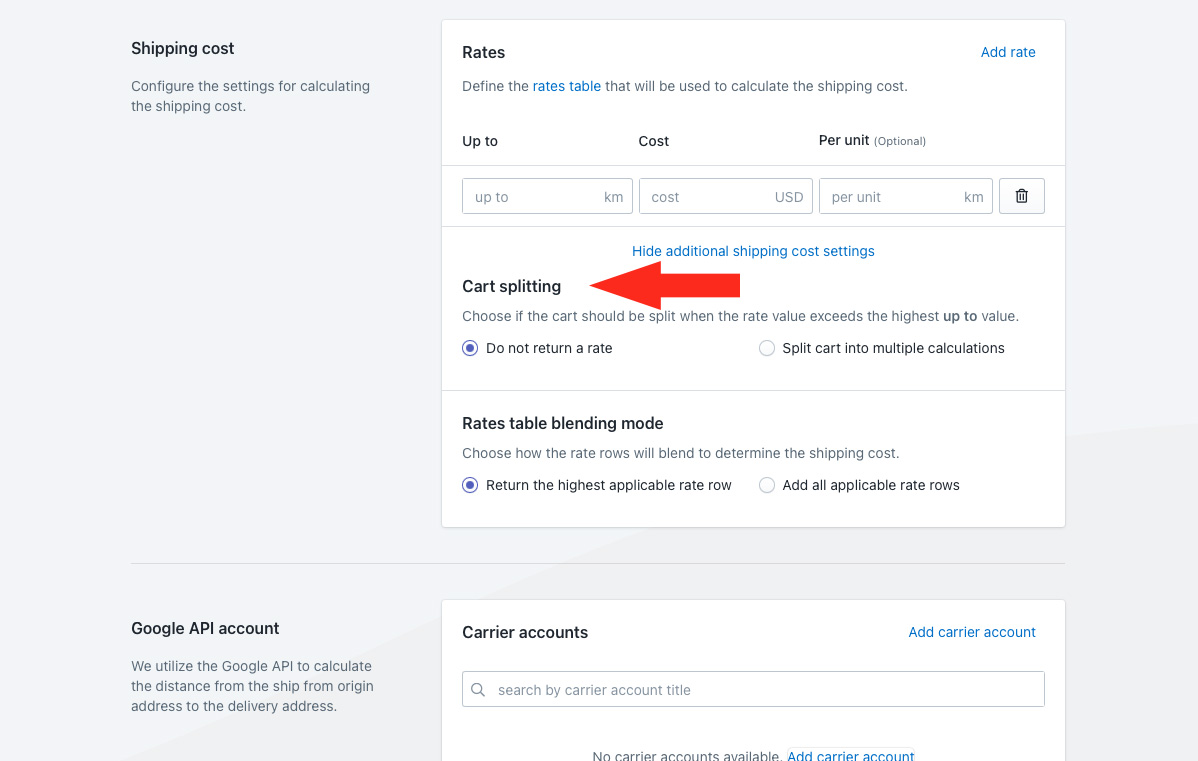
You have two (2) options to choose from:
Do not return a rate – when the highest up to limit from your rate rows is exceeded, no cost will be displayed to the customer at checkout. This is the default setting.
This setting is preferred if you want to prevent customers who live farther than the maximum allowable distance from getting a local delivery rate.
Split cart into multiple calculations – when the highest up to limit from your rate rows is exceeded, the cart will be split, and the costs will be blended together.
For example, if you have three rate rows:
- Up to 5 km = $10.00
- Up to 15 km = $25.00
- Up to 40 km = $60.00
A customer who lives 50 km from your Shipping origin will be charge $85.00 for shipping at checkout because the first 40 km are calculated based on the highest limit ($60.00). The remaining 10 km are split off and run through the table again; they are within the second limit of 15 km ($25.00).
5) Select a rate row blending mode. This setting applies only to rate tables with multiple rate rows. If you’re setting up a single flat rate, skip ahead to Google API Account.

You have two (2) options to choose from:
Return the highest applicable rate row – only the highest applicable cost is used to calculate the rate. This is the default setting.
Add all applicable rate rows – the highest applicable cost and all lower costs are added together. This setting is useful if you want to compound costs from your rate table.
For example, if you have three rate rows:
- Up to 10 mi = $20.00
- Up to 25 mi = $50.00
- Up to 50 mi = $80.00
When the ‘Return the highest applicable rate row’ setting is used, a customer who lives 18 miles from your Shipping Origin will be charged $50.00 for shipping at checkout, because they are within the highest applicable rate row (up to 25 mi).
When the ‘Add all applicable rate rows’ setting is used, the same customer will be charged $70.00 for shipping at checkout because $50.00 is the highest applicable cost and $20.00 is the lower cost.
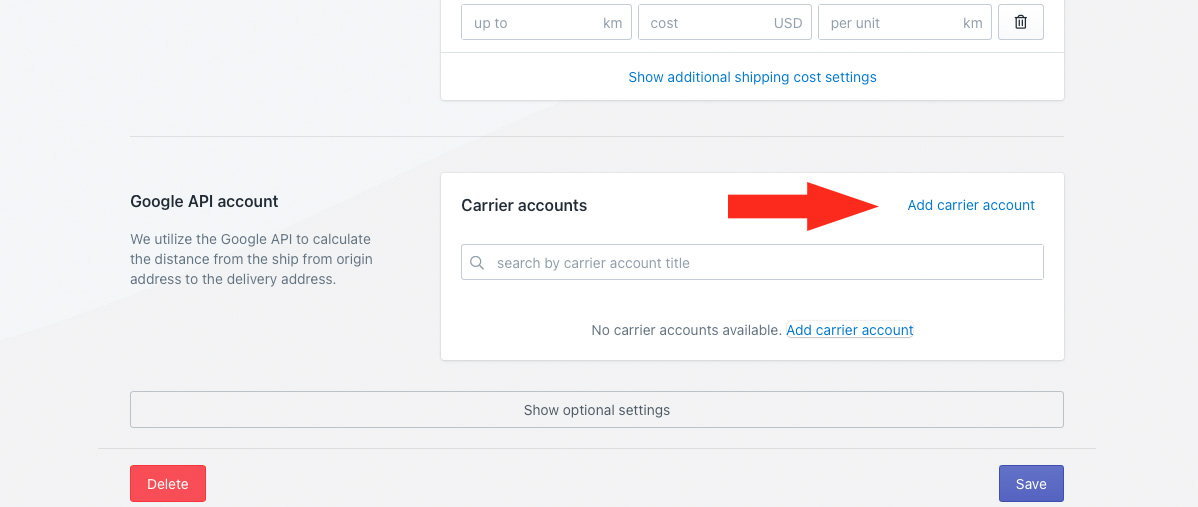
Google API Account
A Google API account is required to complete this setup. If you don’t have a Google API account connected to Intuitive Shipping, you will be unable complete this setup.
If you have not yet created an API billing account with Google, you must do so before proceeding.
Once your API account has been created, and you have obtained your API key, you can return here to finish connecting your account, starting at Step 1 below.
If you have already connected your Google API account to Intuitive Shipping, skip ahead to Step 5.
1) Click Add a carrier account.
2) Enter a carrier account title, such a ‘Google Distince’ or ‘Google API’.
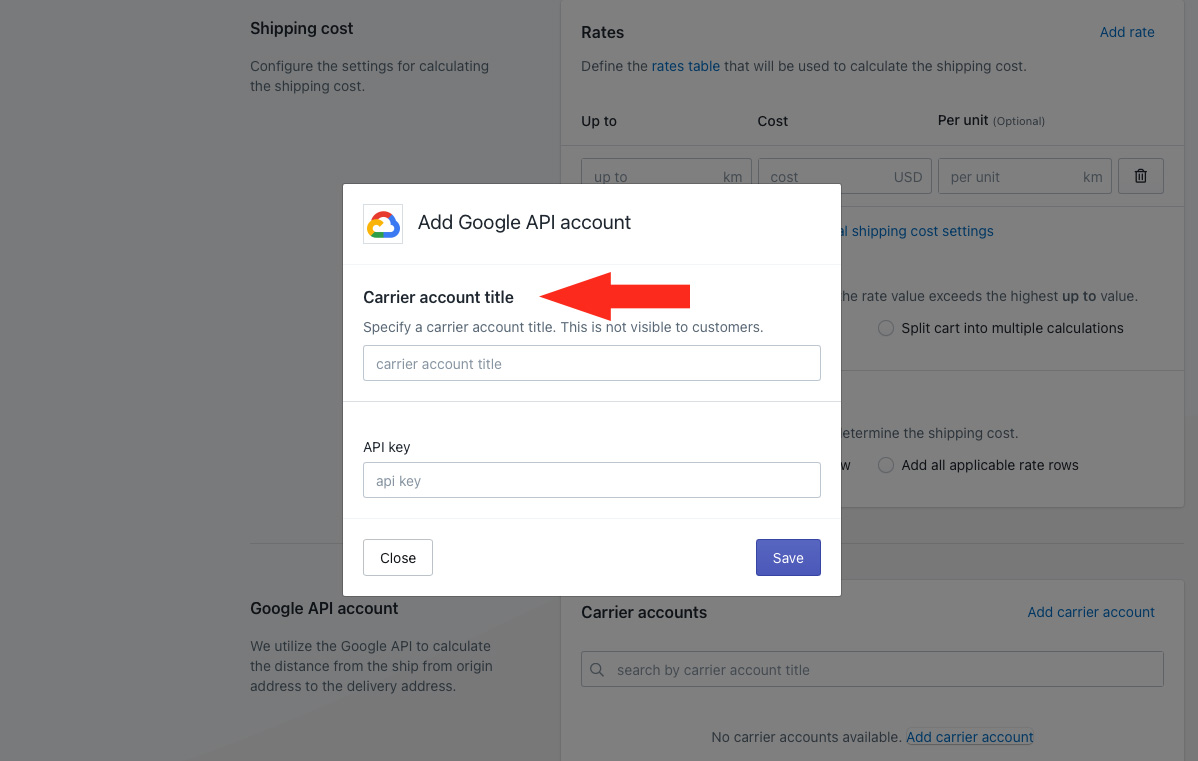
3) Enter your API key.
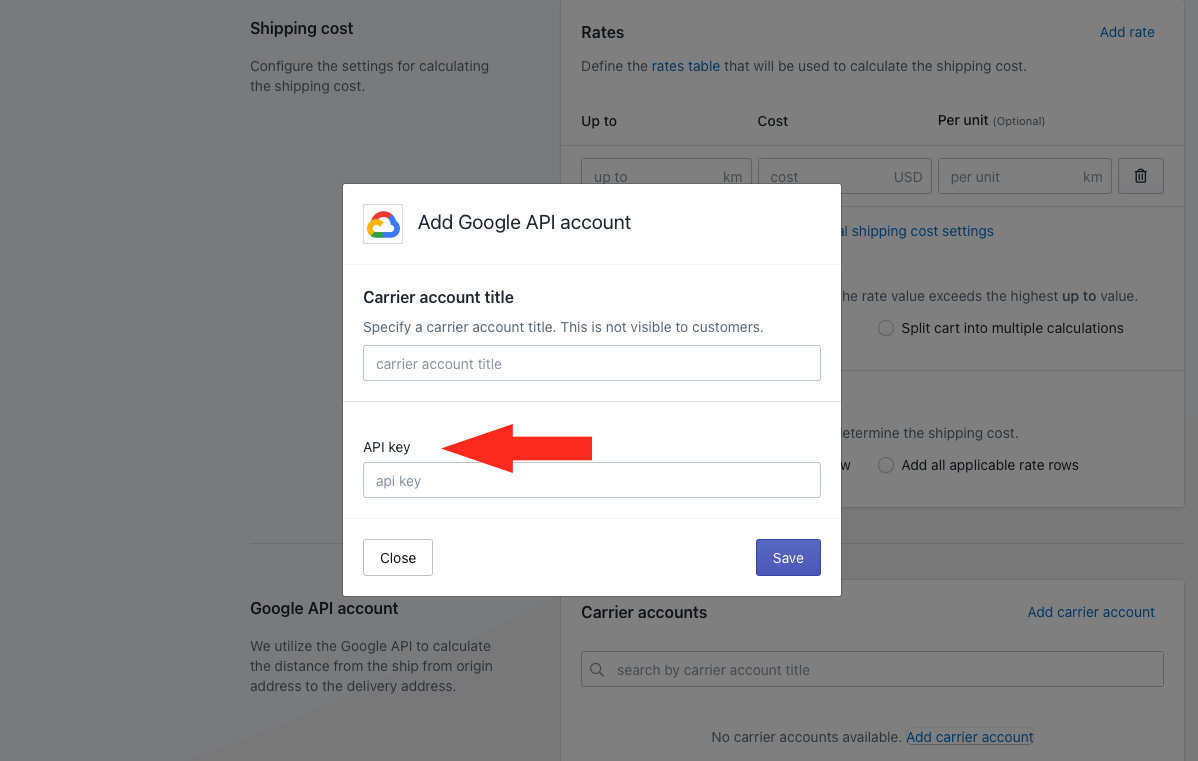
4) Click the Save button.
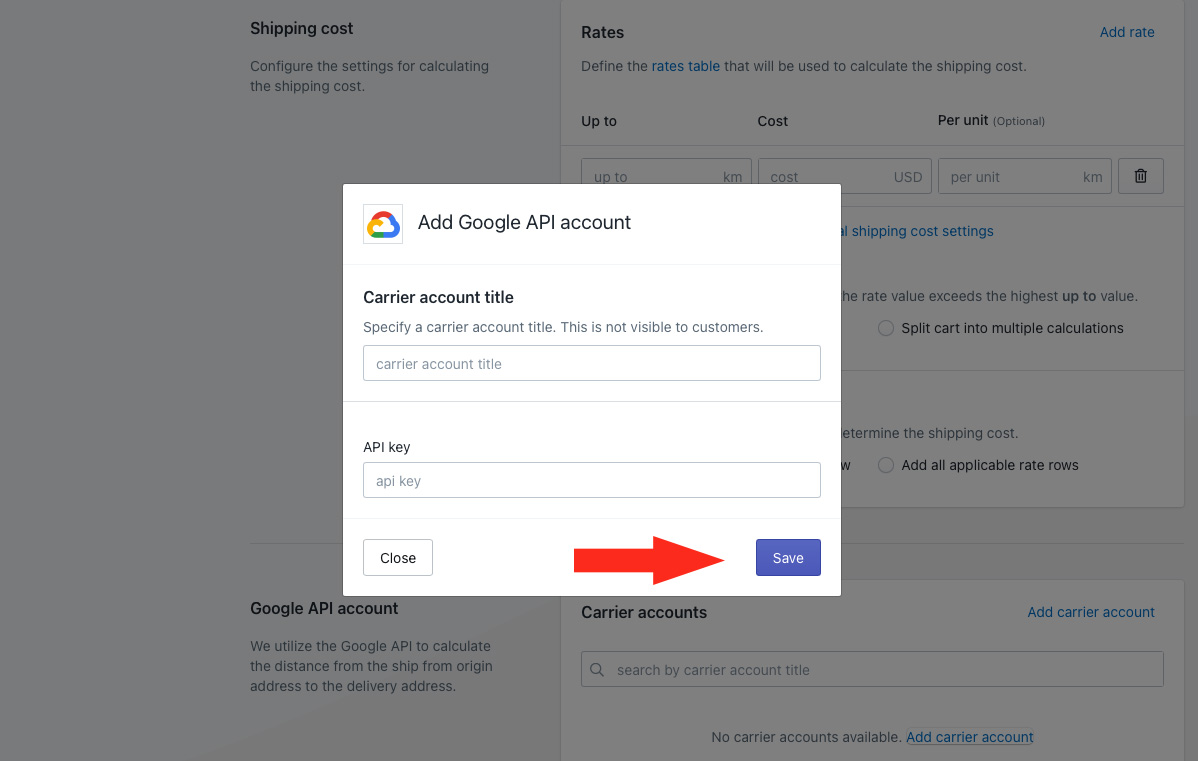
5) Select your Google account.

Optional Settings
Settings for distance calculation type, fallback rate, cost adjustments, free shipping, custom shipping blending and rate blending give you further control of how shipping is calculated at checkout. If you don’t need to adjust these settings, skip ahead to Save Your Settings. Otherwise, continue to Local Delivery Settings.
These settings are not required.
1) Click Show optional settings.

Local Delivery Settings
Intuitive Shipping uses your Google API key to calculate distance between your shipping origin and the customer’s address. There are two ways this can be done.
By default, we attempt to calculate distance using your Distance API to get driving directions. If that fails, we attempt to calculate distance using your Geocoding API. If desired, you can configure your local delivery shipping method to only use one or the other.
Distance API uses your shipping origin address and the customer’s address to look up driving directions with Google Maps. This method generally passes about 75% of the time. However, if you live in a region where postal codes are not used, or not recognized by Google Maps, this method will likely fail.
Geocoding API converts your shipping origin address and the customer’s address into geo-coordinates, and measures distance point-to-point (or ‘as the crow flies’). This method typically passes, except if Google is unable to convert an address into coordinates.
Each method results in one API call to your Google API account. That means, if you select Automatic in Step 1, Intuitive Shipping will make only one API call about 75% of the time, or or two API calls about 25% of the time.
API calls cost $5.00 per 1000 calls. Google provides a $200 USD credit each month for an unlimited time. That’s 40,000 API calls – or roughly 30,000 to 40,000 distance-based rate calculations – per month for free.
1) Select a distance calculation type.
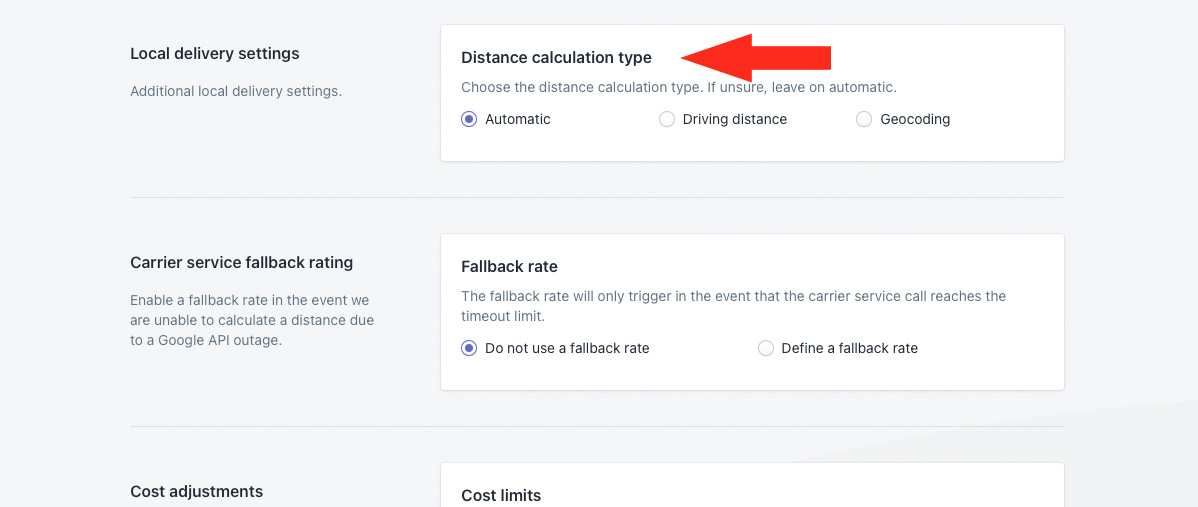
You have three (3) settings to choose from:
Automatic – Intuitive Shipping first attempts to calculate distance using your Distance API. If that fails, we attempt to calculate distance using your Geocoding API. This method may result in up to two API calls per checkout to your Google API account. This is the default setting.
Driving distance – Intuitive Shipping attempts to calculate distance using only your Distance API. This method will result in only one API call per checkout to your Google API account.
If you select this option and it fails, Intuitive Shipping will not fall back to Geocoding. No rate will be returned to the customer.
Geocoding – Intuitive Shipping attempts to calculate distance using only your Geocoding API. This method will result in only one API per checkout call to your Google API account.
If you select this option and it fails, Intuitive Shipping will not fall back on Driving directions. No rate will be returned to the customer.
Carrier Service Fallback Rate
1) Choose if you want a fallback rate to appear at checkout in situations when Google times out. This is useful when Google’s mapping servers are down or when they’re overwhelmed during peak periods.
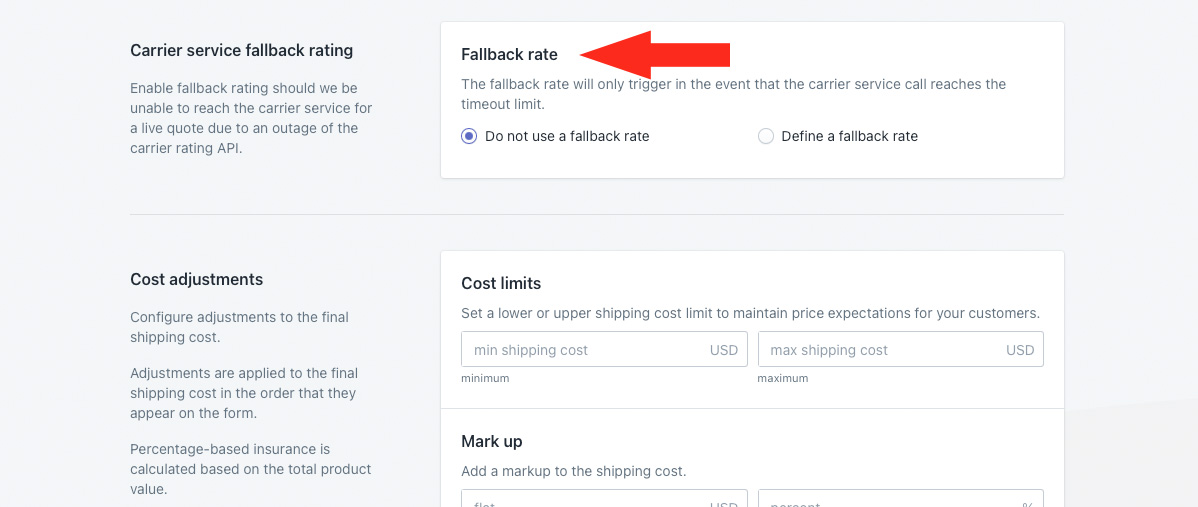
You have two (2) settings to choose from:
Do not use a fallback rate – when the Google API calls time out, no shipping rates from this shipping method are displayed at checkout. This is the default setting.
Define a fallback rate – when the Google API calls time out, the fallback rate entered in Step 2 is displayed at checkout.
That means the fallback rate won’t be displayed if an error occurs, such as when a customer enters an address that isn’t recognized by Google. It only activates when the system times out waiting for a response.
2) If you selected Define a fallback rate in Step 1, enter a fallback shipping cost.
If you’re using a flat rate for same day delivery, enter that cost as the fallback cost. If you’re using a table or rates based on different distances, consider entering the average table cost, or the maximum.

Additional settings are available for fallback rate titles, descriptions, delivery times and service codes. In the event the fallback rate is activated, these settings will override the main settings.
3) Click Show optional display settings.

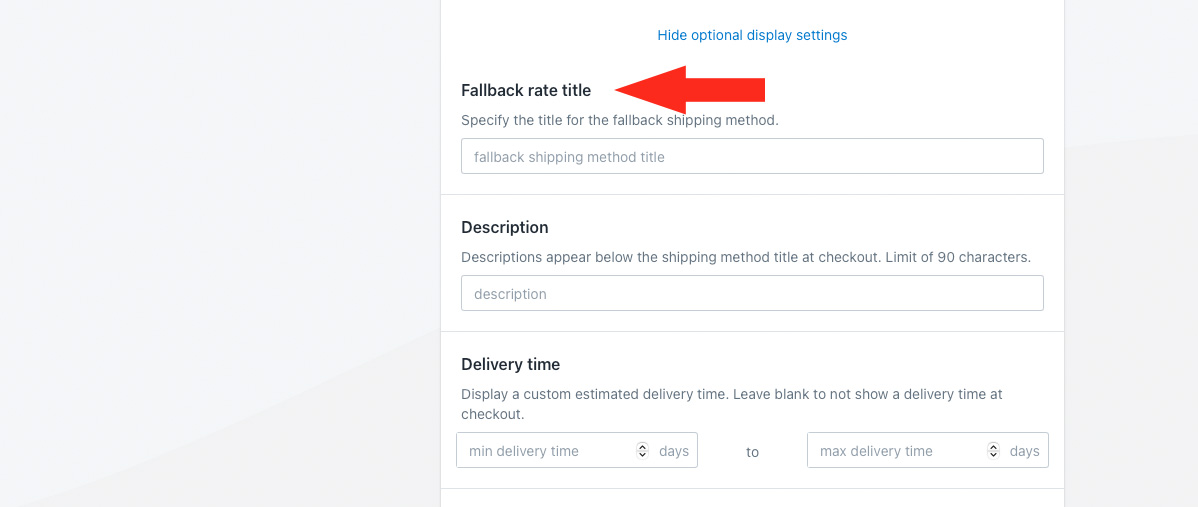
4) If desired, enter a fallback rate title, such as ‘Local Delivery’, or whatever title you entered in General Step 1. This will keep the title consistent when the fallback rate is activated.
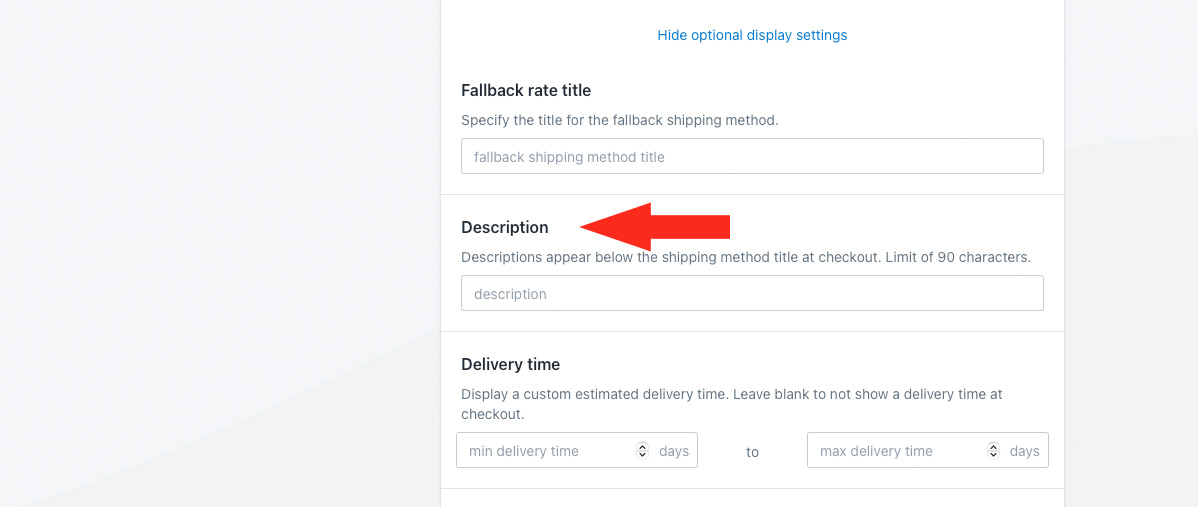
5) If desired, enter a fallback rate description. Consider using the same description you entered in General Step 3.
6) If desired, enter a fallback rate delivery time. Consider using the same delivery time entered in General Step 5.
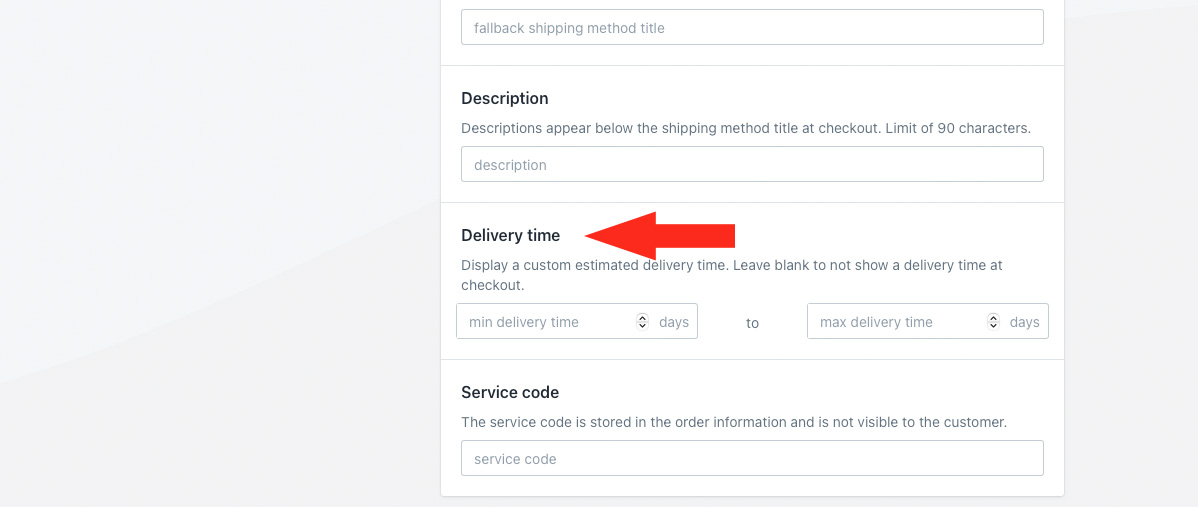
Min delivery time – enter the lower limit of your delivery time range.
Max delivery time – enter the upper limit of your delivery range. When combined with the min setting, delivery times will be displayed like ‘3 to 5 business days’ at checkout.
For example, if you prefer to have delivery time displayed as ‘3 business days’ instead of ‘3 to 5 business days’, enter ‘3’ in either minimum or maximum and leave the other field blank.
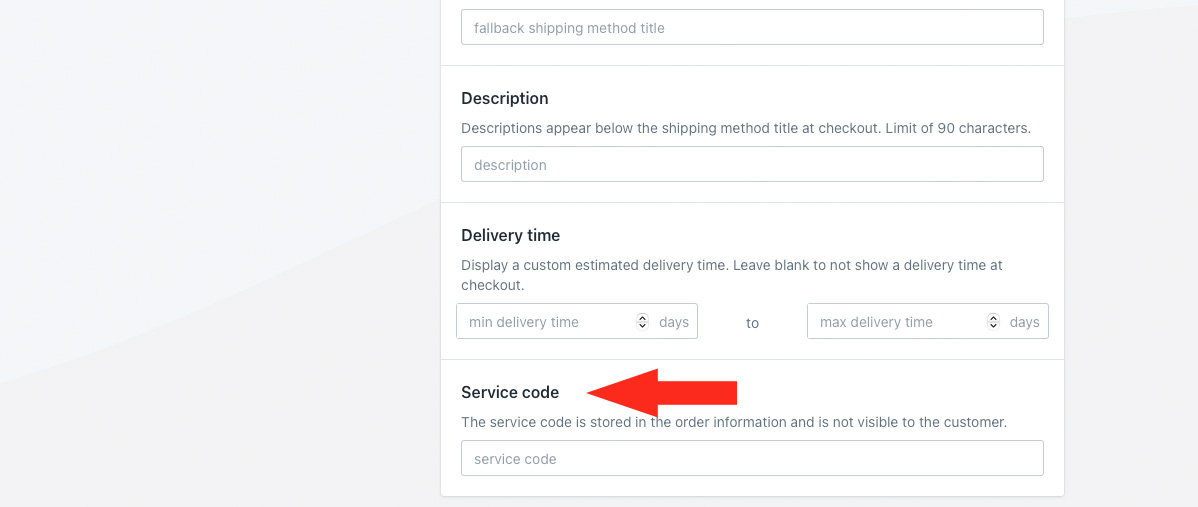
7) If desired, enter a fallback rate service code. The service code is pushed to your fulfillment service (if applicable) when a customer successfully completes their checkout. Consider using the same delivery time entered in General Step 6.
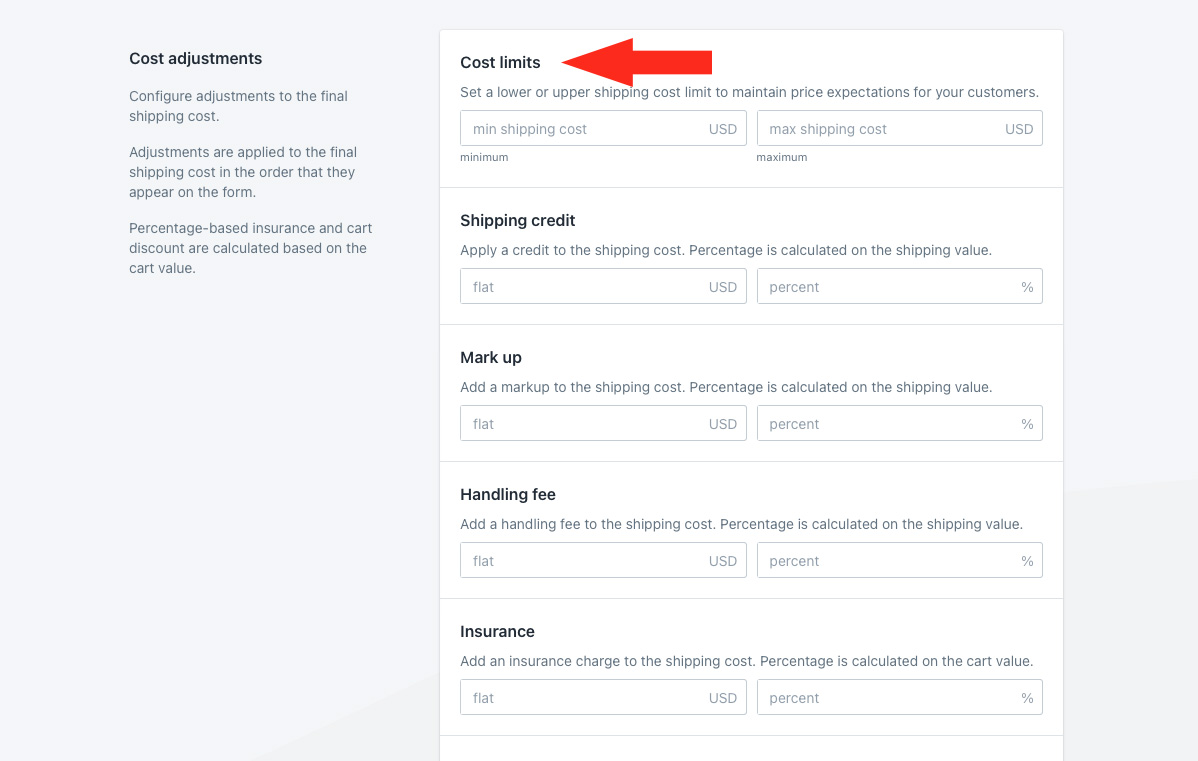
Cost Adjustments
If you want to build in extra costs to your local delivery shipping method without altering the distance-based rates, you can apply cost adjustments.
Cost adjustments are applied in the order they are listed in the app: cost limits first, then shipping credits, then mark ups, then handling, then insurance, then discounts, then rounding.
1) If desired, add cost limits. This is useful if you’re using a ‘per unit’ distance-based rate, such as $3.00 per km, and you want to set minimum or maximum limits.
You have two (2) settings to choose from:
Min shipping cost – if the distance-based rate is less than this value, it will be adjusted up to the minimum cost.
Max shipping cost – if the distance-based rate is more than this value, it will be adjusted down to the maximum cost.
2) If desired, add a shipping credit. This is useful if you want to run a shipping promotion on your distance-base rates without having to alter the original rates.
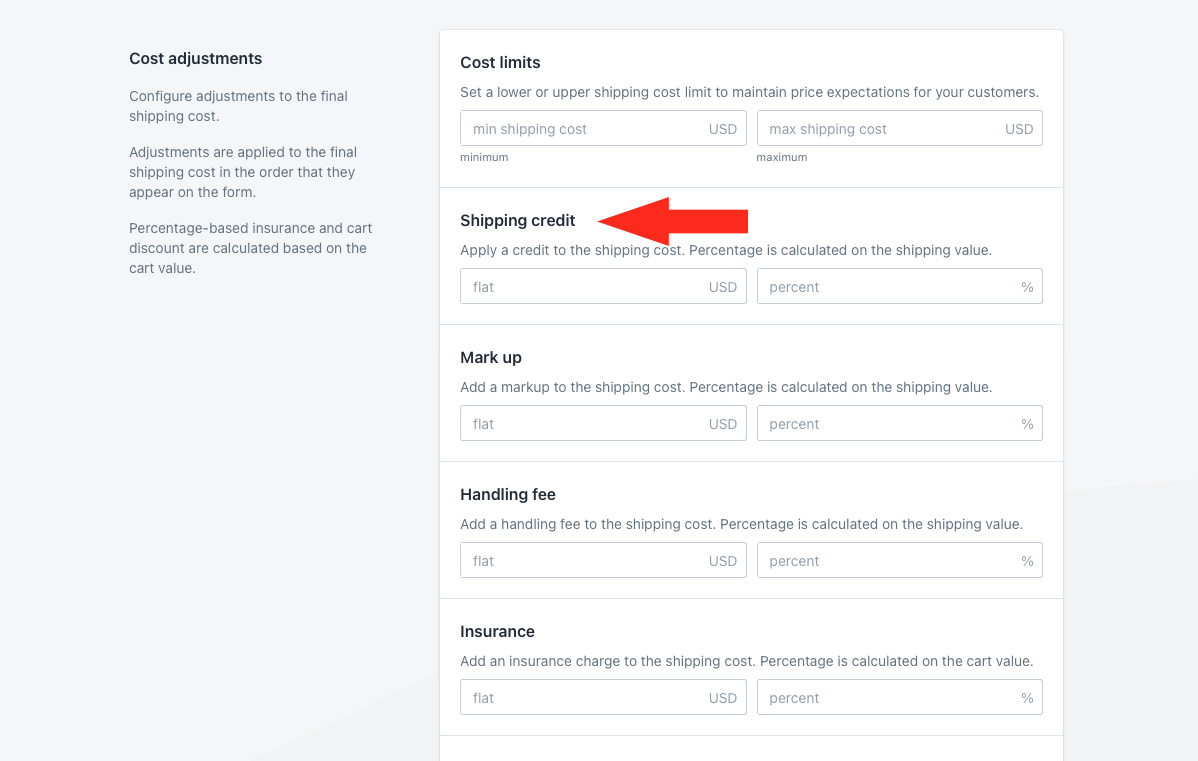
You have two (2) settings to choose from:
Flat – this amount will be subtracted from the shipping cost after any cost limit adjustments.
Percentage – this percentage of the shipping cost, after any cost limit adjustments, will be subtracted from the adjusted shipping cost.
3) If desired, add a mark up. This is useful if your distance-based rates go up unexpectedly, and you need to quickly increase the price or prices.
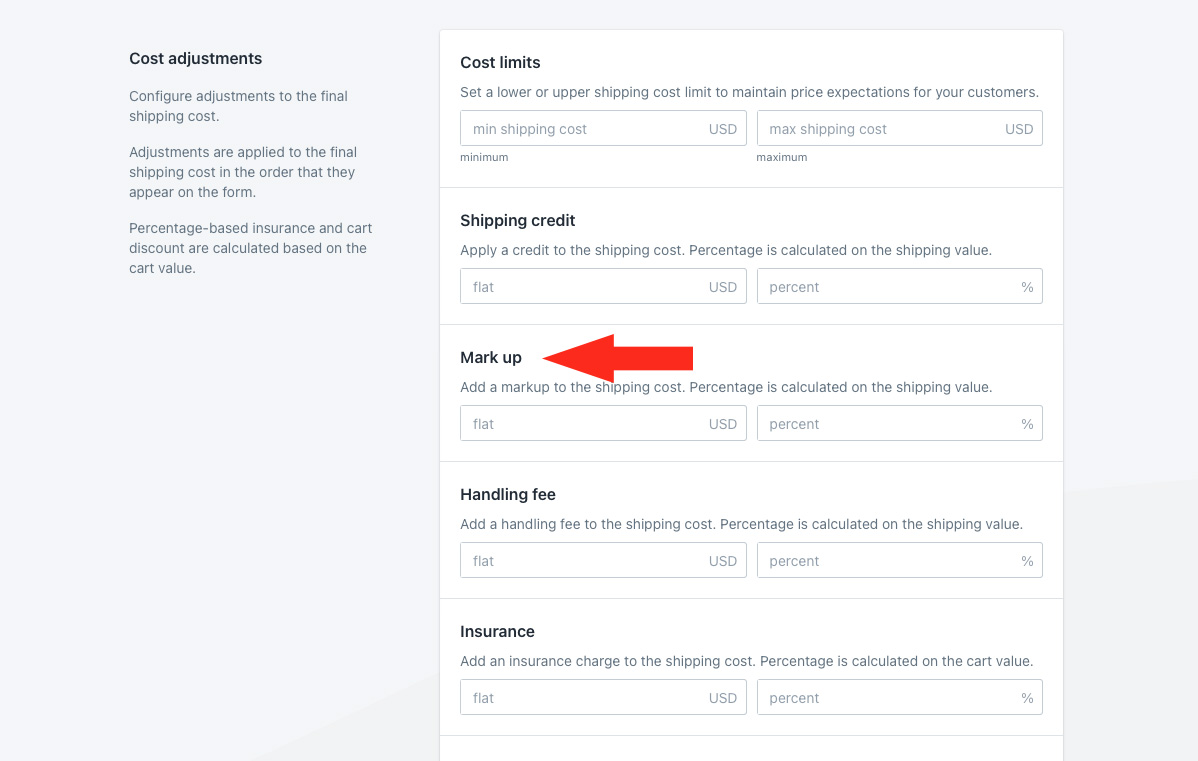
You have two (2) settings to choose from:
Flat – this amount will be added to the shipping cost after any cost limit adjustments and shipping credits.
Percentage – this percentage of the shipping cost, after any cost limit adjustments and shipping credits, will be added to the adjusted shipping cost.
4) If desired, add a handling fee. This is useful if you want to add any surcharges to the distance-based rates.
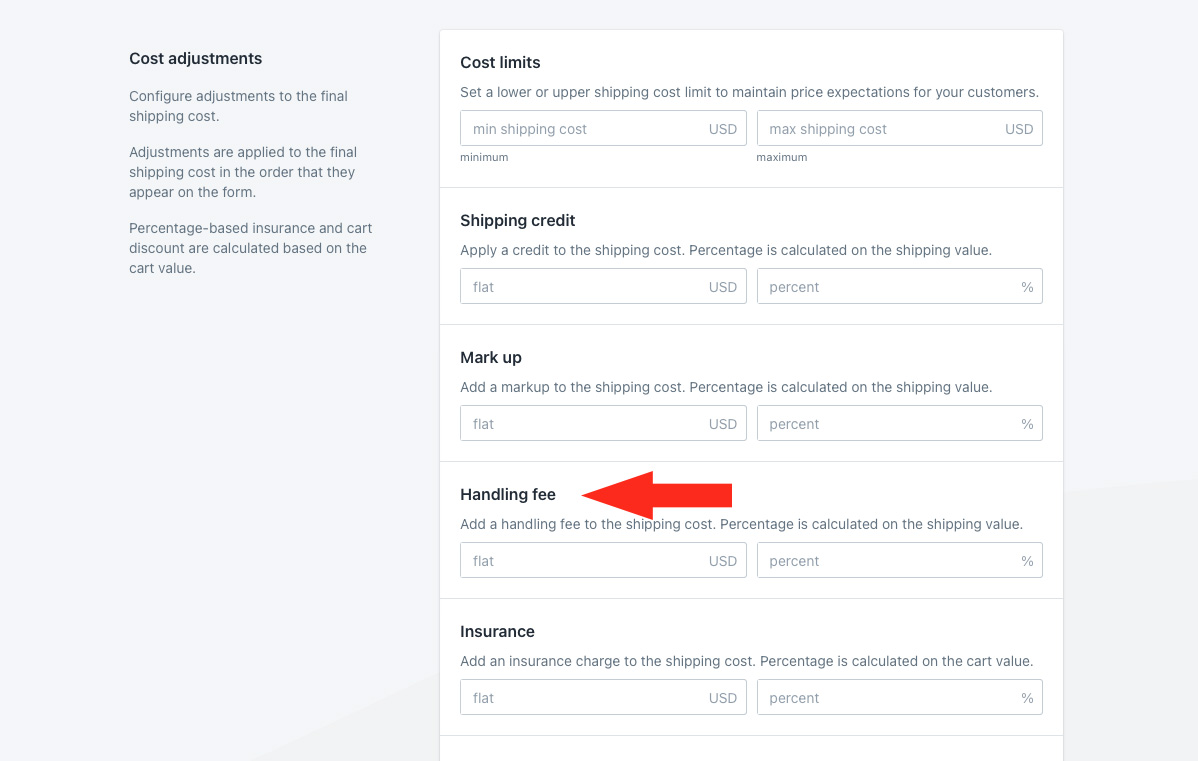
You have two (2) settings to choose from:
Flat – this amount will be added to the shipping cost after any cost limit adjustments, shipping credits and mark ups.
Percentage – this percentage of the shipping cost – after any cost limit adjustments, shipping credits and mark ups – will be added to the adjusted shipping cost.
5) If desired, add insurance.
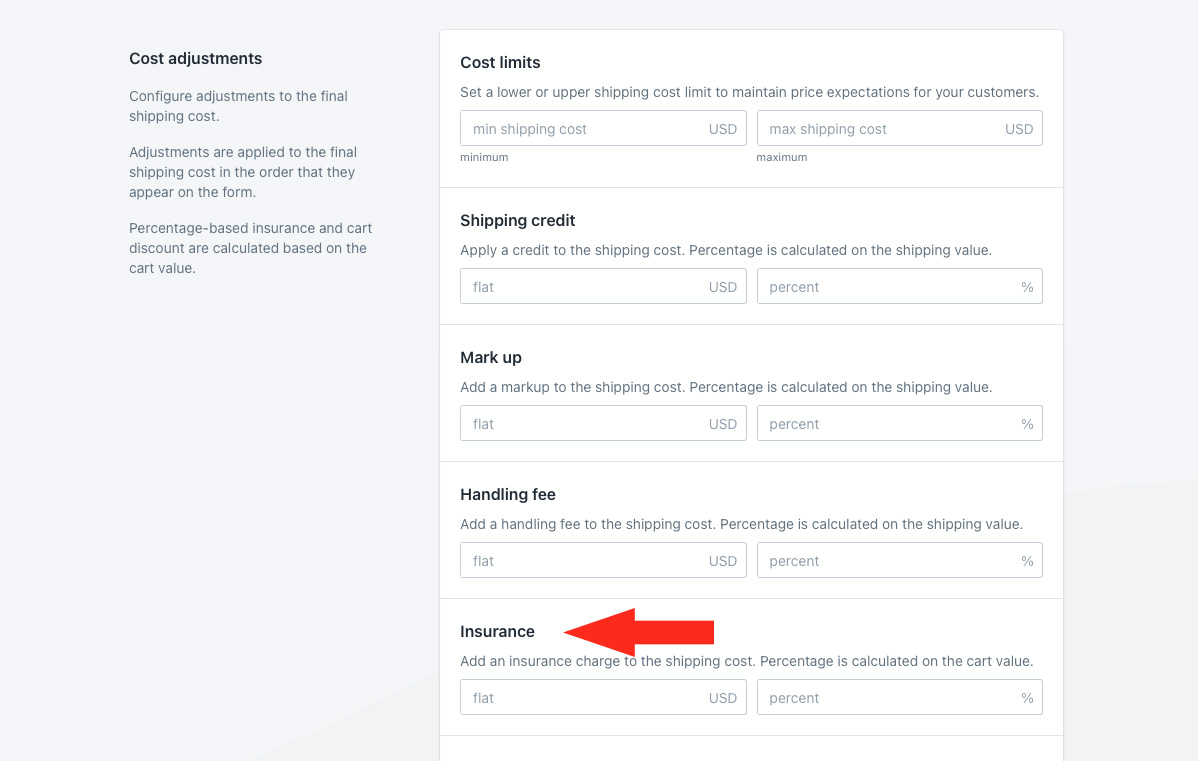
You have two (2) settings to choose from:
Flat – this amount will be added to the shipping cost after any cost limit adjustments, shipping credits, mark ups and handling fees.
Percentage – this percentage of the cart total will be added to the adjusted shipping cost.
6) If desired, apply a discount.
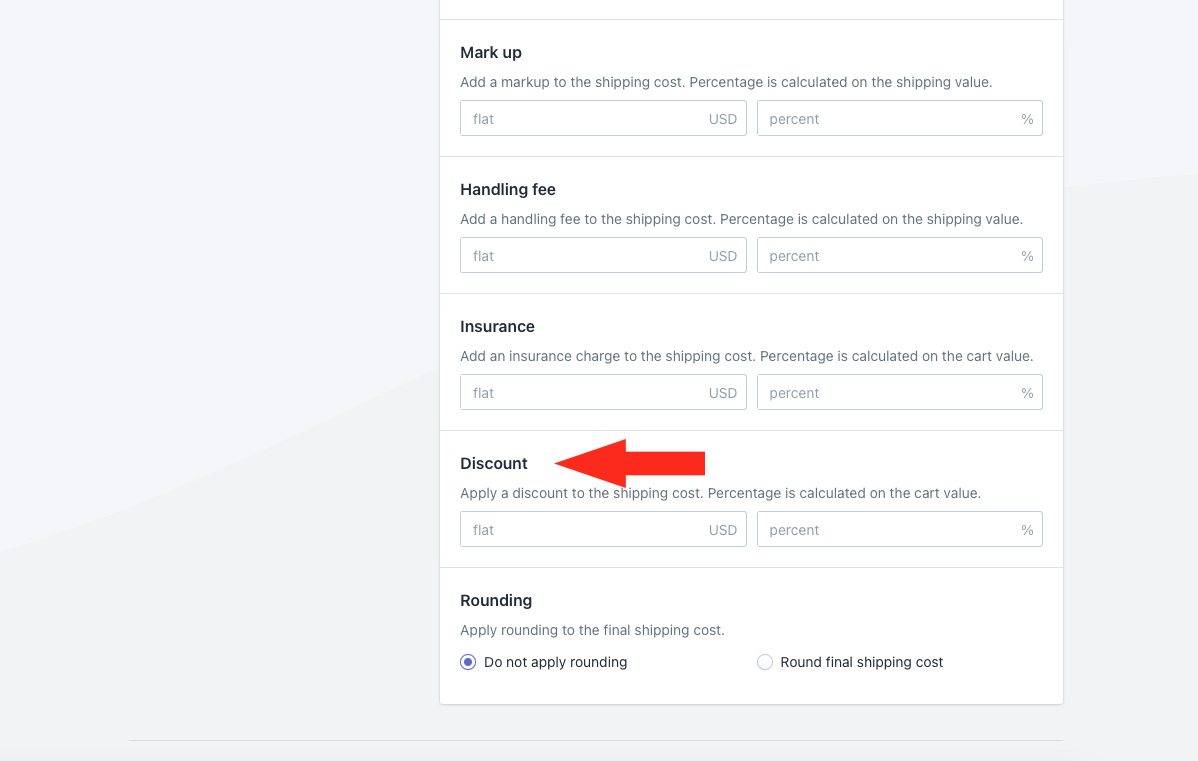
Flat – this amount will be subtracted from the shipping cost after any cost limit adjustments, shipping credits, mark ups, handling fees and insurance.
Percentage – this percentage of the total product value will be subtracted to the adjusted shipping cost.
7) If desired, apply rounding. This is useful if your distance-based rates have other cost adjustments, such as percentage mark ups or mark downs that result in an odd totals like $37.23.
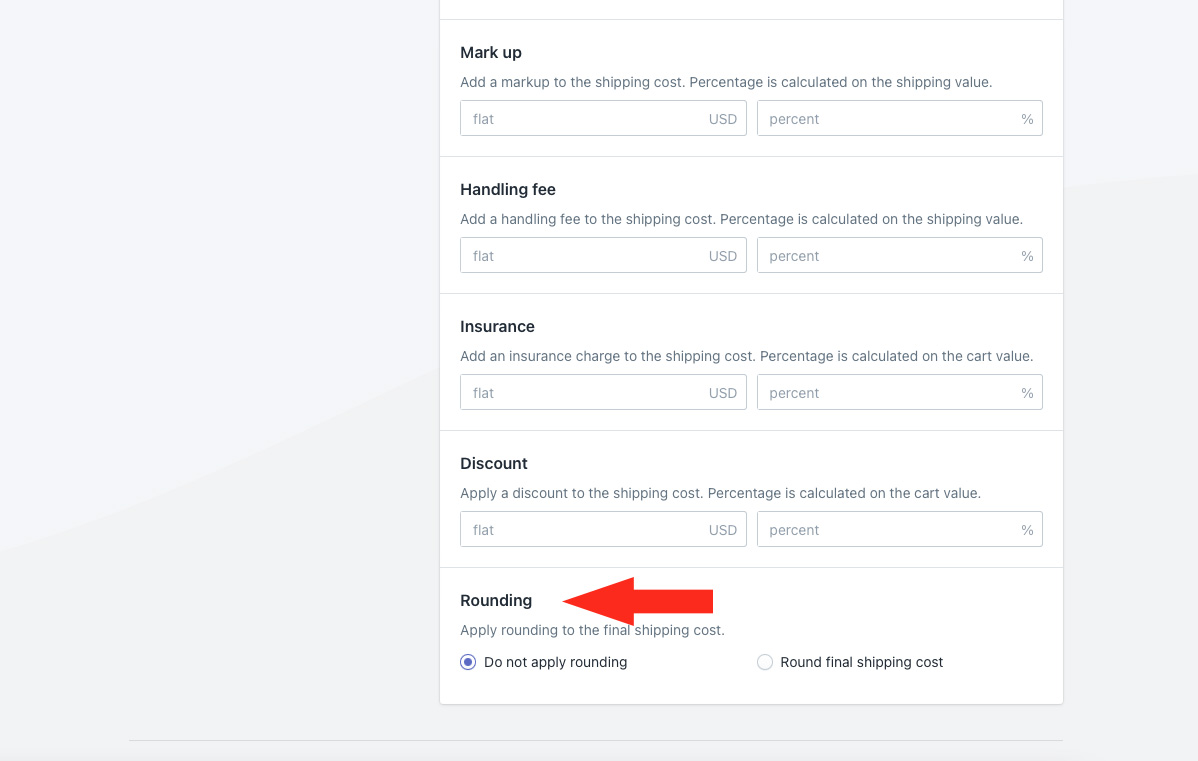
You have two (2) settings to choose from:
Do not apply rounding – the final shipping cost, after all other cost adjustments, will be displayed exactly as calculated.
Round final shipping cost – the final shipping cost, after all other cost adjustments, will be rounded up or down, depending on the settings selected in Steps 8 and 9.
8) Choose which direction to round the shipping cost.
You have three (3) settings to choose from:
Up/down – the final adjusted shipping cost will be rounded either up or down by the increment selected in Step 9 – whichever is closer.
Up – the final adjusted shipping cost will be rounded up by the increment selected in Step 9.
Down – the final adjusted shipping cost will be rounded down by the increment selected in Step 9.
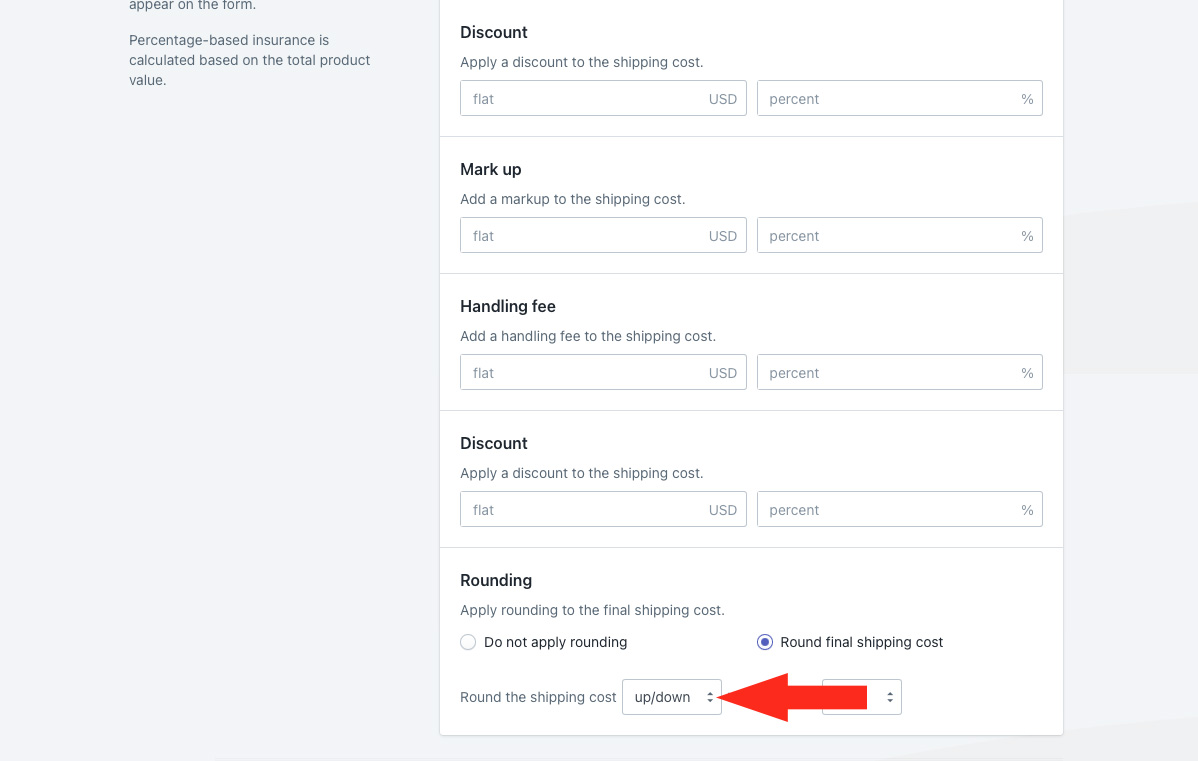
9) Choose the amount to round the shipping cost.
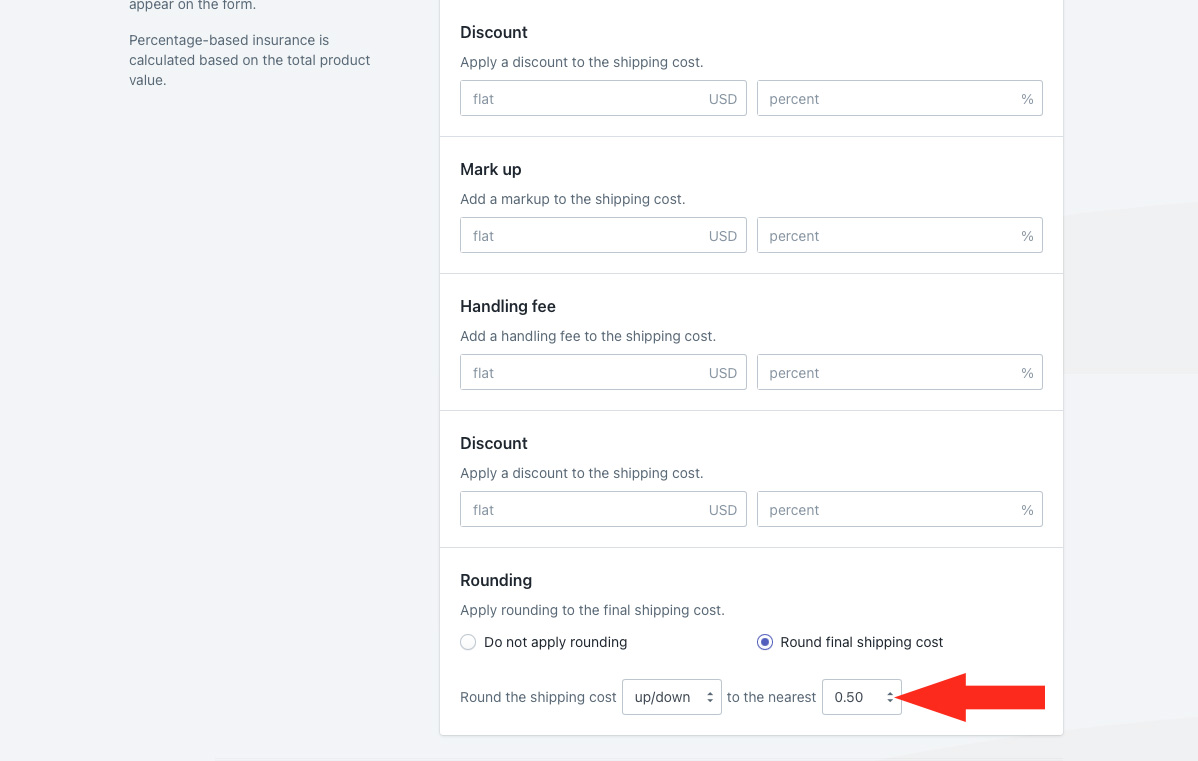
You have four (4) settings to choose from:
0.50 – the final shipping cost will be rounded up or down to the nearest 0.50 of your base currency. If the final shipping cost is $18.80, the rounded cost will be either $18.50 or $19.00, depending on the setting selected in Step 8.
1.00 – the final shipping cost will be rounded up or down to the nearest 1.00 of your base currency. If the final shipping cost is $18.80, the rounded cost will be either $18.00 or $19.00, depending on the setting selected in Step 8.
5.00 – the final shipping cost will be rounded up or down to the nearest 5.00 of your base currency. If the final shipping cost is $18.80, the rounded cost will be either $15.00 or $20.00, depending on the setting selected in Step 8.
10.00 – the final shipping cost will be rounded up or down to the nearest 10.00 of your base currency. If the final shipping cost is $18.80, the rounded cost will be either $10.00 or $20.00, depending on the setting selected in Step 8.
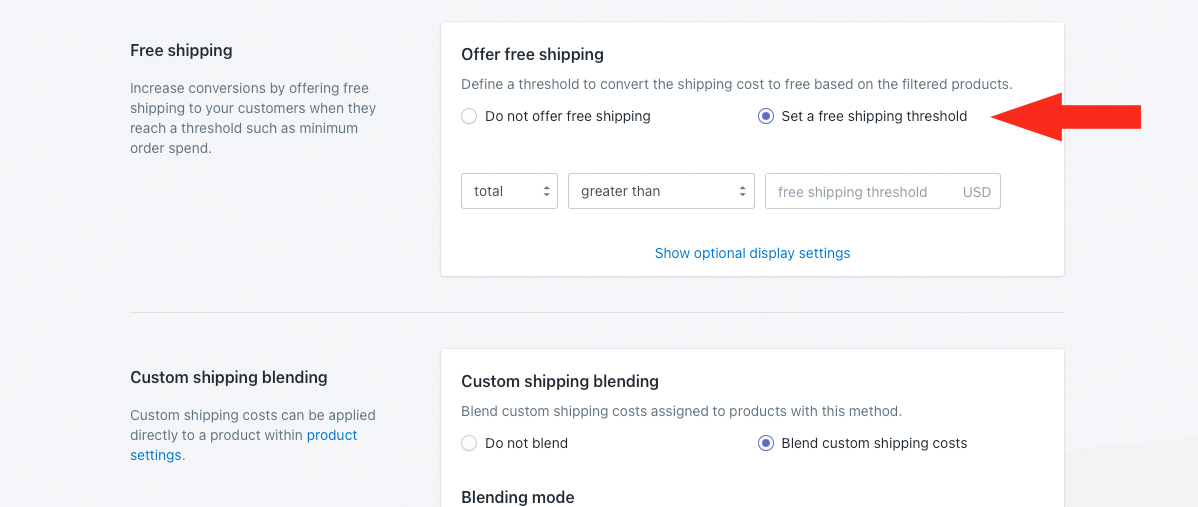
Free Shipping
Activate free shipping when the customer’s cart crosses a threshold limit. This is useful if you have a minimum order value or if you want to offer paid local delivery only above a certain weight limit.
If you don’t need a free shipping threshold, skip ahead to Custom Shipping Blending. Otherwise, continue to Step 1.
1) If desired, select Set a free shipping threshold.
2) Select a cart value type.
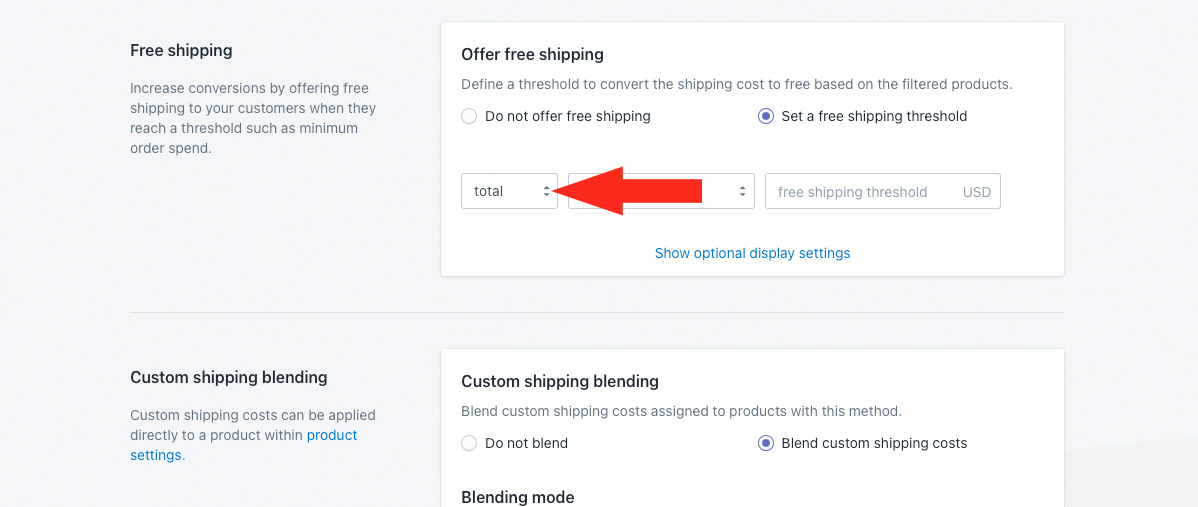
You have three (3) settings to choose from:
Total – free shipping will activate based on the total value of items in the cart.
Quantity – free shipping will activate based on the total number of items in the cart.
Weight – free shipping will activate based on the total weight of items in the cart.
3) Select the logic.

You have six (6) settings to choose from:
Greater than – free shipping will activate when the actual cart value is more than the value entered in Step 4.
Greater than or equals – free shipping will activate when the actual cart value is equal to or more than the value entered in Step 4.
Less than – free shipping will activate when the actual cart value is less than the value entered in Step 4.
Less than or equals – free shipping will activate when the actual cart value is equal to or less than the value entered in Step 4.
Equals – free shipping will activate when the actual cart value is exactly the same as the value entered in Step 4.
Does not equal – free shipping will activate when the actual cart value is anything but the value entered in Step 4.
4) Enter the threshold value. Free shipping will activate when this threshold is met, depending on the settings selected in Steps 2 and 3.

Additional free shipping settings are available for a title, description, delivery time and service code when the free shipping threshold is met. This is useful if you want to override the general display settings when free shipping is activated.
If you don’t need a custom title, description, delivery time or service code for free shipping, skip ahead to Custom Shipping Blending. Otherwise, continue to Step 5.
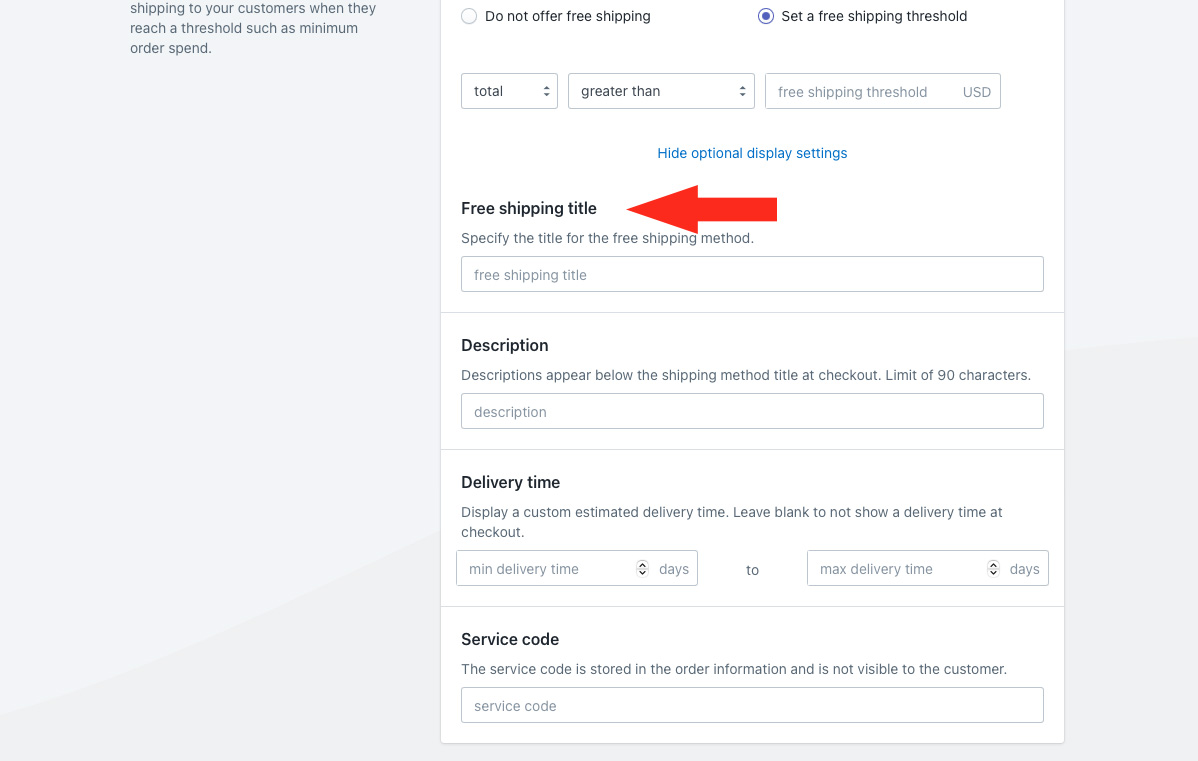
5) Click Show optional display settings.
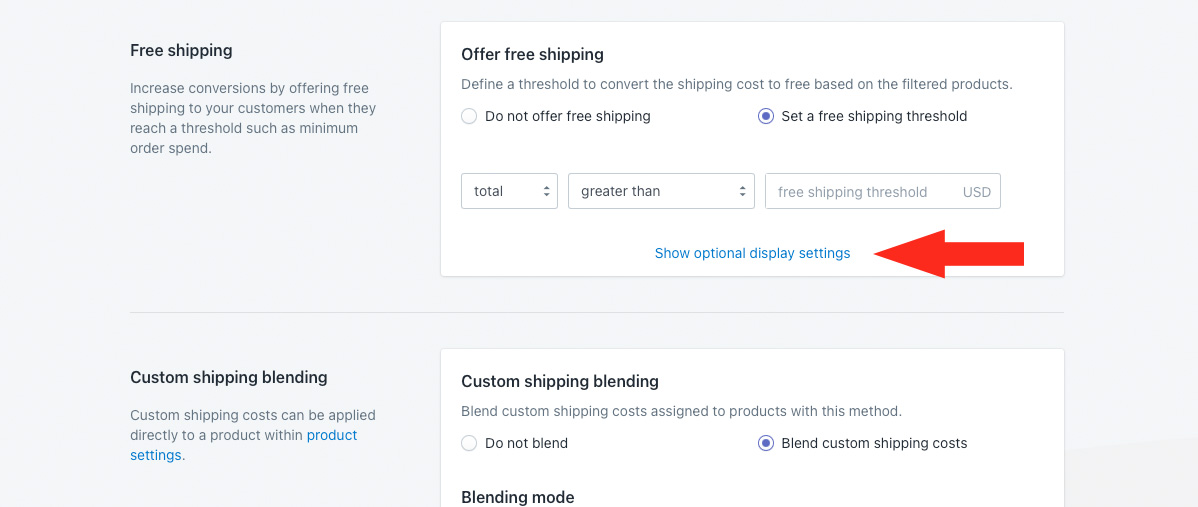
6) If desired, enter a free shipping title. The free shipping title will override the main title entered in General Step 1, when the free shipping threshold is reached.
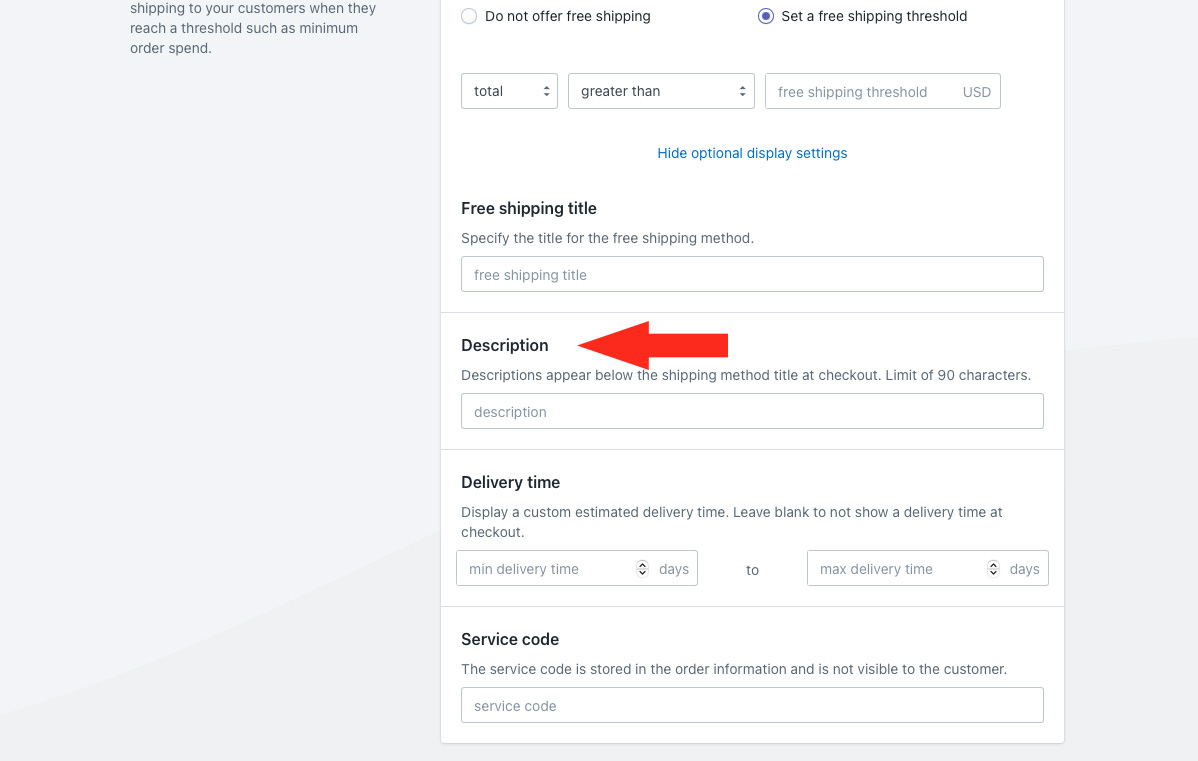
7) If desired, enter a free shipping description. The free shipping description will override the main description entered in General Step 3 when the free shipping threshold is reached.
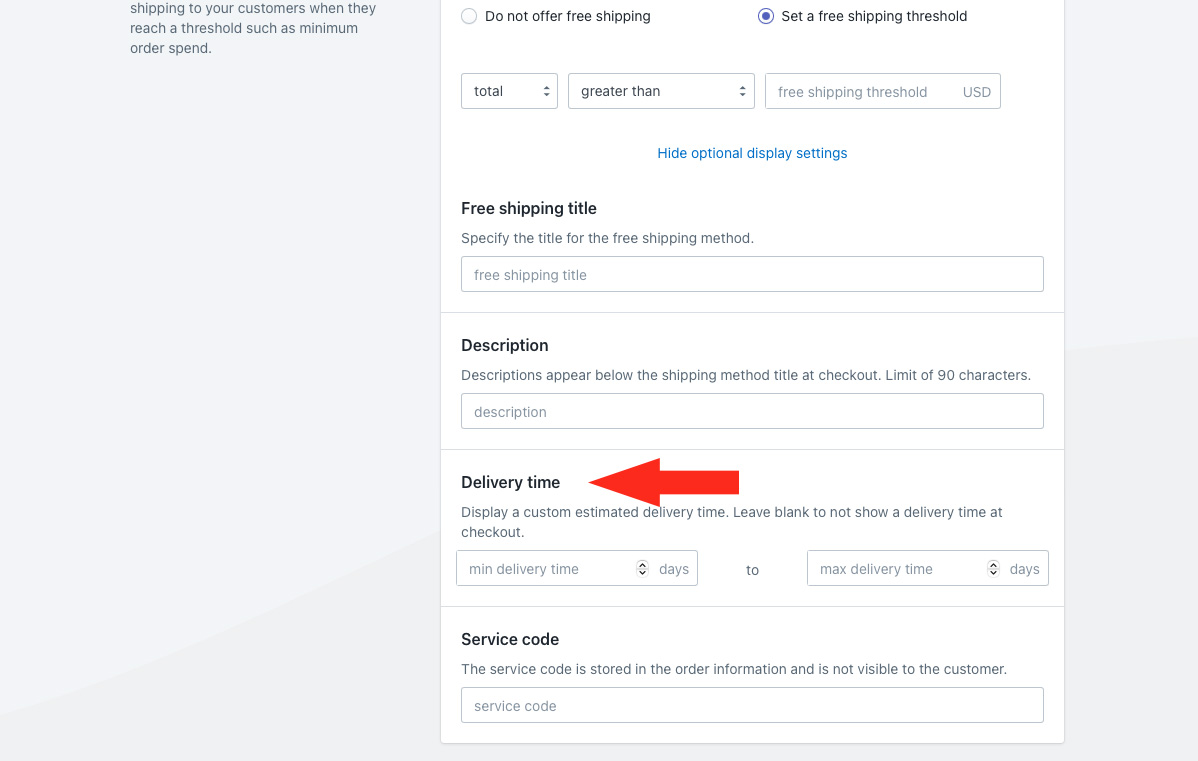
8) If desired, enter a free shipping delivery time. The free shipping delivery time will override the delivery time entered in General Step 5 when the free shipping threshold is reached.
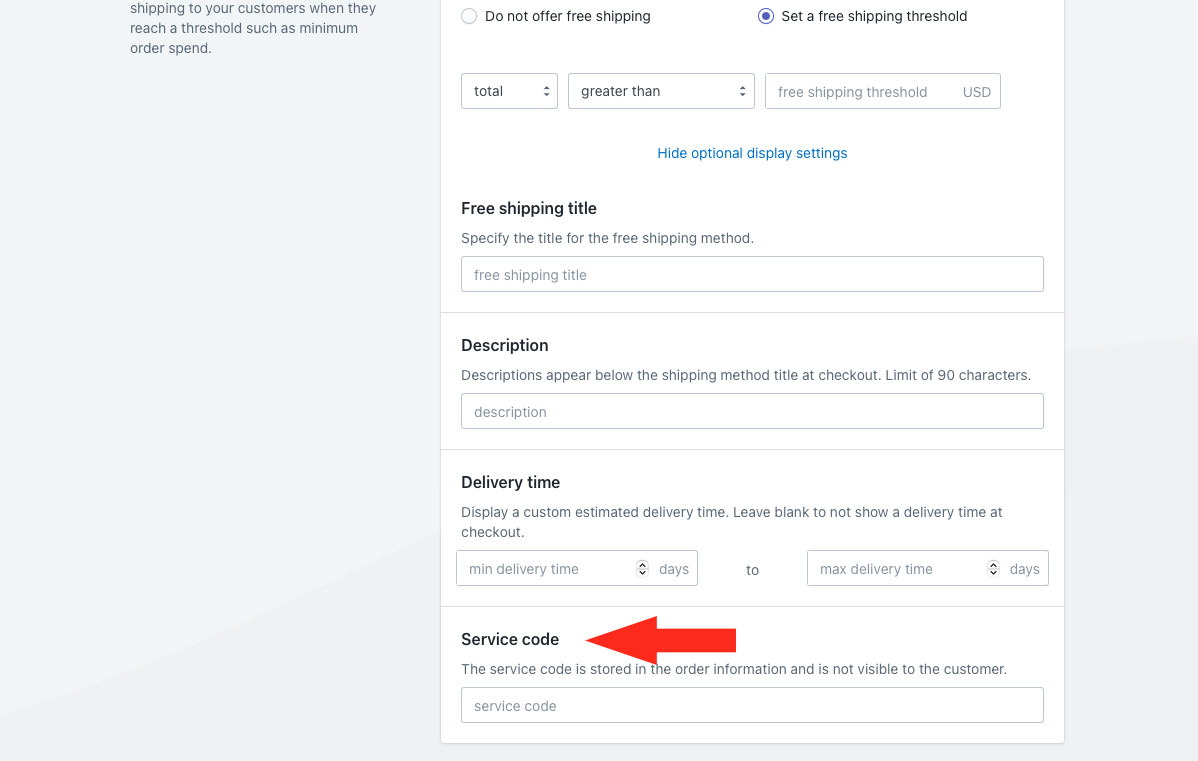
9) If desired, enter a free shipping service code. The free shipping service code will override the service code entered in General Step 6 when the free shipping threshold is reached.
Custom Shipping Blending
If you have products with custom shipping costs, those special costs can be blended with your local delivery rates.
Let’s say you have a product with a $100.00 custom shipping cost. That means you don’t delivery it locally, and it always costs you $100.00 to ship, regardless of what else is in the cart. When a customer orders one of these products along with products that do qualify for local delivery, and your same day shipping method generates a delivery cost of $15.00, the customer will be charged $115.00 for shipping at checkout.
Custom shipping prices can be added in your Intuitive Shipping product settings.
For situations like this, we recommend that you include a note in your same day delivery description (General Step 3.), such as ‘oversized items cannot be delivered same day’.
If you don’t have products with custom shipping costs, these settings are ignored regardless of how you configure these settings, and you can skip ahead to Rate Blending. Otherwise, continue to Step 1.
1) Select a custom shipping blending option.
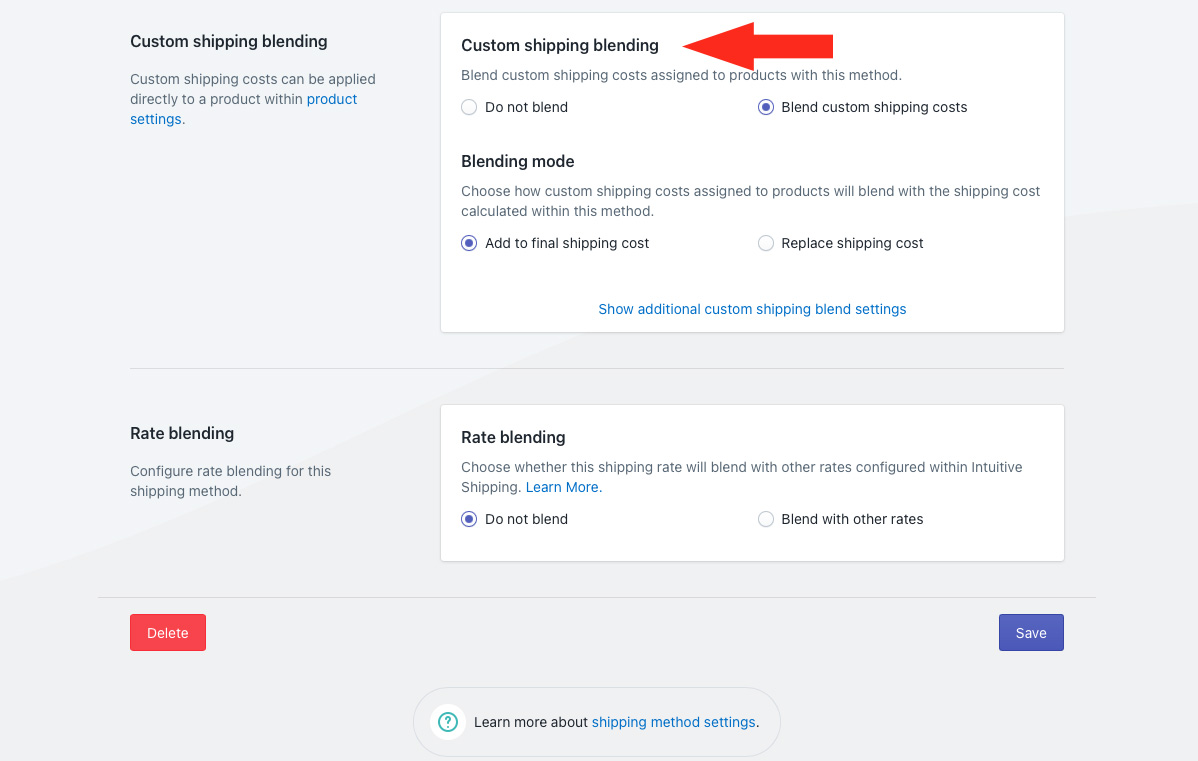
You have two (2) options to choose from:
Do not blend – custom shipping costs are ignored by this shipping method. For example, if you have a product with a $100.00 custom shipping cost, and this shipping method has a flat rate of $50.00, a customer ordering the product with custom costs will be charged $50.00 for shipping at checkout.
If you choose this setting, skip ahead to Rate Blending.
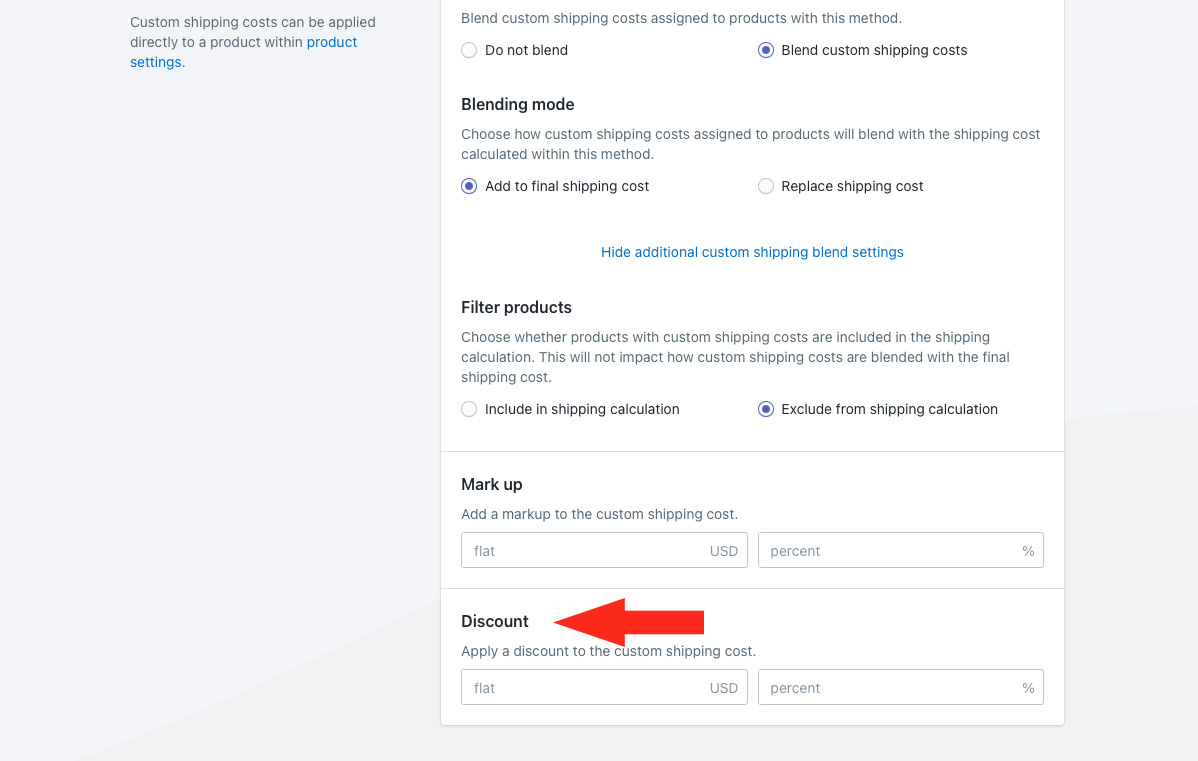
Blend custom shipping costs – custom shipping costs are blended with this shipping method based on the setting selected in Step 2. This is the default setting.
2) Select a blending mode.

You have two (2) settings to choose from:
Add to final shipping cost – custom shipping costs are added to the shipping costs calculated by the shipping method. For example, if you have a product with a custom shipping cost of $250.00 and the shipping method calculates a shipping cost of $75.00, the customer will be charged $325.00 for shipping at checkout.
Replace shipping cost – custom shipping costs replace the shipping costs calculated by the shipping method. Using the same example as above, the customer will only be charged $250.00 for shipping at checkout.
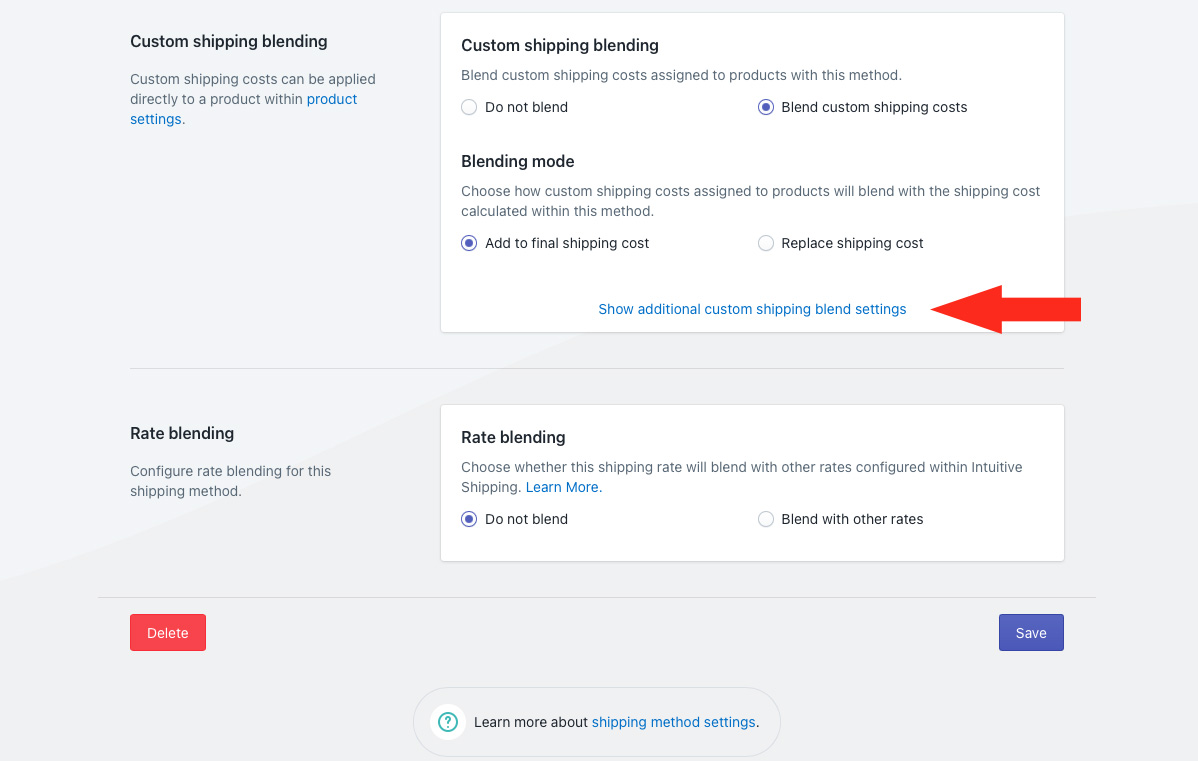
Additional custom shipping blending settings are available for a filtering, mark ups and discounts.
If you don’t need to filter or apply cost adjustments to products with custom shipping charges, skip ahead to Rate Blending. Otherwise, continue to Step 3.
3) Click Show additional custom shipping blend settings.
4) Select a filter products option.
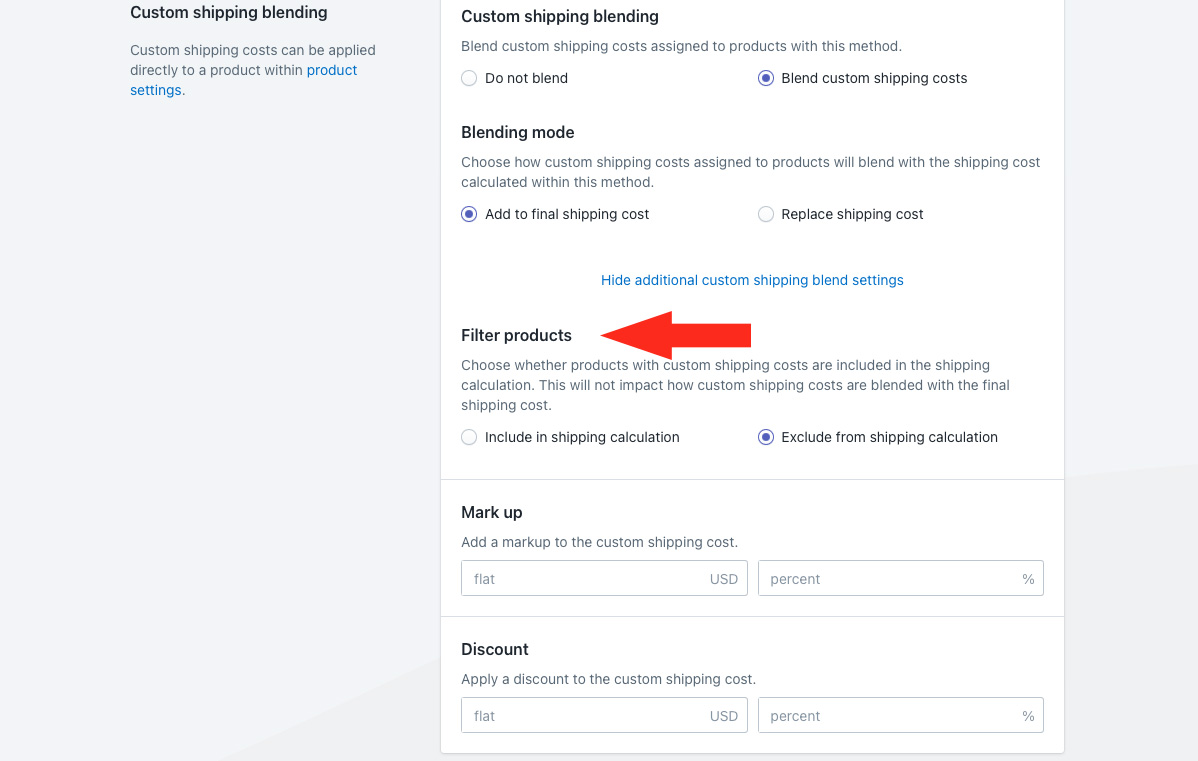
You have two (2) settings to choose from:
Include in shipping calculation – all products with custom shipping costs will be included in the rate calculation.
Exclude from shipping calculation – all products with custom shipping costs will be excluded from the rate calculation.
5) If desired, add a mark up to the custom shipping costs.
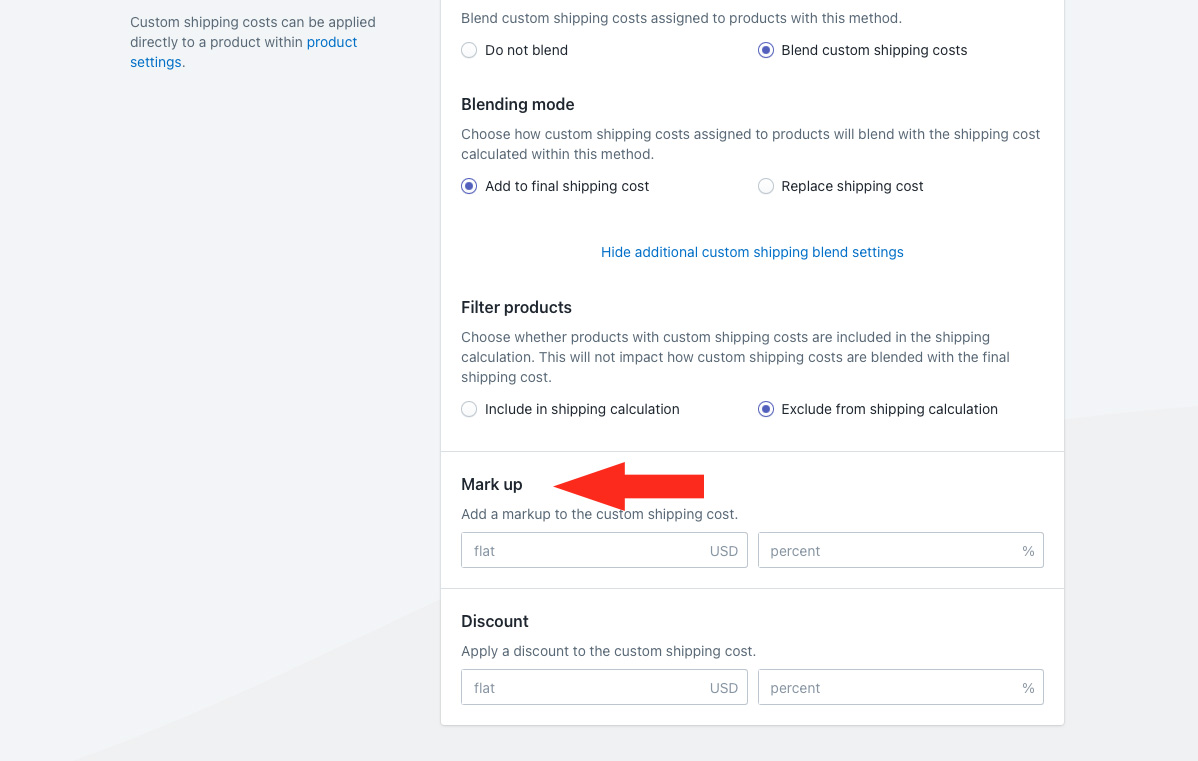
You have two (2) settings to choose from:
Flat – when there are products with custom shipping costs in the cart, this amount will be added to their combined custom shipping costs. The adjusted custom shipping costs will then be blended with the final local delivery cost depending on the Blending mode settings in Step 2.
Percentage – when there are products with custom shipping costs in the cart, this percentage of their combined shipping costs will be added to that combined cost. The adjusted custom shipping costs will be blended with the final local delivery cost pending on the Blending mode settings in Step 2.
For example, if you have 2 products with custom shipping costs of $50.00 and $30.00 respectively, and you add a 10% mark up, the custom shipping cost will be adjusted to $88.00, then blended with the final rate from this shipping method.
6) If desired, add a discount to the custom shipping costs.
You have two (2) settings to choose from:
Flat – when there are products with custom shipping costs in the cart, this amount will be subtracted from their combined custom shipping costs. The adjusted custom shipping costs will then be blended with the final local delivery cost depending on the Blending mode settings in Step 2.
Percentage – when there are products with custom shipping costs in the cart, this percentage of their combined shipping costs will be subtracted from that combined cost. The adjusted custom shipping costs will be blended with the final local delivery cost depending on the Blending mode settings in Step 2.
For example, if you have 2 products with custom shipping costs of $50.00 and $30.00 respectively, and you add a 10% discount, the custom shipping cost will be adjusted to $72.00, then blended with the final rate from this shipping method.
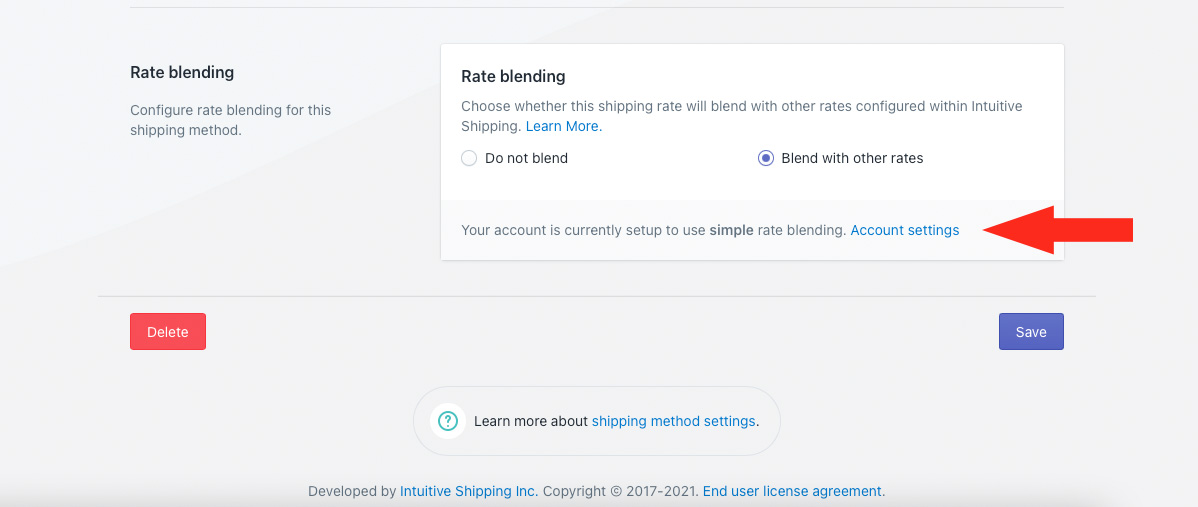
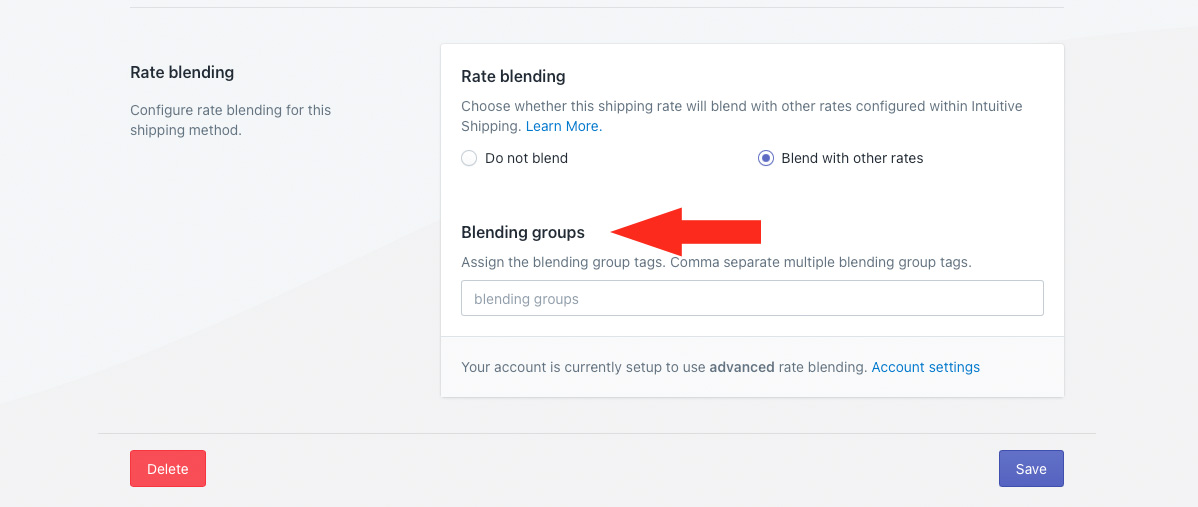
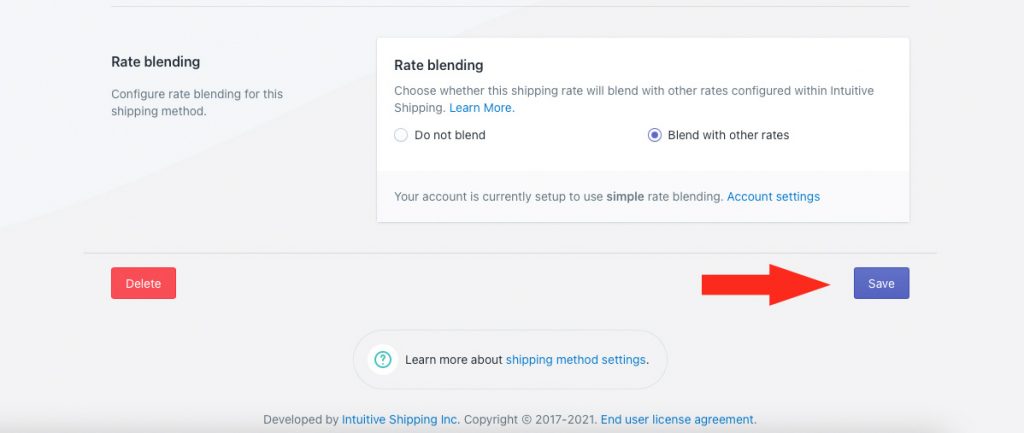
Rate Blending
If you have multiple Scenarios – perhaps you have different local delivery rates depending on the product – you can decide if those rates should be blended together or not.
For example, if one product type has a flat rate local delivery cost of $10.00 and another product type has a per km cost of $2.50 per km, rate blending can add those two costs together when a customer orders both product types.
If you don’t have rates that need to be blended, leave rate blending set to the default ‘Do not blend’, and skip ahead to Save Your Settings. Otherwise, continue to Step 1.
1) Select Blend with other rates.
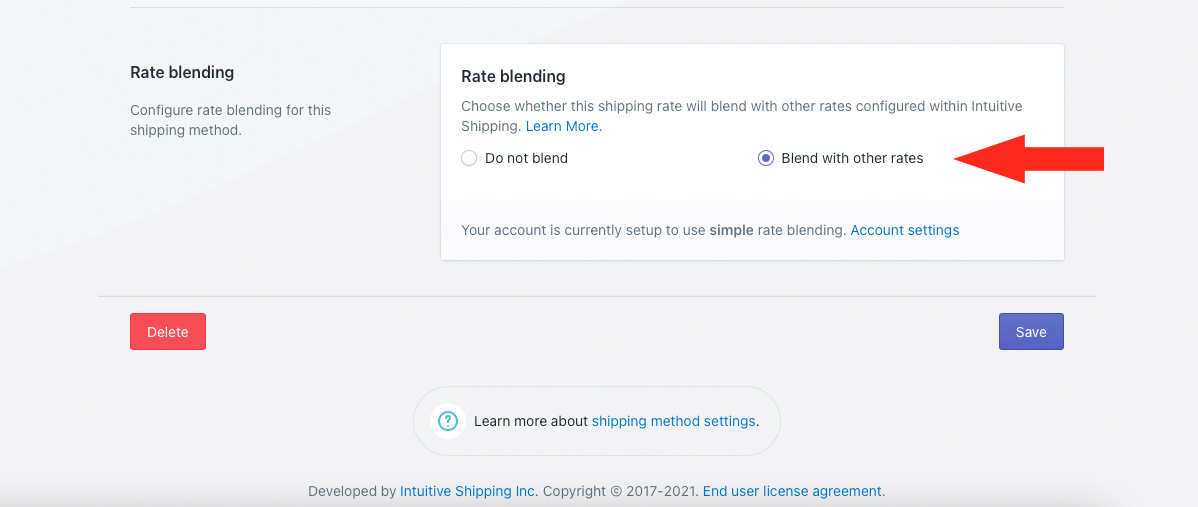
By default, Intuitive Shipping is set to simple rate blending.
If you have not adjusted your account settings for rate blending, the message ‘Your account is currently set up to use simple rate blending’ will appear at the bottom of the Rate blending section.
If you previously adjusted your account settings for advanced rate blending, the message ‘Your account is currently set up to use advanced rate blending’ will appear at the bottom of the Rate blending section, along with a setting for Blending groups.
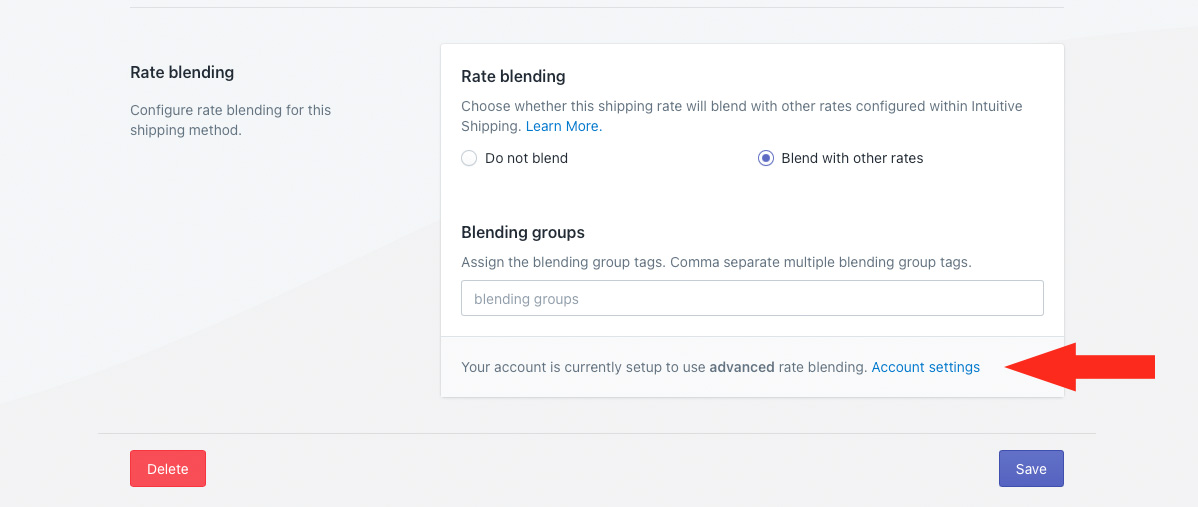
If you’re using simple blending, skip ahead to Save Your Settings. Otherwise, continue to Step 2.
2) Add a Blending group tag. All shipping methods with the same blending group tag, whether they are parcel service shipping methods with live carrier rates, custom service shipping methods with pre-determined rates, or local delivery services, will be blended together by the Blended rate.
Save Your Settings
1) Click the Save button to save your local delivery shipping method.
Check out more common setups or look at additional setups.