Customers generally want to receive their purchases as soon as reasonably possible, but sometimes the delivery time is more meaningful. Ordering gifts for family, friends and loved ones leading up to special occasions, like the Holidays or Valentine’s Day, can be stressful when the person giving isn’t sure when their gifts will be delivered.
With Intuitive Shipping, you can set up time-sensitive shipping methods that give customers the confidence that their gifts will arrive on time, and let them choose whether they want priority delivery when it’s getting down to the wire, or standard delivery if they don’t mind waiting a little longer.
How It Works
Before setting up your holiday shipping methods, you first need to understand what your preferred carriers’ limitations are when it comes to delivering around popular gift-giving seasons. You’ll want to ensure you know their cut-off dates for guaranteed delivery. Then, using Scenarios with current date conditions, shipping method descriptions, and if desired, the carrier’s own delivery estimates, you can give customers the confidence their order will get to their special someone on time.
For this example, we’re creating three (3) new Scenarios with current date conditions. The first Scenario will include an expedited shipping method, such as ‘Priority Overnight’, that offers delivery in time for the holidays. The second will include a standard shipping method, such as ‘Ground’, that also offers delivery ahead of the holidays. The third will include the same standard shipping method used in the second Scenario, except with delivery after the holidays.
After setting up the new Scenarios, you’ll need to update your existing non-holiday Scenario by adding current date conditions, then modify the descriptions for all shipping methods that delivery after the holidays. While customers may be disappointed they’ve missed a cut-off date, they’ll appreciate the transparency rather than being mislead or left to wonder.
Before completing this setup: contact your carrier’s account rep or customer service team, or visit their website to find out when their cut-off dates take effect for each service level you wish to offer for holiday deliveries.
Create An Expedited Holiday Scenario
This Scenario will allow customers to choose an expedited shipping method that guarantees delivery before the holidays. For this example, we’re using FedEx Priority Overnight as our expedited service.
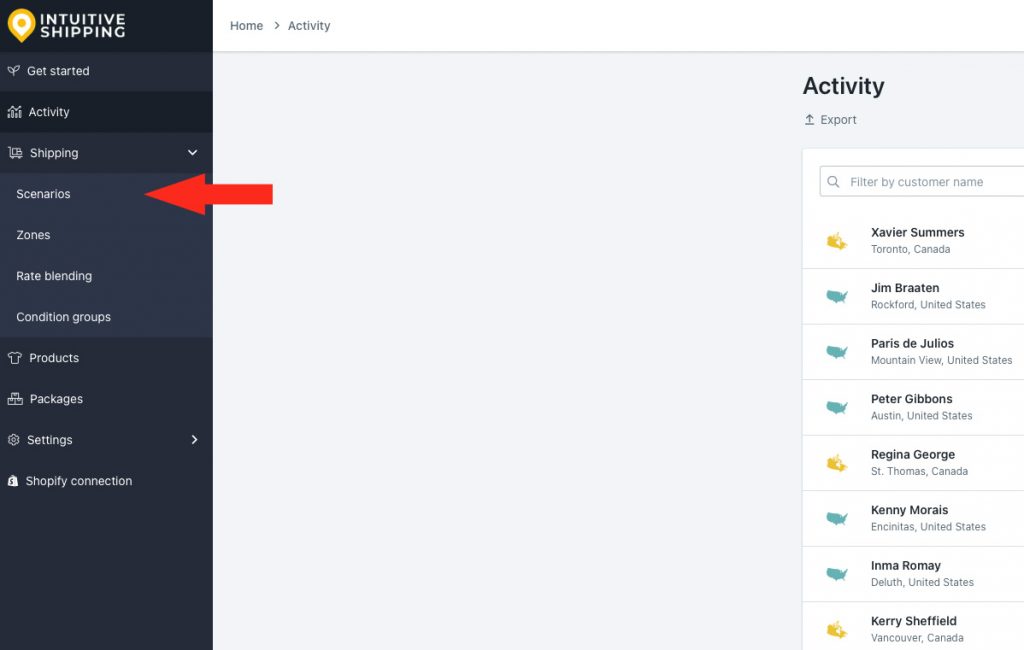
1) Click Shipping on the sidebar menu, then select Scenarios from the drop-down list.
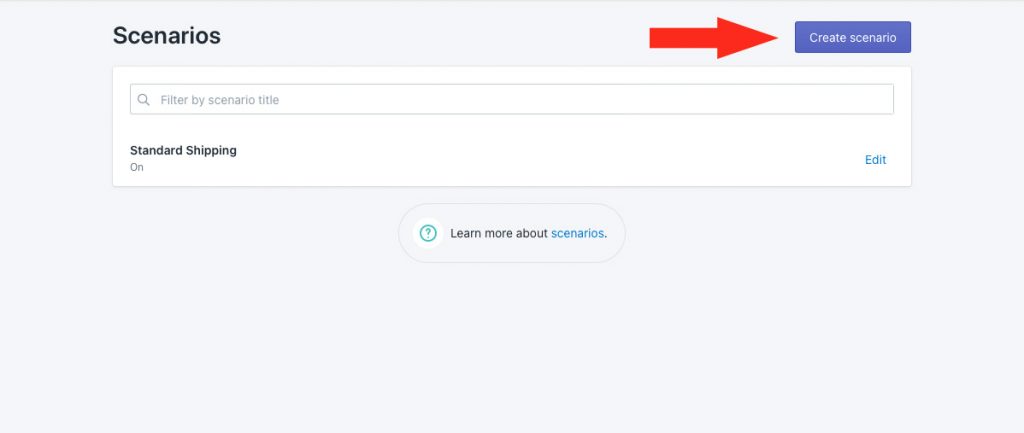
2) Click the Create scenario button.
General Settings
1) Enter a Scenario title like ‘Expedited Holiday Shipping’.
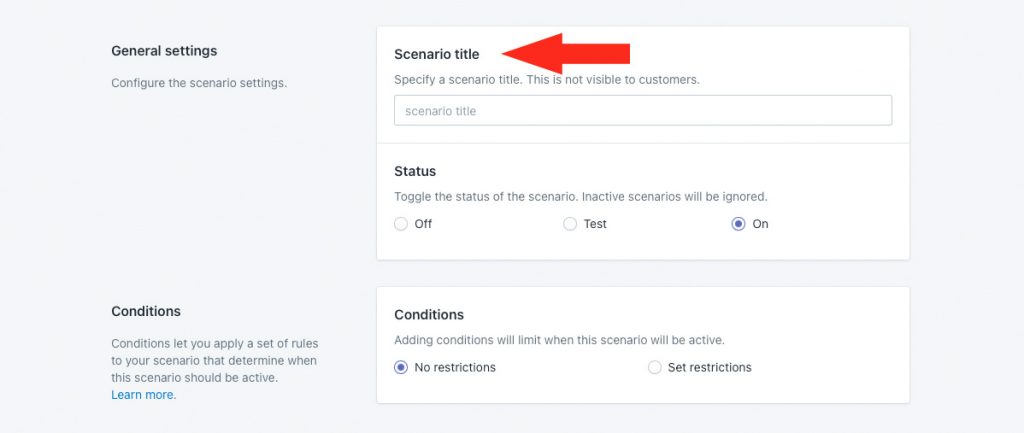
2) Leave the Status set to On.
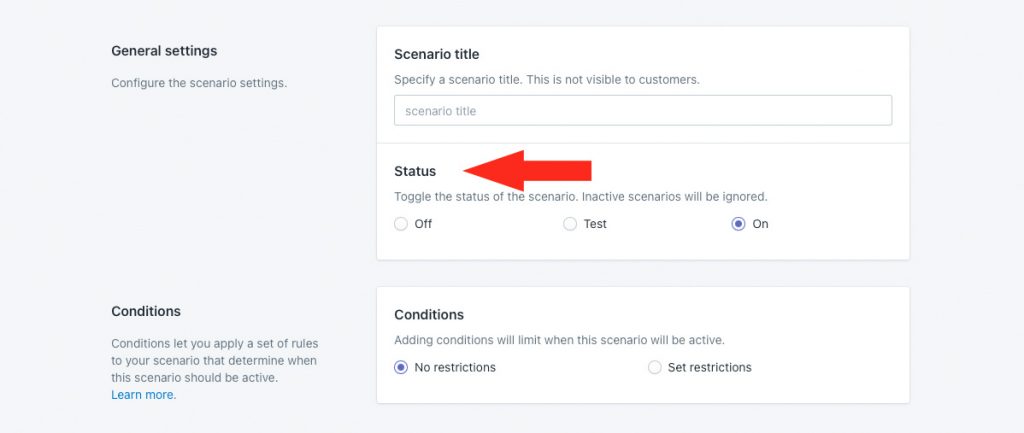
Conditions
1) Select Set restrictions.
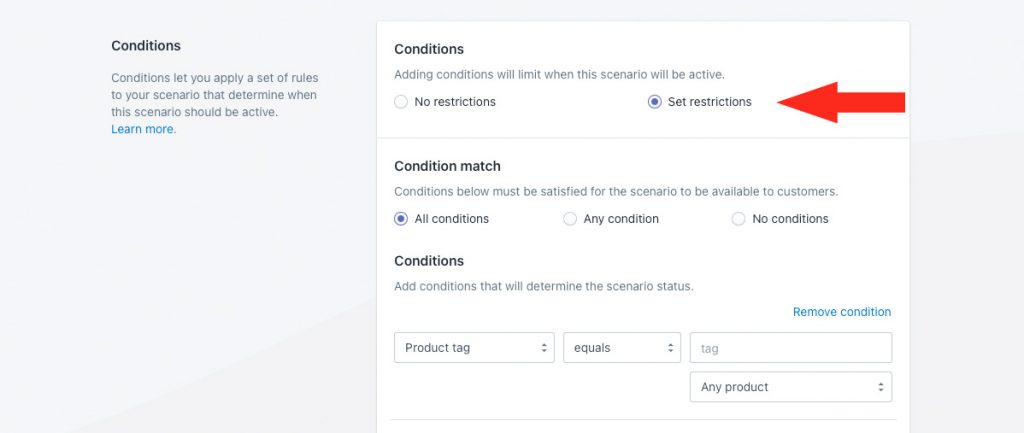
2) Leave Condition match set to ‘All conditions’.
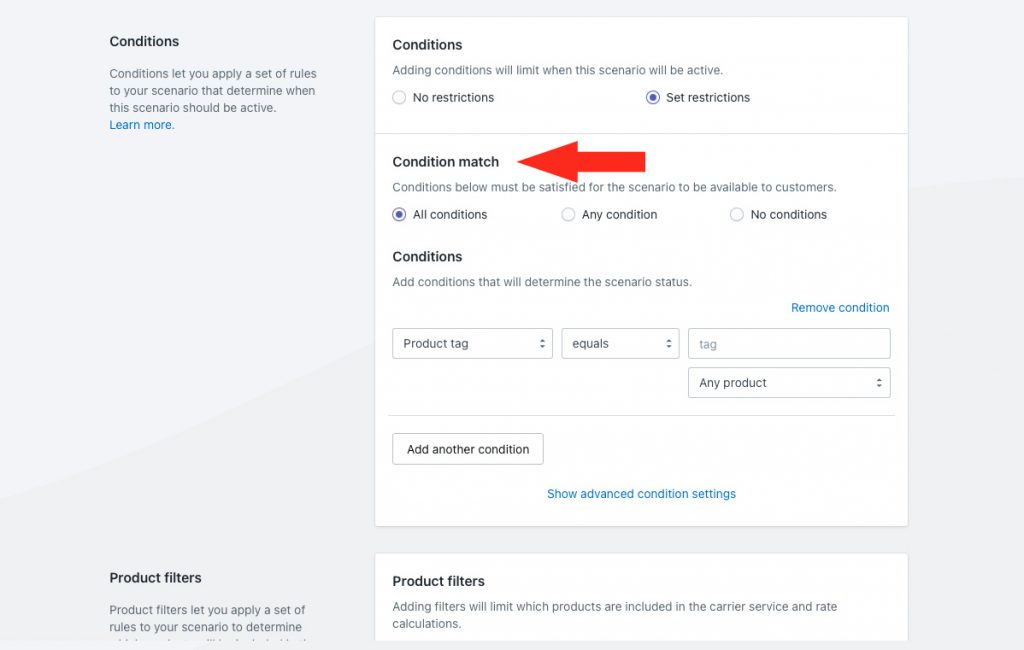
3) Select ‘Current date’ as the condition type.
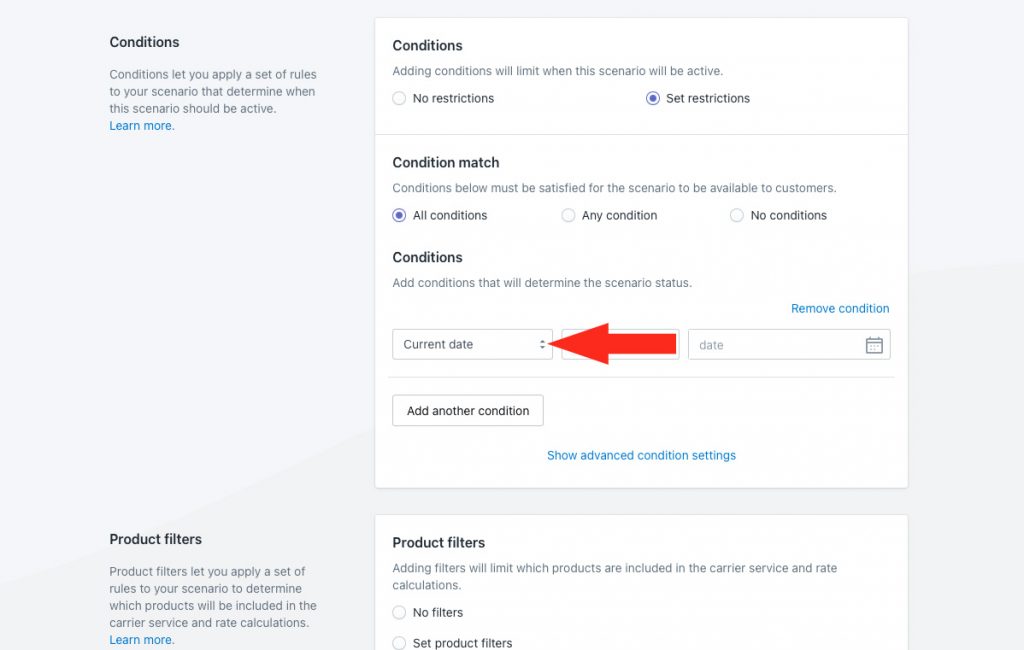
4) Change the condition logic to ‘less than or equals’.
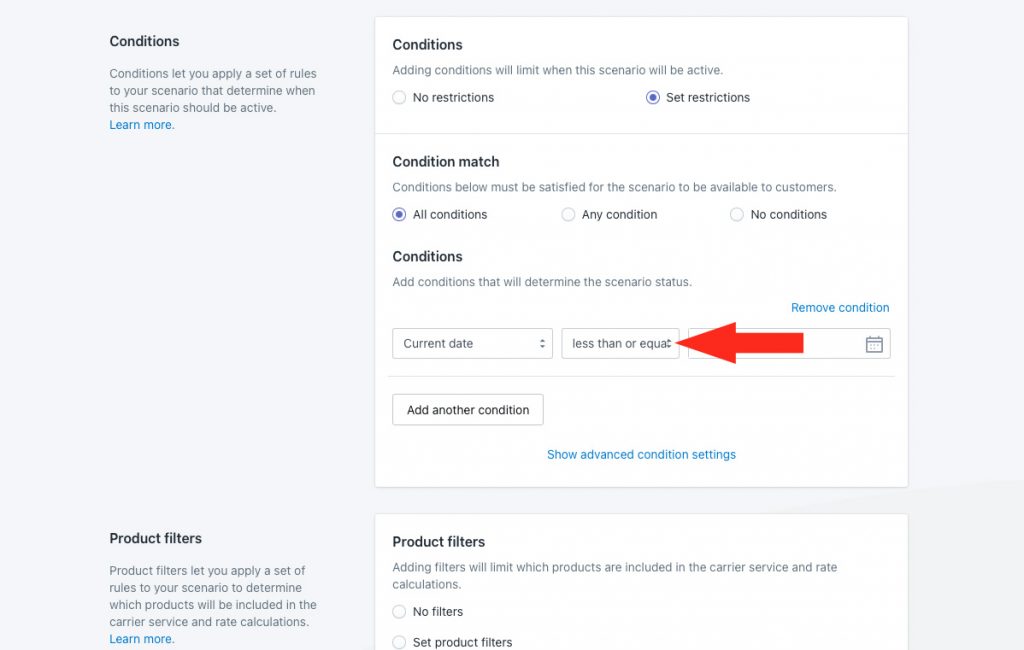
5) Select the cut-off date for priority shipping in the country or region you’re shipping to as the condition value. For this example, we’re selecting December 22nd, 2022.
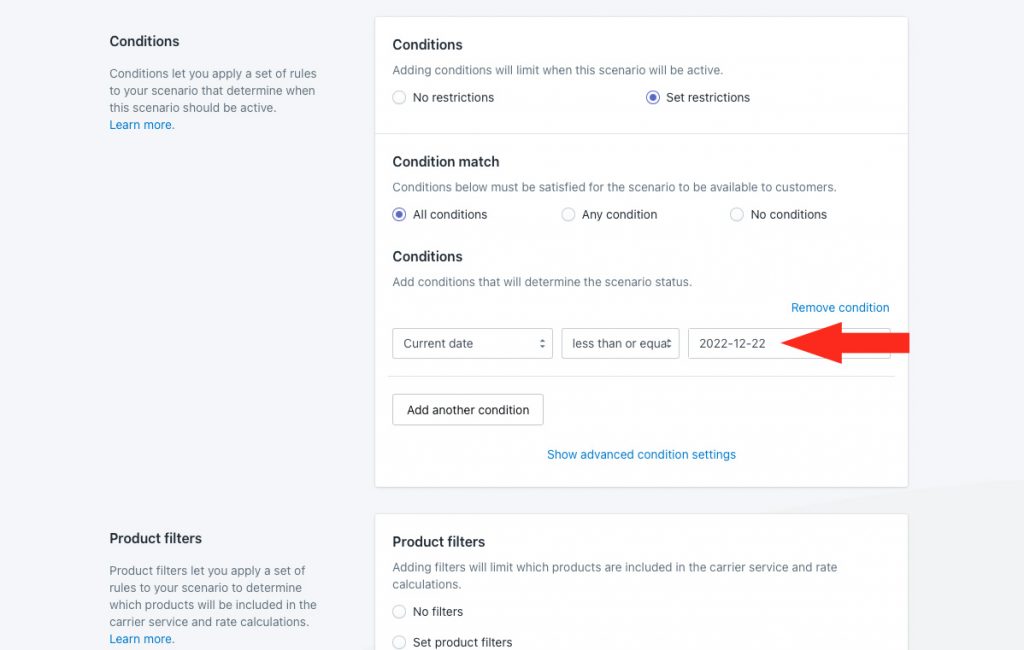
That means, customers placing their orders on or before December 22nd, 2022 will see the priority shipping method assigned to this Scenario. This is based on the ‘last day to ship’ date provided by the carrier.
Product Filters
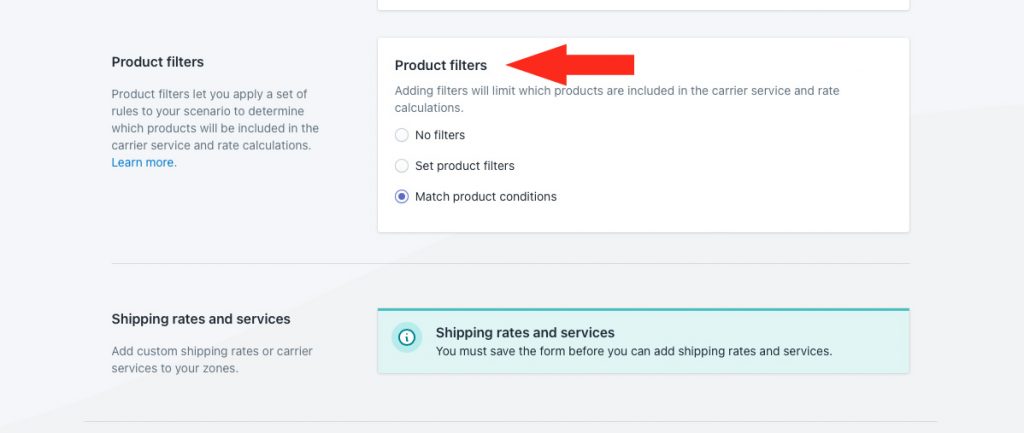
1) Leave Product filters to set to ‘Match product conditions’.
Because there are no product conditions in this Scenario, this setting is not applicable and can be left as-is.
Save Your Settings
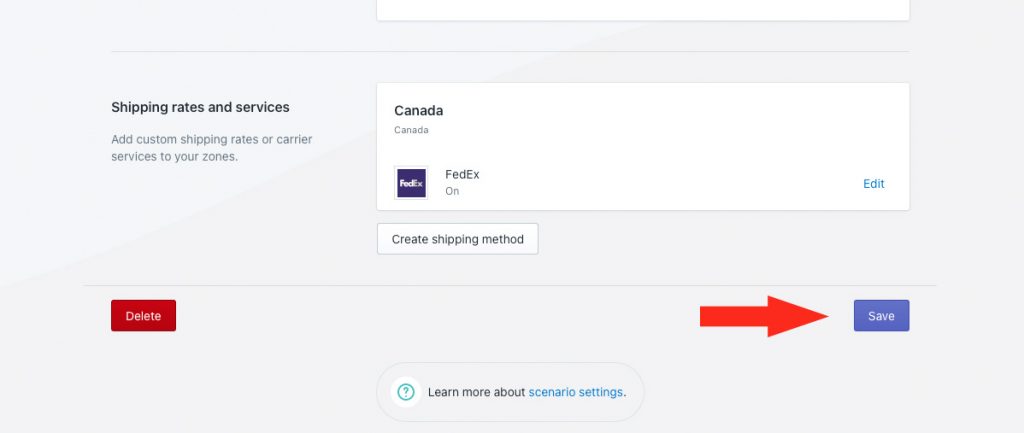
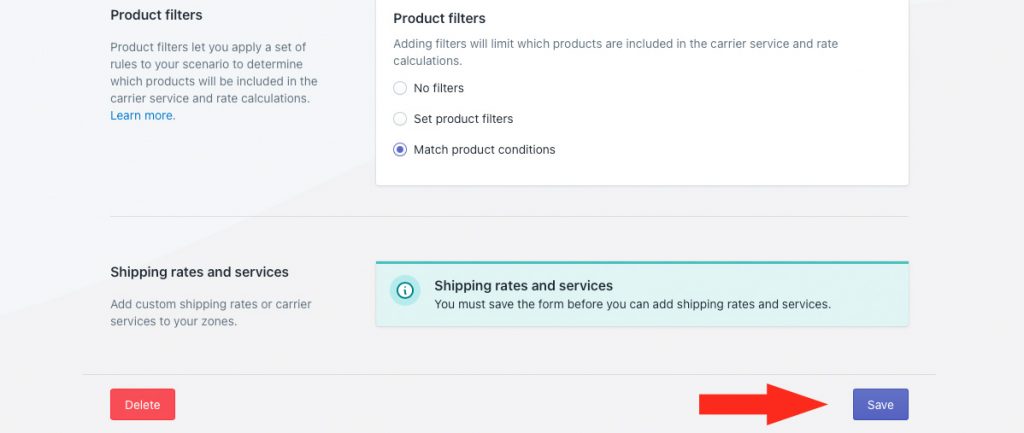
1) Click the Save button to save your expedited holiday Scenario.
Select A Parcel Service
1) Click the downward arrow beside Parcel services to display a list of live rate carriers.
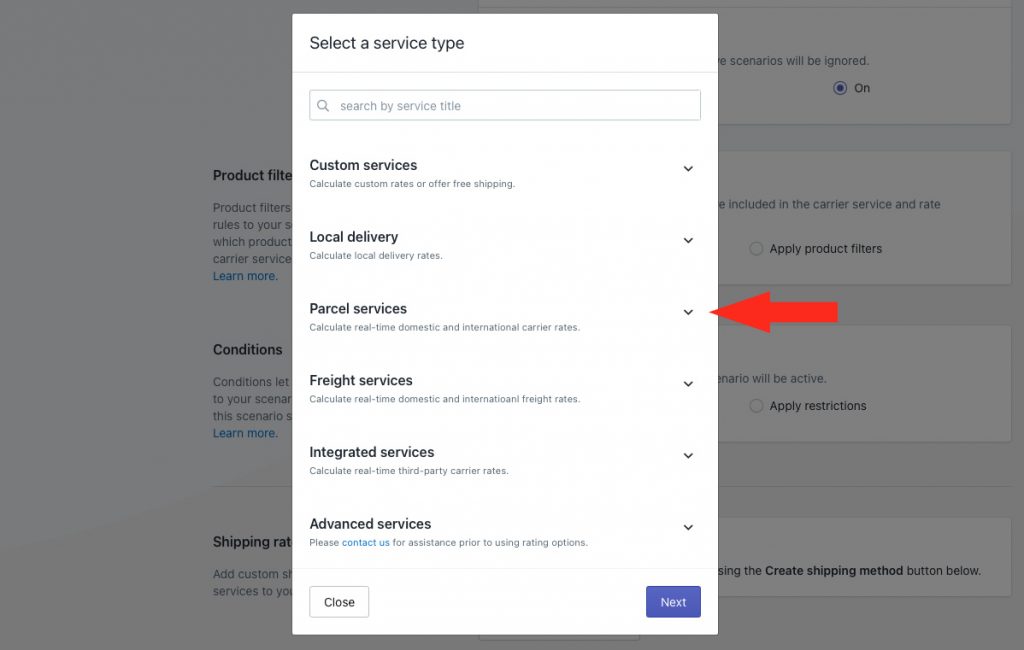
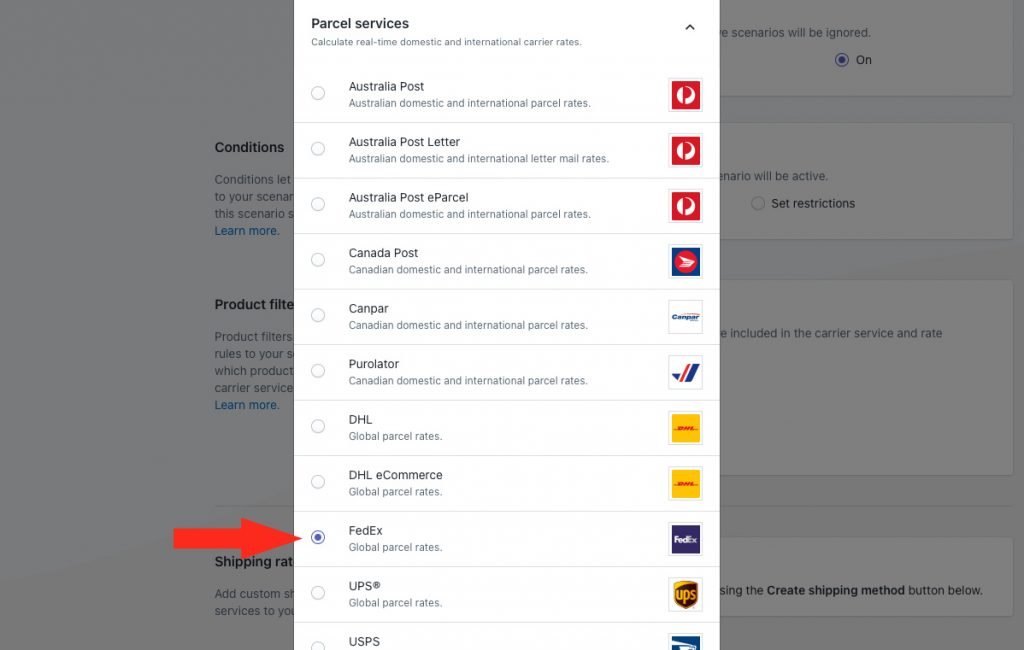
2) Select your preferred carrier from the list. For this example, we’re selecting FedEx.
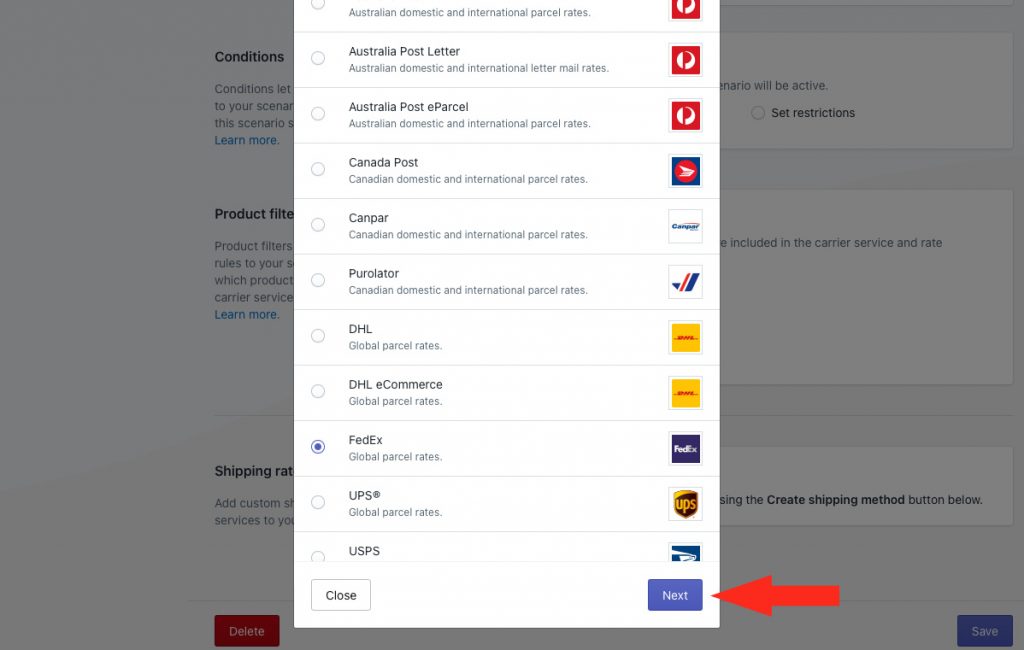
3) Click the Next button.
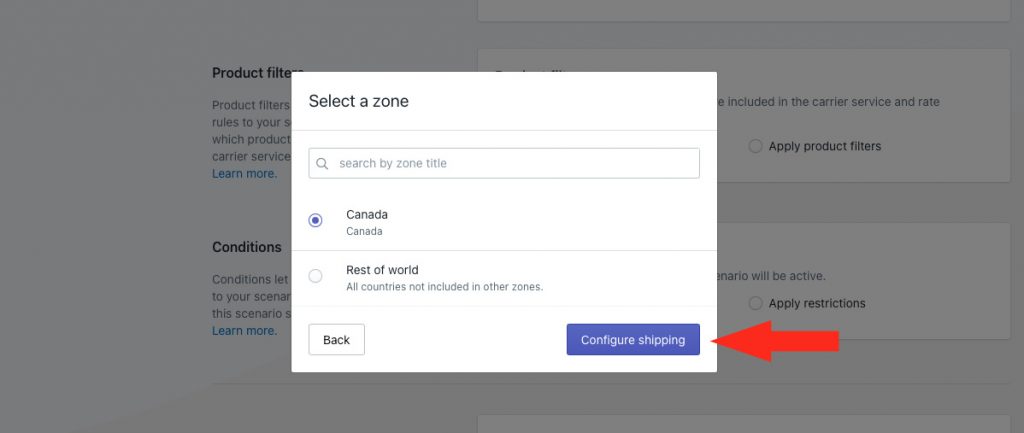
4) Select a Zone.
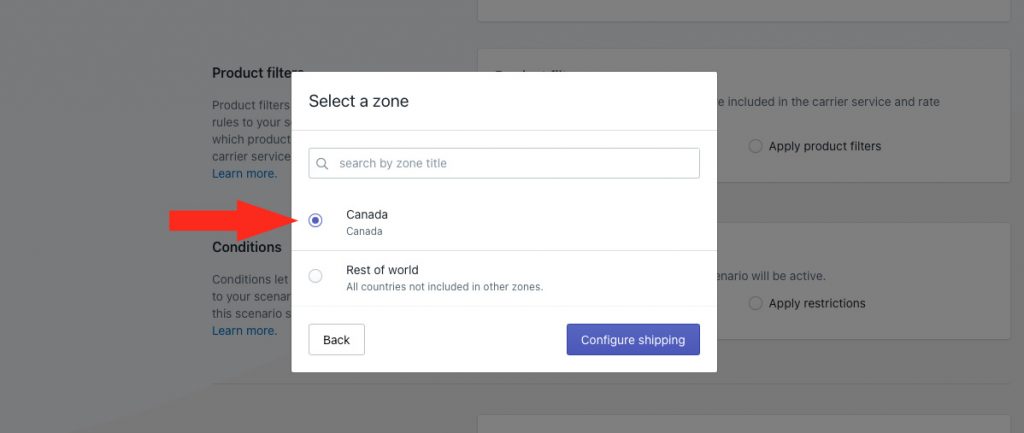
5) Click the Configure shipping button.
General
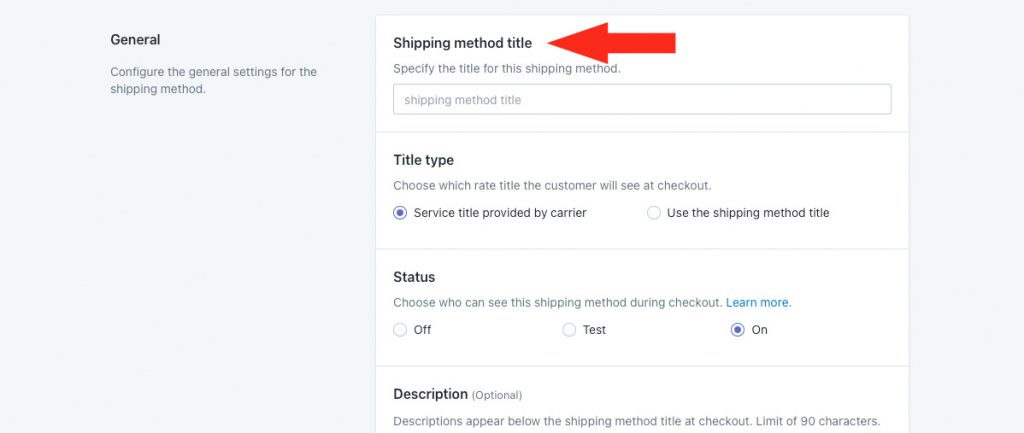
1) Enter a shipping method title, like ‘FedEx Holiday Priority’. This title will not be displayed to customers (see Step 2).
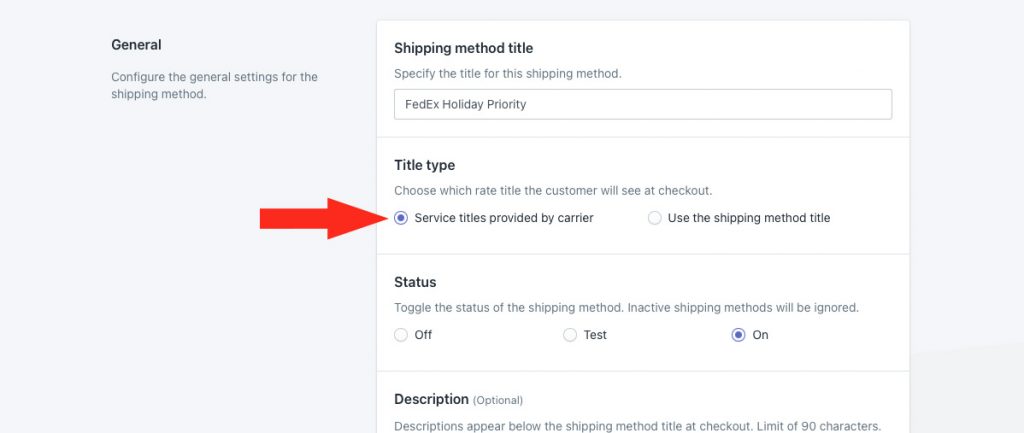
2) Leave the title type set to ‘Service title provided by carrier’. The service title provided by the carrier in the rate calculation, such as ‘FedEx Priority Overnight’, will be displayed as the shipping method title at checkout.
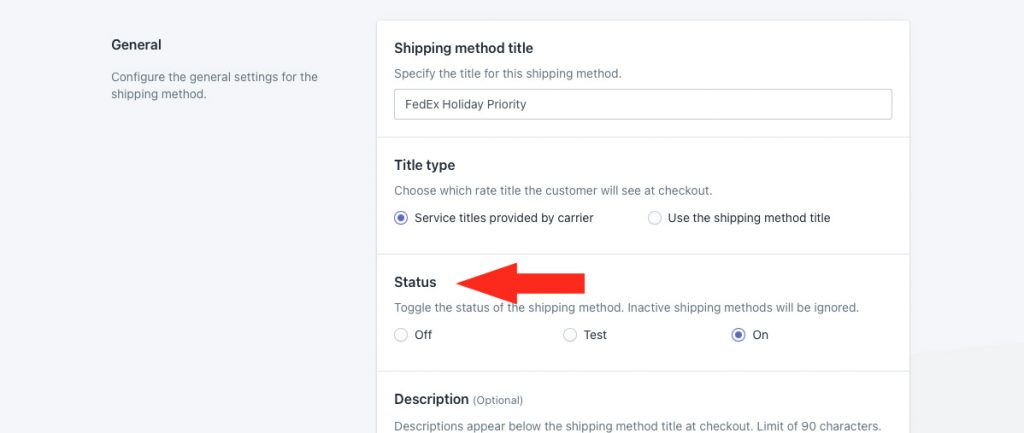
3) Leave the status set to On. If you want to test it first before making it public, set it to Test.
4) Enter a description for your shipping method, such as ‘Get it for Christmas!’ We recommend limiting your description to 90 characters or less to ensure it displays properly on the checkout page.
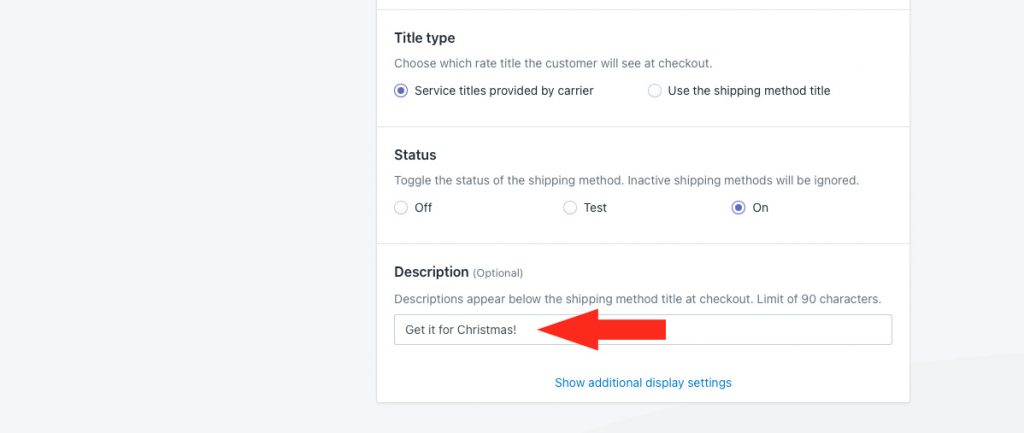
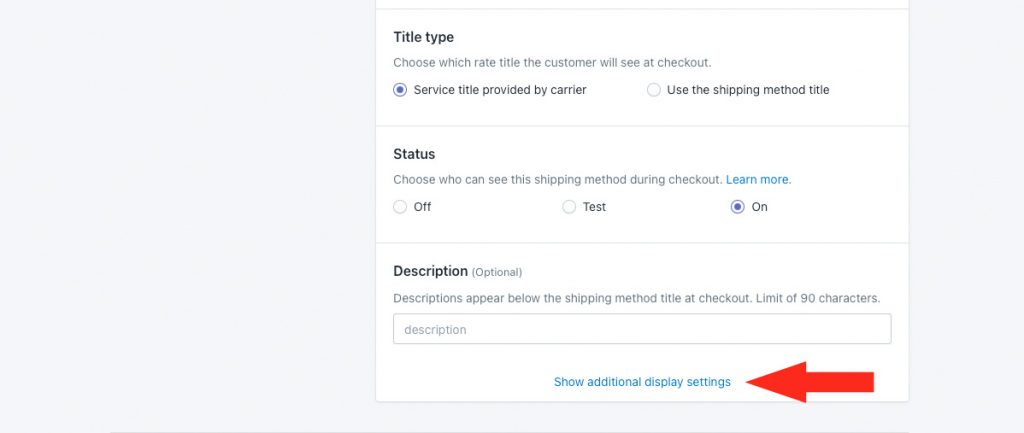
Additional display settings are available for delivery times, order processing times and service codes. If you do not need to adjust these settings, skip ahead to Packages. Otherwise, continue to Step 5.
5) If desired, click Show additional display settings, then configure delivery time, order processing and service code settings as needed.
6) Choose whether or not you wish to have a delivery time displayed at checkout along with the rate. Carrier delivery times are shown at checkout by default.
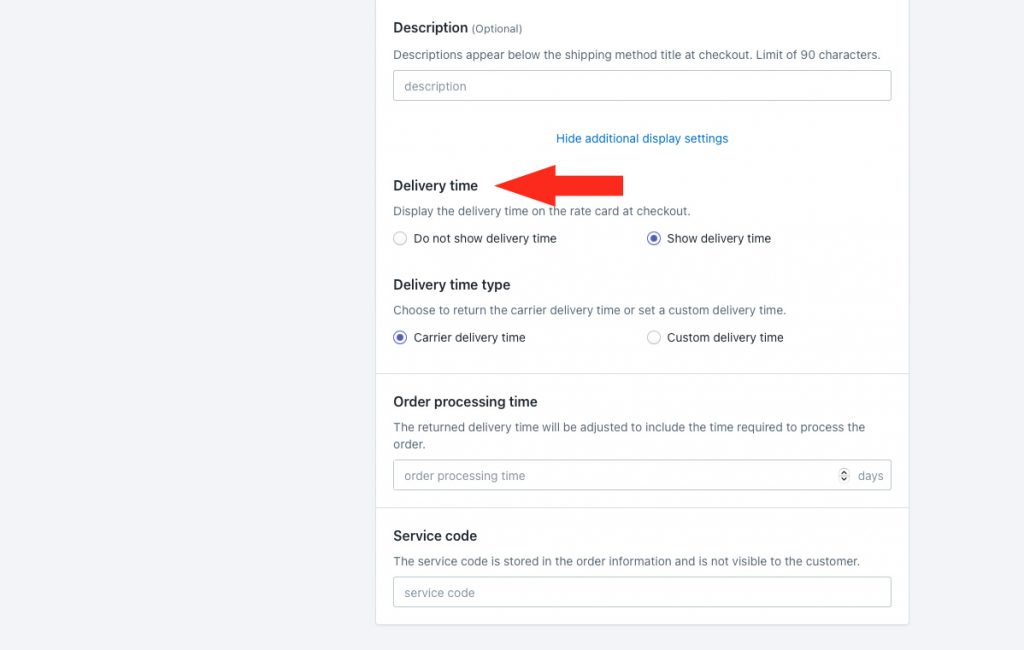
If you selected ‘Do not show delivery time’, skip ahead to Step 9. Otherwise, continue to Step 7.
7) If you’re planning to show delivery times, choose the type of delivery time you wish to have displayed at checkout.
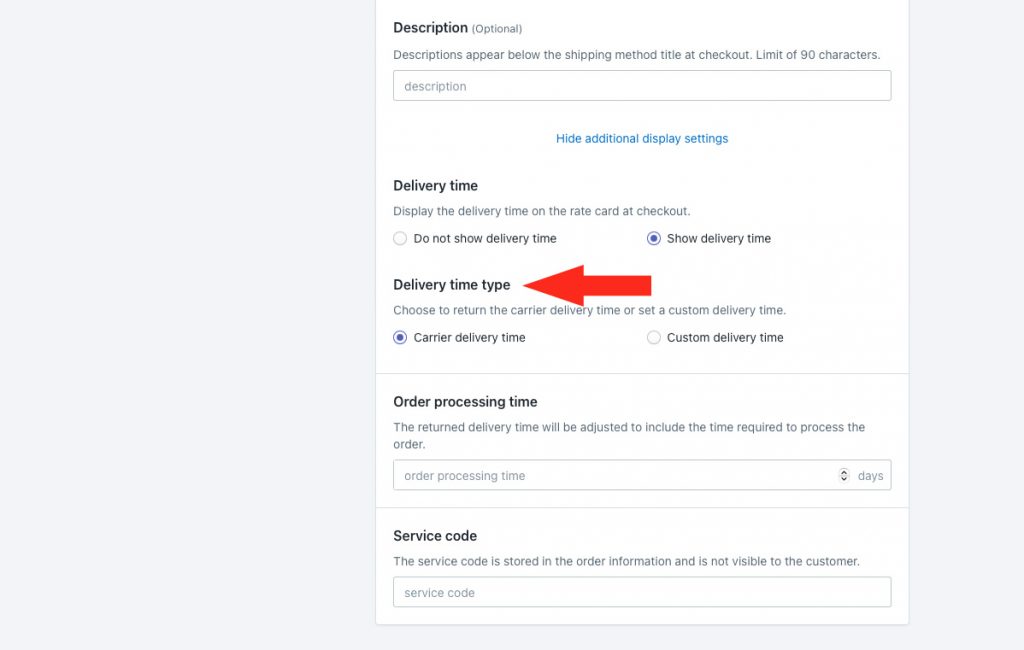
You have two (2) settings to choose from:
Carrier delivery time – delivery times displayed at checkout are estimates provided directly by the carrier along with the live rate calculation.
Custom delivery time – delivery times displayed at checkout are the values entered by you in Step 8. When you select this option, additional fields will appear on the screen.
8) If you selected Custom delivery time in Step 7, enter a minimum and, if desired, a maximum number of days.
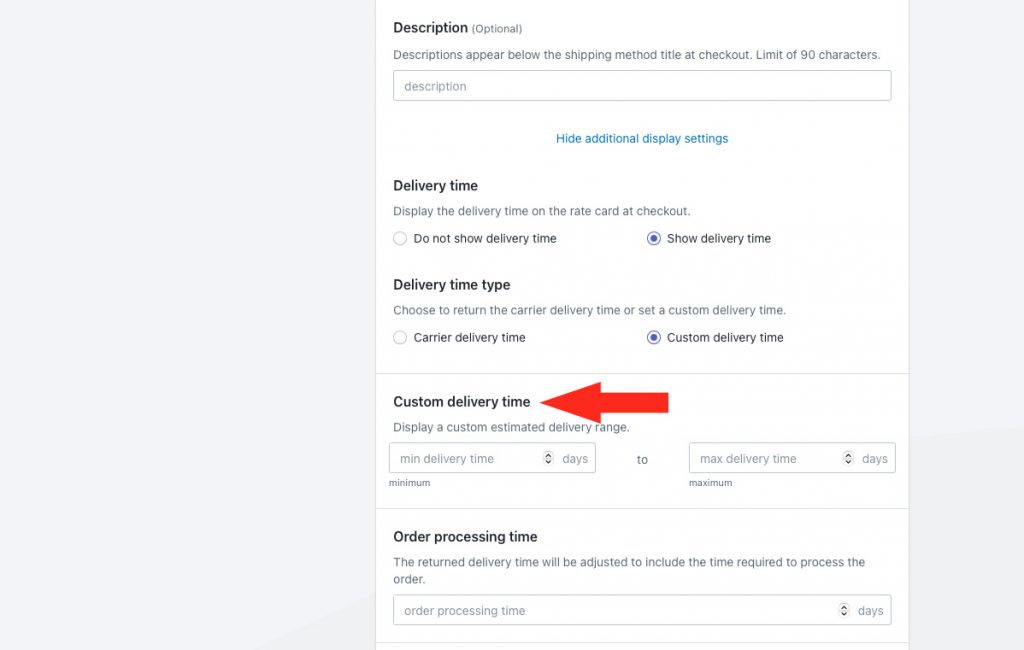
Min delivery time – enter the lower limit of your delivery time range.
Max delivery time – enter the upper limit of your delivery time range. When combined with the min setting, delivery times will be displayed like ‘1 to 2 business days’ at checkout.
For example, if you prefer to have delivery time displayed as ‘1 business day’ instead of ‘1 to 2 business days’, enter ‘1’ in either minimum or maximum and leave the other field blank.
9) If desired, add order processing time, in days. This is useful when you sell products that cannot be shipped out the same day the order is placed.
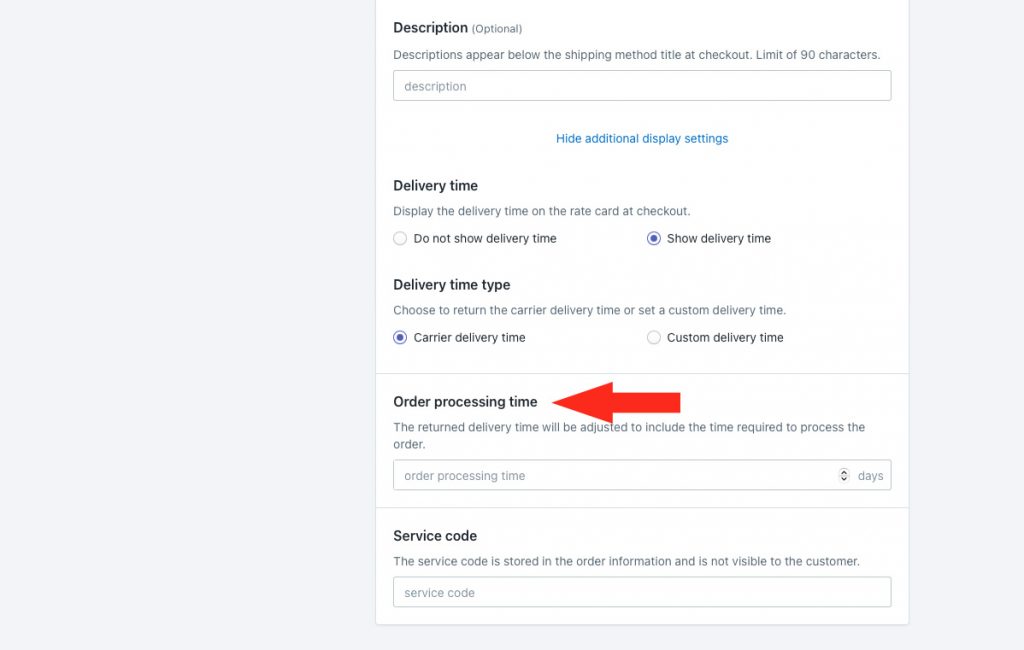
For example, if you enter 2 days for order processing and the carrier returns an estimated delivery time of 1 day, Intuitive Shipping will display the delivery time as ‘3 business days’ at checkout.
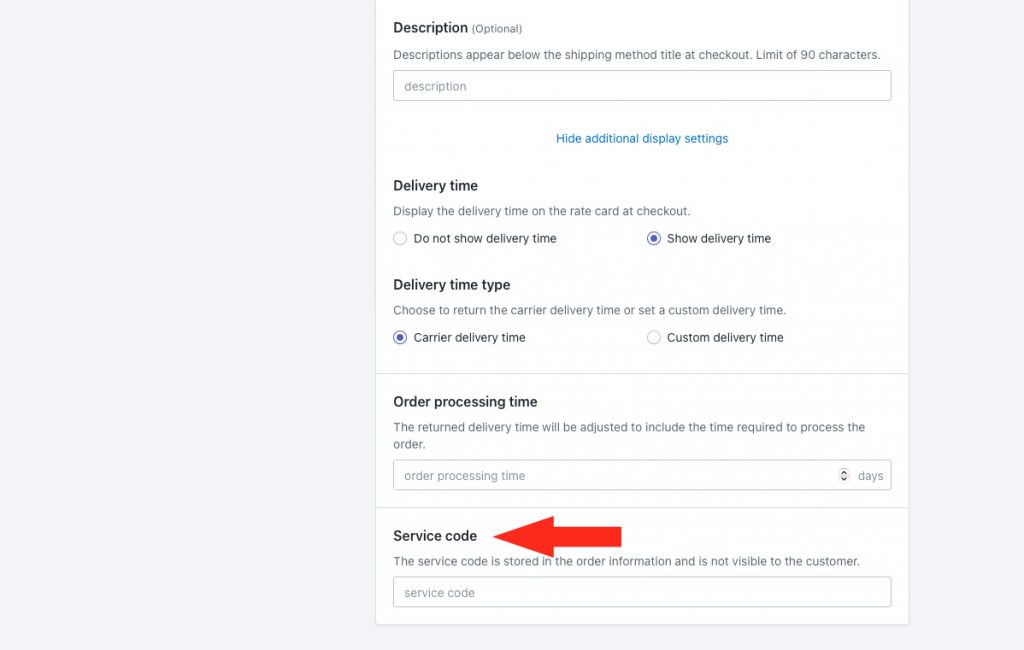
10) If desired, enter a custom service code, such as ‘EXP’. The service code is pushed to your fulfillment service (if applicable) when a customer successfully completes their checkout.
Entering a custom service code will override the service codes provided by the carrier. If you want to use the carrier-provided service codes, leave this setting blank.
Packages
You can determine how the customer’s order will be packaged by selecting the appropriate packing algorithm and assigning the packages you want to be used by the shipping method.
1) Select a packing algorithm.
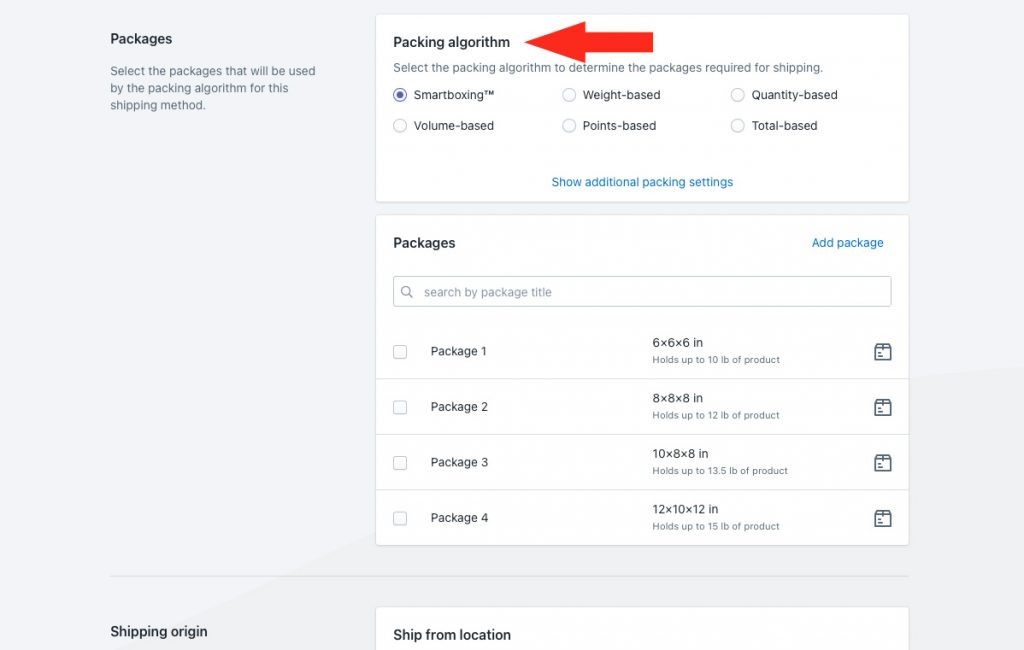
You have six (6) options to choose from:
SmartBoxing™ – Intuitive Shipping will select the best package combination based on the weight and the volume of the order.
Weight-based – Intuitive Shipping will select the best package combination based only on the weight of order.
Quantity-based – Intuitive Shipping will select the best package combination based only on the number of items on the order.
Volume-based – Intuitive Shipping will select the best package combination based only on the volume of order.
Points-based – Intuitive Shipping will select the best package combination based on a point system.
Total-based – Intuitive Shipping will select the best package combination based only on the total value of order.
Additional packing settings are available for packing methods and multiple package blending. If you do not need to adjust these settings, skip ahead to Step 3. Otherwise, continue to Step 2.
2) Click Show additional packing settings, then configure packing method and multiple package blending settings as needed.
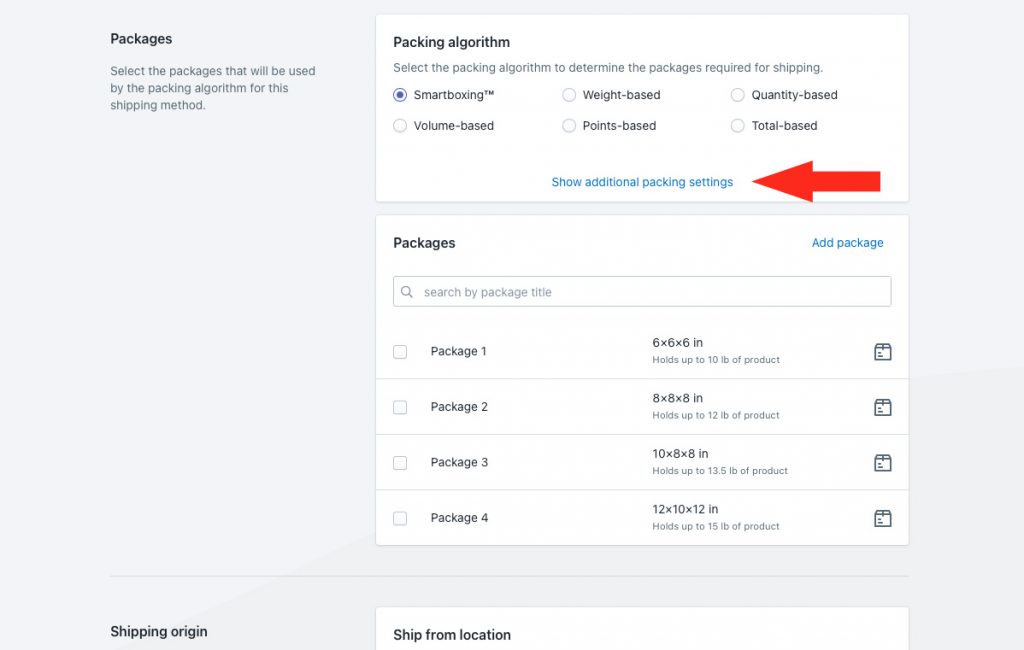
3) Select each of the packages you want to be included in the signature required parcel service shipping method.
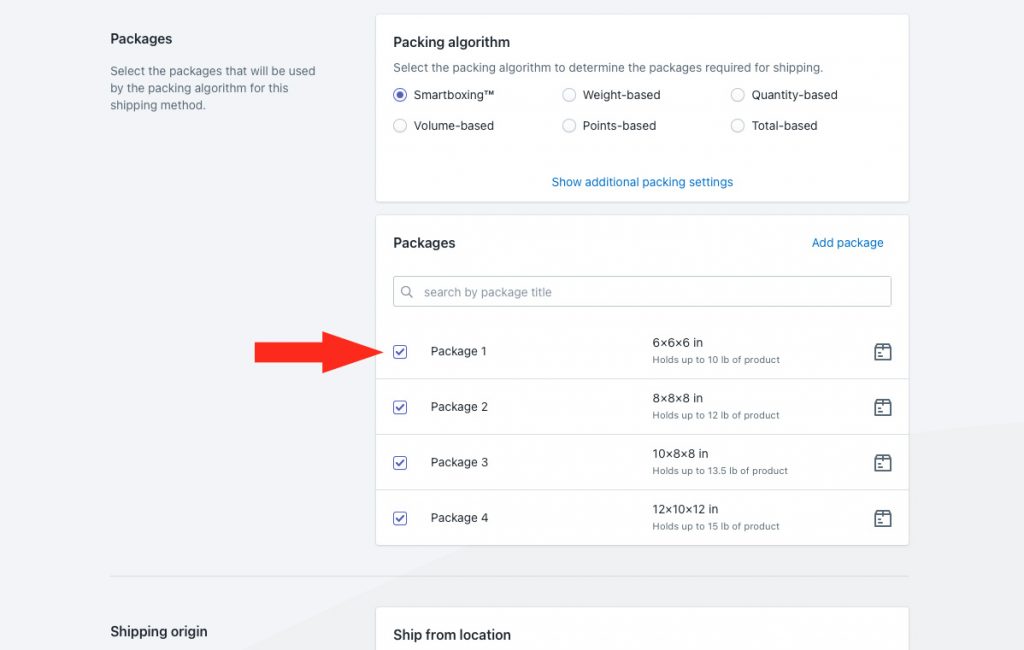
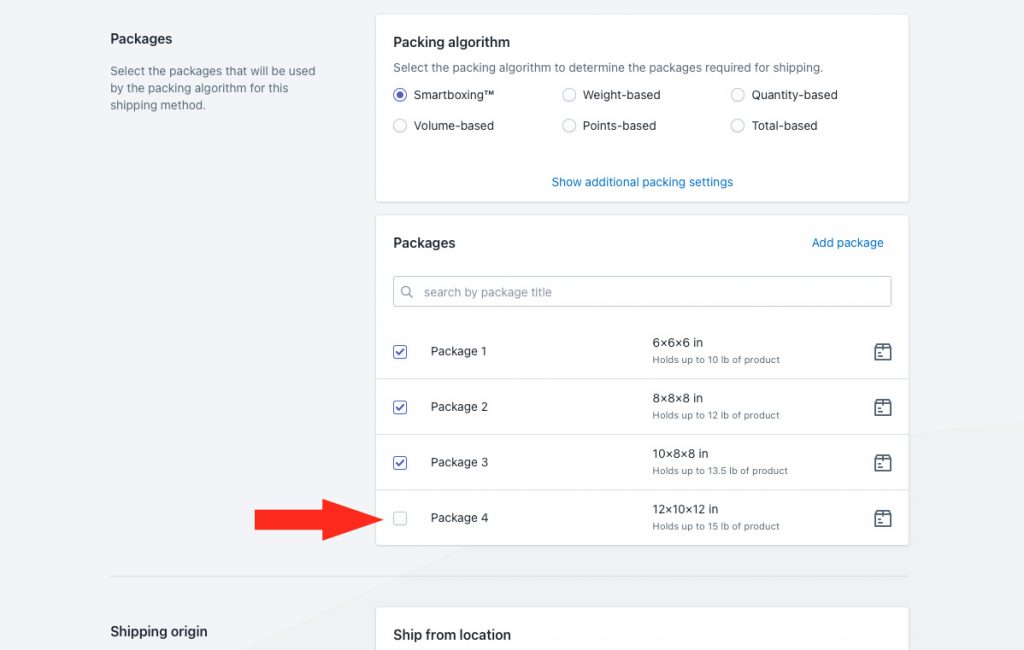
Packages not selected will be ignored by the shipping method.
Packages that have been turned off are muted. They cannot be selected or deselected, and will also be ignored by the shipping method.
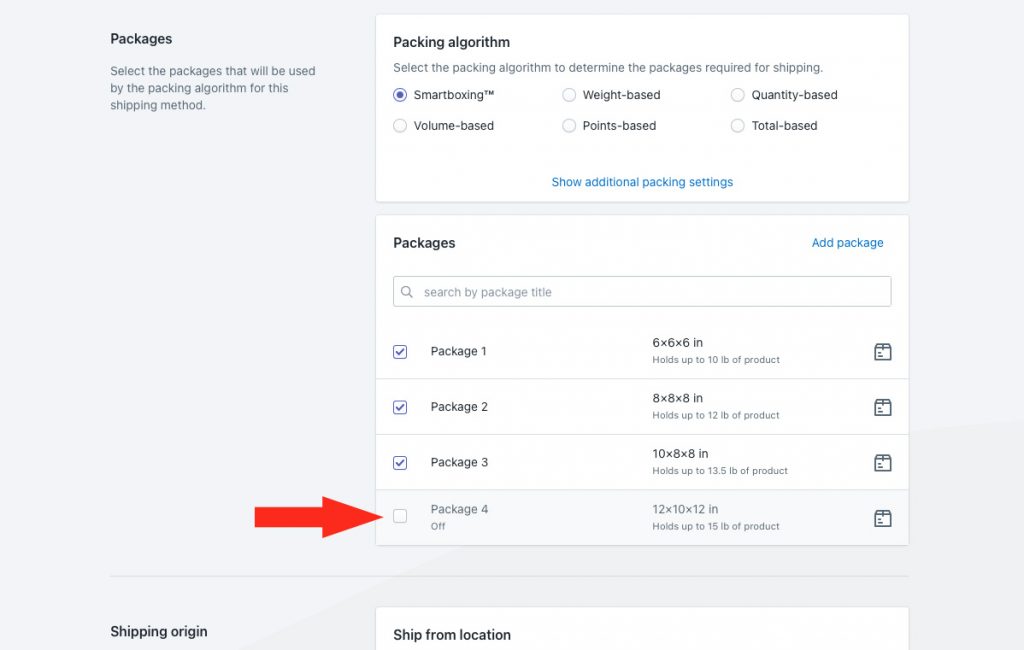
To change the On/Off status of a package, go to your main package settings after saving your shipping method.
Shipping Origin
Real-time carrier rates can be calculated using the primary location set up in Shopify, or a custom ship-from location.
1) Select the ship from location.
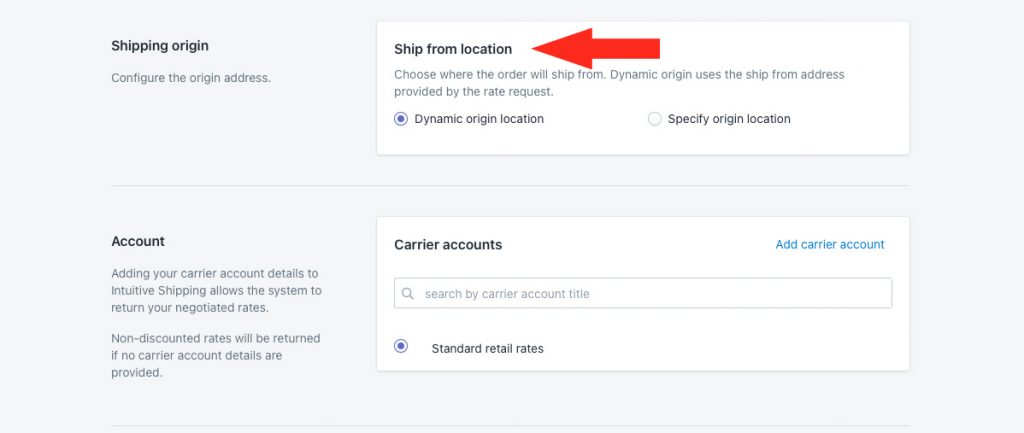
You have two (2) settings to choose from:
Dynamic origin location – live carrier rates will be calculated based on the distance between the customer’s address and your primary Shopify location address. This is the default setting.
Specify origin location – live carrier rates will be calculated based on the address specified in Step 2.
If you selected dynamic, skip ahead to Services. Otherwise, continue to Step 2.
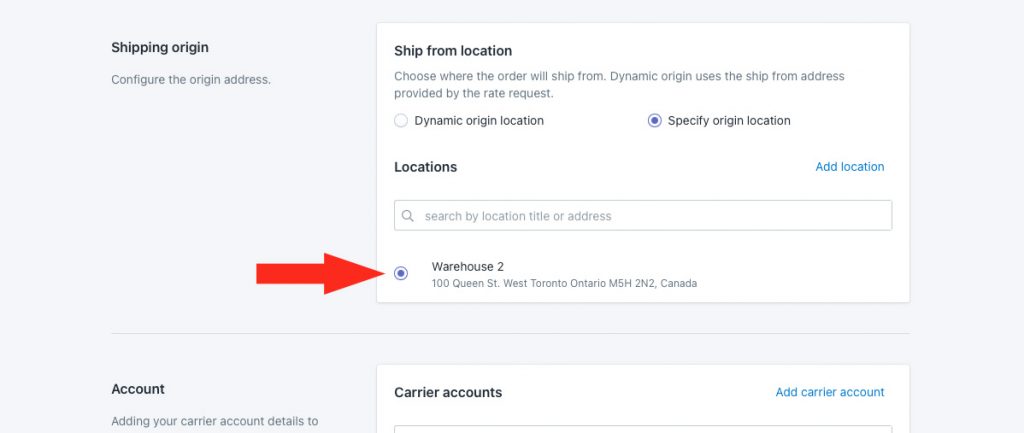
If you have already set up custom ship-from locations, they will appear as selectable options.
2) Select a location. This location will be used as the starting point for live carrier rate calculations in this shipping method. You can also add a new location.
Account
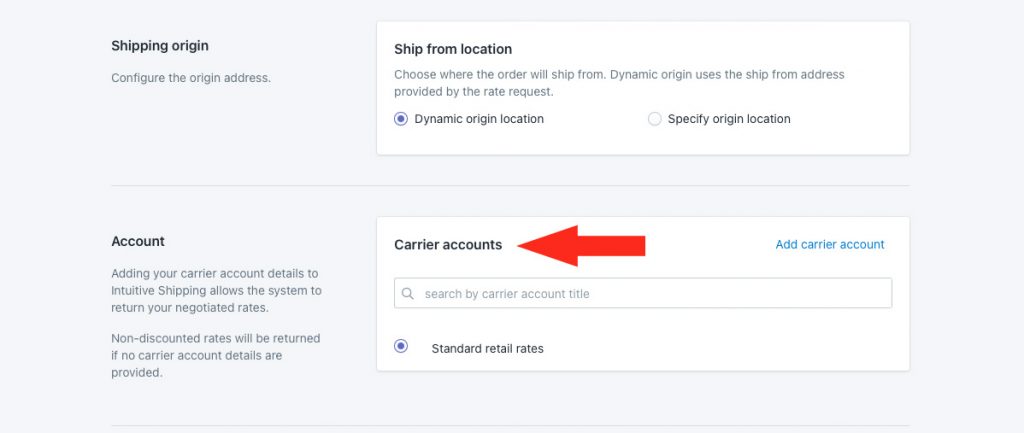
If you have an account with the carrier you selected at the beginning of this guide, you can use that account to access your discounted or negotiated rates. If you previously connected your preferred carrier account with Intuitive Shipping, it will be listed in the Carrier accounts area as a selectable option.
Most carriers offer retail rates which can be used if you don’t have an account with the carrier. If the carrier you selected at the beginning of this guide offers retail rates, a ‘Standard retail rates’ option will be displayed below Carrier accounts and selected as the default option. If the carrier does not offer retail rates, nothing will be displayed.
1) Select a carrier account or use standard retail rates, if available.
Services
1) Select the priority service with the cut-off date selected for the Scenario condition. For this example, we’re selecting FedEx Priority Overnight.
If this shipping method was assigned to a domestic zone, be sure to select domestic services. If this shipping method was assigned to an international zone, be sure to select international services.
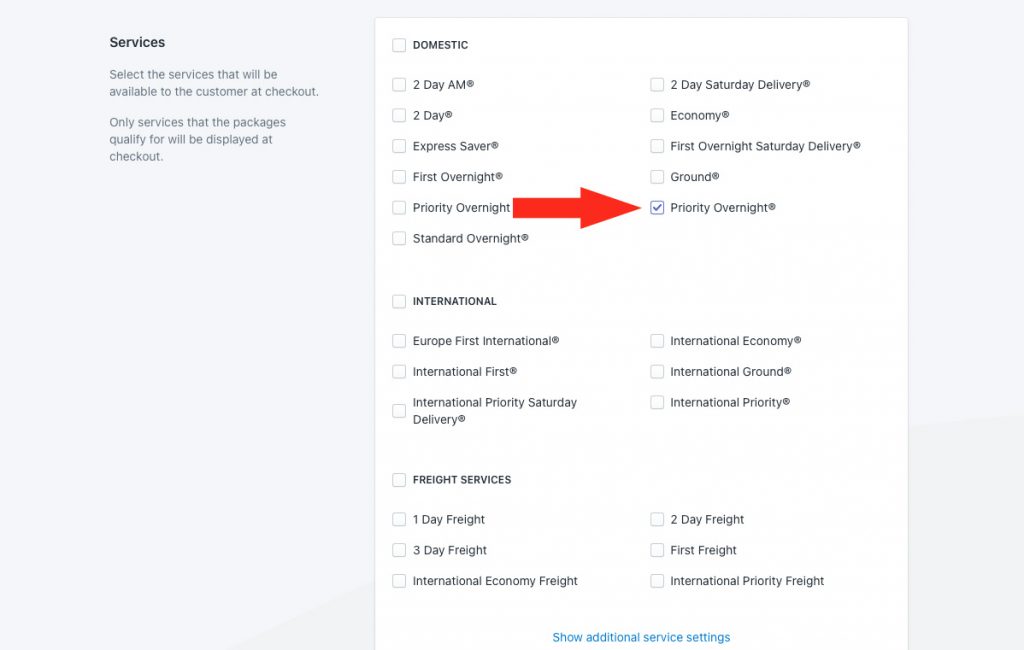
Let’s say you’ve selected Priority Overnight. If a customer lives in a postal code where that service is not offered by FedEx, they may only see the ‘standard’ shipping method you’ll be setting up in the next Scenario.
Additional service settings are not required for this setup.
Optional Settings
Additional settings are available for each parcel service shipping method. These settings are optional and not required for this setup.
Save Your Settings
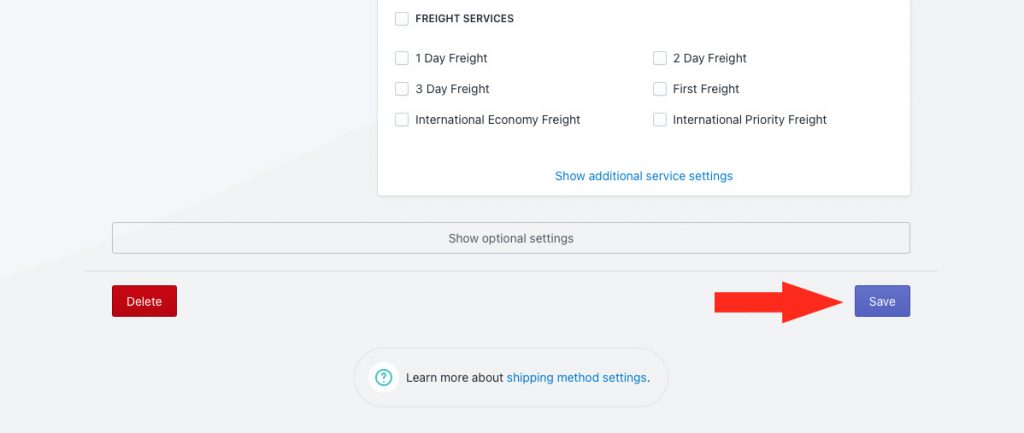
1) Click the Save button to save your priority holiday parcel service shipping method.
Create A Standard Holiday Scenario
To simplify the process, you can create a duplicate of the expedited holiday Scenario rather than creating one from scratch.
1) Click Shipping on the sidebar menu, then select Scenarios from the drop-down list.

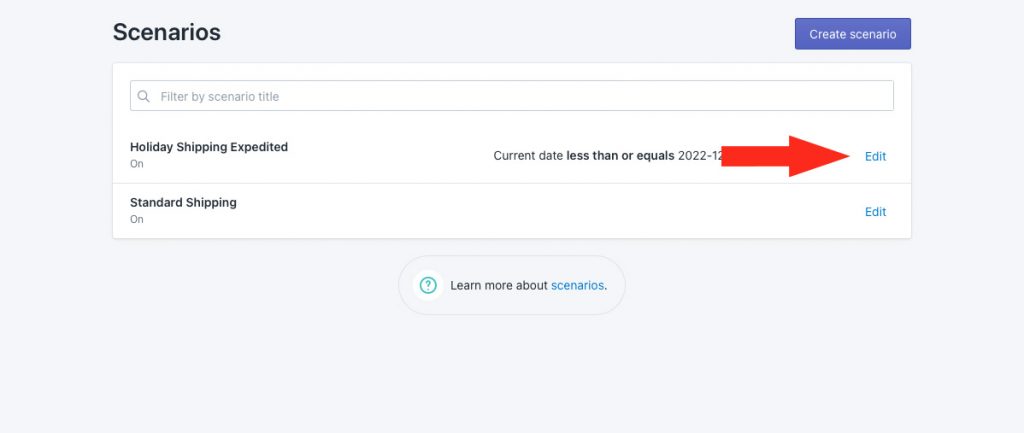
2) Click Edit beside your newly created expedited holiday Scenario.
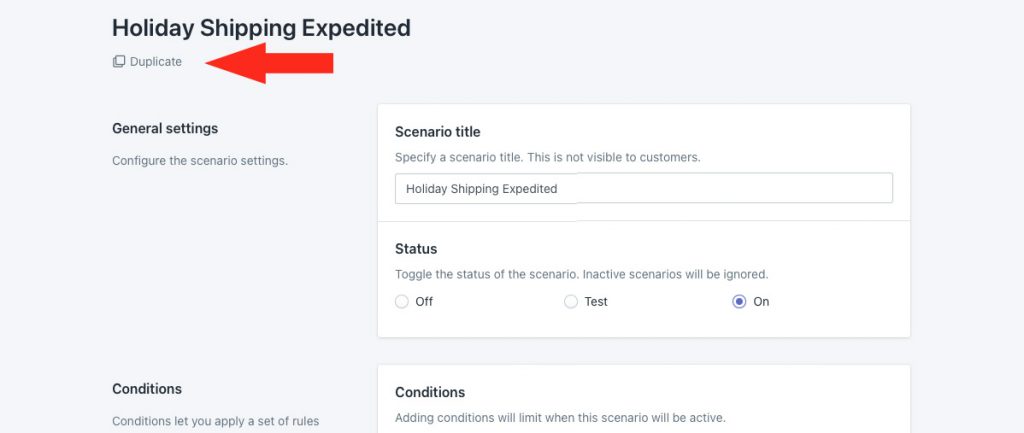
3) Click Duplicate below the Scenario header. This will create an exact copy of the expedited Scenario, including the shipping method.
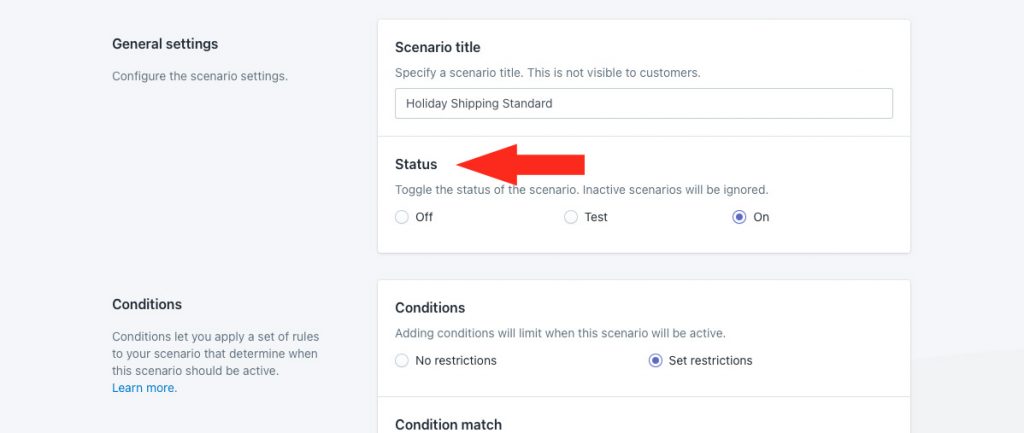
General Settings
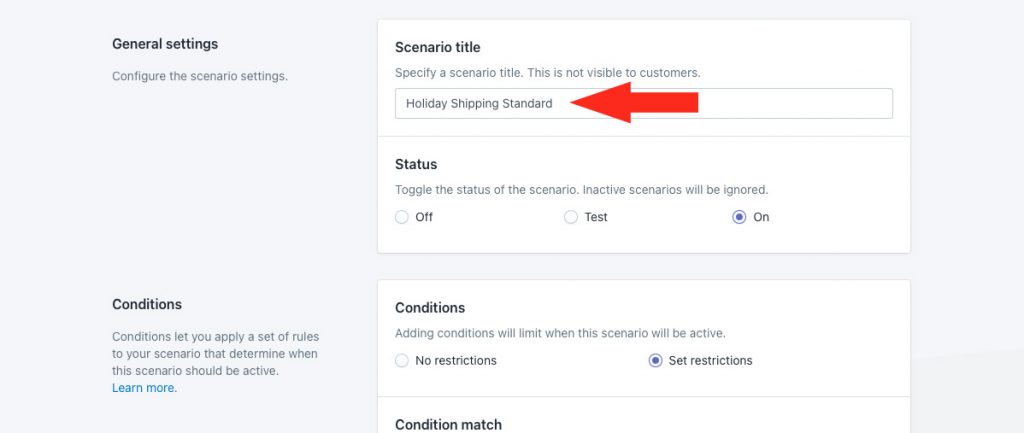
1) Change the Scenario title from ‘Copy of [original title] to something else, like ‘Holiday Shipping Standard’.
2) Leave status set to ‘On’.
Conditions
1) Leave Condition match set to ‘All conditions.
2) Leave the condition type set to ‘current date’ and leave the condition logic set to ‘less than or equals’.
3) Change the condition value to the cut-off date for standard shipping in the country or region you’re shipping to. For this example, we’re selecting December 14th, 2022.
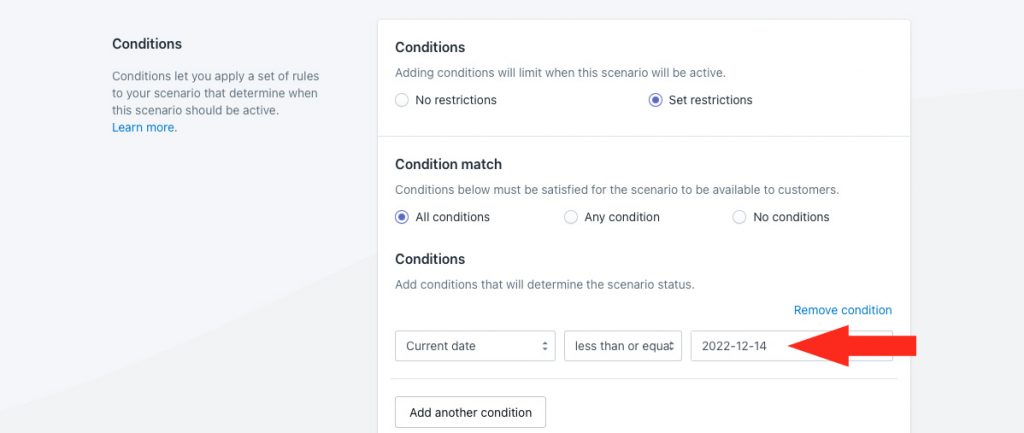
That means, customers placing their orders on or before December 14th, 2022 will see the standard shipping method assigned to this Scenario. This is based on the ‘last day to ship’ date provided by the carrier.
Product Filters
1) Leave Product filters to set to ‘Match product conditions’.
Because there are no product conditions in this Scenario, this setting is not applicable and can be left as-is.

Save Your Settings
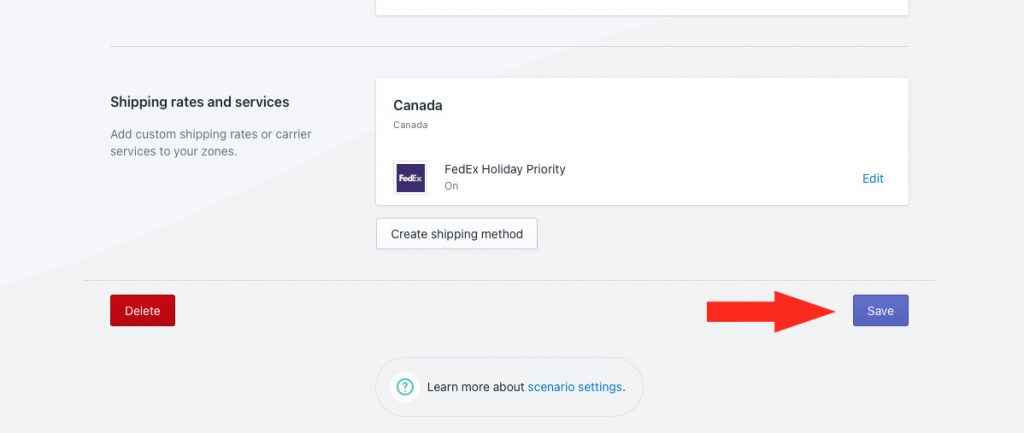
1) Click the Save button to save your standard holiday Scenario.
Update The Shipping Method
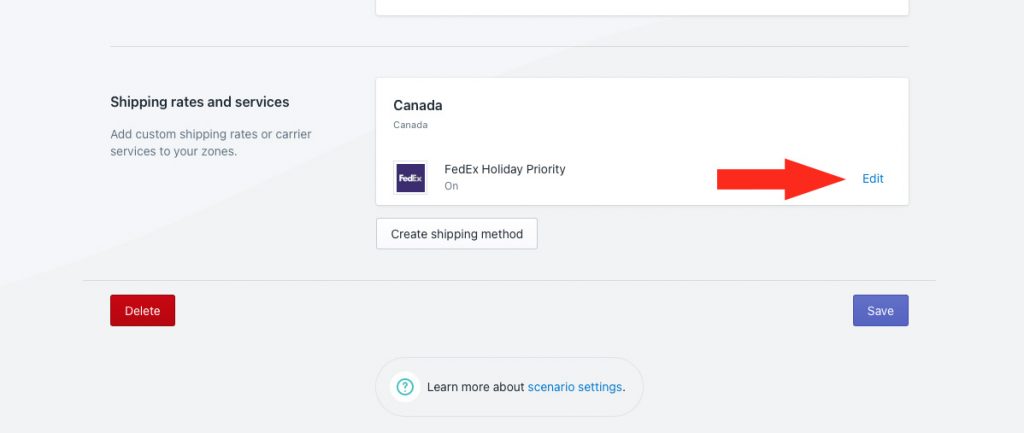
When you created a duplicate of the expedited holiday Scenario, it copied all of the settings, including the ‘priority’ shipping method. You will need to update the shipping method by changing the title and delivery service.
1) Click Edit beside the priority shipping method.
General
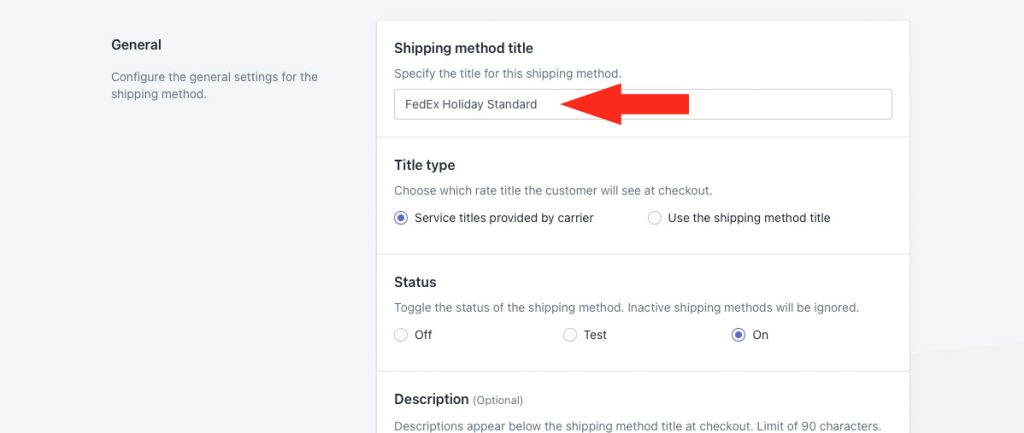
1) Change the shipping method title to something different, like ‘FedEx Holiday Standard’. This title will not be displayed to customers (see Step 2).
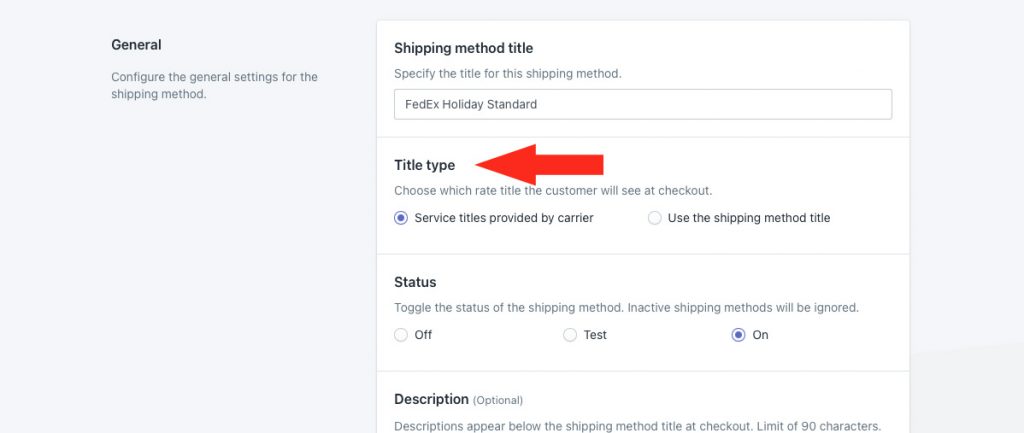
2) Leave the title type set to ‘Service title provided by carrier’. The service title provided by the carrier in the rate calculation, such as ‘FedEx Ground’, will be displayed as the shipping method title at checkout.
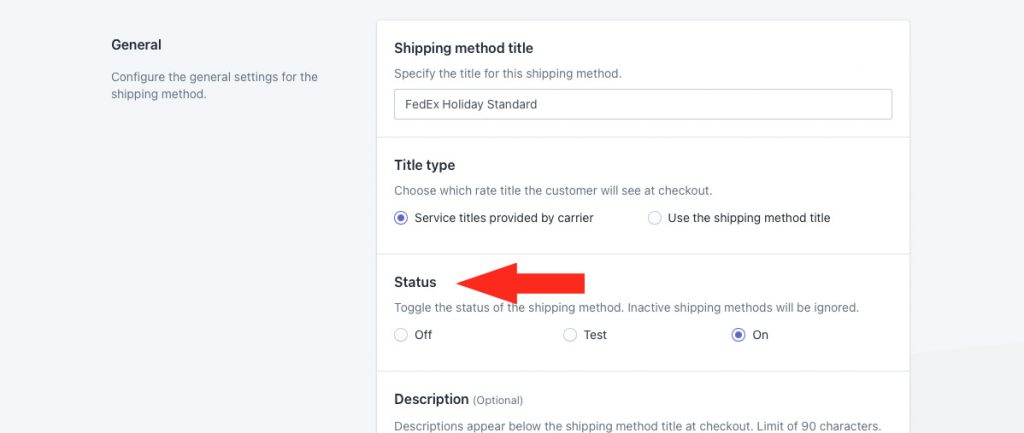
3) Leave the status set to On. If you want to test it first before making it public, set it to Test.
4) Keep the description you used for your priority holiday shipping method, such as ‘Get it for Christmas!’ We recommend limiting your description to 90 characters or less to ensure it displays properly on the checkout page.

Additional display settings are available for delivery times, order processing times and service codes. If you do not need to update the settings copied from your priority holiday shipping method, skip ahead to Services. Otherwise, continue to Step 5.
5) If desired, click Show additional display settings, then configure delivery time, order processing and service code settings as needed.

Leave all settings for Packages, Shipping origin and Account as-is if you want these settings to be the same as your priority holiday shipping method.
Services
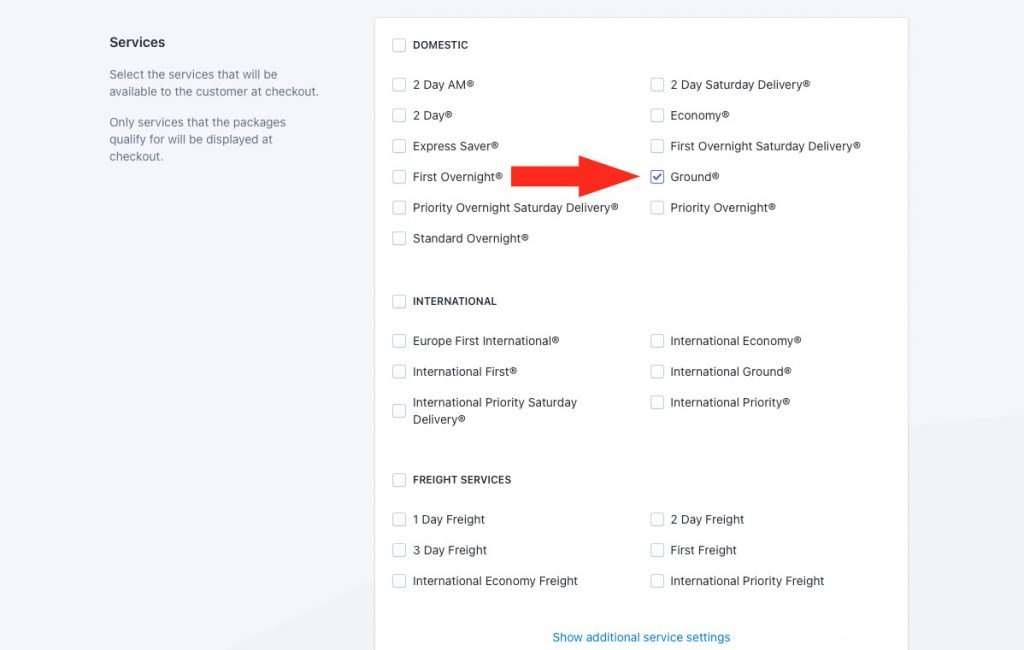
1) Deselect the priority service used in the priority holiday shipping method, then select the standard service with the cut-off date selected for the standard holiday Scenario condition. For this example, we’re selecting FedEx Ground.
If this shipping method was assigned to a domestic zone, be sure to select domestic services. If this shipping method was assigned to an international zone, be sure to select international services.
Additional service settings are not required for this set
Optional Settings
Additional settings are available for each parcel service shipping method. These settings are optional and not required for this setup.
Save Your Settings
1) Click the Save button to save your standard holiday parcel service shipping method.

Create A Standard Post-Holiday Scenario
When a customer places an order after the cut-off date for your standard holiday shipping method – in this example, December 14th – they’ll still see the priority holiday shipping method up until December 22nd. Between the two cut-off dates, you can still give buyers the option to choose the lower-cost standard delivery option, such as ‘Ground’, with the understanding it will not arrive in time for the holidays.
To simplify the process, you can create a duplicate of the standard holiday Scenario rather than creating one from scratch.
1) Click Shipping on the sidebar menu, then select Scenarios from the drop-down list.

2) Click Edit beside your newly created standard holiday Scenario.
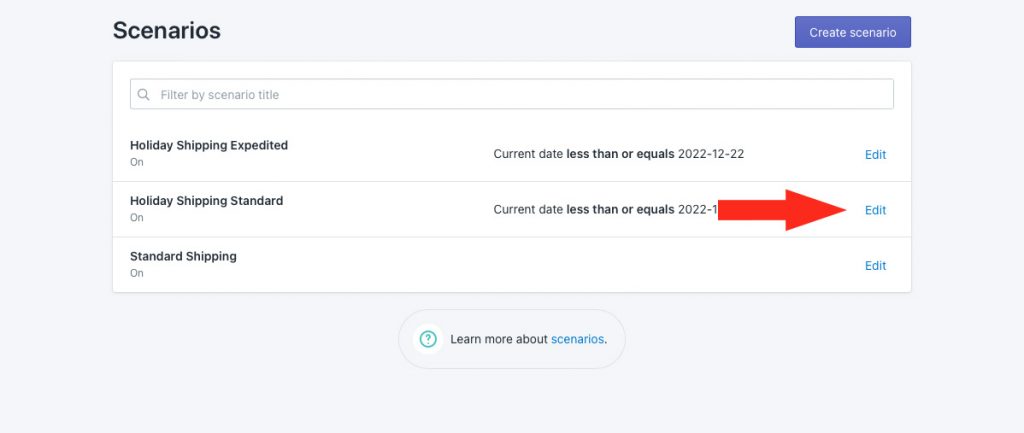
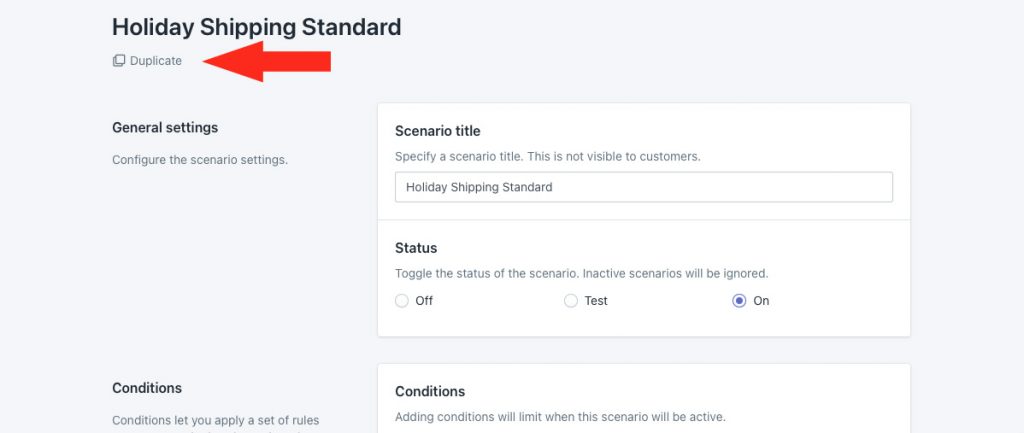
3) Click Duplicate below the Scenario header. This will create an exact copy of the holiday standard Scenario, including the shipping method.
General Settings
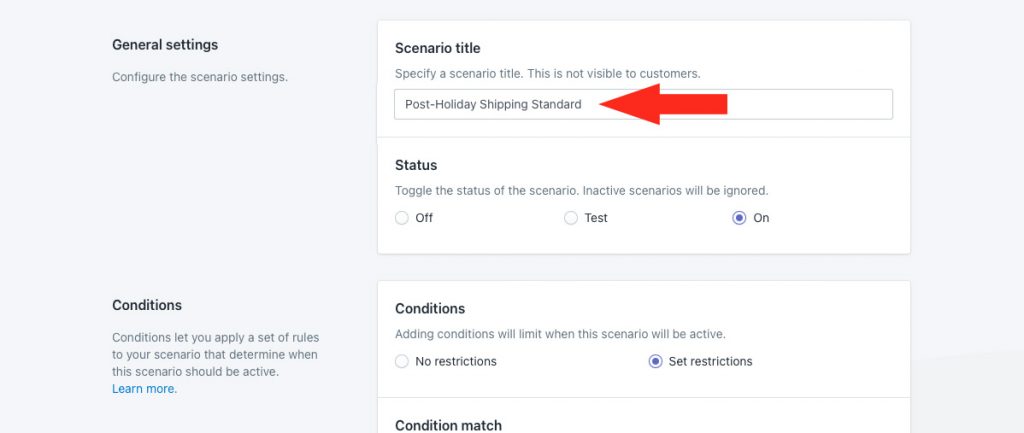
1) Change the Scenario title from ‘Copy of [original title] to something else, like ‘Post-Holiday Shipping Standard’.
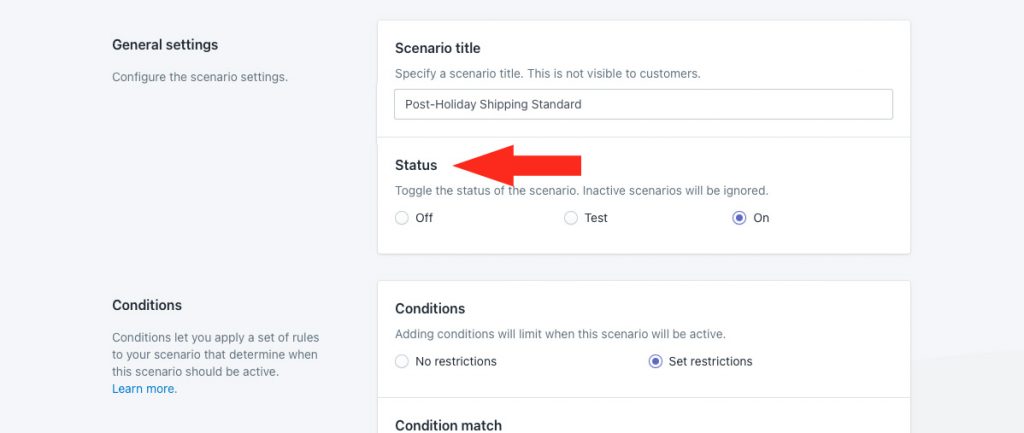
2) Leave status set to ‘On’.
Conditions
1) Leave Condition match set to ‘All conditions.
2) Leave the condition type set to ‘current date’.
3) Change the condition logic set to ‘greater than’.
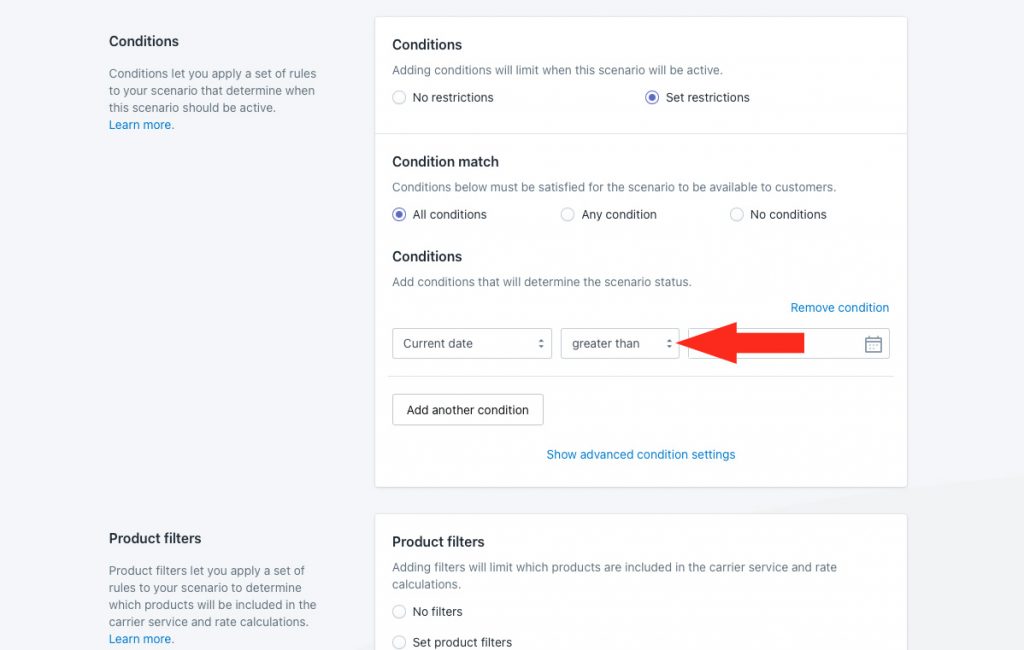
4) Leave the condition value set to the cut-off date for standard shipping in the country or region you’re shipping to. For this example, we’re keeping it set to December 14th, 2022.
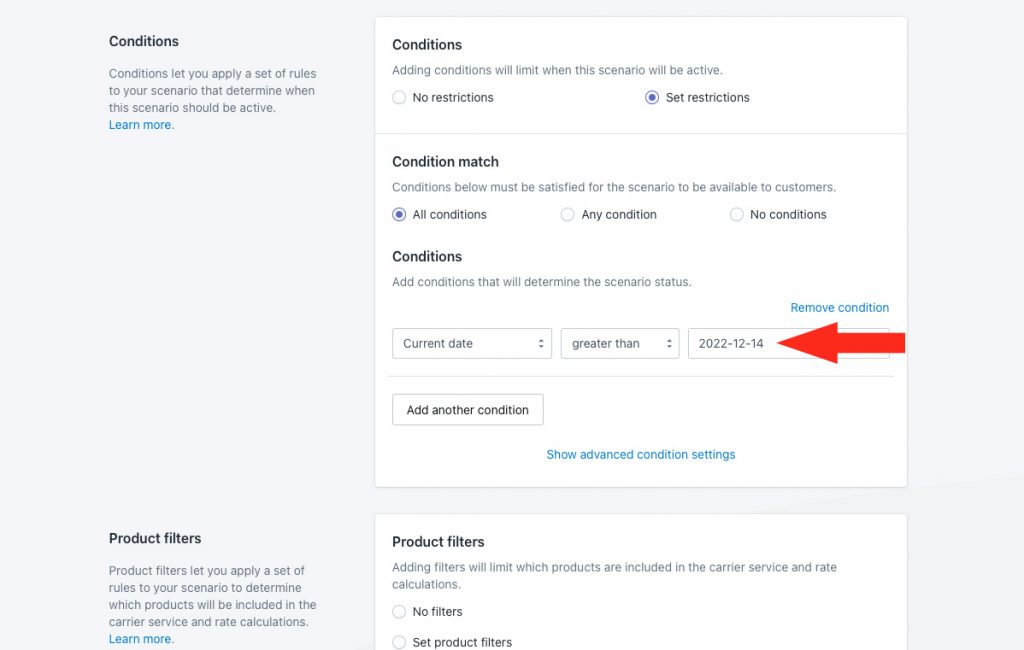
That means, customers placing their orders after December 14th, 2022 will see the post-holiday standard shipping method assigned to this Scenario. This is based on the ‘last day to ship’ date provided by the carrier.
5) Click the Add another condition button.
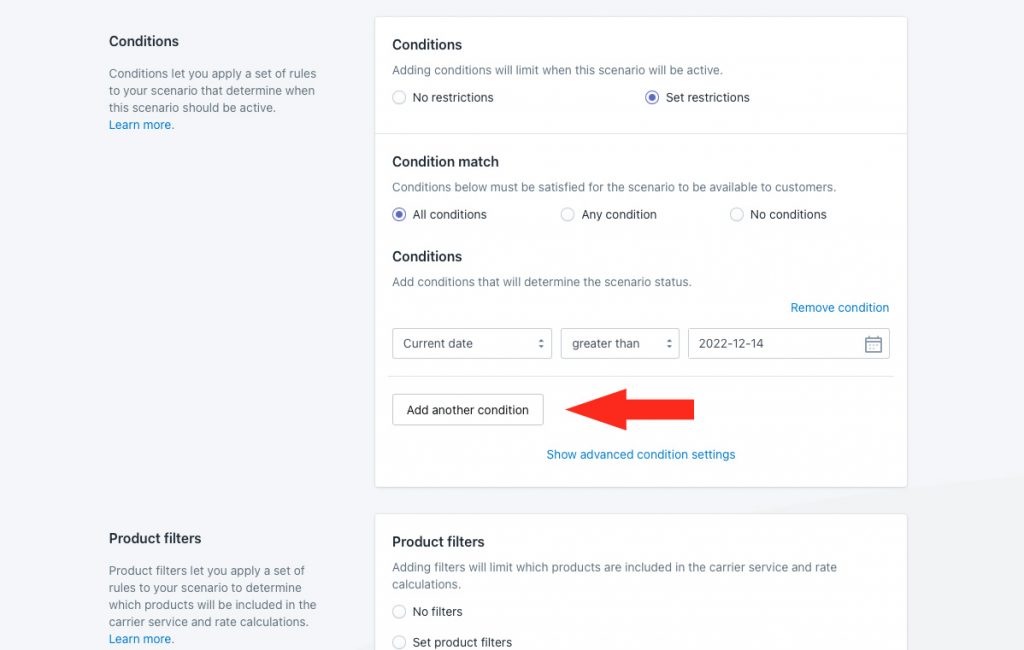
6) Select ‘Current date’ as the condition type.
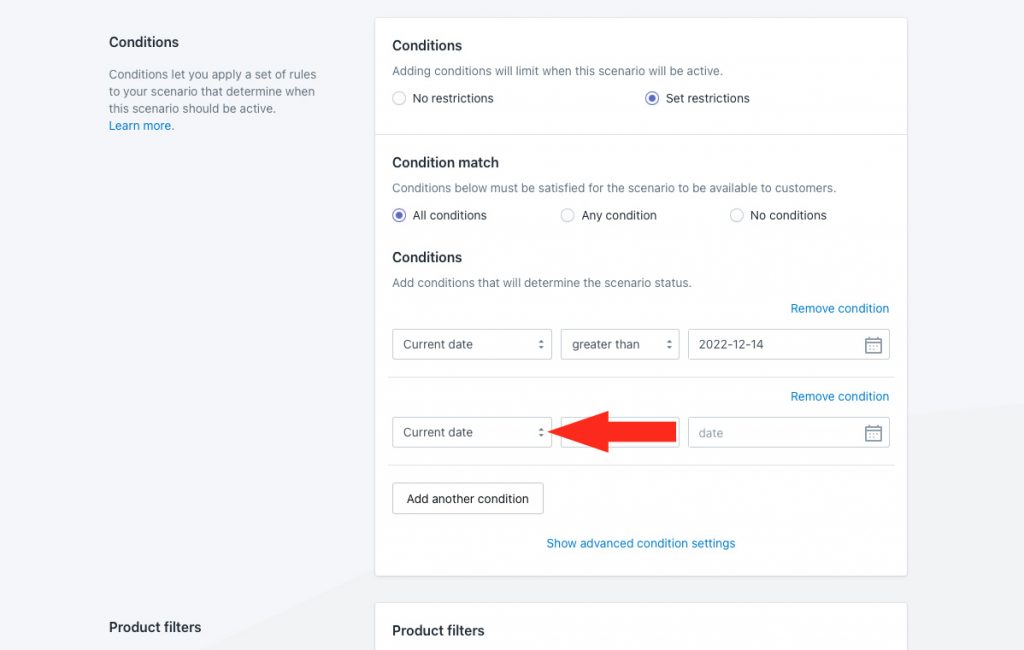
7) Change the condition logic to ‘less than or equals’.
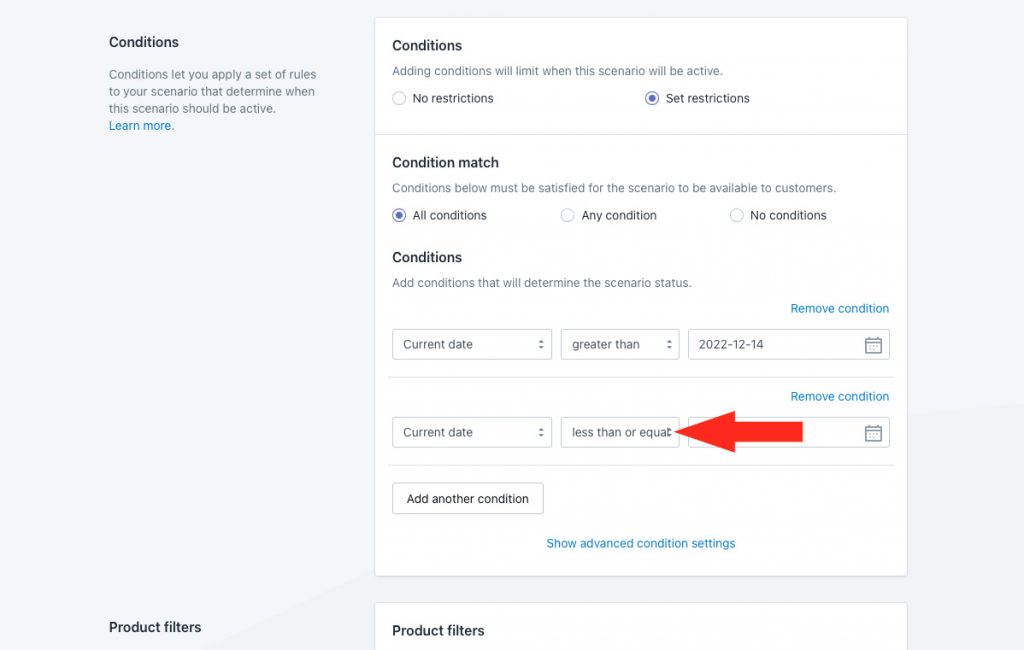
8) Select the cut-off date for priority holiday shipping in the country or region you’re shipping to as the condition value. For this example, we’re selecting December 22nd, 2022.
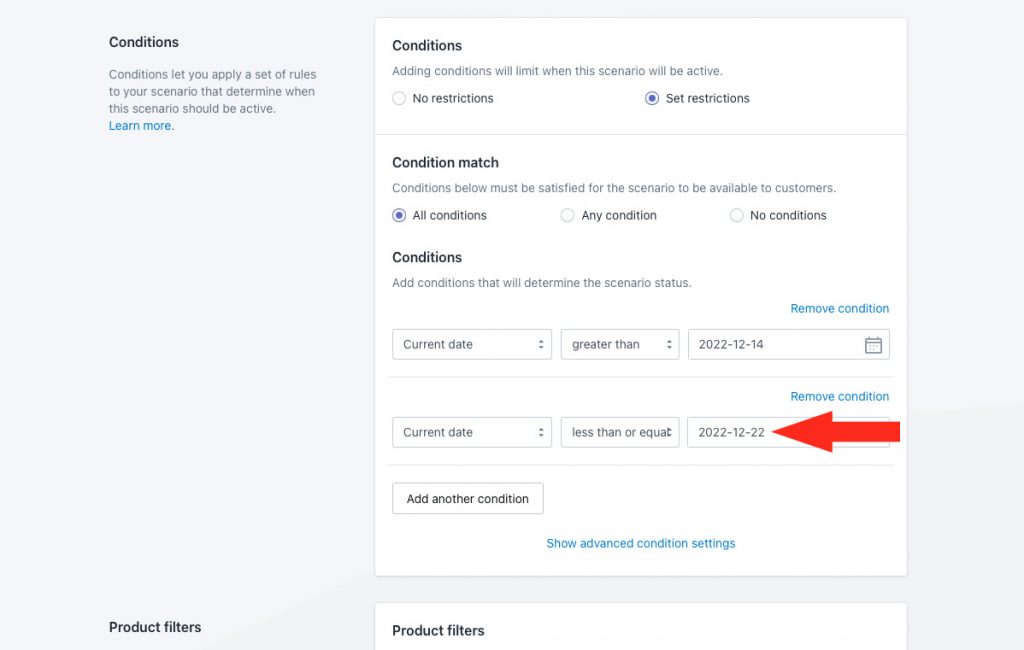
That means, customers placing their orders after December 14th and on or before December 22nd, 2022 will see the standard shipping method assigned to this Scenario. This is based on the ‘last day to ship’ date provided by the carrier.
Product Filters
1) Leave Product filters to set to ‘Match product conditions’.
Because there are no product conditions in this Scenario, this setting is not applicable and can be left as-is.

Save Your Settings
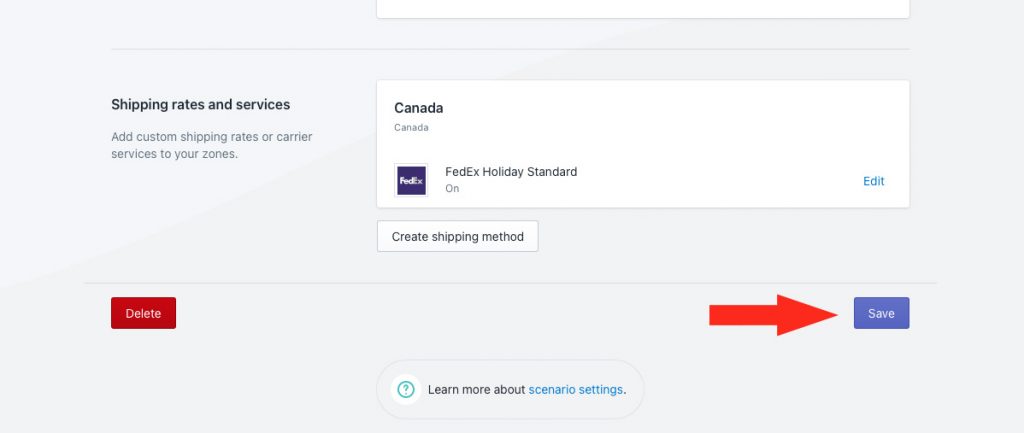
1) Click the Save button to save your standard post-holiday Scenario.
Update The Shipping Method
When you created a duplicate of the standard holiday Scenario, it copied all of the settings, including the ‘standard’ shipping method.
Because we’re going to offer the same standard service, the only thing that needs to change this time is the description.
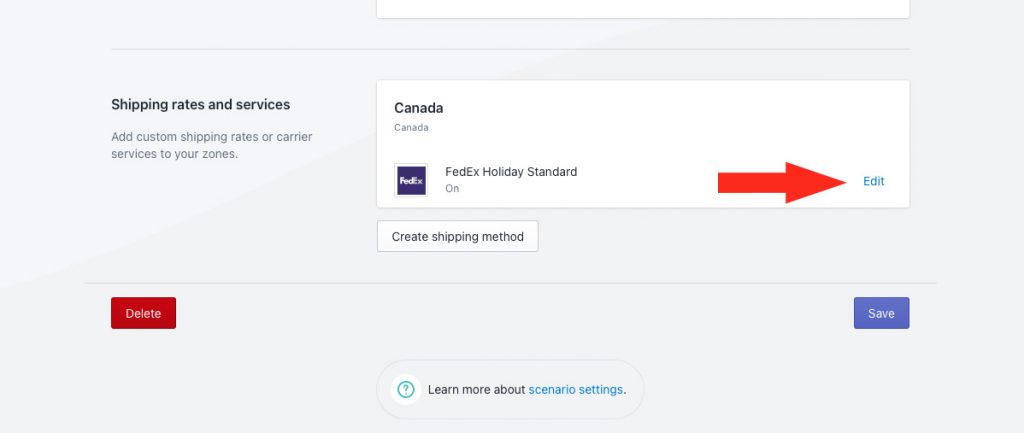
1) Click Edit beside the standard shipping method.
General
1) Leave the shipping method title, title type, and status as-is
2) Change the description to something like ‘Arrives after Christmas’ We recommend limiting your description to 90 characters or less to ensure it displays properly on the checkout page.
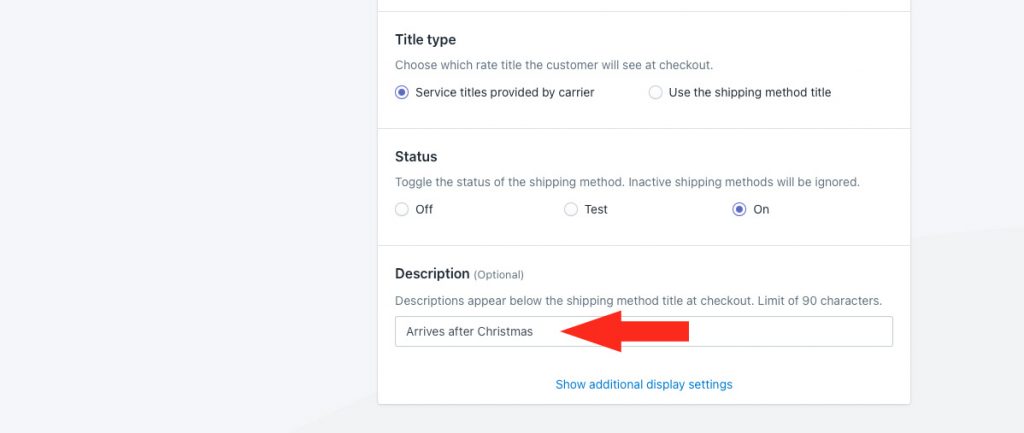
Additional display settings are available for delivery times, order processing times and service codes. If you do not need to update the settings copied from your standard holiday shipping method, skip ahead to Services. Otherwise, continue to Step 3.
3) If desired, click Show additional display settings, then configure delivery time, order processing and service code settings as needed.

Leave all settings for Packages, Shipping origin, Account and Services as-is.
Optional Settings
Additional settings are available for each parcel service shipping method. These settings are optional and not required for this setup.
Save Your Settings
1) Click the Save button to save your standard post-holiday parcel service shipping method.

Edit Your General Scenario
After setting up the new Scenarios, you will need add current date conditions to your original Scenario to prevent your general, non-holiday shipping methods from being displayed at checkout until after the cut-off date for both of your holiday shipping methods.
1) Click Shipping on the sidebar menu, then select Scenarios from the drop-down list.

2) Click Edit beside your non-holiday Scenario.
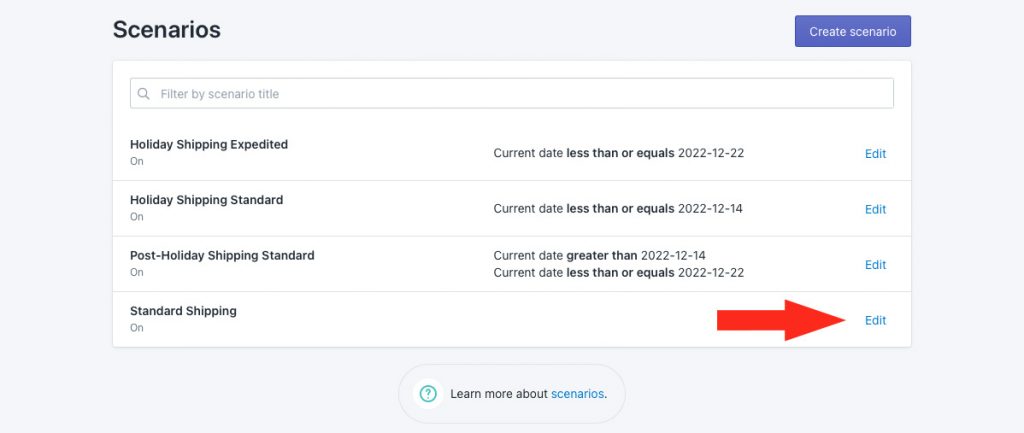
Conditions
1) If your Scenario doesn’t have any existing conditions, select Set restrictions. Otherwise, skip ahead to Step 3. For this example, our non-holiday Scenario does not have any existing conditions.
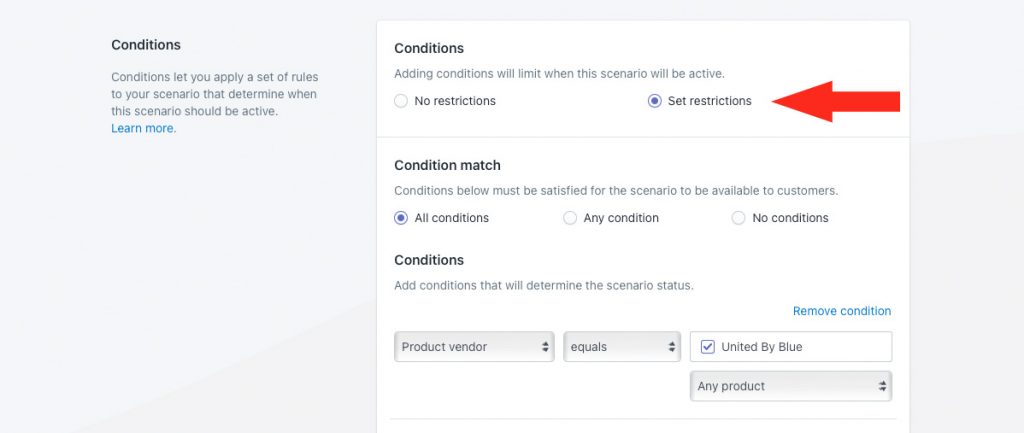
2) Leave Condition match set to ‘All conditions’.
3) If your Scenario has existing conditions, click the Add another condition button. If there are currently not conditions, skip ahead to Step 4.
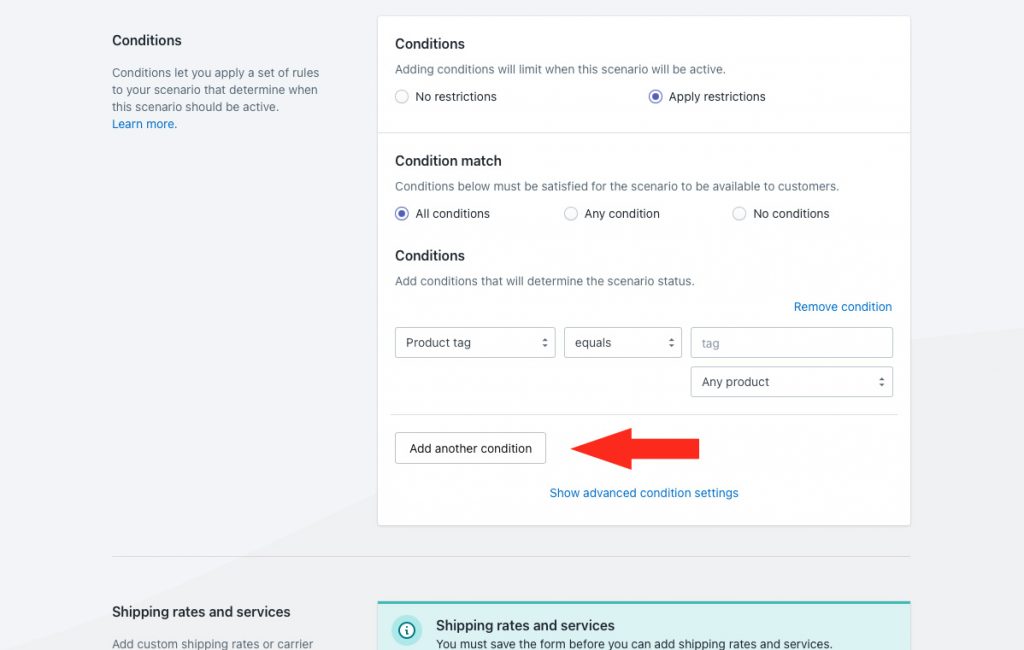
4) Select ‘Current date’ as the condition type.

5) Change the condition logic to ‘greater than’.
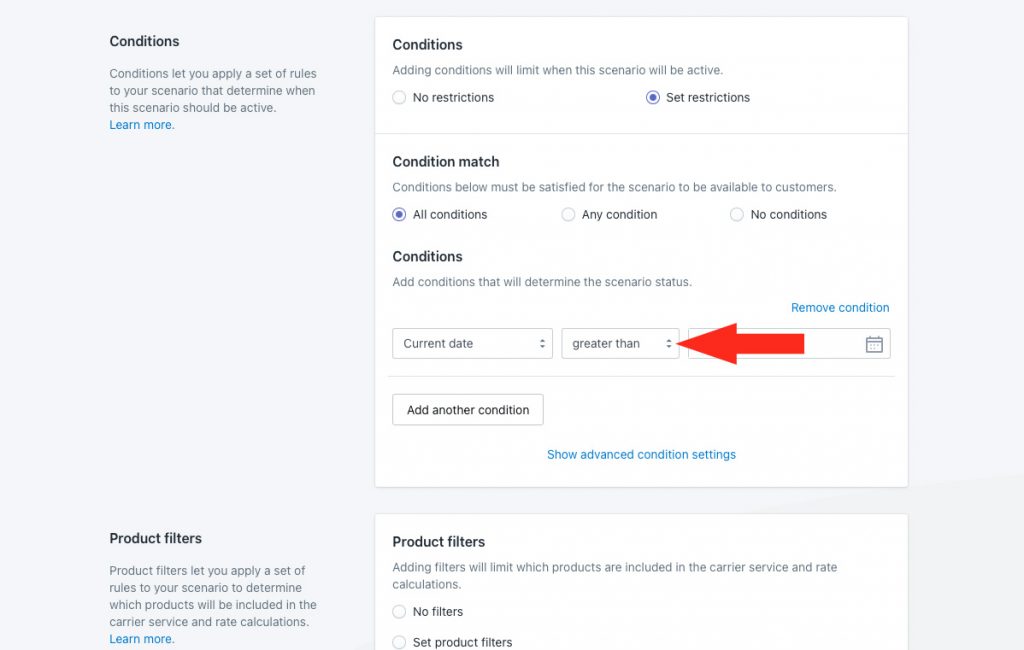
6) Select the cut-off date for holiday priority shipping in the country or region you’re shipping to as the condition value. For this example, we’re selecting December 22nd, 2022.
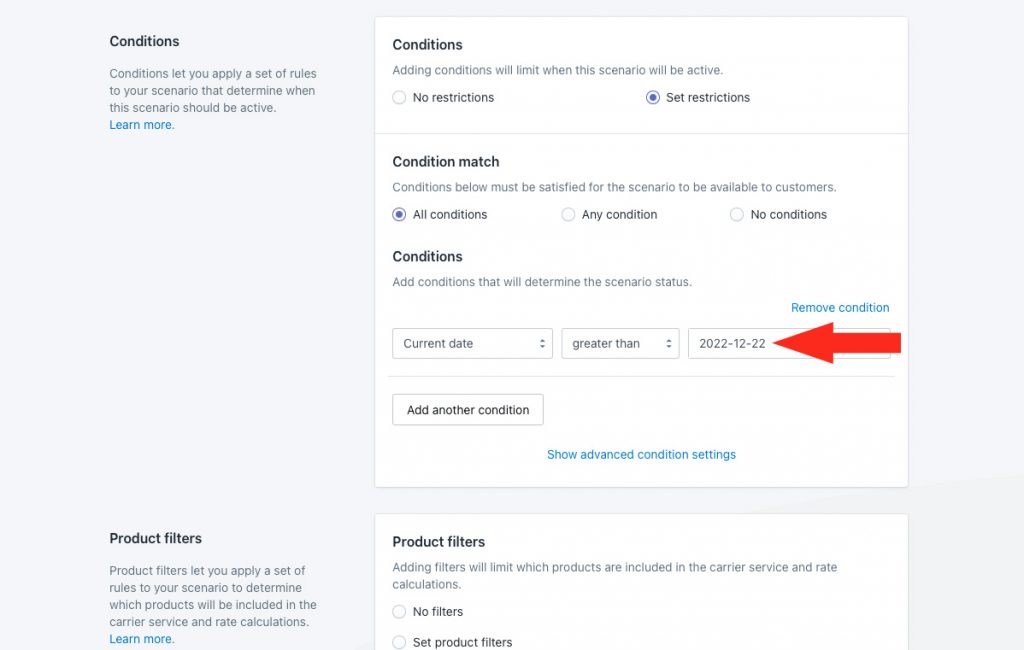
That means, customers placing their orders after December 22nd, 2022 will only see the general shipping method assigned to this Scenario.
Product Filters
1) Leave Product filters set to whichever setting you have been using.

Save Your Settings
1) Click the Save button to save changes to your general, non-holiday Scenario.
