One of the most frequent ways Intuitive Shipping is used is to create a multi-vendor Setup. This guide will teach you how to create a Shipping Scenario for each of your vendors, then blend them together into a single rate using a combined shipping method. This setup works well for drop-shipping.
Add A Vendor Scenario
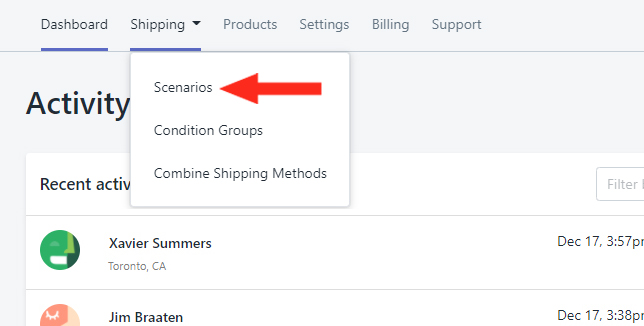
1) Click Shipping on the main menu, then select Scenarios from the drop-down list.
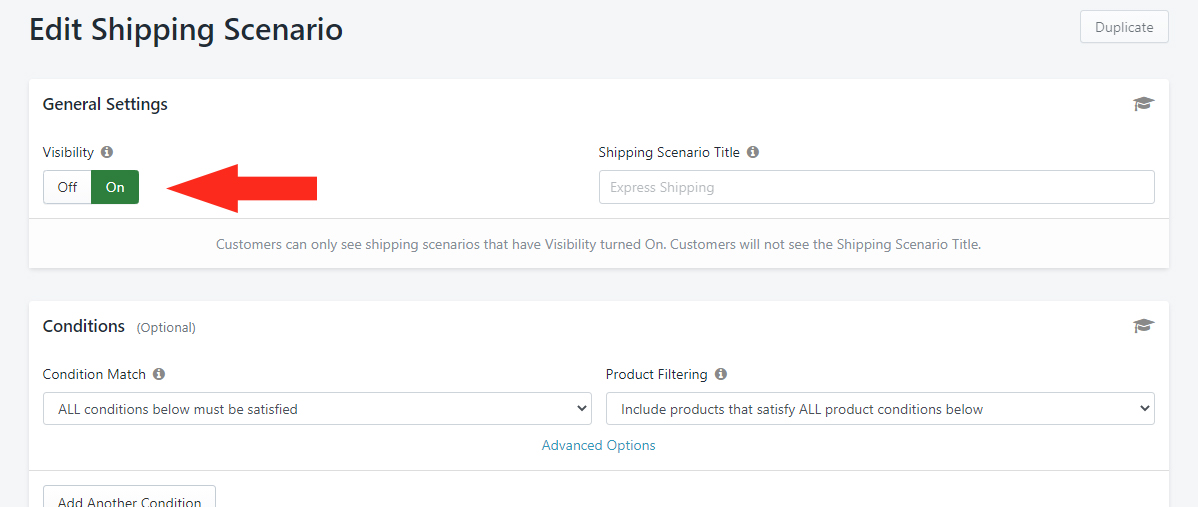
3) Set Visibility to On.
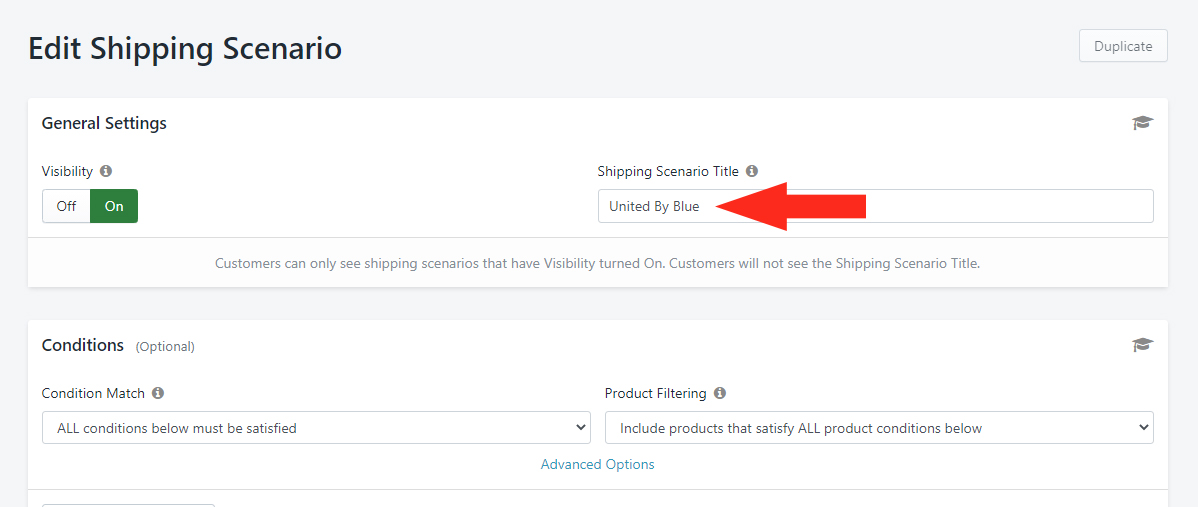
4) Enter the Shipping Scenario Title. We recommend using your Vendor name as the Title.
Set The Vendor Scenario Condition
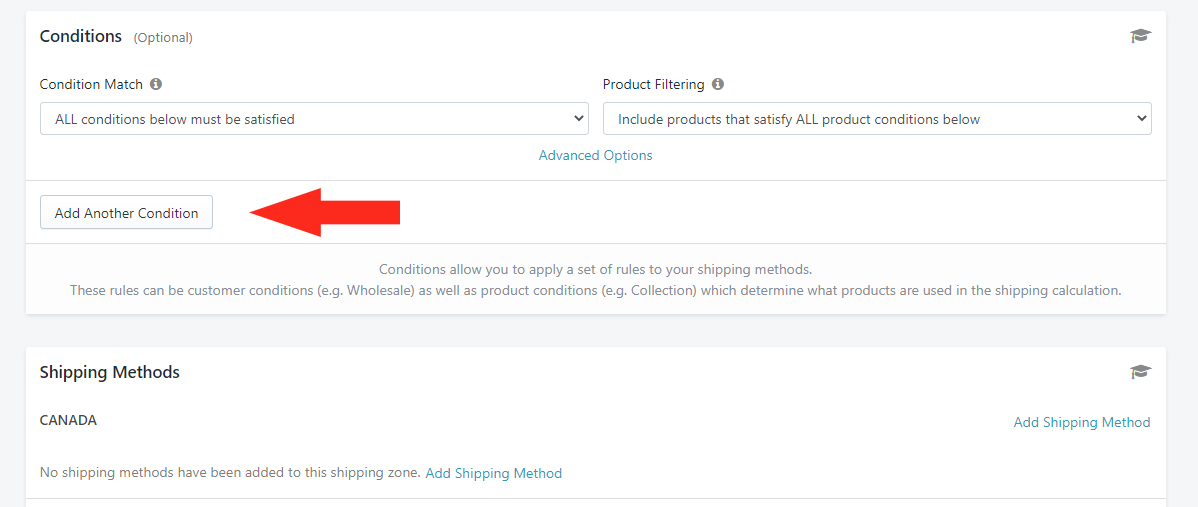
1) Leave the settings under Condition Match, Product Filtering, and Advanced Options on their Default settings.
2) Click the Add Another Condition button.
3) Click the Condition field, then select Vendor from the Per Product Conditions group.
4) Set the Condition logic to Equals.
5) Check the box beside the Vendor Name.
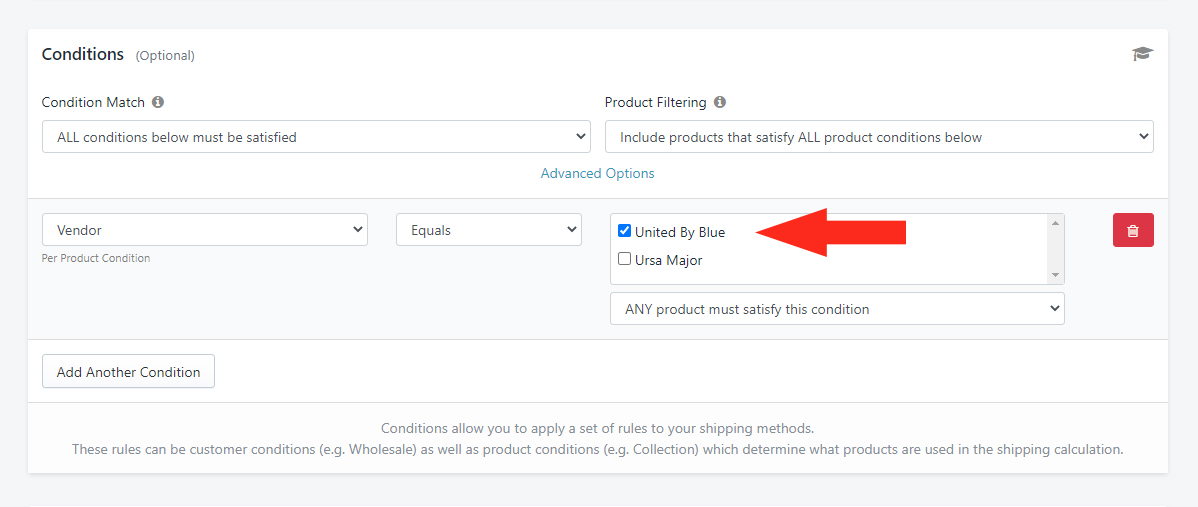
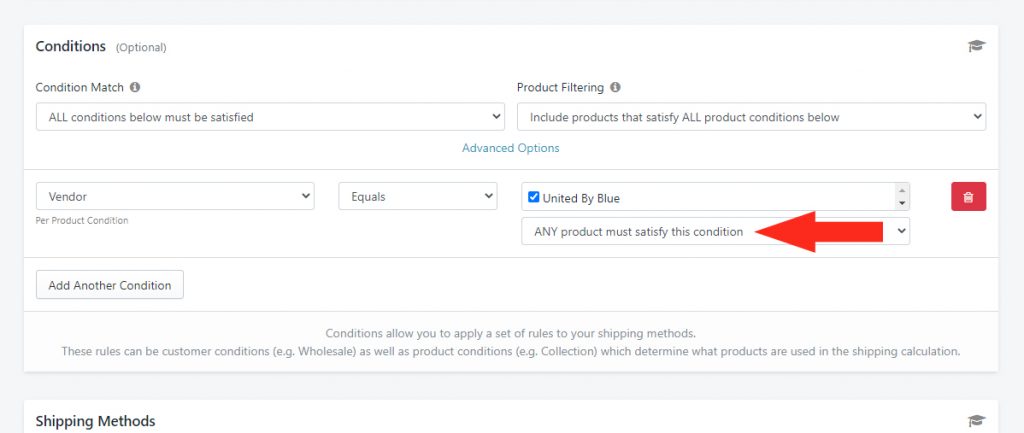
6) Leave the setting below the Vendor Name set to ‘ANY product must satisfy this condition’.
Add A Shipping Method For The Vendor
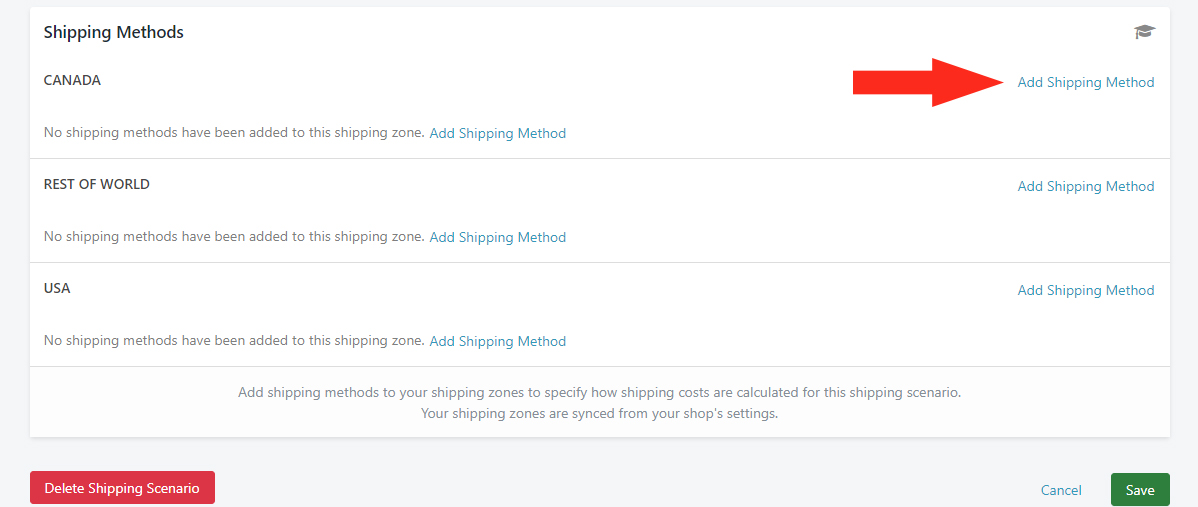
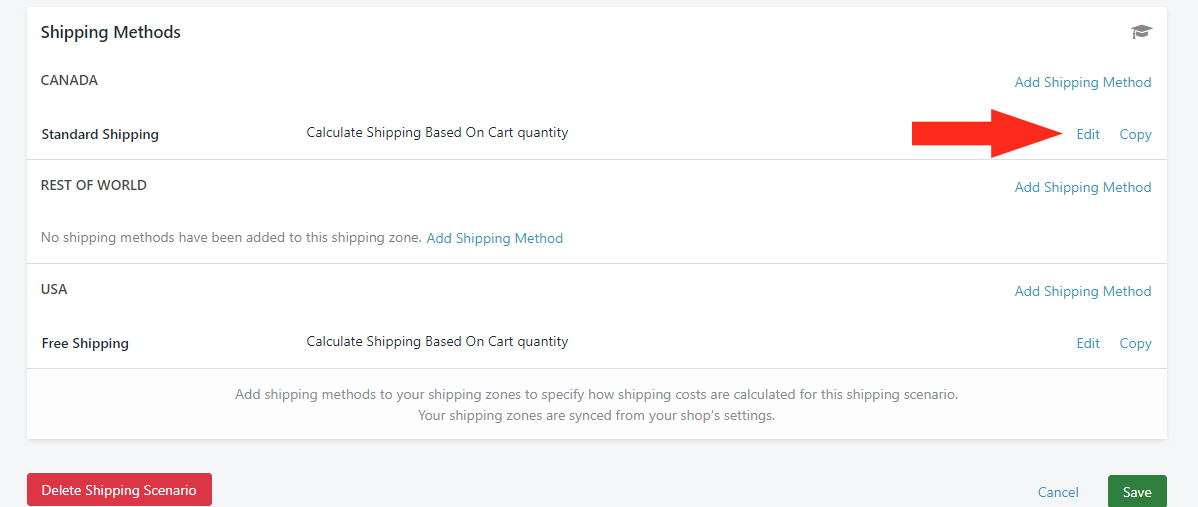
1) In the Shipping Methods section, click Add Shipping Method beside a Shipping Zone that qualifies for the vendor’s shipping rates.
To learn how to add a Custom Shipping Method with flat shipping rates or a table of pre-determined rates, click here. To learn how to add a Live Rate Shipping Method with real-time shipping rates from your preferred carrier, click here.
2) In the Combine Shipping Methods section of your Shipping Method screen, assign a Shipping Tag.
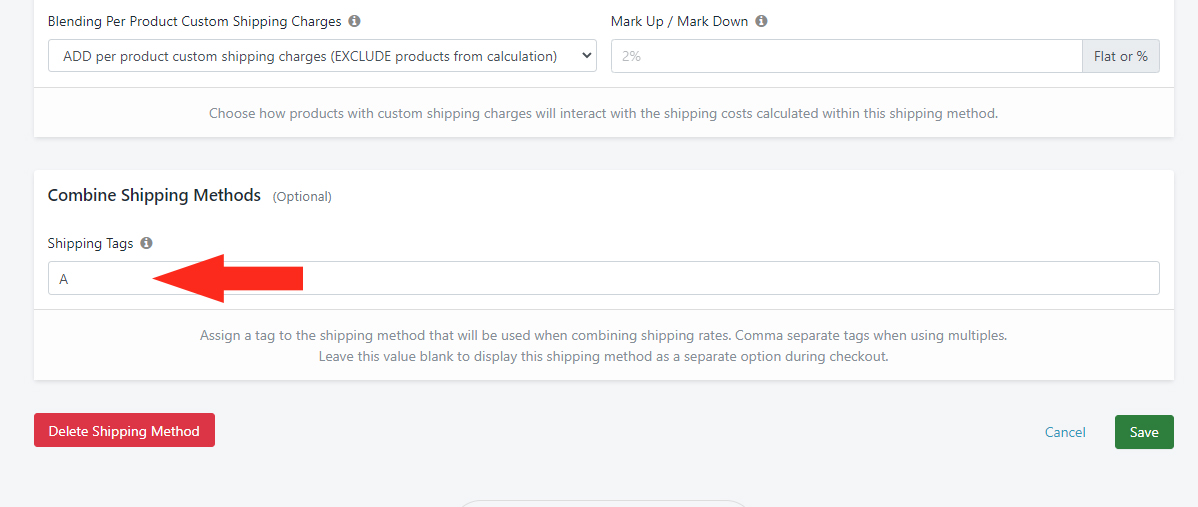
Shipping Tags are especially important when creating a multi-vendor setup. Since it is likely that a customer will order products from multiple vendors, Shipping Tags are needed to blend shipping methods together in a multi-vendor order.
3) Click the Save button to save your settings!
4) If desired, copy Steps 1 to 3 to add more Shipping Methods to the same Shipping Zone or other Shipping Zones, then skip ahead to Save Your Settings.
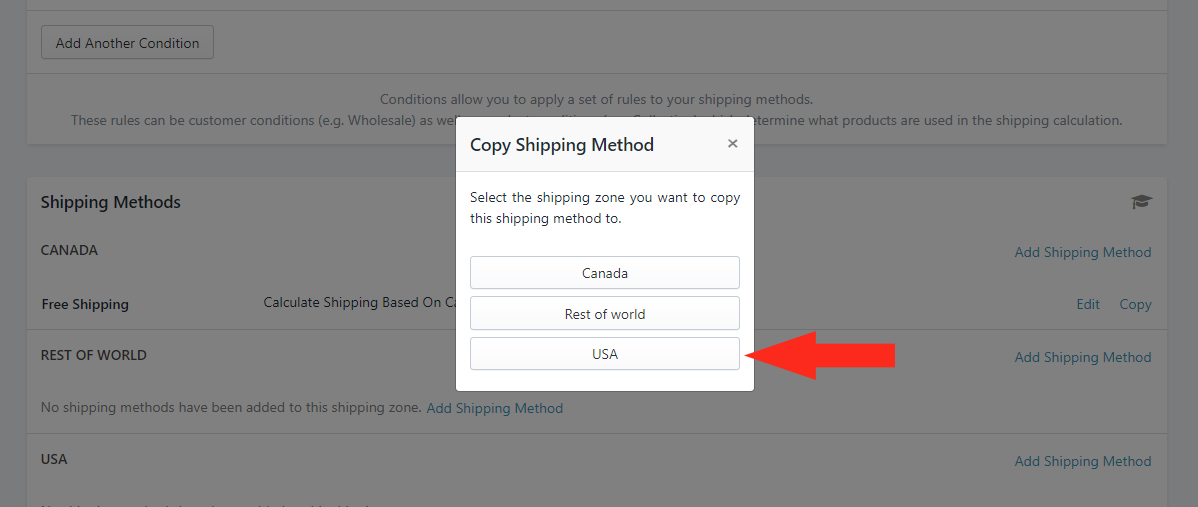
3) Or, to create an exact copy of the original Shipping Method, click Edit.
4) Select another Shipping Zone from the Copy Shipping Method popup box.
If you want to exclude this vendor’s products from being shipped to certain zones, do not add or copy a Shipping Method to those Zones.
Let’s say you have two (2) Vendor Scenarios. In the Vendor A Scenario, you’ve added Shipping Methods to USA, Canada and UK Zones. In the Vendor B Scenario, you’ve only added Shipping Methods to USA.
When a customer from Canada or the UK tries to order products from both Vendor A and Vendor B, they will be unable to complete their checkout until they remove Vendor B products from their cart.
Save Your Settings
Click the Save button!
Add More Vendor Scenarios
1) Repeat the steps from Add A Vendor Scenario for each of your Vendors.
When adding a Shipping Tag to the Shipping Method, be sure to use the same Shipping Tag you used in Add A Shipping Method For The Vendor Step 2.
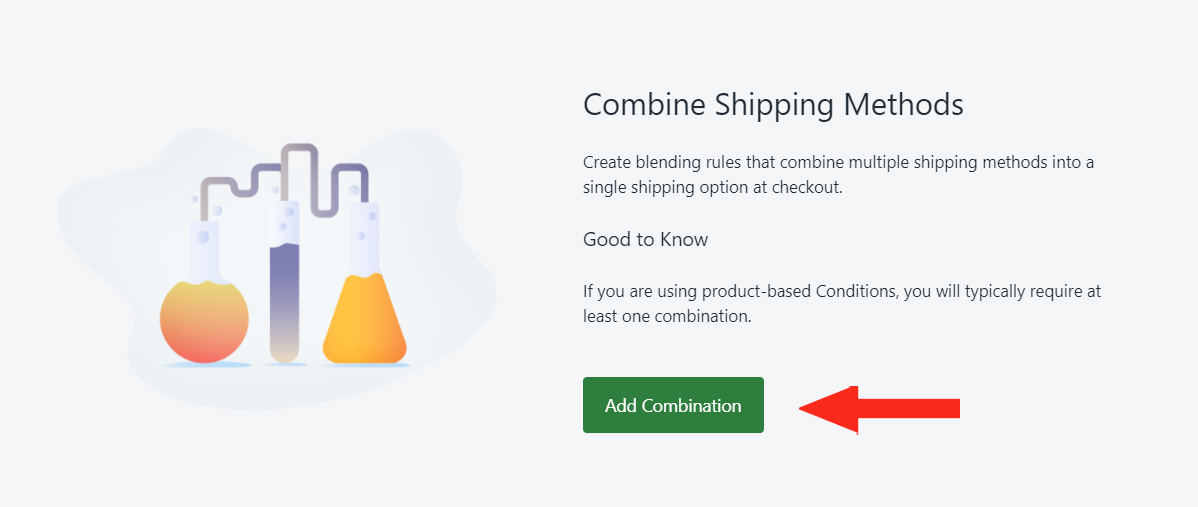
Combine Vendor Shipping Methods
Combined Shipping Methods let you blend multiple shipping rates from individual Shipping Methods together into a single rate. The Combined Shipping Method looks for the Shipping Tags that you added to each of your Vendor Shipping Methods and blends shipping rates that have the same Tag.
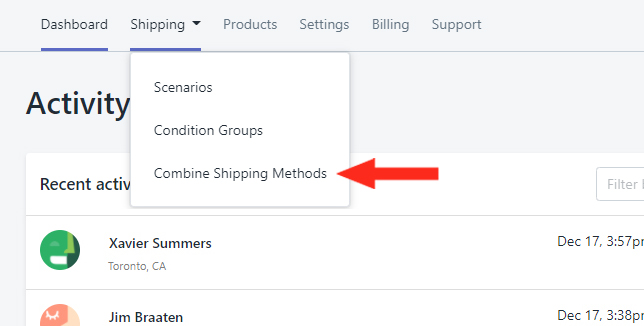
1) Click Shipping on the main menu, then select Combine Shipping Methods from the drop-down list.
2) Click the Add Combination button.
Configure Display Settings
Choose how the Combined Shipping Method will be presented to your customers.
1) Enter the Title of the Combined Shipping Method. Depending on which setting you choose in Step 2, this may be the title that customers see at checkout.
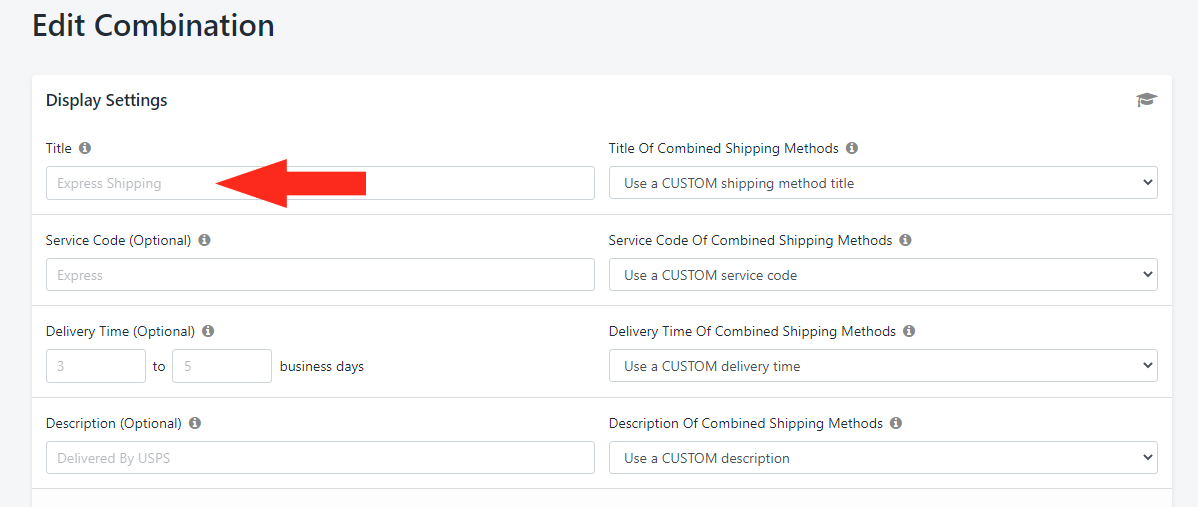
2) Select how the Title of Combined Shipping Methods will be displayed in situations when the Combined Shipping Method is activated. You have five (5) settings to choose from.
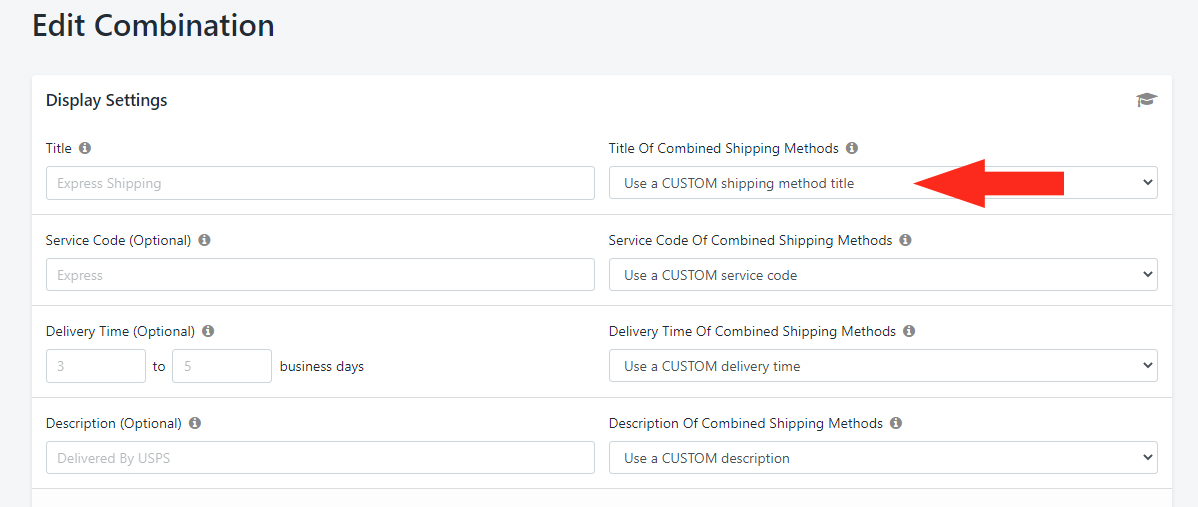
3) If desired, configure the optional Display Settings. Learn more about configuring Combined Shipping Method Display Settings here.
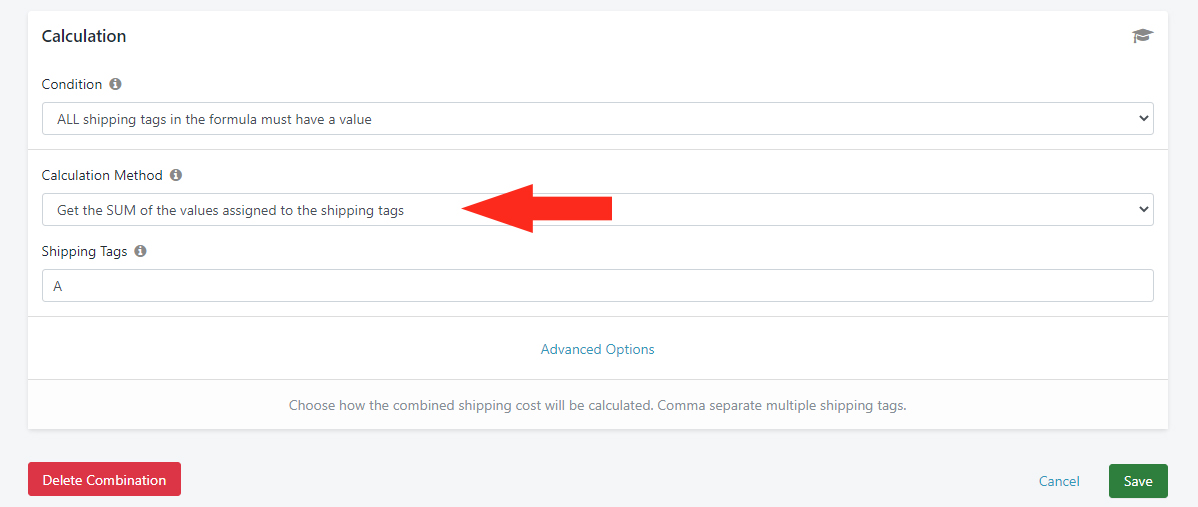
Calculation
Calculation settings let you choose how the shipping rates in the Combined Shipping Method will be calculated.
1) Under Condition, select ‘ALL shipping tags in the formula must have a value’.
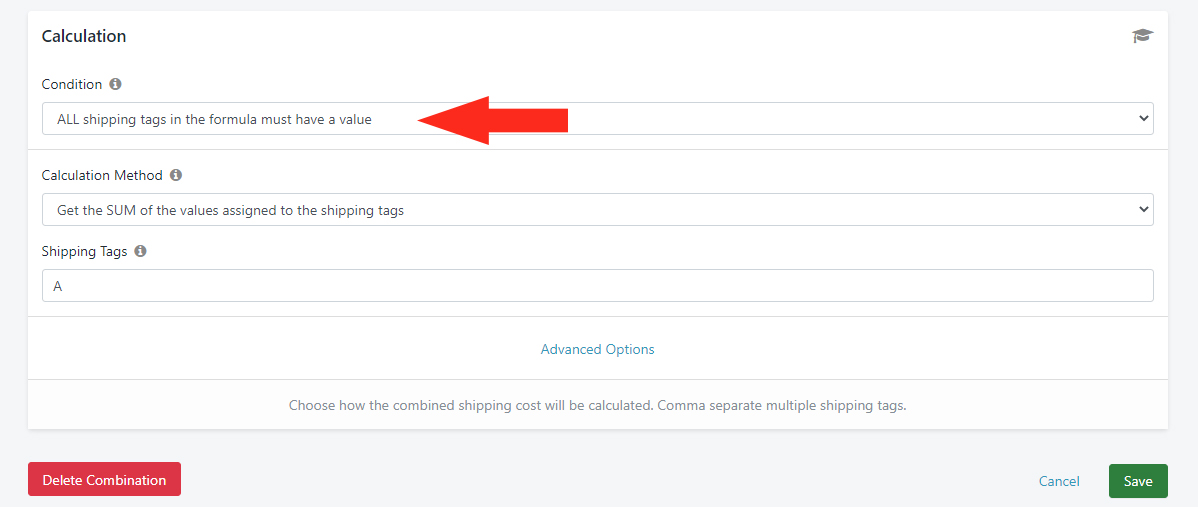
2) Under Calculation Method, select ‘Get the SUM of the values assigned to the shipping tags’. This setting sums all of the shipping rates with the same Shipping Tag into a single rate.
Alternatively, you can choose to get the AVERAGE, HIGHEST or LOWEST values.
3) Add the same Shipping Tag that you assigned to each of the vendor Shipping Methods.
4) To create a custom calculation formula, click Advanced Settings (Optional).
We recommend this option for advanced users only. If you would like to use a custom formula, please contact us for assistance.
Save Your Settings
Click the Save button!
What’s Next: Test Your Setup or check out more Common Setups