Intuitive Shipping Scenarios give you the ability, if needed, to control the way shipping methods are displayed at checkout based on the products in the cart.
Product conditions let you control when shipping methods are displayed, while product filters let you control how shipping methods are displayed.
Let’s say you want to offer free shipping only when a certain product is included in the cart. You can use a product condition, like a product tag, to activate free shipping only if that eligible product is in the cart. If you want to limit free shipping to just a portion of the order – say, just the products that are eligible for free shipping – while the rest of the order gets regular paid shipping, product filters ensure that free shipping is only applied to the appropriate products.
With Intuitive Shipping, you can also create condition groups, which are multiple conditions packaged together into a single set. Condition groups can include any condition type in Intuitive Shipping, including cart conditions, customer conditions, and yes, product conditions, too.
We generally recommend against using product conditions in condition groups because of how our product filtering system handles them. Product filtering does not recognize product conditions within a condition group. That can lead to rate calculation errors unless you manually adjust the product filtering settings.
This guide explains how to effectively use product conditions in a condition group, because there are times when you can’t avoid it without completely rebuilding your entire setup.
How It Works
Let’s say you have three distinct product groups: frozen food, non-perishables, and beverages. Each product type has its own unique shipping rates. You’re running a free shipping promotion that is only for certain customer types, and only for beverage products:
- VIP customers that live anywhere in the state who spend more than $25.00 on beverage, or
- Any customers that live within your city who spend more than $75.00 on beverage
That means, even if these customer types meet their respective minimums, you still only want to offer free shipping on the beverage portion of the order. If they have any frozen or non-perishable food in the cart, they’ll still have to pay for shipping on those items.
Adding multiple, individual conditions to a Scenario won’t work for this promotion setup because conditions can only be ‘All’ – meaning every condition must be met – ‘Any’ – meaning any condition can be met – or ‘None’ – meaning no condition can be met.
That means, you cannot simply add 5 conditions like these to a Scenario:
- VIP customers > equals > true
- Product tag > equals > beverage
- Filtered product total > greater than > 25.00
- City > equals > Dallas
- Filtered product total > greater than > 75.00
That’s because there are conflicts among these individual conditions.
By default, Scenarios check to see if all conditions are met. In this case, a customer would have to be a VIP and live in Dallas and order more that $75.00 worth of beverage products. That means VIP customers who live elsewhere in the state won’t get the free shipping promotion, regardless of how much beverage they order.
Changing the setting to any condition wouldn’t allow the restrictions to apply in the way they are intended because only one of the five conditions then needs to be met for the Scenario to work. A customer could be VIP and order anything in your store, or be non-VIP from anywhere in the state and order more than $75.00 worth of beverage, or be from Dallas and order anything.
Using the no conditions setting would mean the restrictions are being applied in the opposite way they are intended. Only customers who are not VIP, don’t live in Dallas and don’t spend more than $25.00 on beverage would activate the promotional shipping method.
To ensure the conditions in this example are being applied as intended, you need to set up two (2) condition groups – one group to check if the customer is a VIP and is spending more that $25.00 on beverage products, and a second group to check if the customer lives in Dallas and is spending more than $75.00 on beverage products.
Then, you need to manually adjust product filtering in the Scenario so if either customer orders food along with their beverage products, only the beverage portion gets free shipping. Without this step, the entire order would get free shipping as long as the condition groups are satisfied.
Existing Setup
For this example, we’re saying our store has three (3) types of product groups – frozen food, non-perishables and beverage.
Each of these products has its own standard flat shipping rate, and we’re using rate blending to combine the rates together when a customer orders multiple product types.
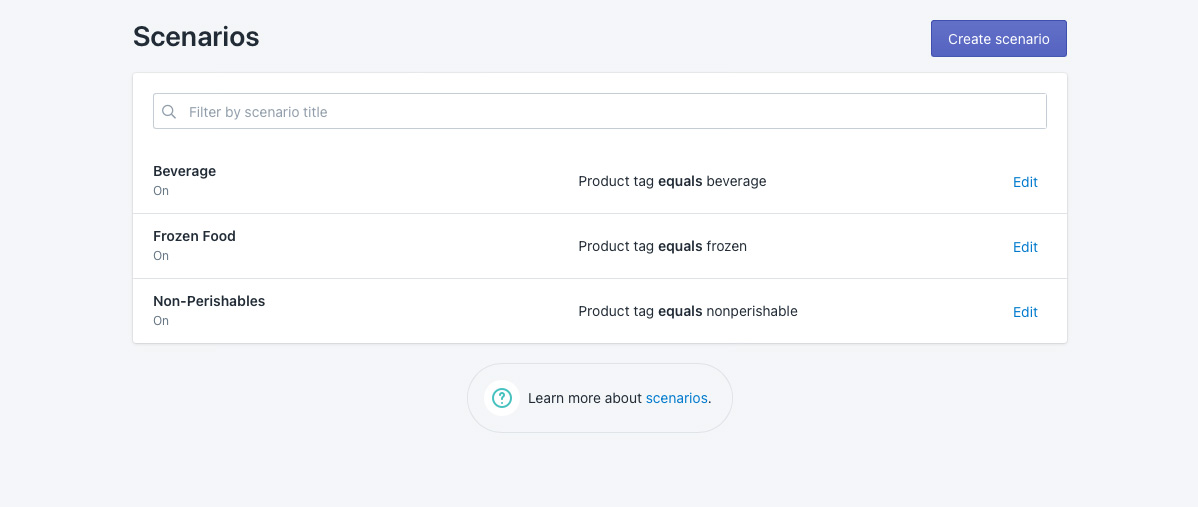
Let’s say we have 3 existing Scenarios:
- Scenario 1 is called ‘Beverage’. It has a flat shipping rate of $12.00.
- Scenario 2 is called ‘Frozen Food’. It has a flat shipping rate of $18.00
- Scenario 3 is called ‘Non-Perishables’. It has a flat shipping rate of $10.00
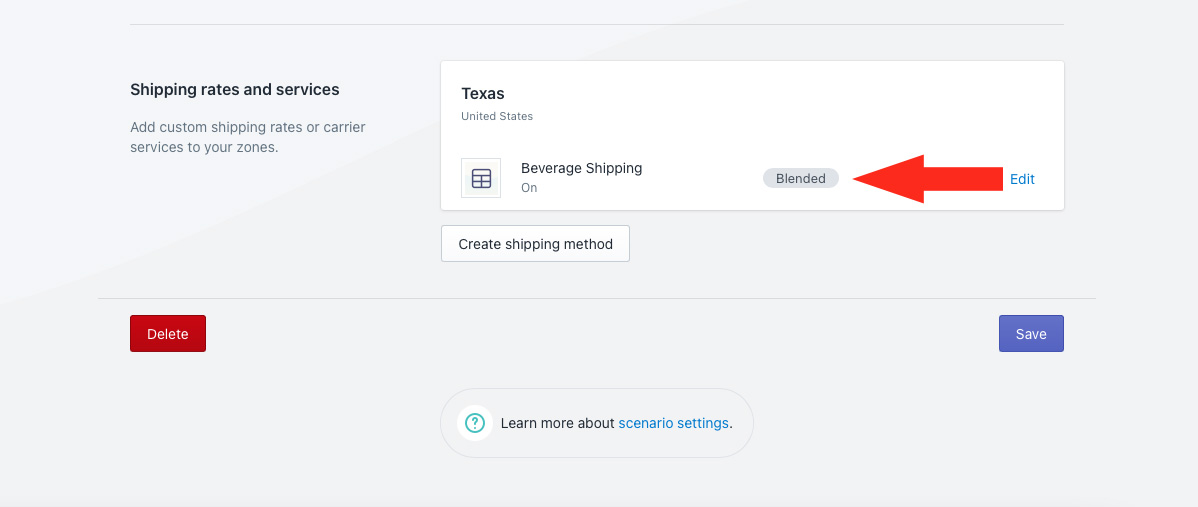
All three shipping rates are assigned to a shipping Zone that is just the state of Texas.
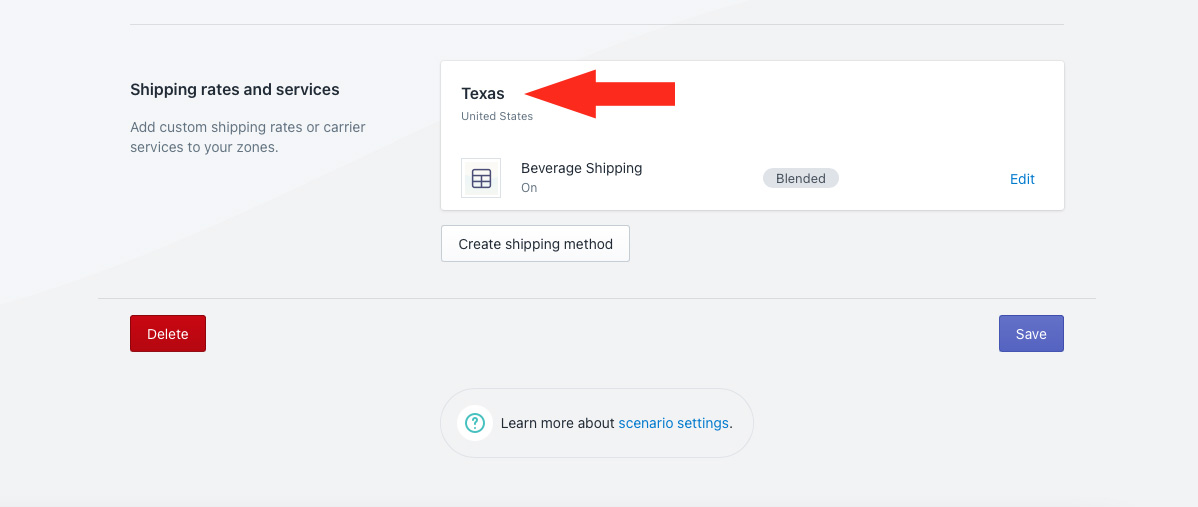
All three have simple rate blending enabled.
Normally, when any customer from Texas orders frozen food and beverage, they’re charged $30.00 for shipping at checkout ($18.00 + $12.00).
We’re going to run the promotion mentioned earlier where VIP customers from anywhere in Texas who spend more than $25.00 on beverage or any customers from Dallas who spend more than $75.00 on beverage get free shipping on the beverage portion of the order. That means, if either customer type orders their threshold of beverage along with any frozen food products, they’ll only be charged $18.00 for shipping at checkout.
Create The First Condition Group
This condition group will allow VIP customers who order more than $25.00 on beverage products to get the free shipping promotion.
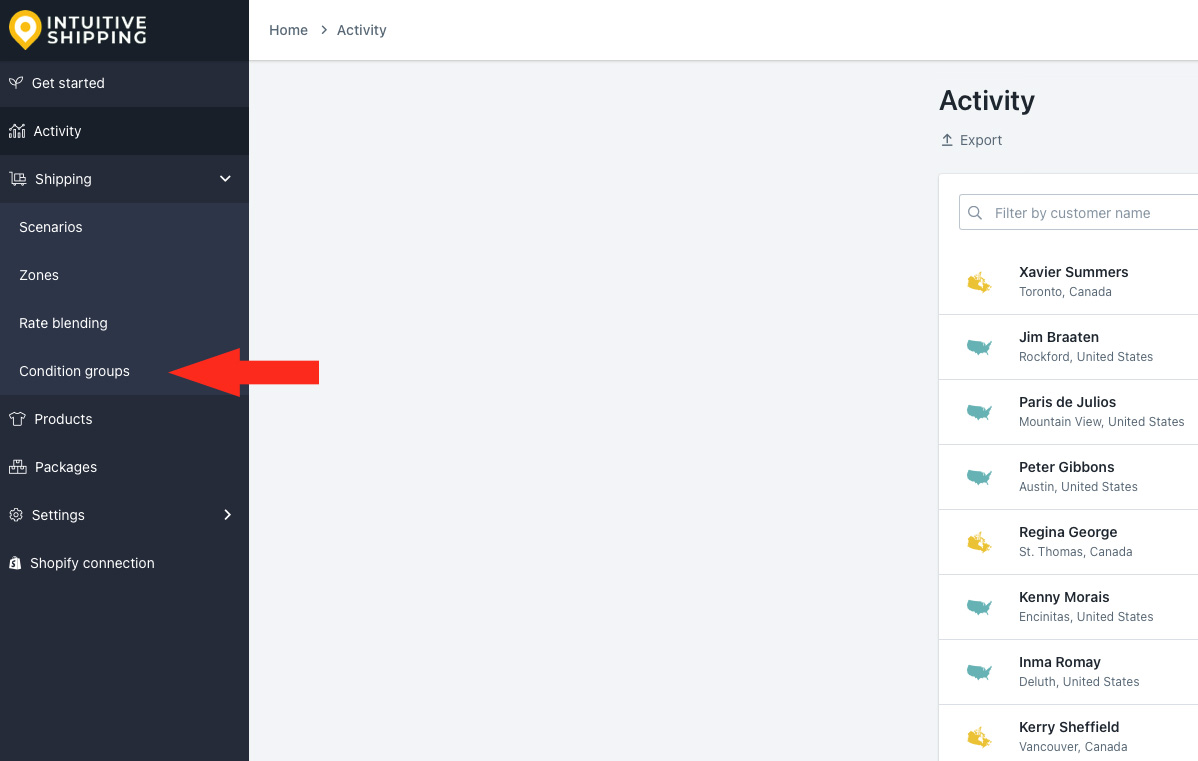
1) Click Shipping on the sidebar menu, then select Condition groups from the drop-down list.
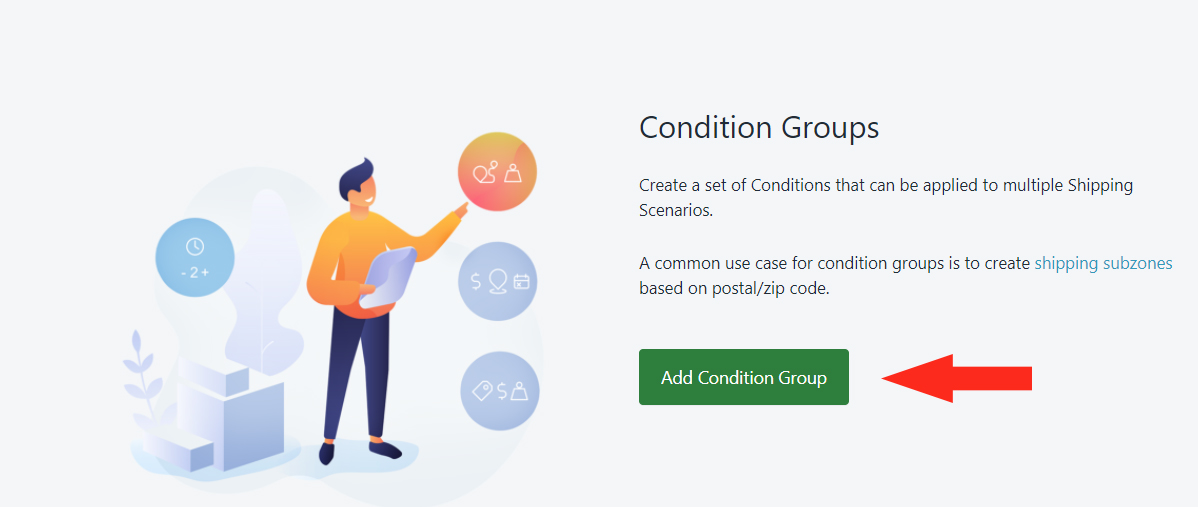
2) Click the Add Condition Group button.
General Settings
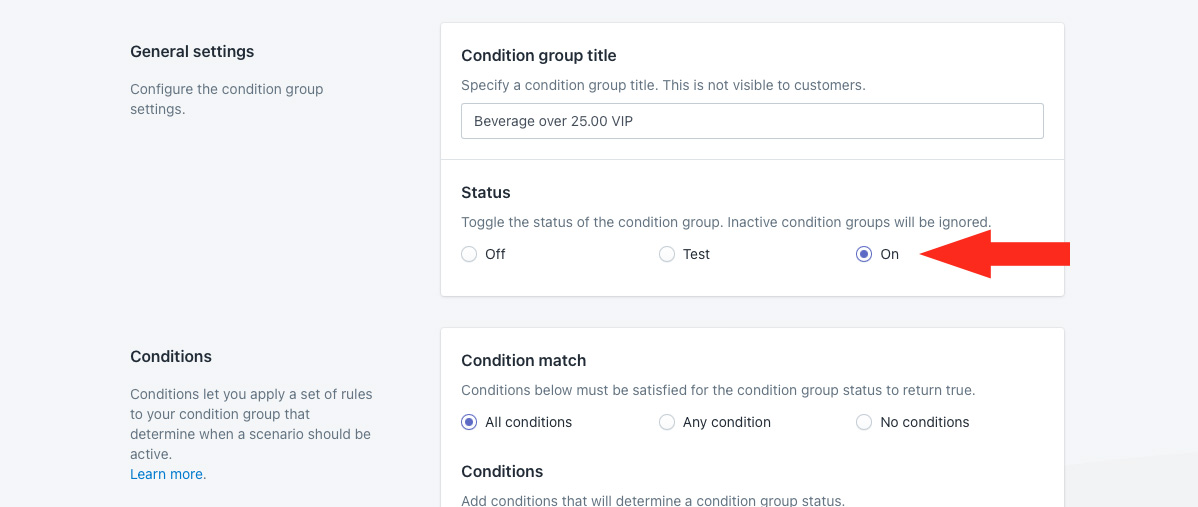
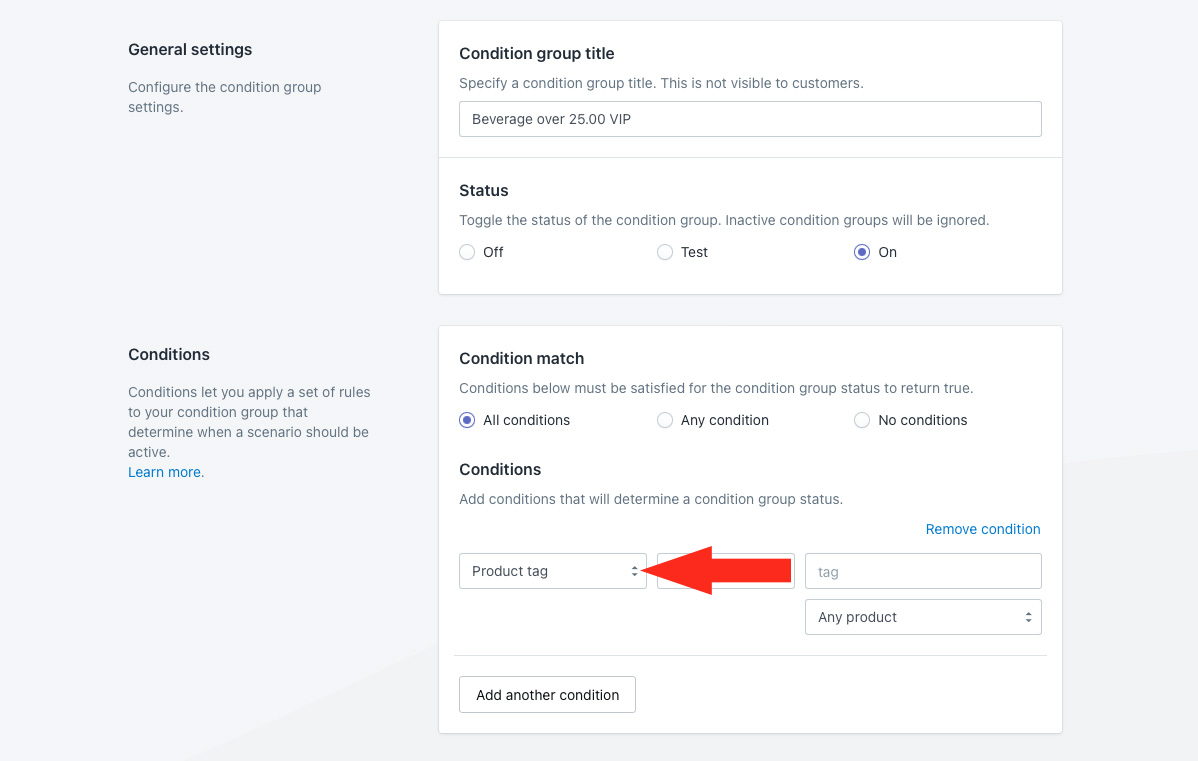
1) Enter a condition group title, like ‘Beverage over 25.00 VIP.
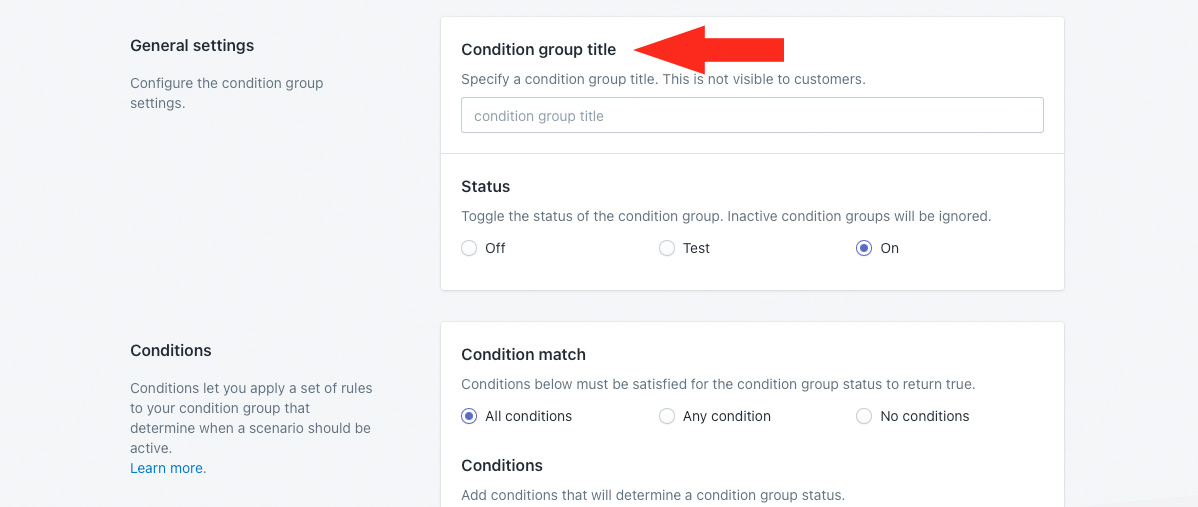
2) Leave the condition group status set to ‘On’.
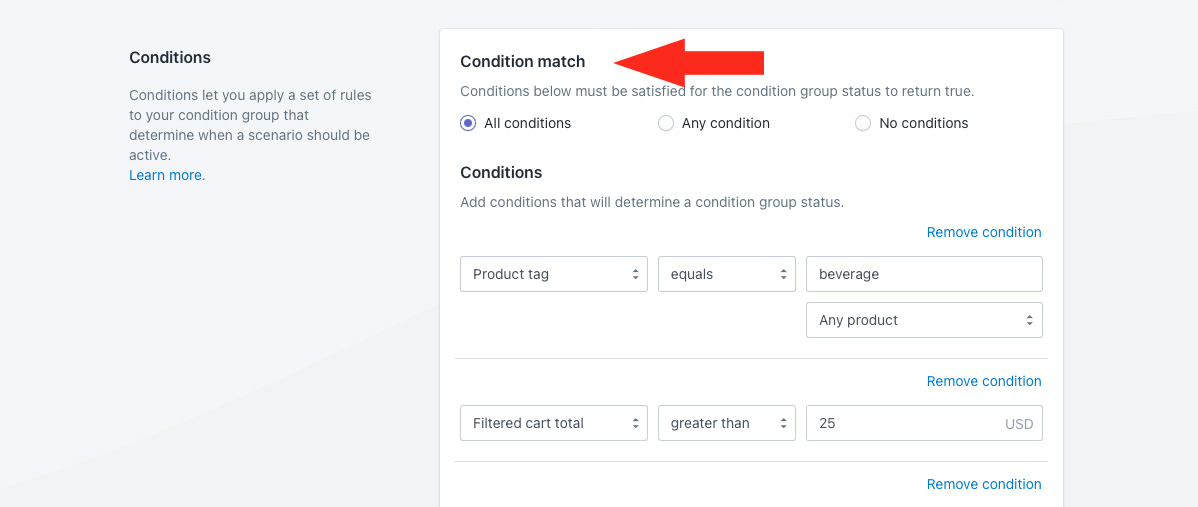
Conditions
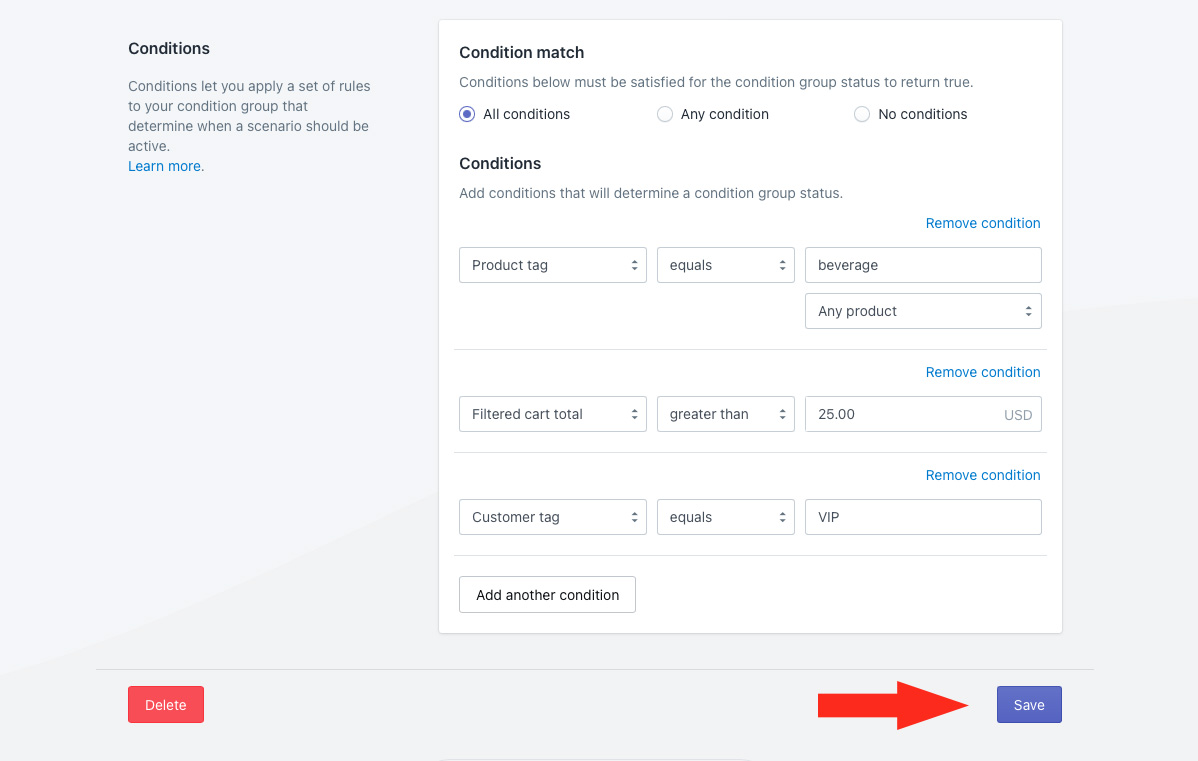
1) Leave Condition match set to ‘All conditions’.
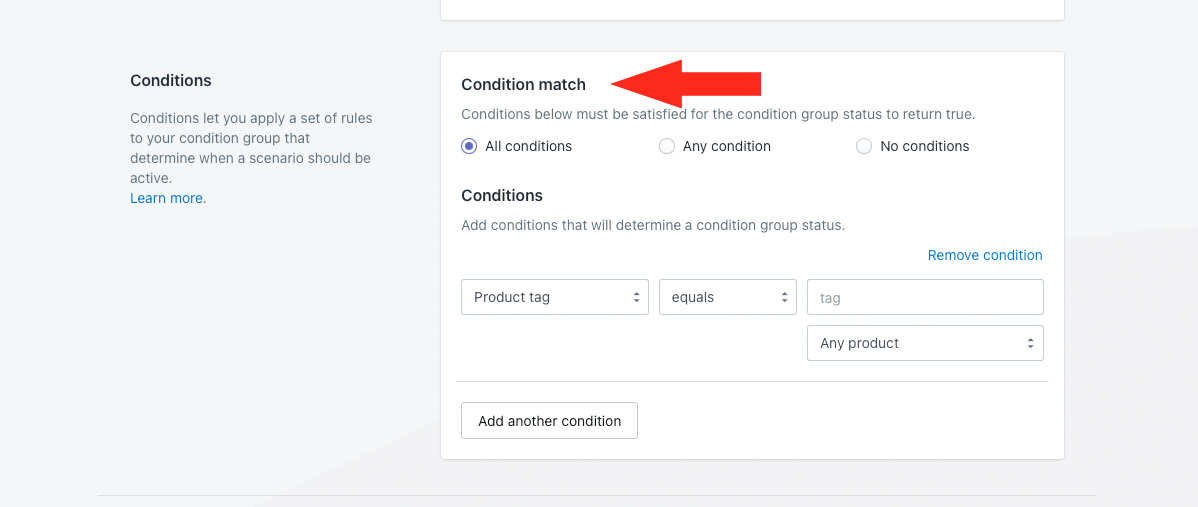
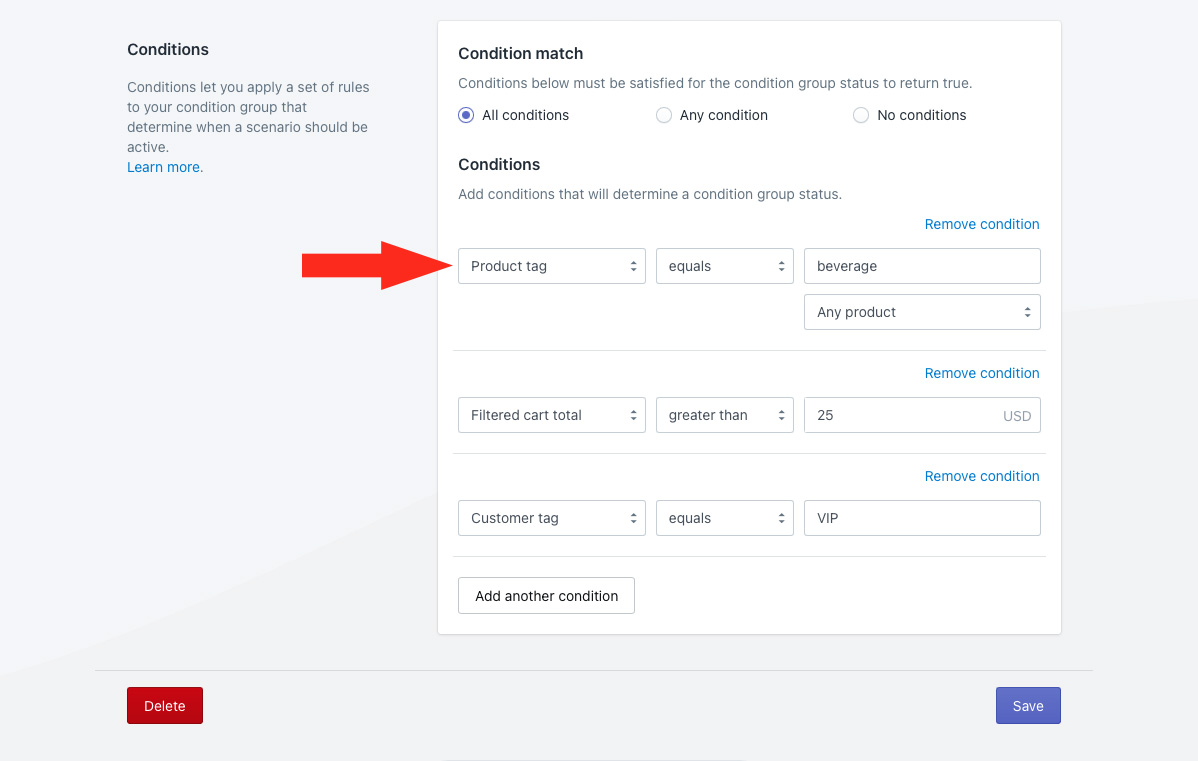
2) Choose a product condition as the condition type. For this example, we’re leaving it set to ‘Product tag’, but you can use any type of product condition to identify the product.
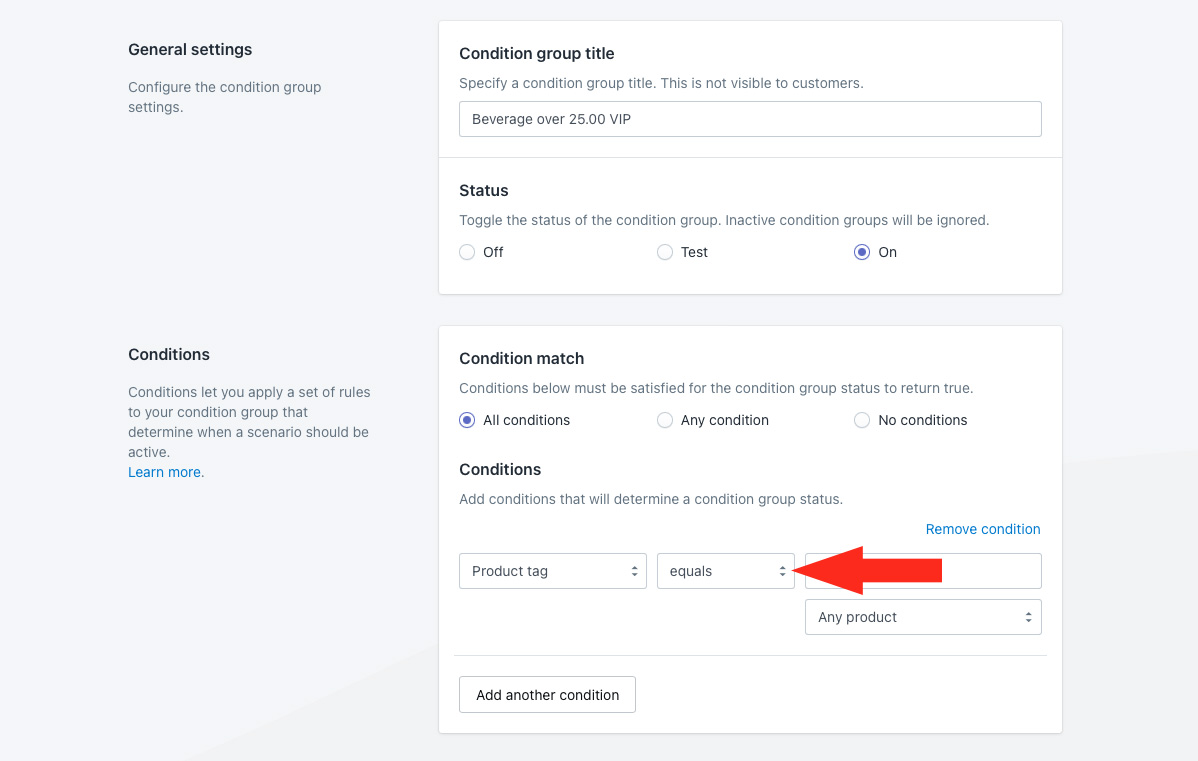
3) Choose the condition logic. For this example, we’re leaving it set to ‘equals’ because we want the product tag to match the value entered in Step 4.
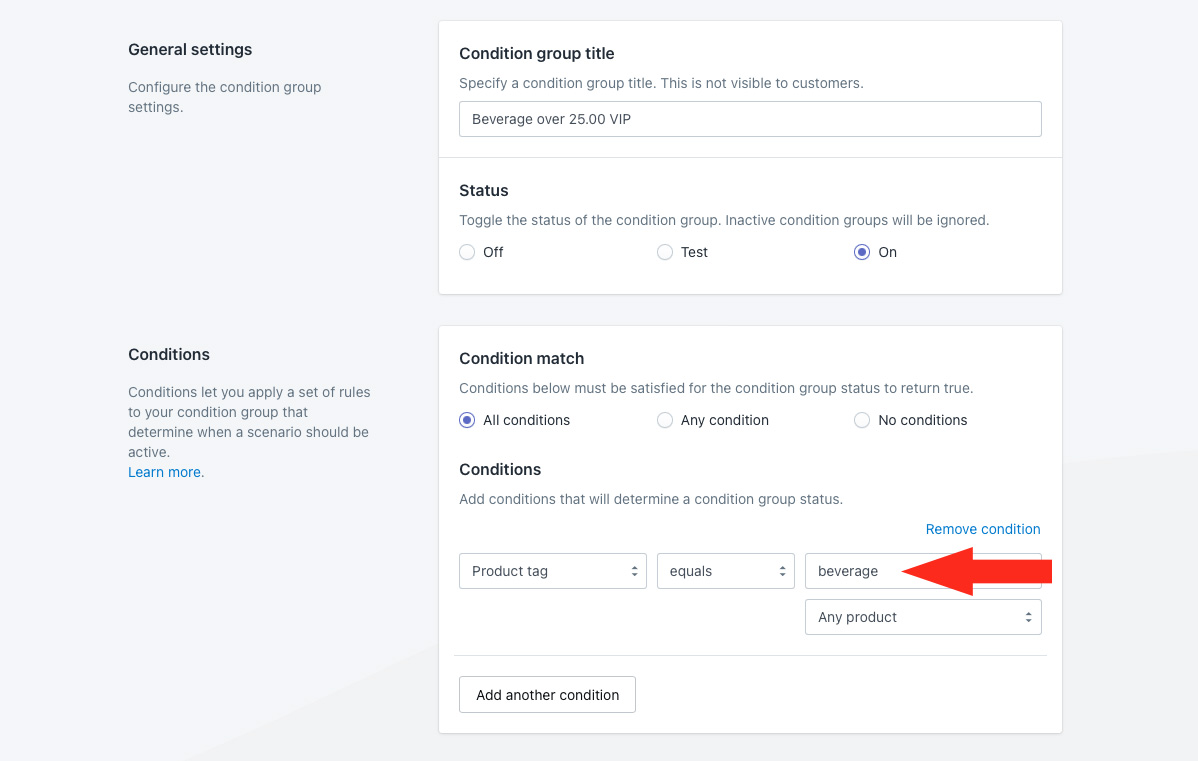
4) Enter the condition value. For this example, we’re entering ‘beverage’ because we want to identify products in the cart that include this product tag.
5) Leave the additional product setting set to ‘Any product’.

For this example, we want to set a minimum total requirement for beverage, so we’re adding a filtered cart condition. If your promotion doesn’t have a minimum value threshold, you can skip ahead to Step 10.
6) Click the Add another condition button.
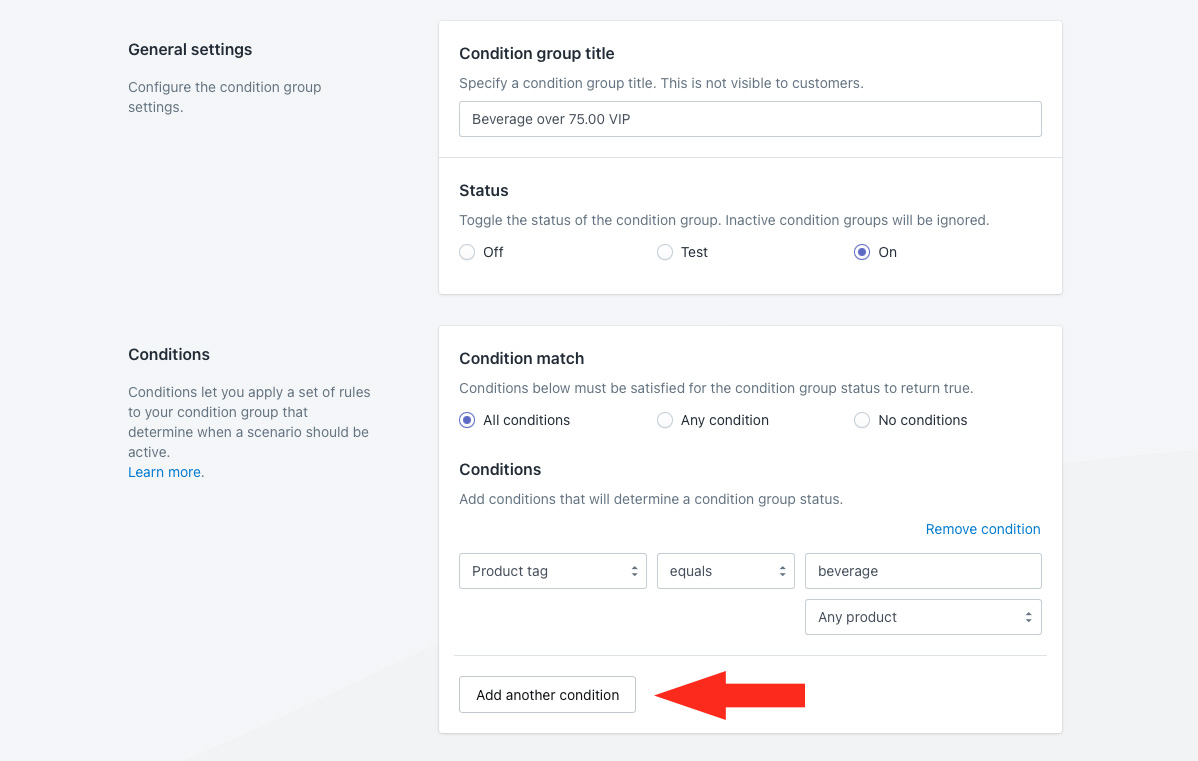
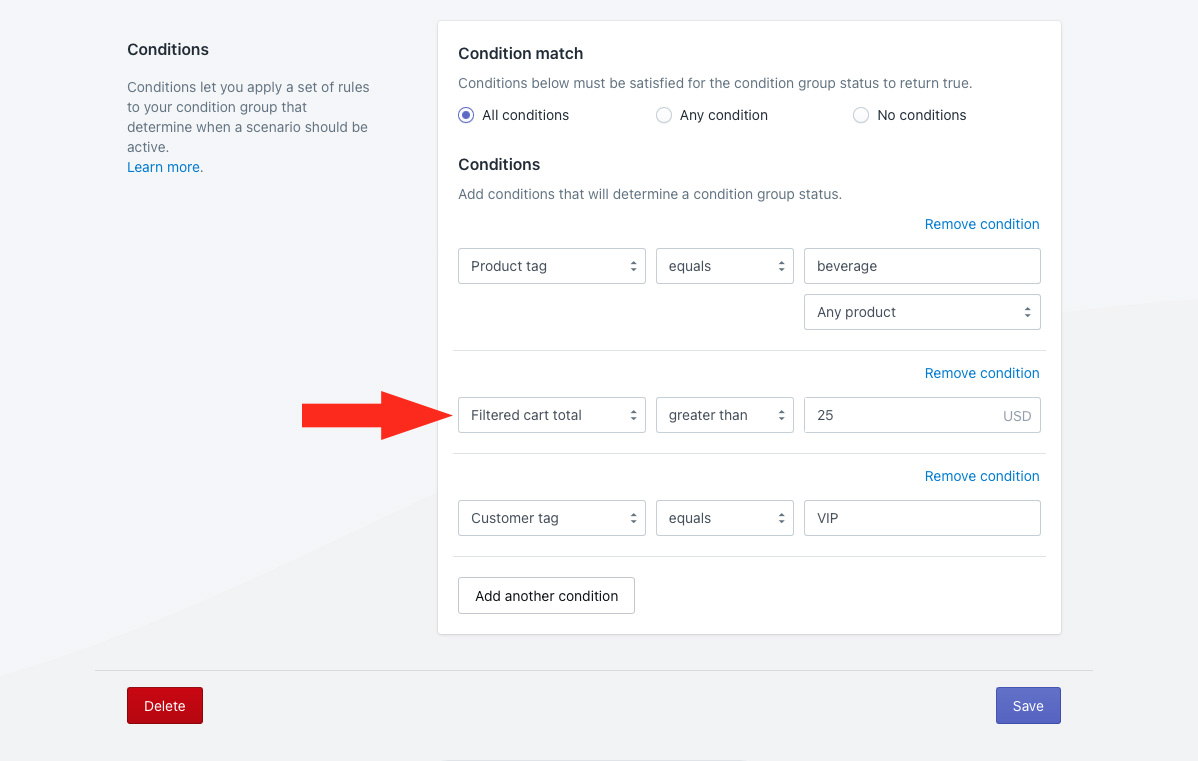
7) Select a filtered cart condition as the second condition type. For this example, we’re choosing ‘Filtered cart total’.
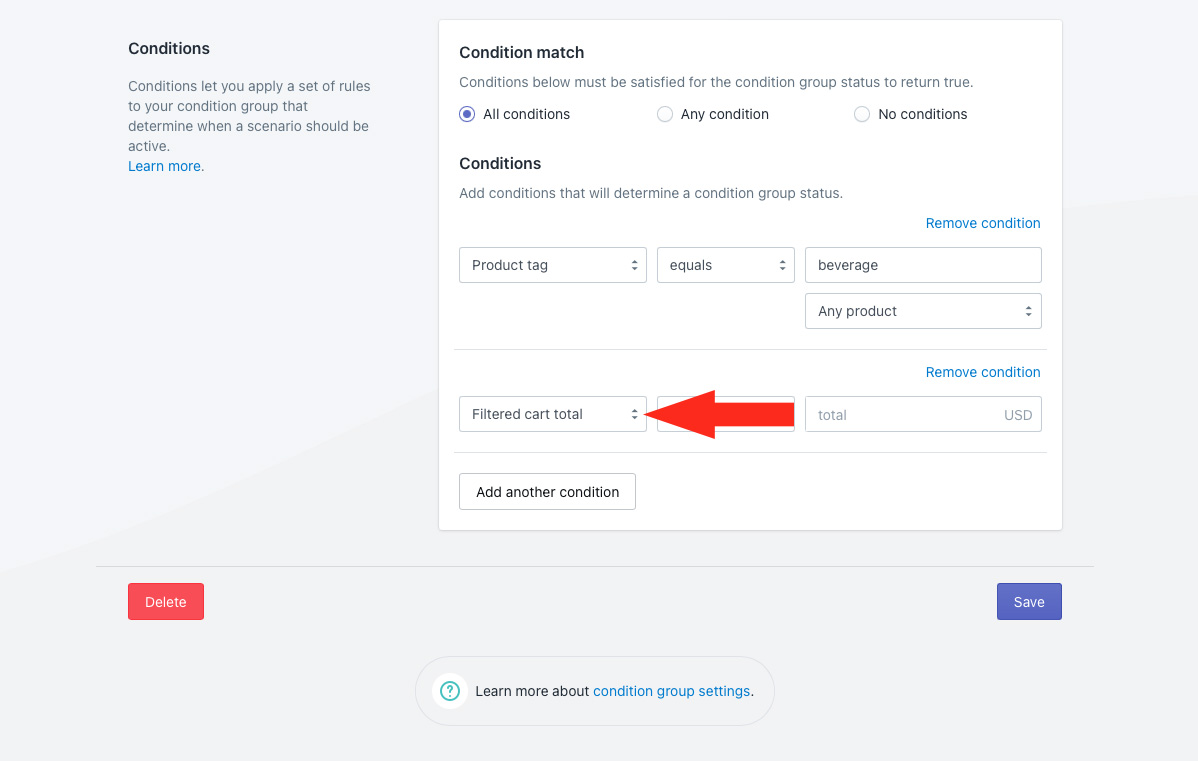
That means, we want the total entered in Step 8 to apply only to products that meet the condition entered in Steps 2 to 5, regardless of any other products in the cart.
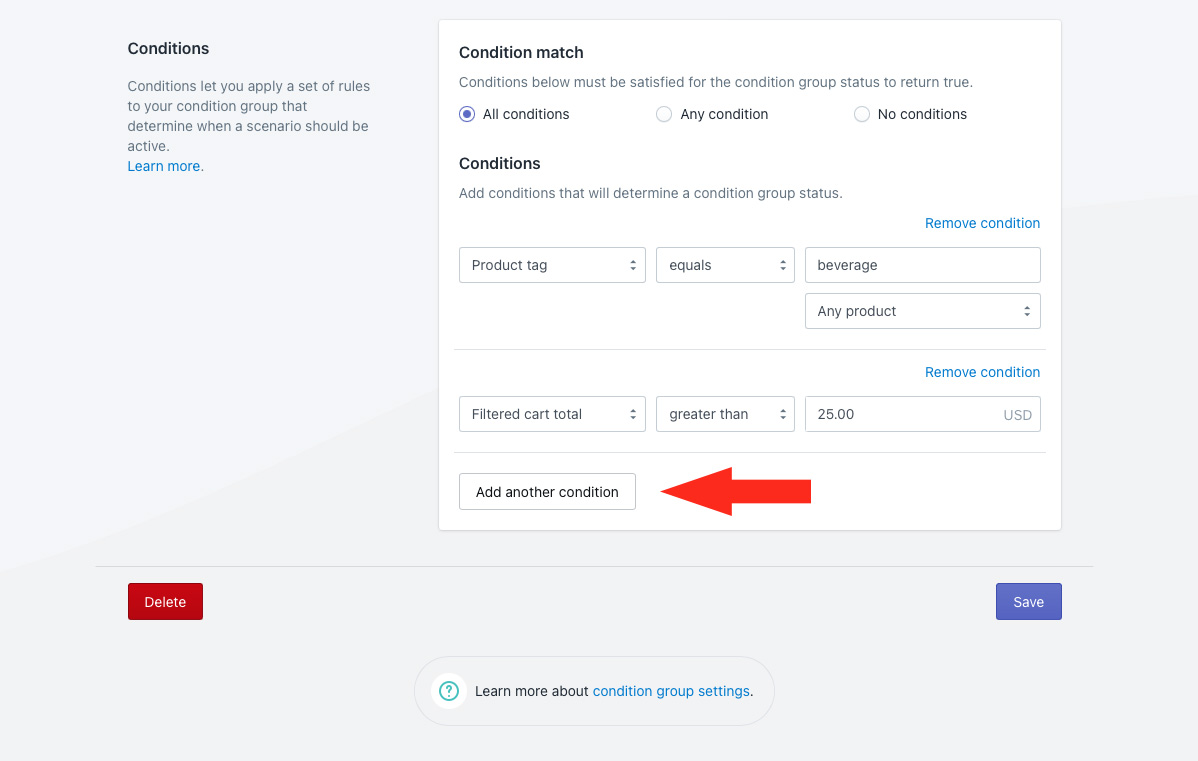
8) Set the condition logic. For this example, we’re using ‘greater than’.

That means, the condition group will be applied only when VIP customers place orders for more than the value entered in Step 9. Alternatively, you can select ‘greater than or equals’ if you want the threshold to include the value entered in Step 9.
9) Enter the condition value. For this example, we’re entering ‘25.00’ ($25.00).

That means, the condition group will be applied only when VIP customers place orders for more than this amount of beverage products.
10) Click the Add another condition button.
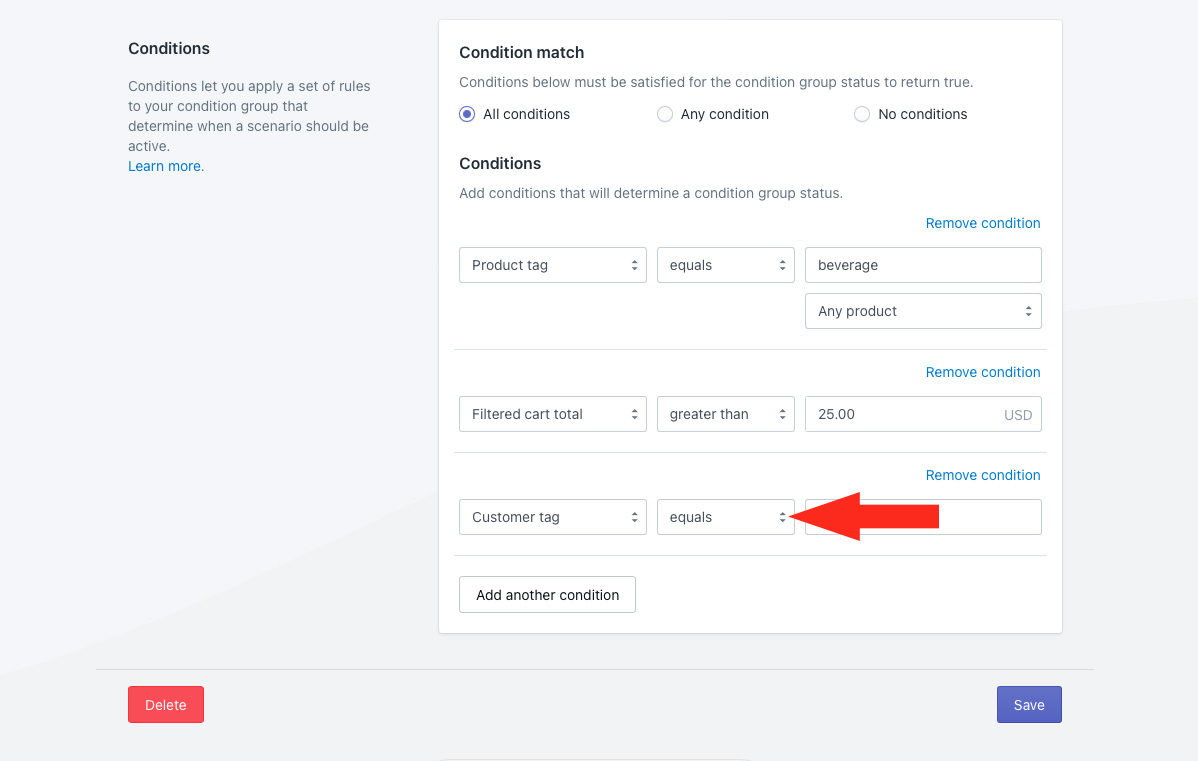
11) Select a customer condition as the second condition type. For this example, we’re choosing ‘Customer tag’, but you can use any type of customer condition.

12) Set the condition logic. For this example, we’re leaving it set to ‘equals’.
13) Enter the condition value. For this example, we’re using ‘VIP’ because we want to identify customers with this tag.
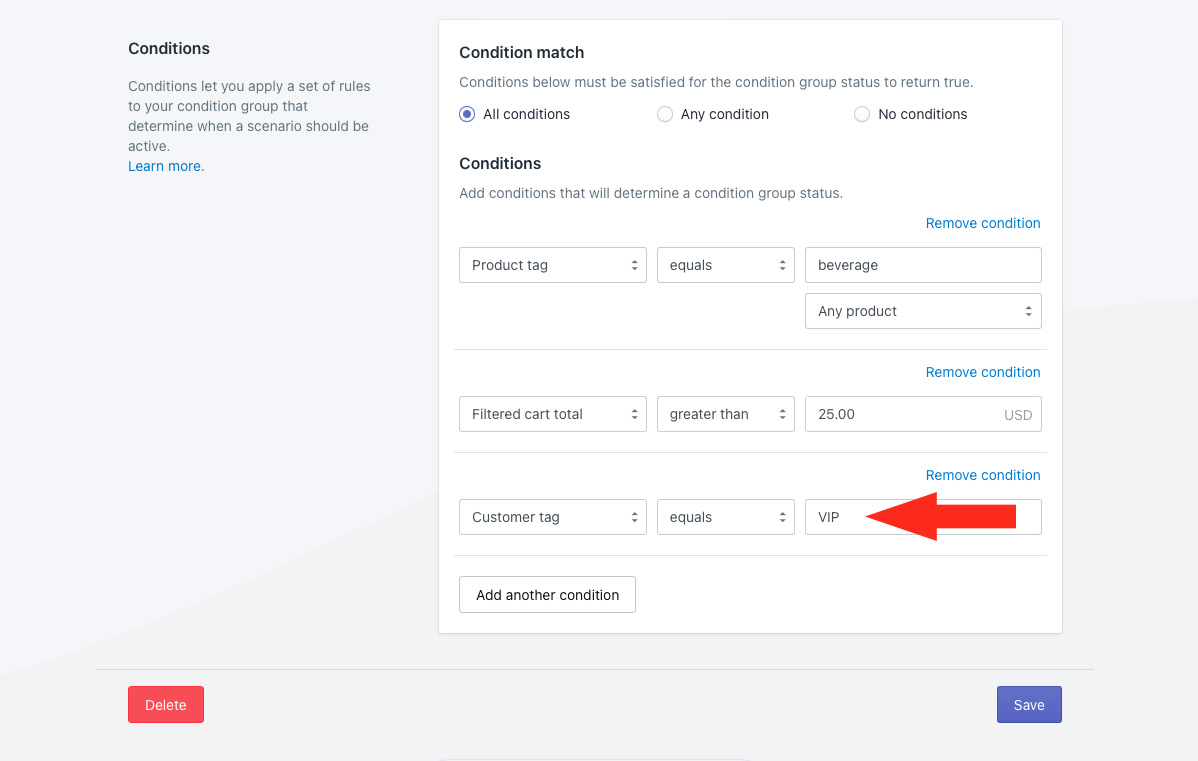
That means, the condition group will be applied only when VIP customers place orders for more than the amount of beverage products entered in Step 9.
14) Click the Save button to save your first condition group.
Create The Second Condition Group
This condition group will allow any customers from the city of Dallas who order more than $75.00 of beverage products to get the free shipping promotion.
To simplify the process, you can make a duplicate of your first condition group, then make minor adjustments to the condition settings rather than creating a new group from scratch.
1) After saving your first condition group, scroll to the top of the page, then click Duplicate below the condition group heading.
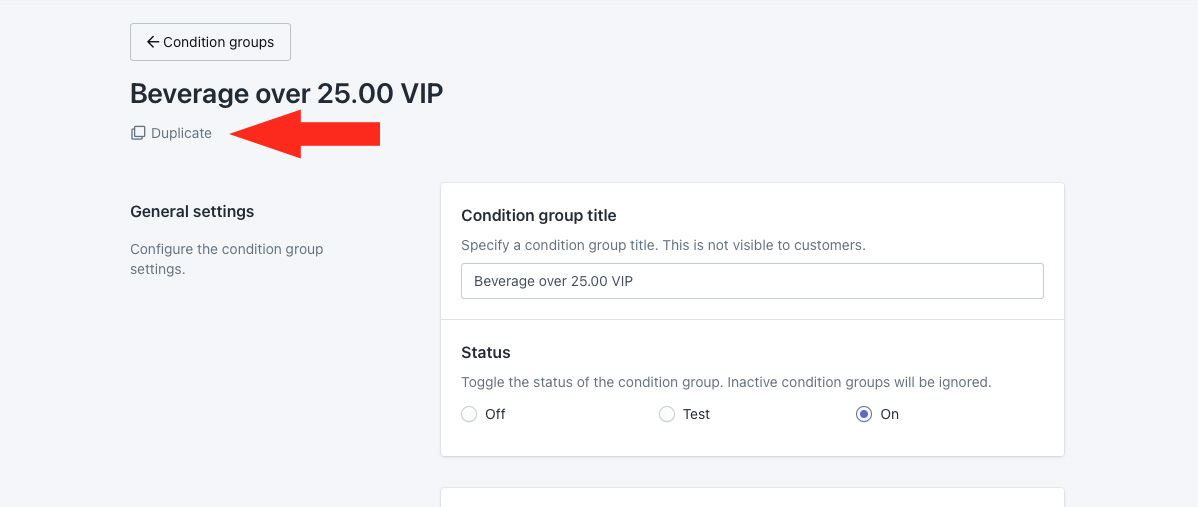
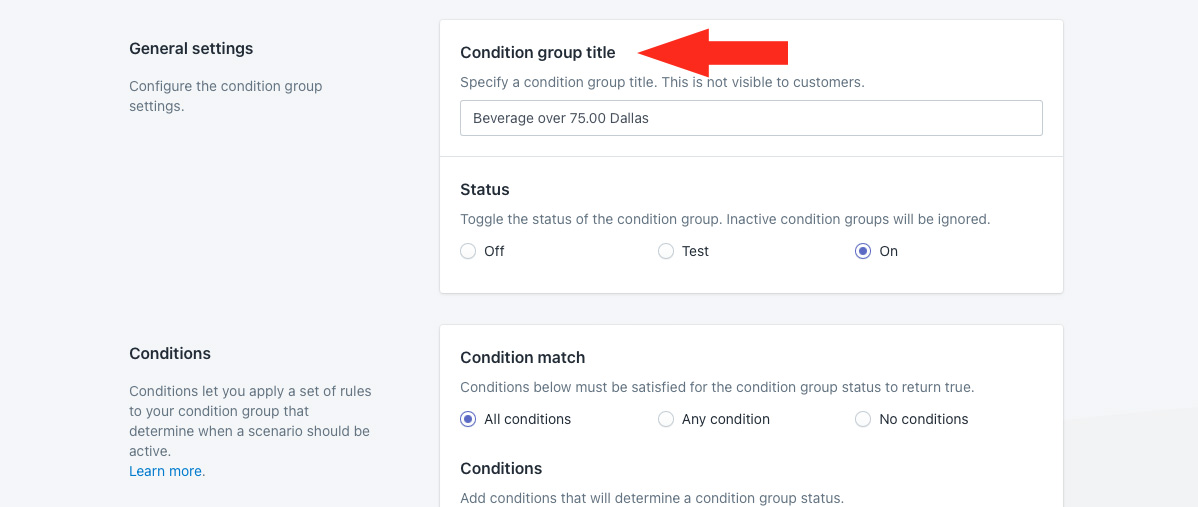
2) Change the condition group title from ‘Copy of [the original title]’ to something else, like ‘Beverage over 75.00 Dallas’
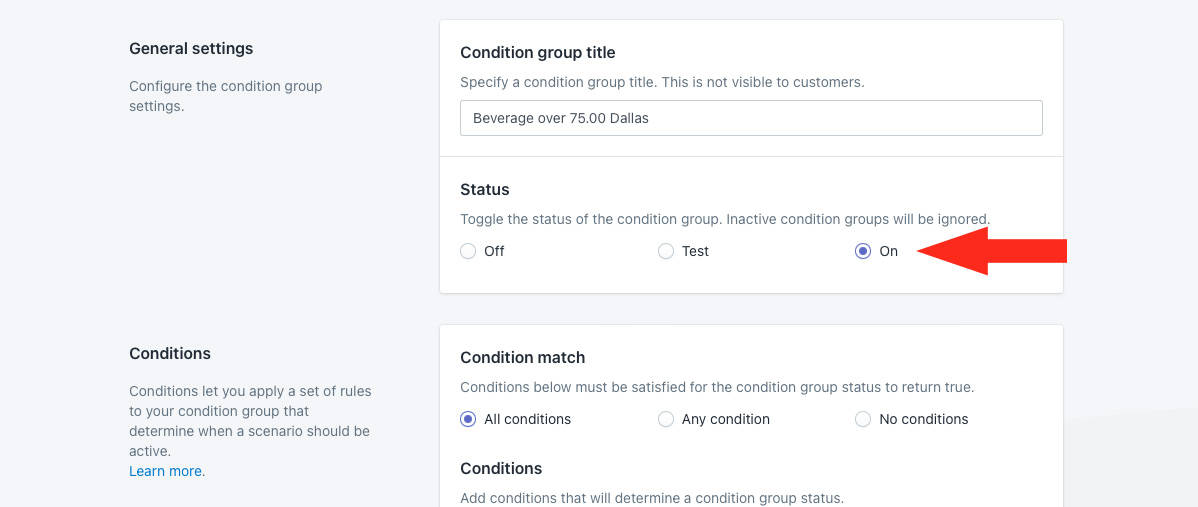
3) Leave the status set to ‘On’
Conditions
1) Leave Condition match set to ‘All conditions’
2) For the first condition copied over from the original condition group, leave all of the settings as-is.
For this example, we want to set a minimum total requirement for beverage, so we added a filtered cart condition to the original condition group. If your setup doesn’t require a minimum value threshold and you didn’t have a filtered cart condition in your original condition group, you can skip ahead to Step 5.
3) For the second condition copied over from the original condition group, leave the condition type set to ‘Filtered cart total’ and leave the condition logic set to ‘greater than’.
That means, the condition group will be applied only when Dallas customers place orders for more than the value entered in Step 4. Alternatively, if you selected ‘greater than or equals’ for your original condition group, you can use that setting again if you want the threshold to include the value entered in Step 4.
4) Change the condition value. For this example, we’re changing to ‘75.00’ ($75.00).

That means, the condition group will be applied only when Dallas customers place orders for more than this amount of beverage products.
5) For the third condition copied over from the original condition group, change the condition type as needed or leave it as-is. For this example, we’re changing to the ‘City’ customer condition.
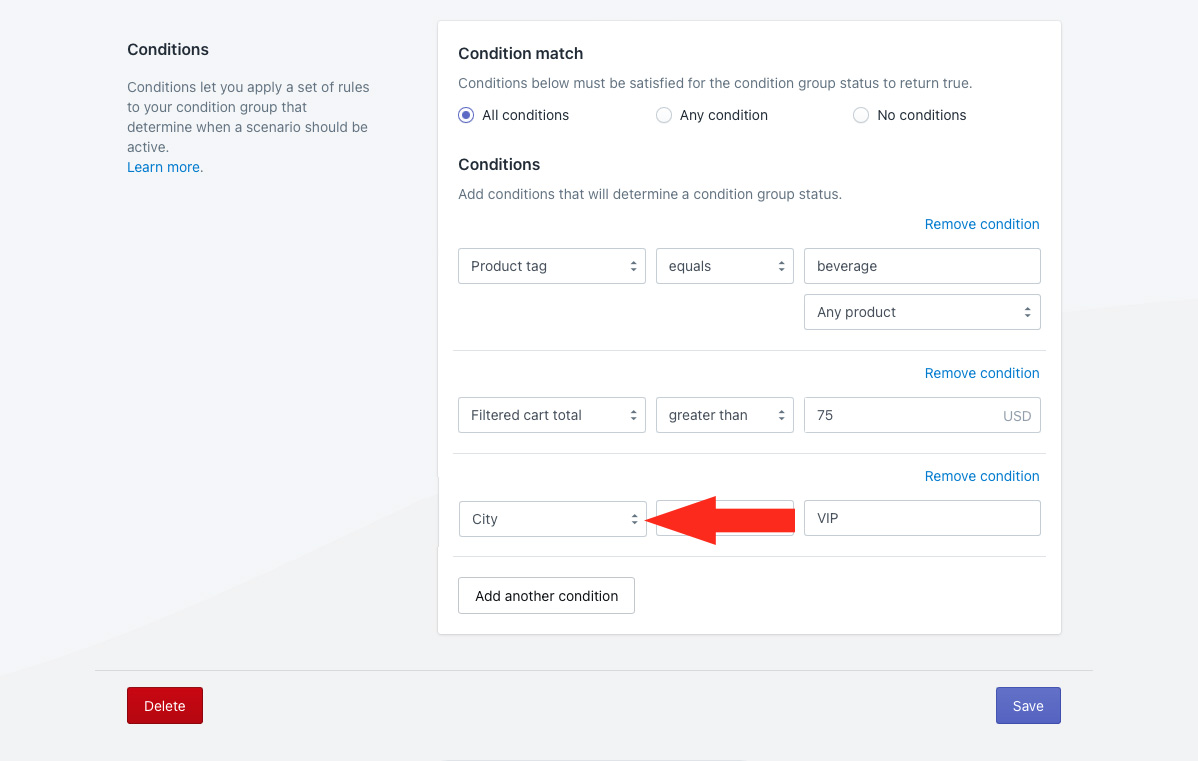
6) Set the condition logic as needed. For this example, we’re leaving it set to ‘equals’.
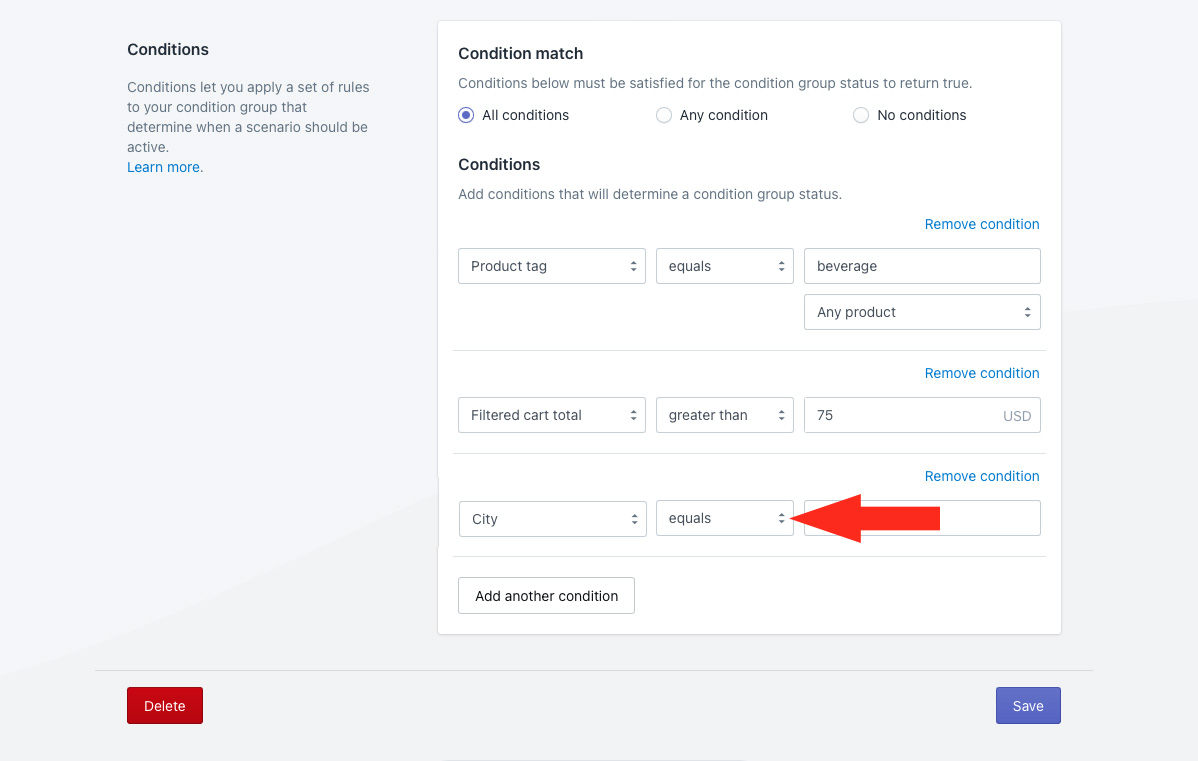
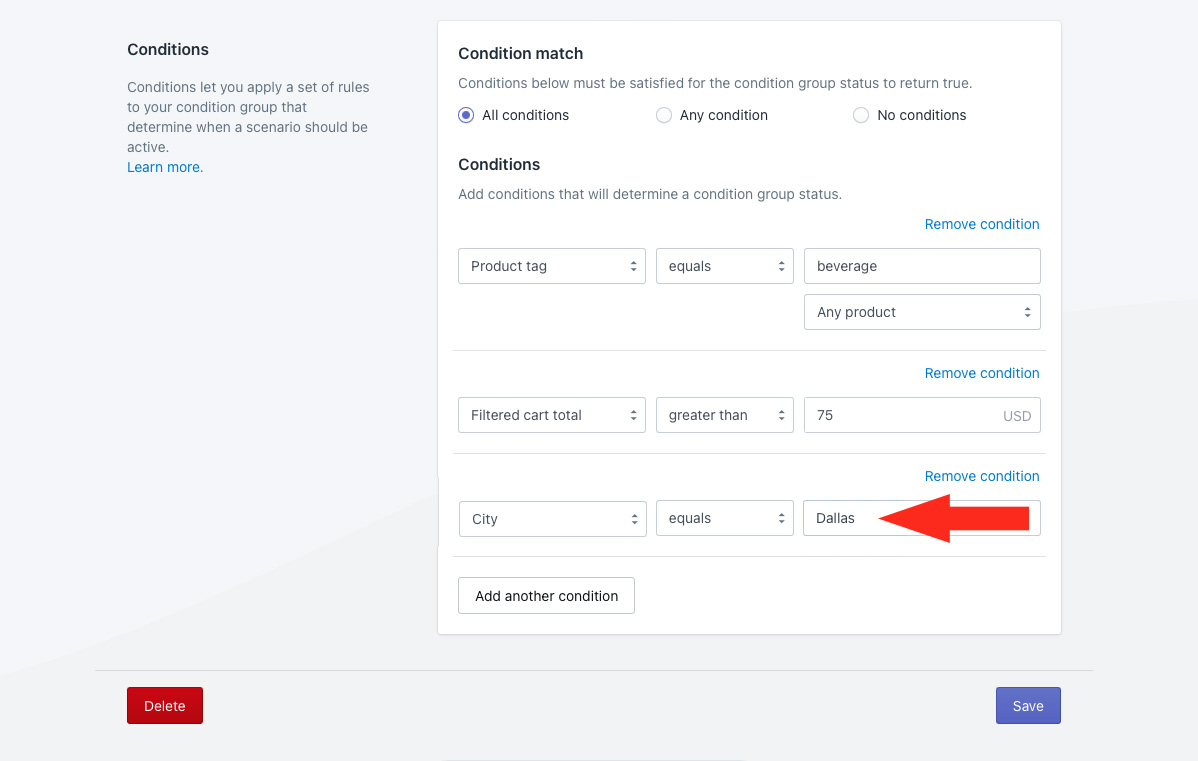
7) Enter the condition value. For this example, we’re using ‘Dallas’.
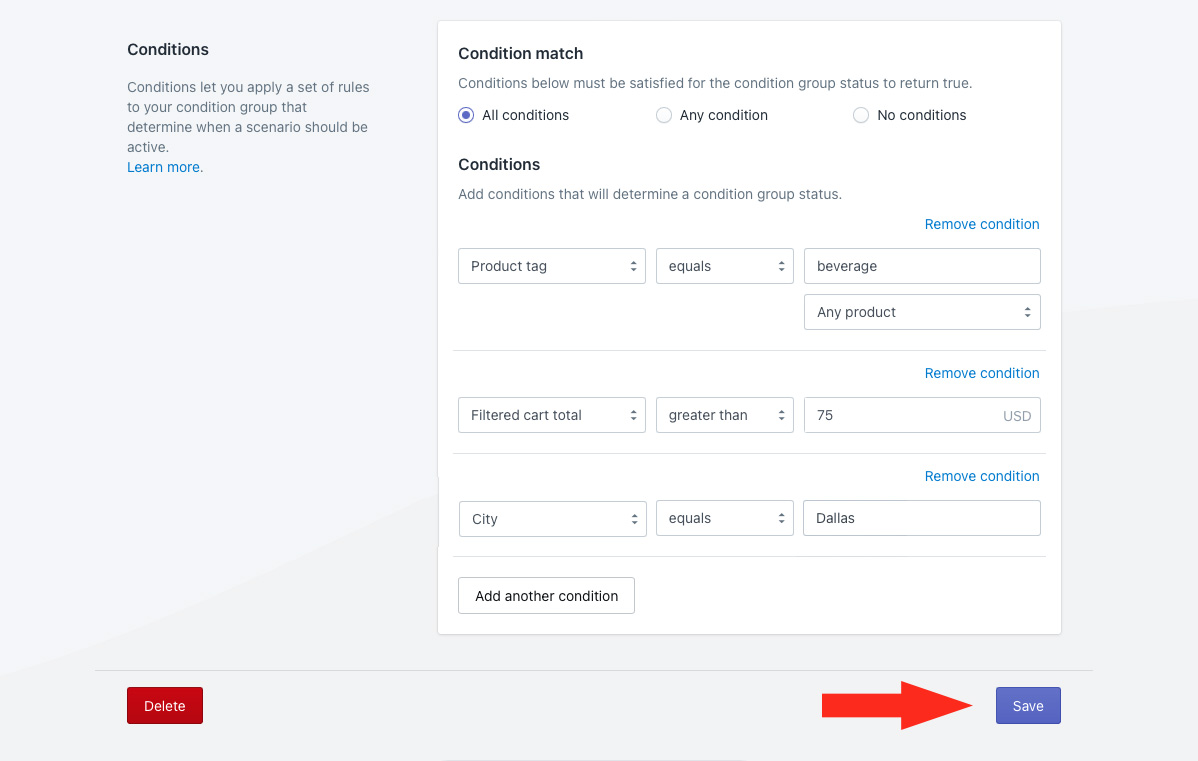
8) Click the Save button to save your second condition group.
7) After saving your second condition group, scroll to the top of the page, then hit the back button above the condition group heading.
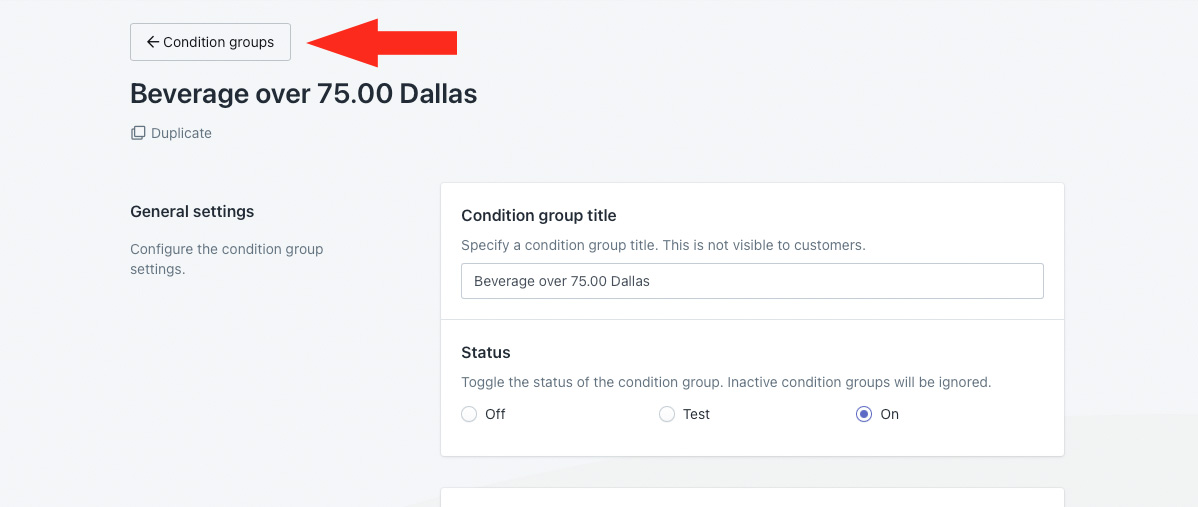
You should now see two (2) condition groups. One for your first set of conditions, and one for your second set of conditions. For this example, we created one condition group for beverage products over $25.00 purchased by VIP customers and another condition group for beverage products over $75.00 purchased by customers from Dallas.
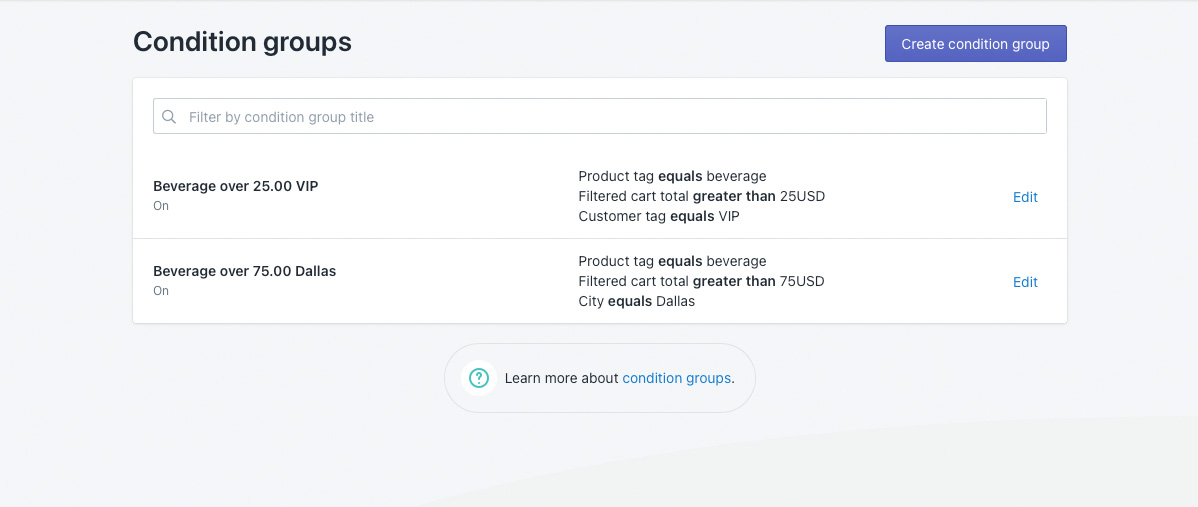
These conditions groups will now be available as ‘conditions’ in your Scenarios.
Create A Beverage Free Shipping Scenario
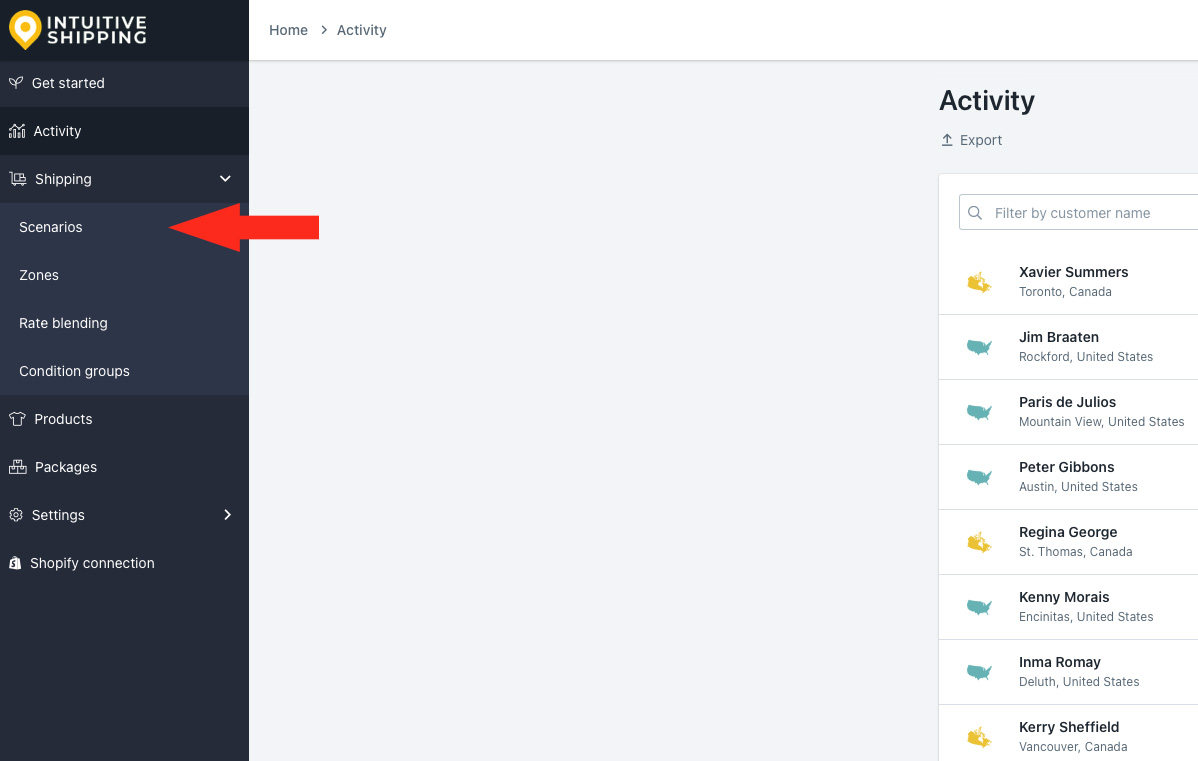
1) Click Shipping on the sidebar menu, then select Scenarios from the drop-down list.
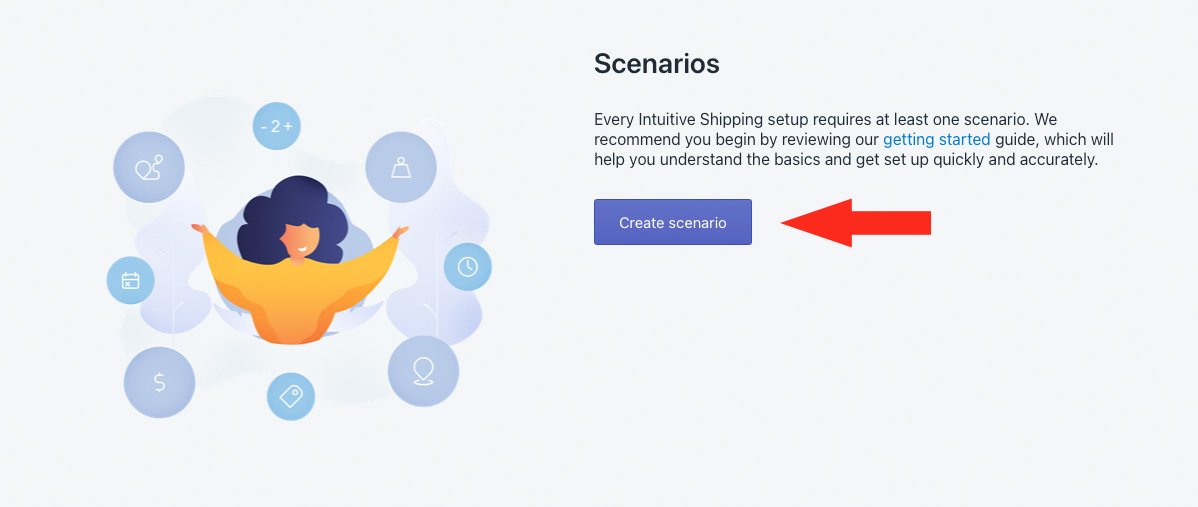
2) Click the Create scenario button.
General Settings
1) Enter a Scenario title, like ‘Beverage Free Shipping Promo’.
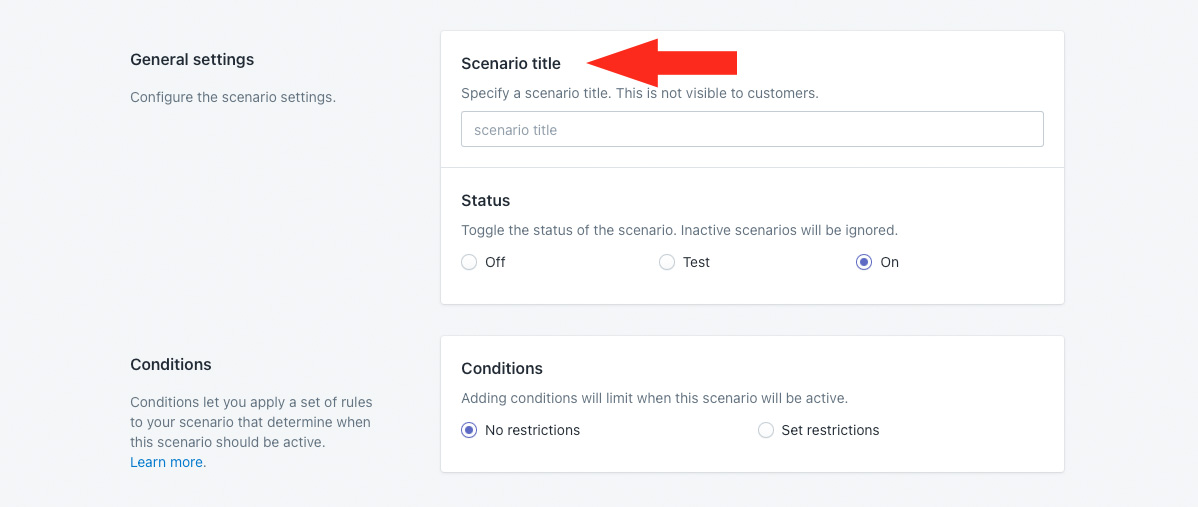
2) Leave the status set to On.
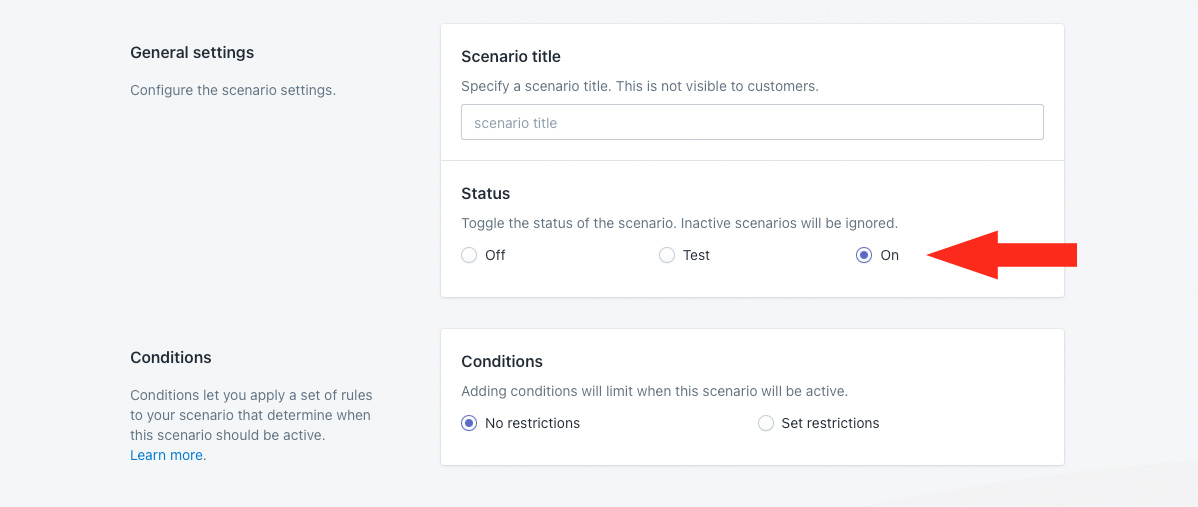
Alternatively, you can set the status to ‘Test’ if you want test your free shipping method before making it live to customers.
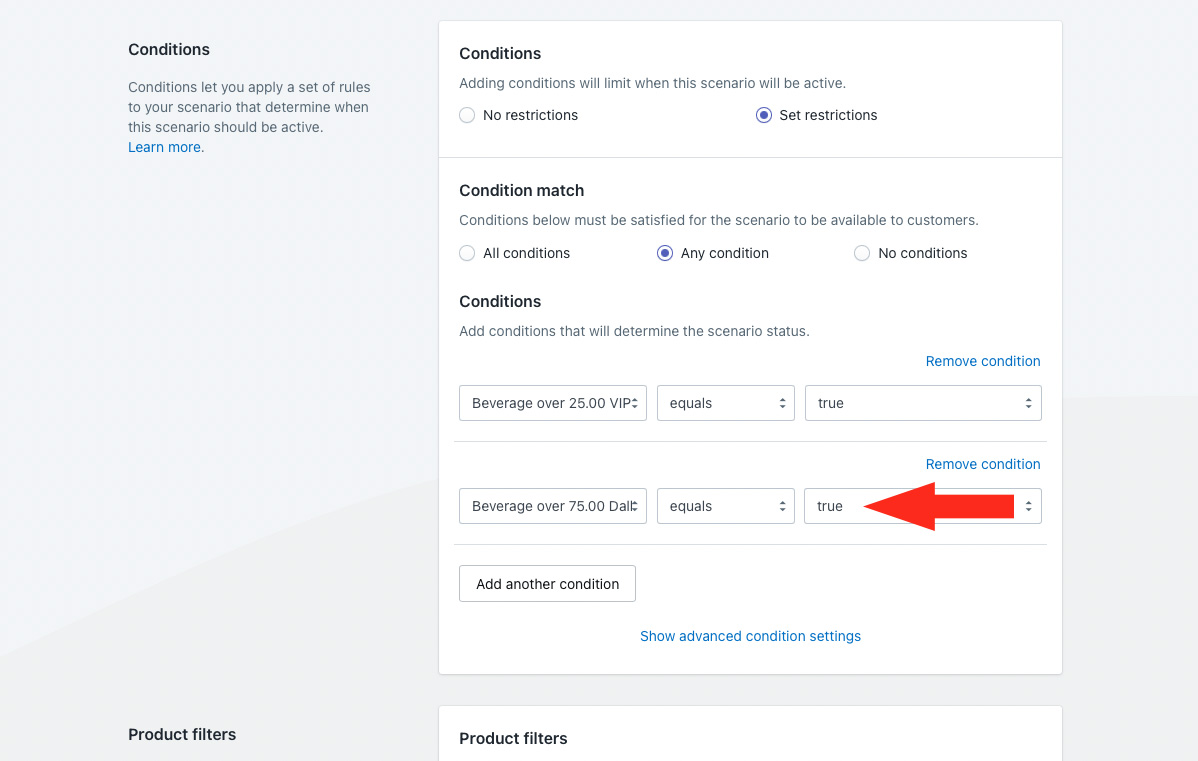
Conditions
1) Select Set restrictions.
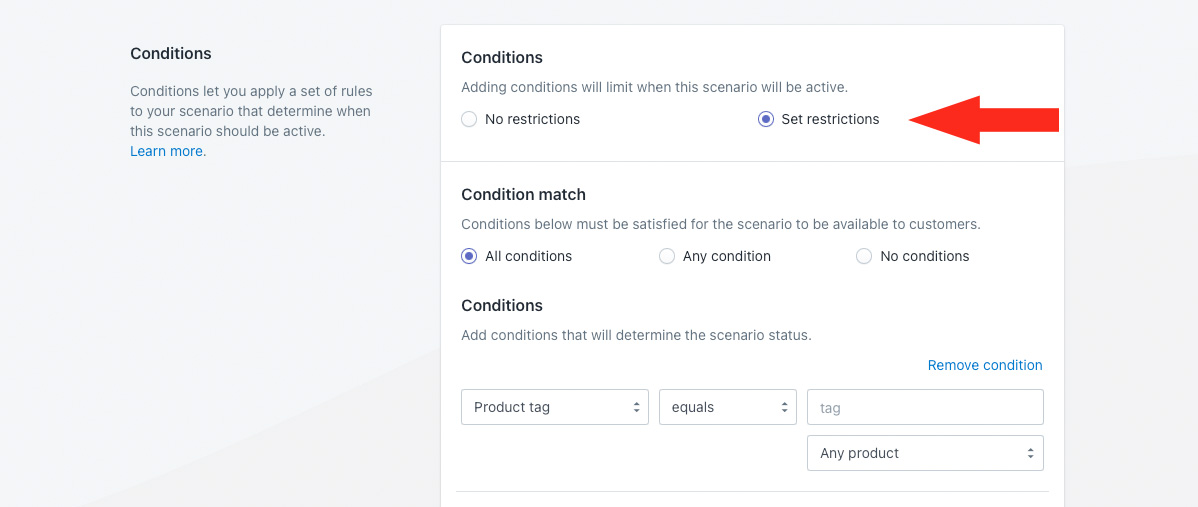
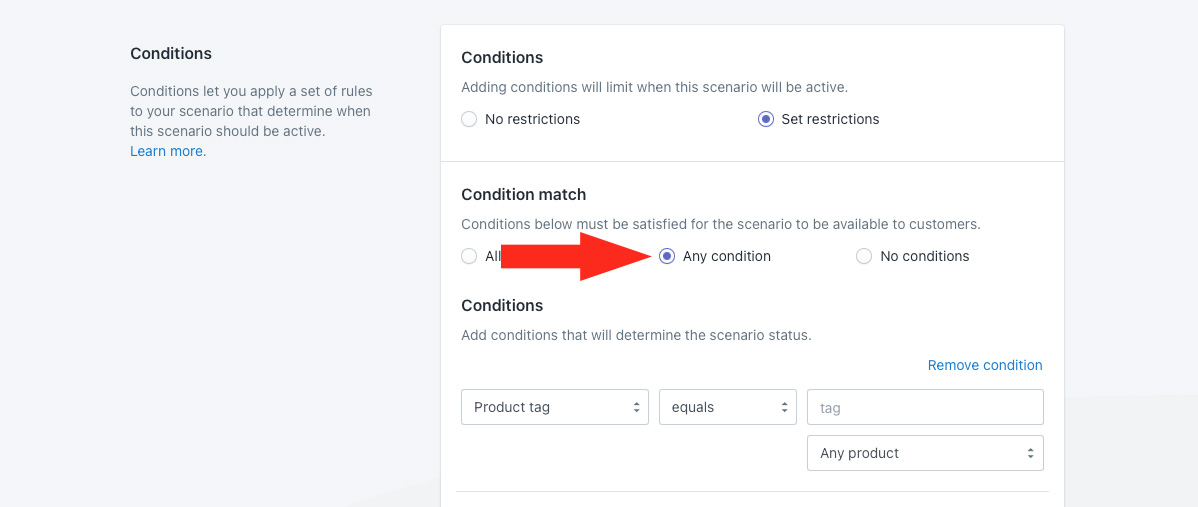
2) Set Condition match to ‘Any condition’.
3) Select the first condition group you created earlier as the condition type. For this example, we’re selecting ‘Beverage over 25.00 VIP’ which includes a minimum threshold of $25.00 for VIP customers.
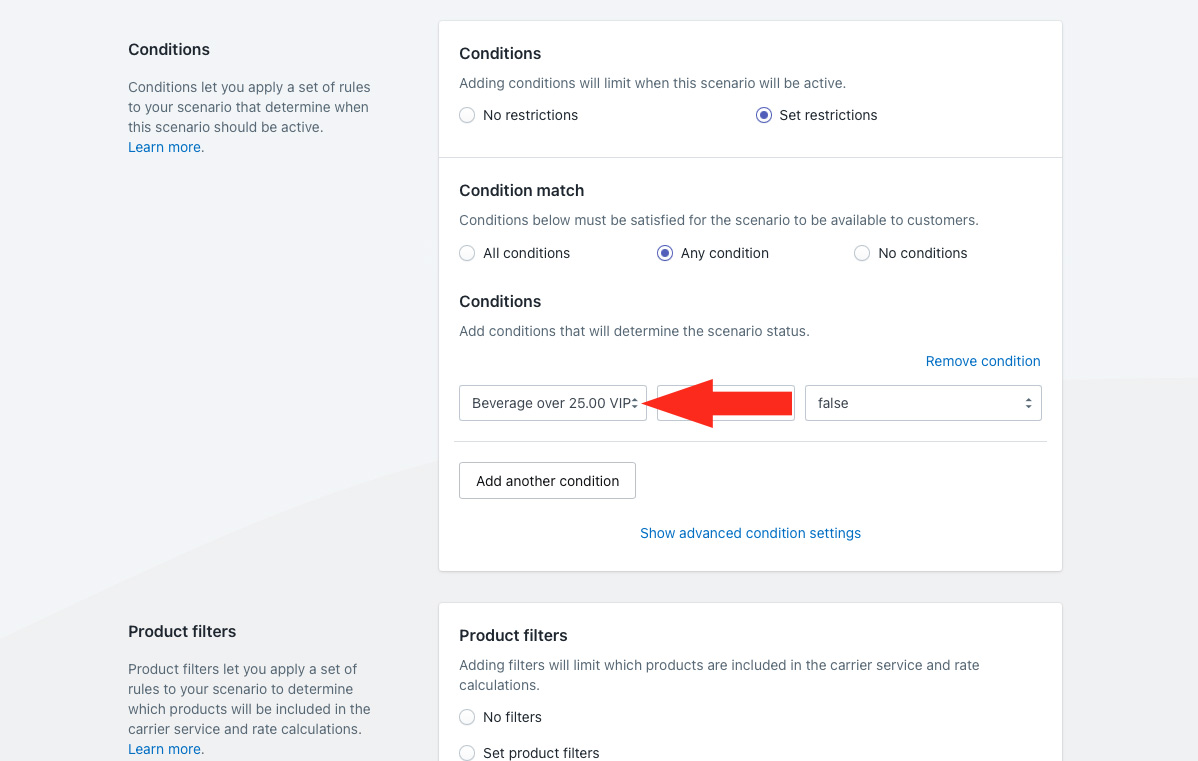
4) Leave the condition logic set to ‘equals’.
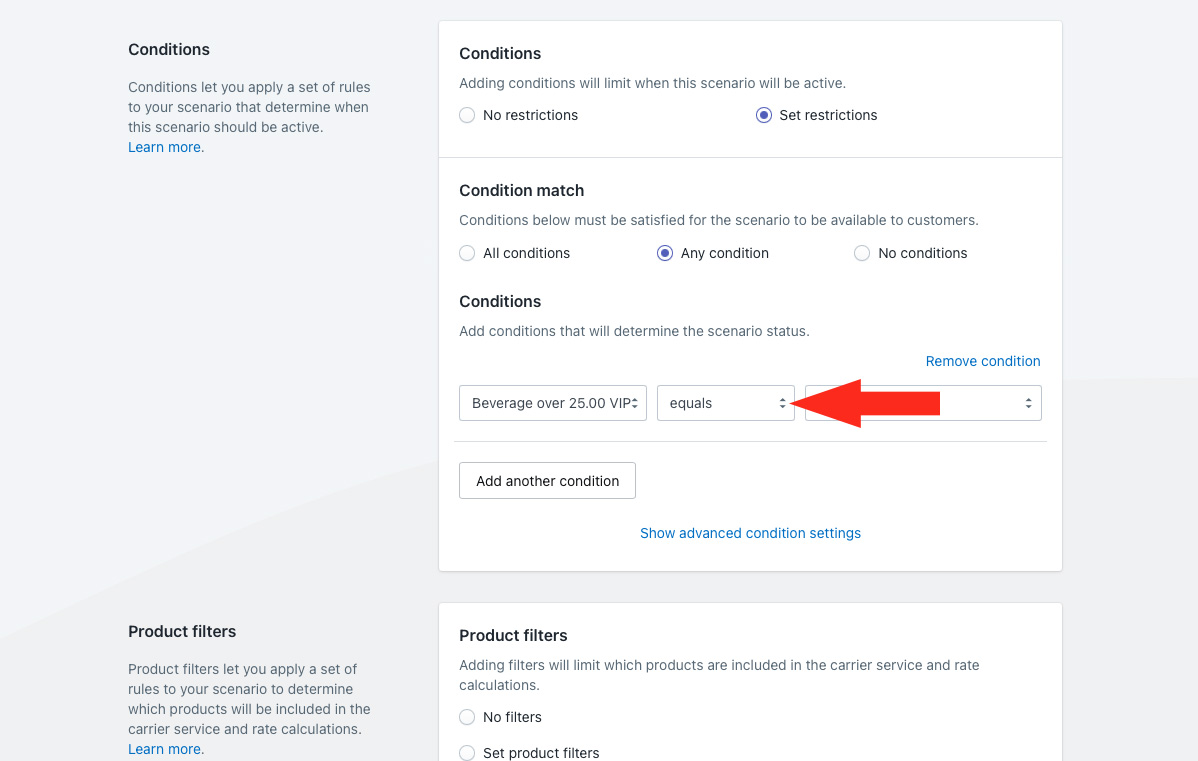
5) Select ‘true’ as the condition value.
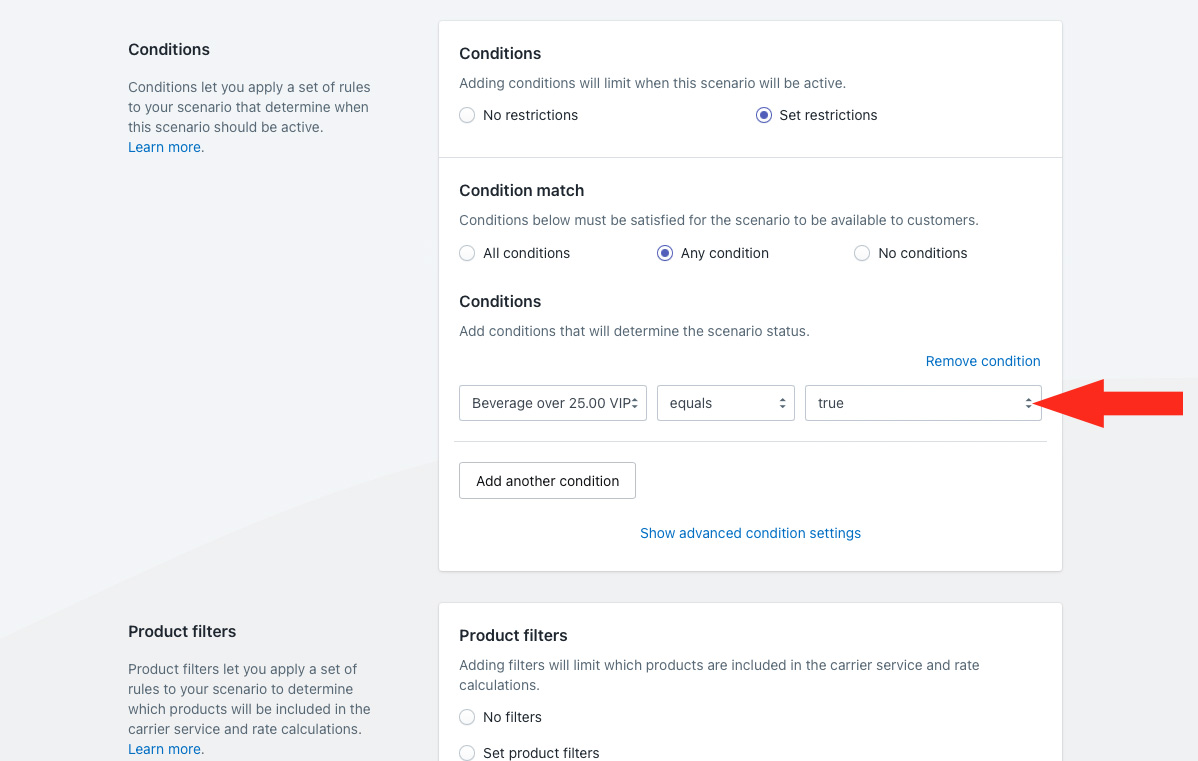
That means the conditions within the condition group must be met. For this example, a customer must order more than $25.00 worth of Beverage product and be tagged ‘VIP in their Shopify customer profile.
6) Click the Add another condition button.

7) Select the second condition group you created earlier as the condition type. For this example, we’re selecting ‘Beverage over 75.00 Dallas’ which includes a minimum threshold of $75.00 for customers whose address is in Dallas.
8) Leave the condition logic set to ‘equals’.
9) Select ‘true’ as the condition value.
That means the conditions within the condition group must be met. For this example, a customer must place their order on a Thursday before 12:00 noon.
And, because Condition match was set to ‘Any condition’ in Step 2, it means the conditions within either condition group must be met. For this example, a customer with a VIP tag must order more than $25.00 worth of beverage or a customer from Dallas must order more than $75.00 worth of beverage.
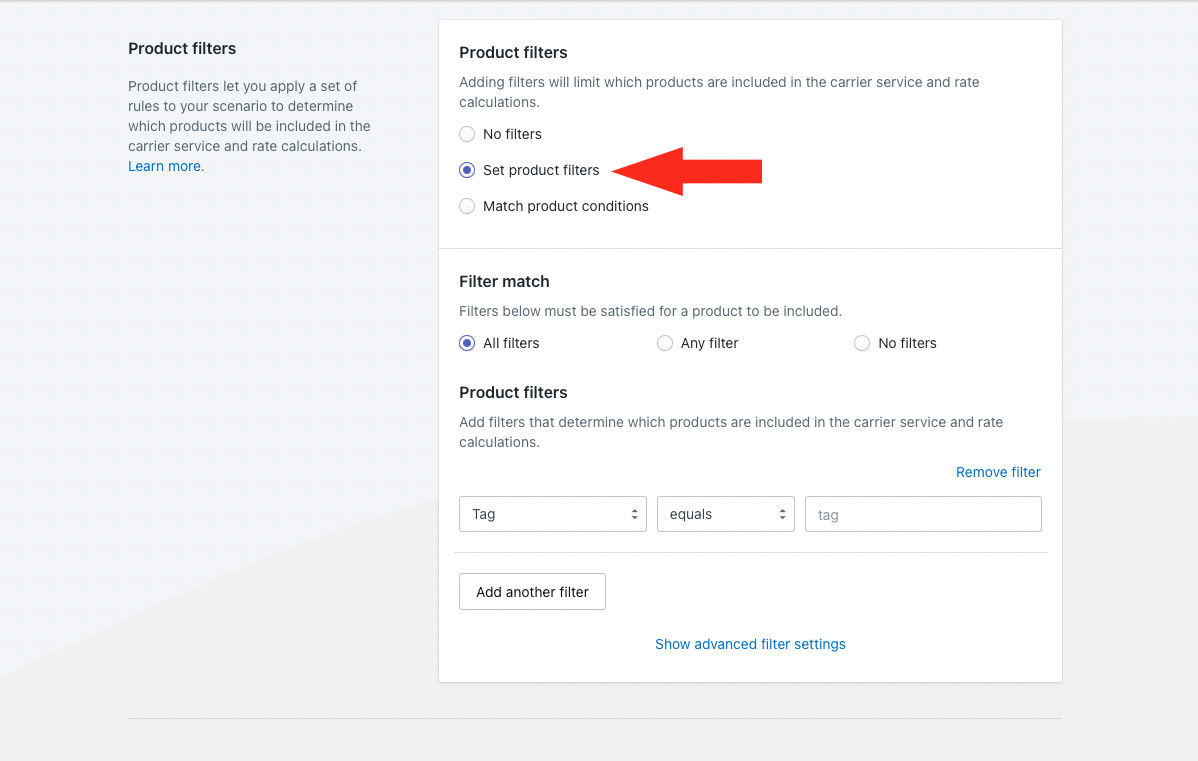
Product Filters
Earlier in this guide, we mentioned that product conditions that are part of a condition group do not get handled by the filtering system the same way as a stand-alone product condition. Because of that, a product filter has to be applied manually to the Scenario to ensure that, in this example, only the Beverage products filter through to the free shipping.
1) Set Product filters to ‘Set product filters’.
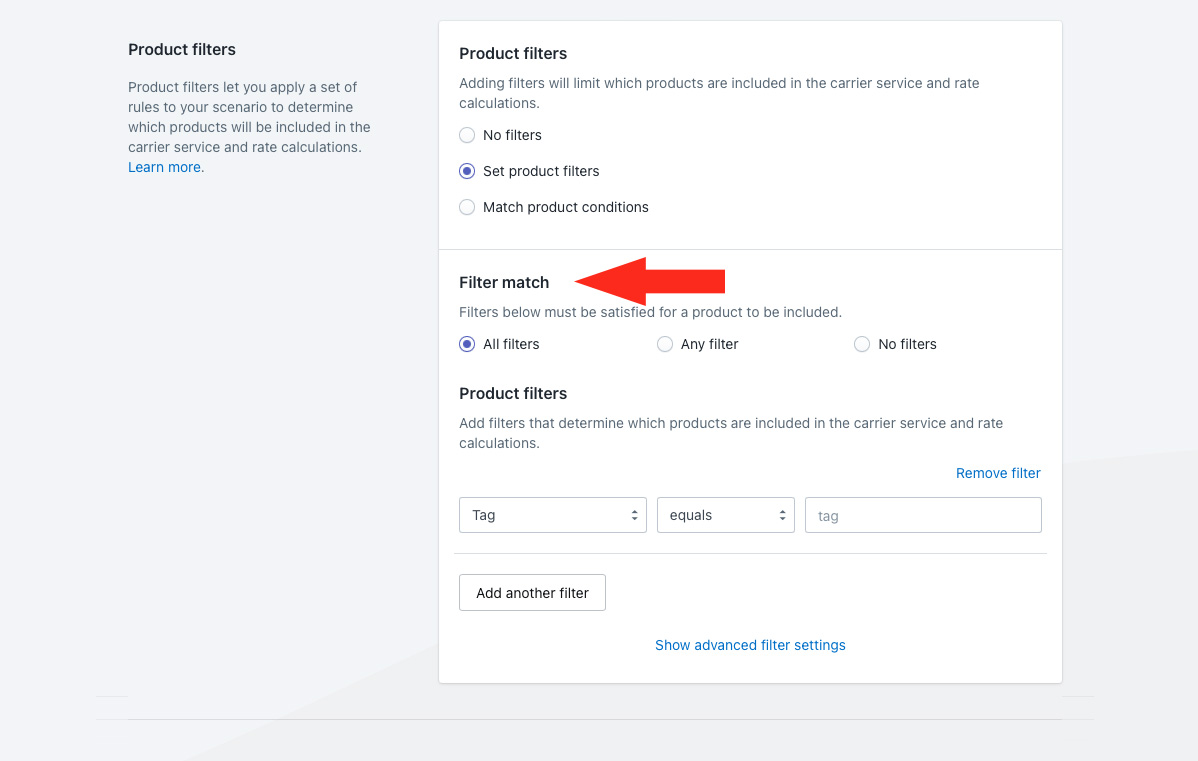
2) Leave Filter match set to ‘All filters’.
3) Select a product filter type. In this example, we’re leaving it set to ‘Tag’, which is the condition type we included in both of our condition groups earlier in this setup.
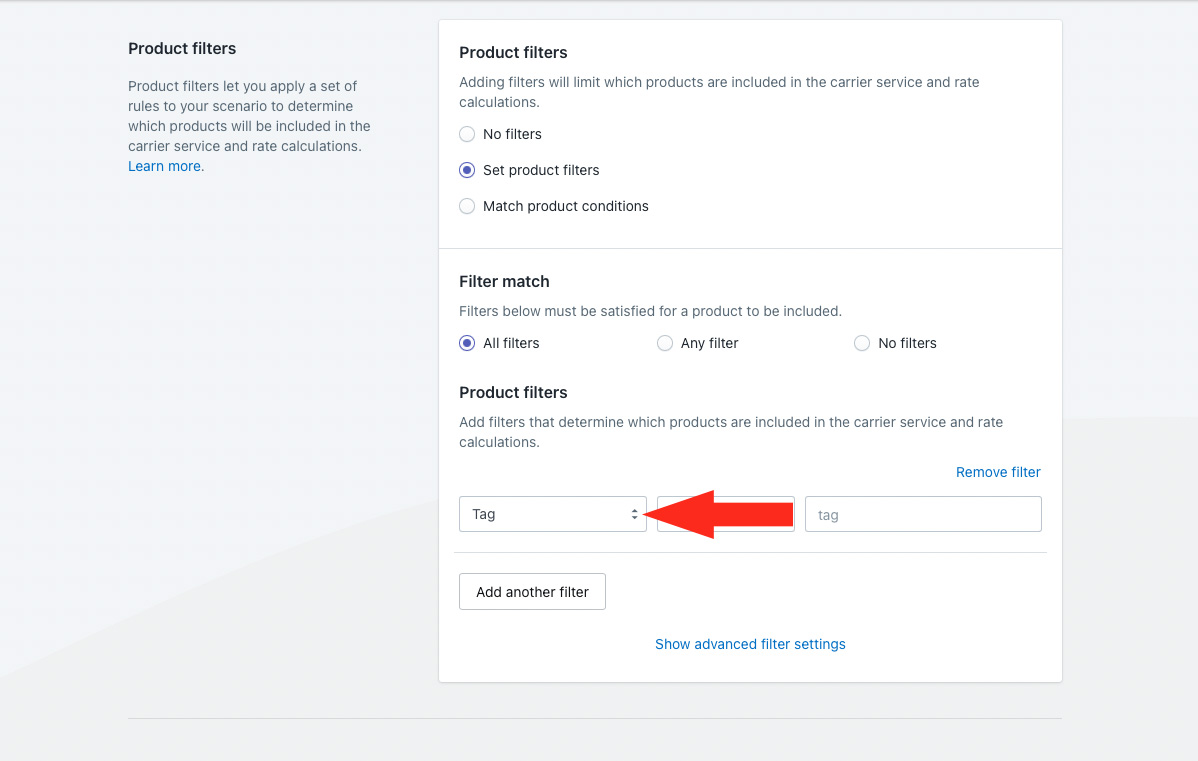
4) Select the product filter logic. In this example, we’re leaving it set to ‘equals’.
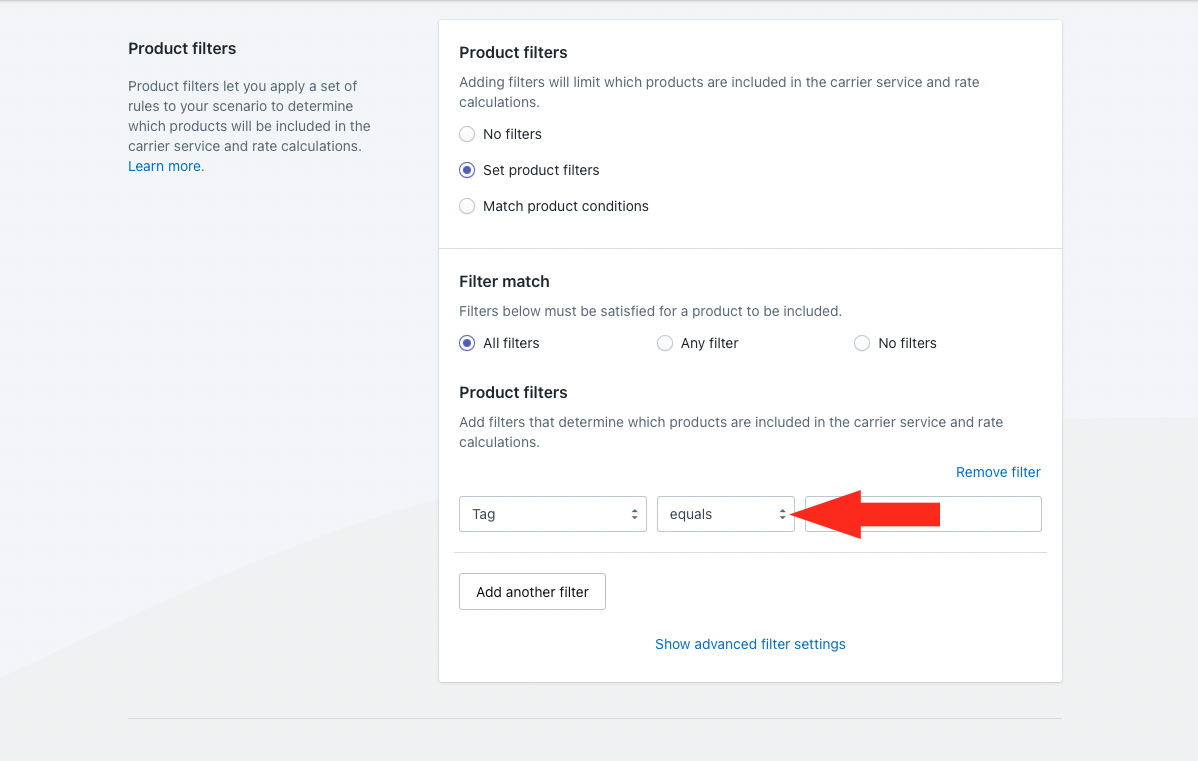
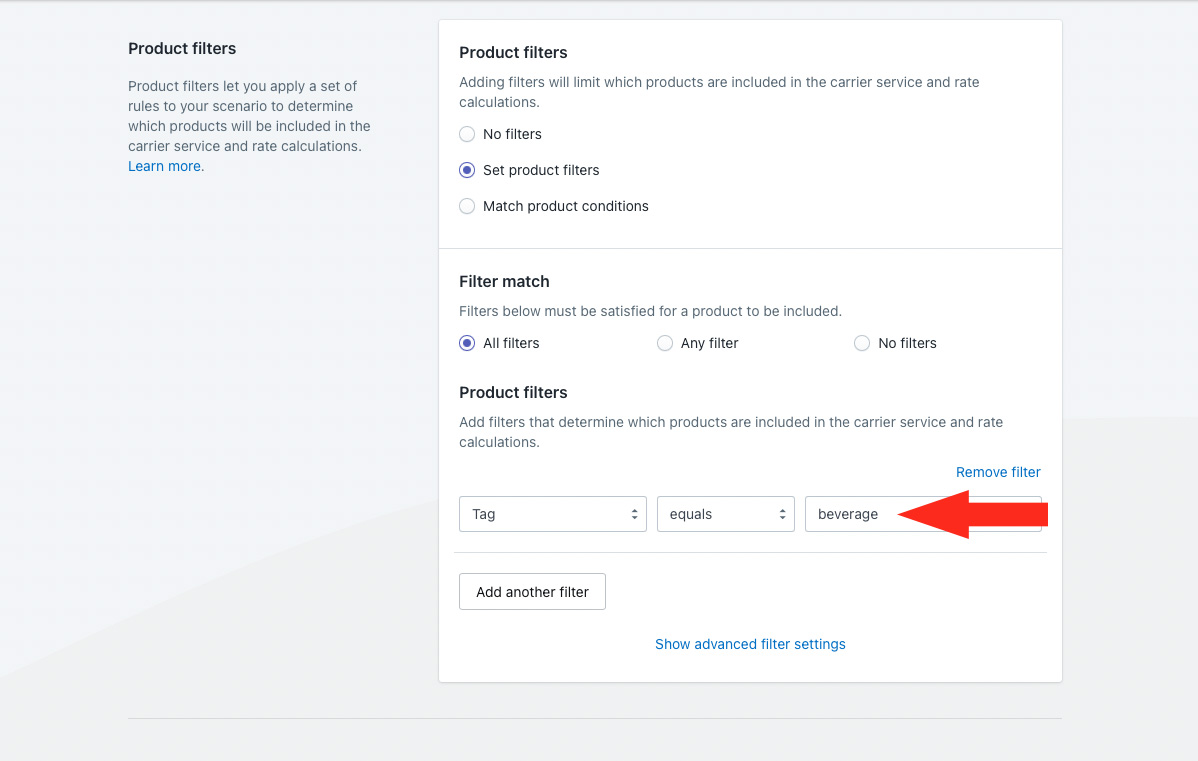
4) Enter a product filter value. In this example, we’re entering ‘beverage’ because we want only products with this tag to be filtered through to the free shipping calculation.
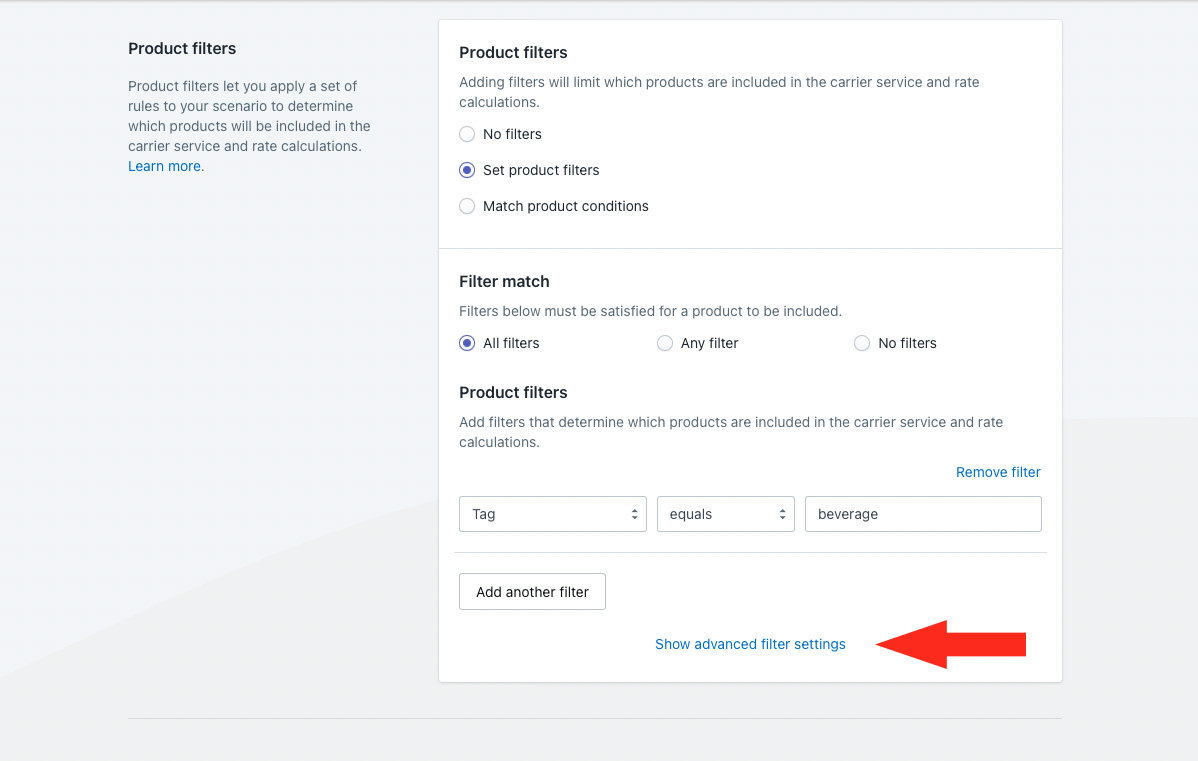
5) Additional product filter settings are available for products with custom shipping charges. If you don’t have any products with custom shipping charges, skip ahead to Save Your Settings. Otherwise, click Show advanced filter settings and adjust the settings as needed.
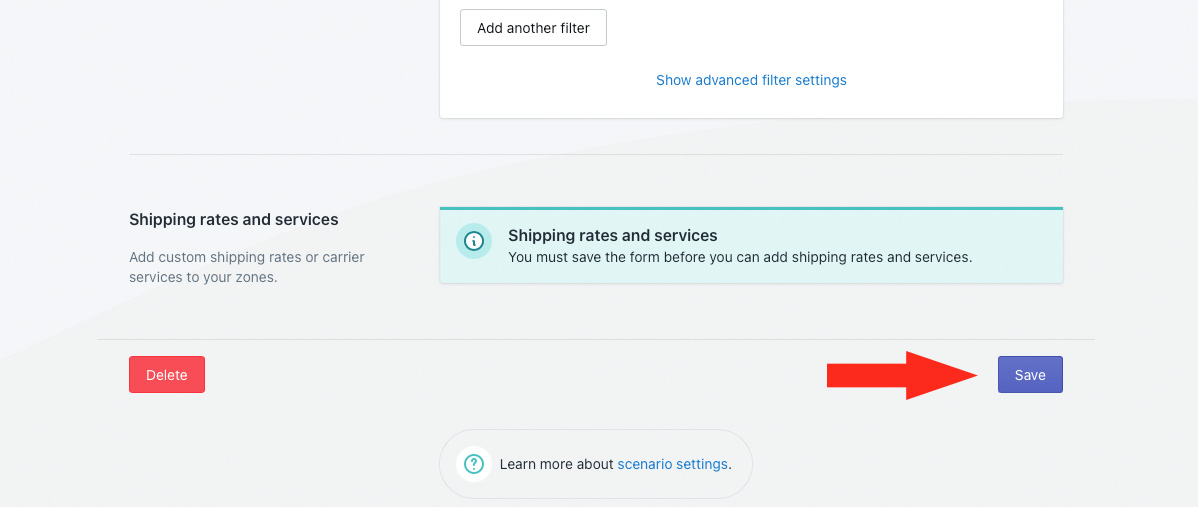
Save Your Settings
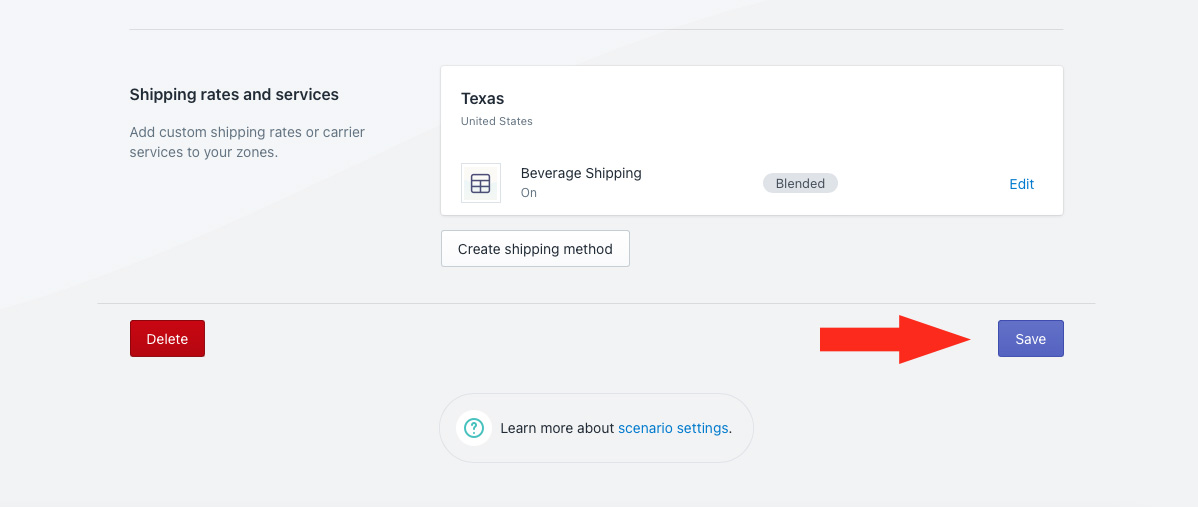
1) Click the Save button to save your beverage free shipping Scenario.
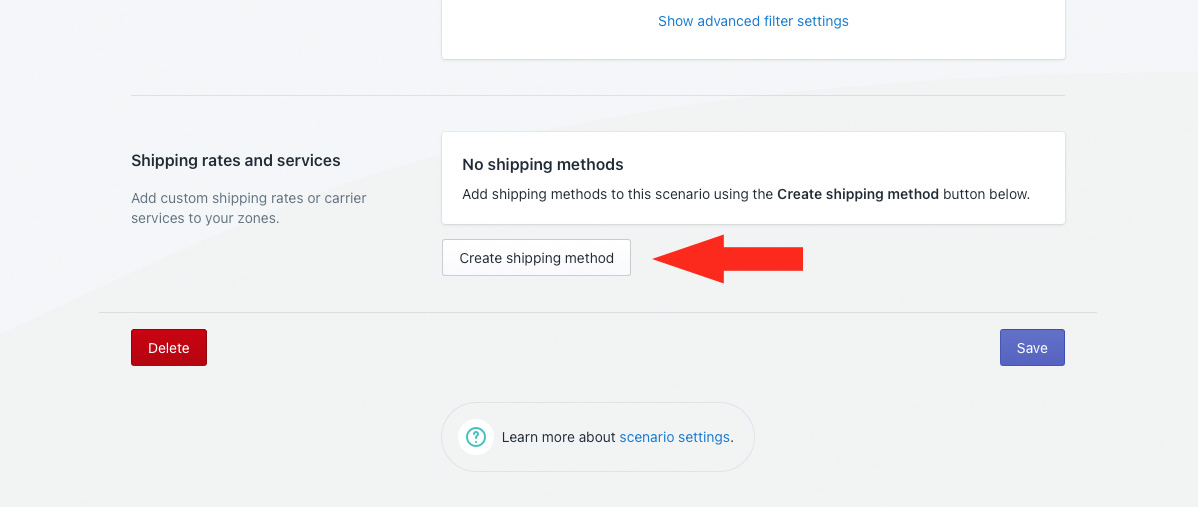
Add A Free Shipping Method
1) Click the Create shipping method button.
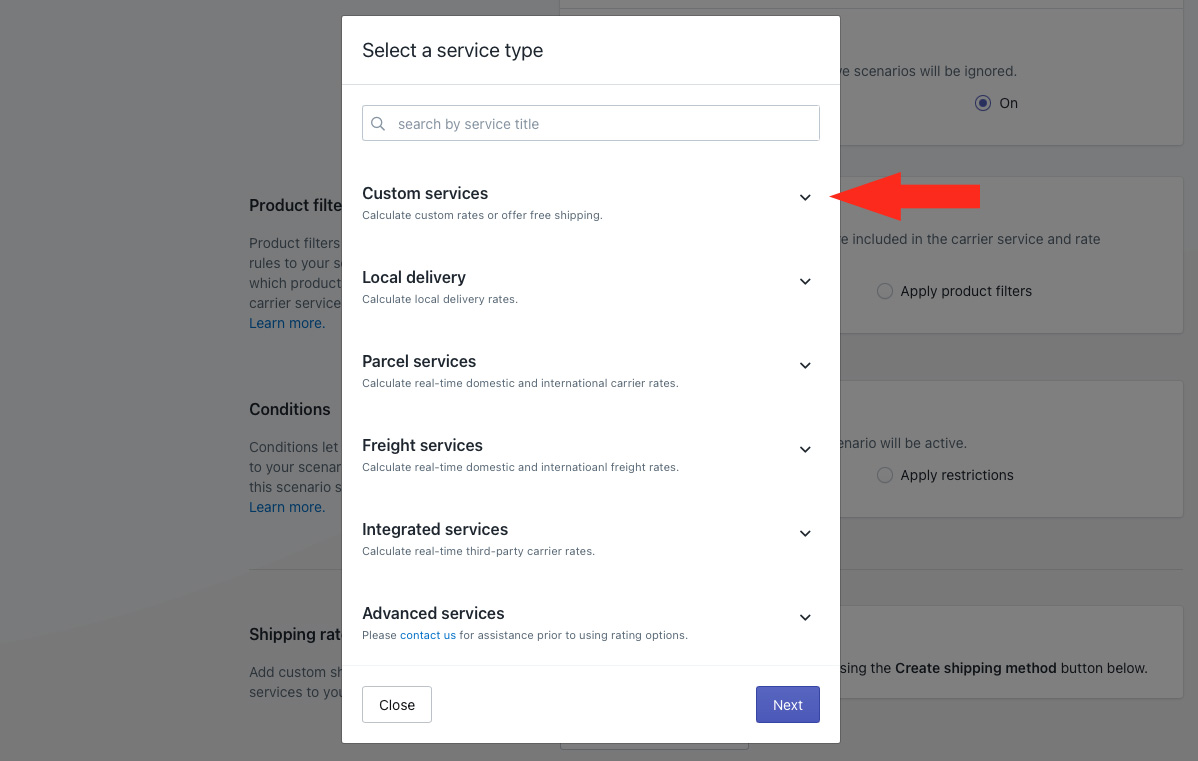
2) Click the downward arrow beside ‘Custom services’ to display a list of options.
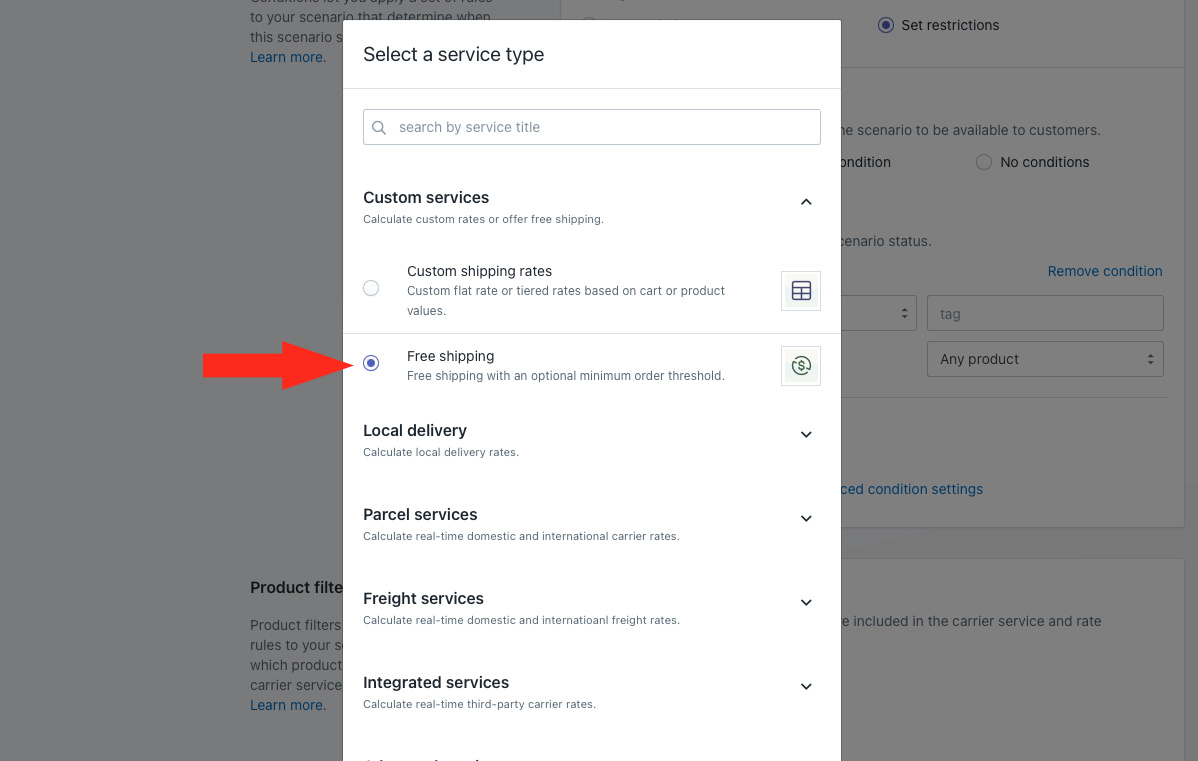
3) Select Free shipping from the list.
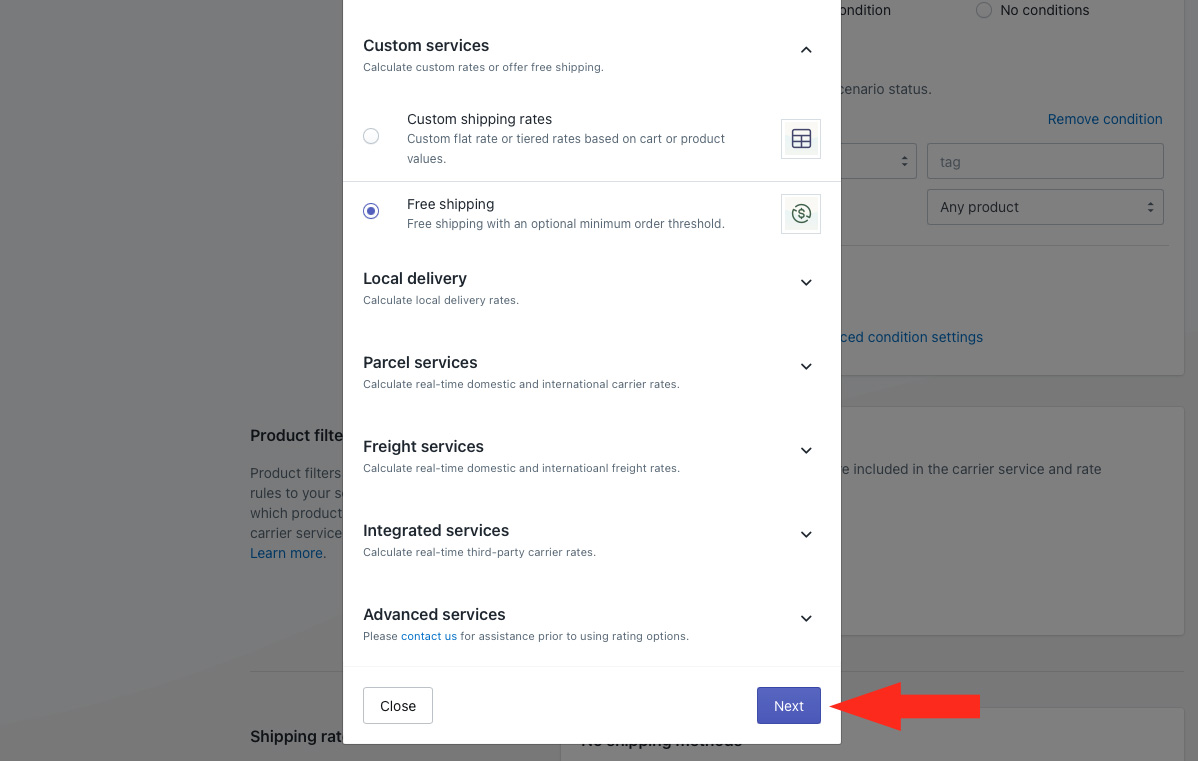
4) Click the Next button.
5) Select a Zone.
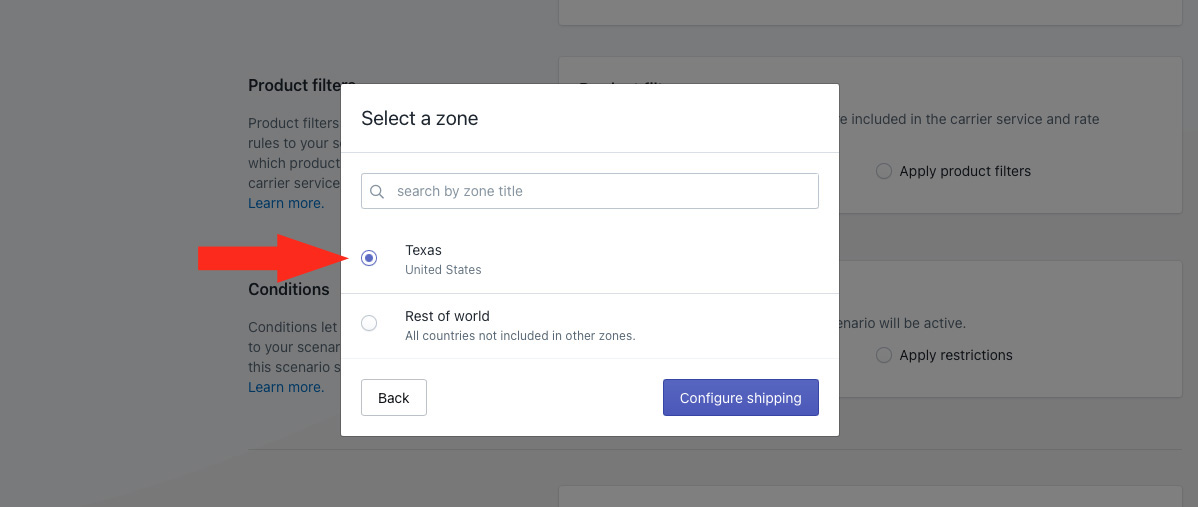
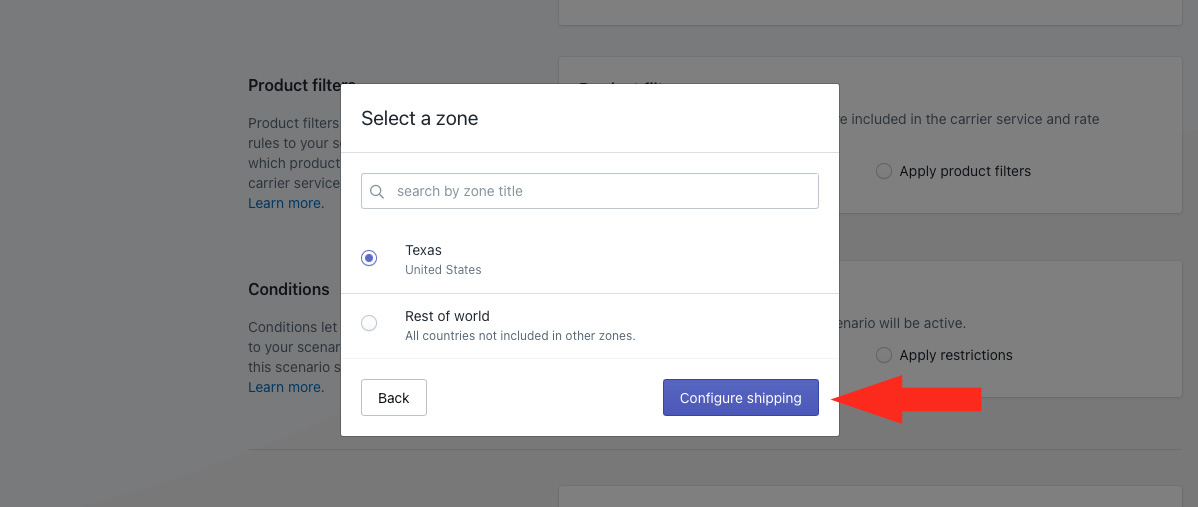
6) Click the Configure shipping button.
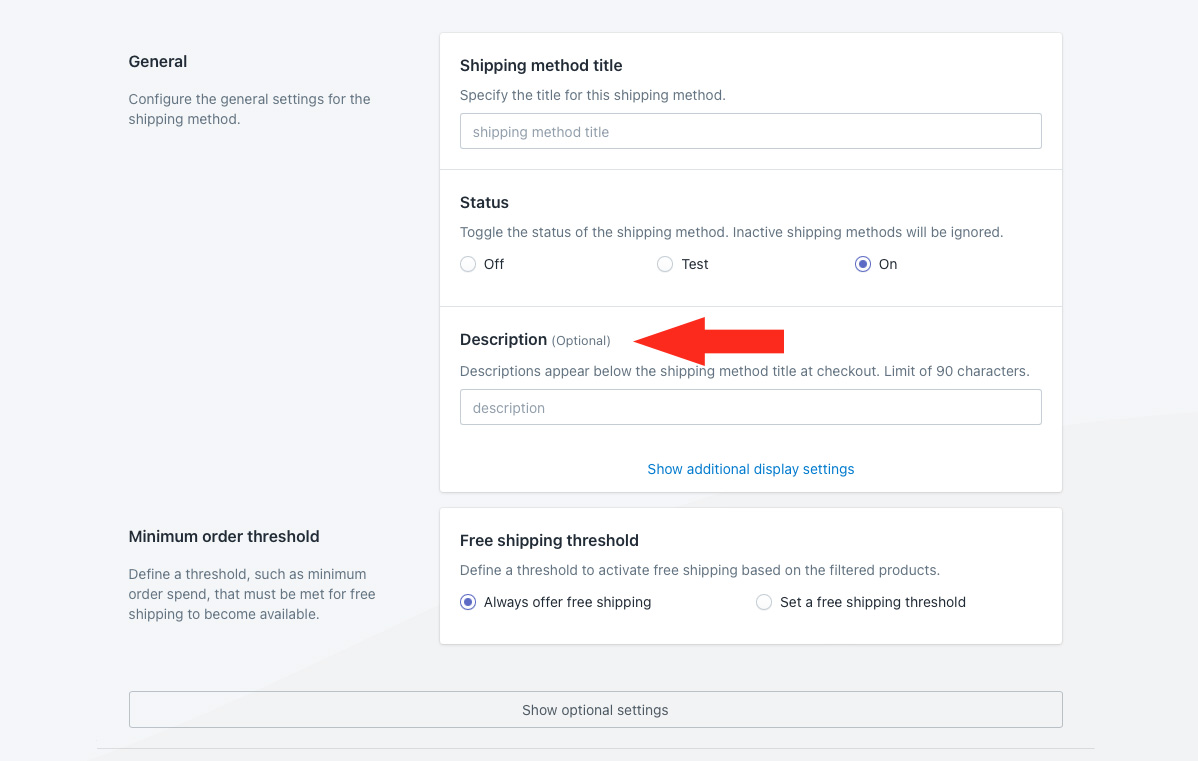
General
1) Enter a shipping method title, such as ‘Free Shipping’. The title entered here will be visible to customers.
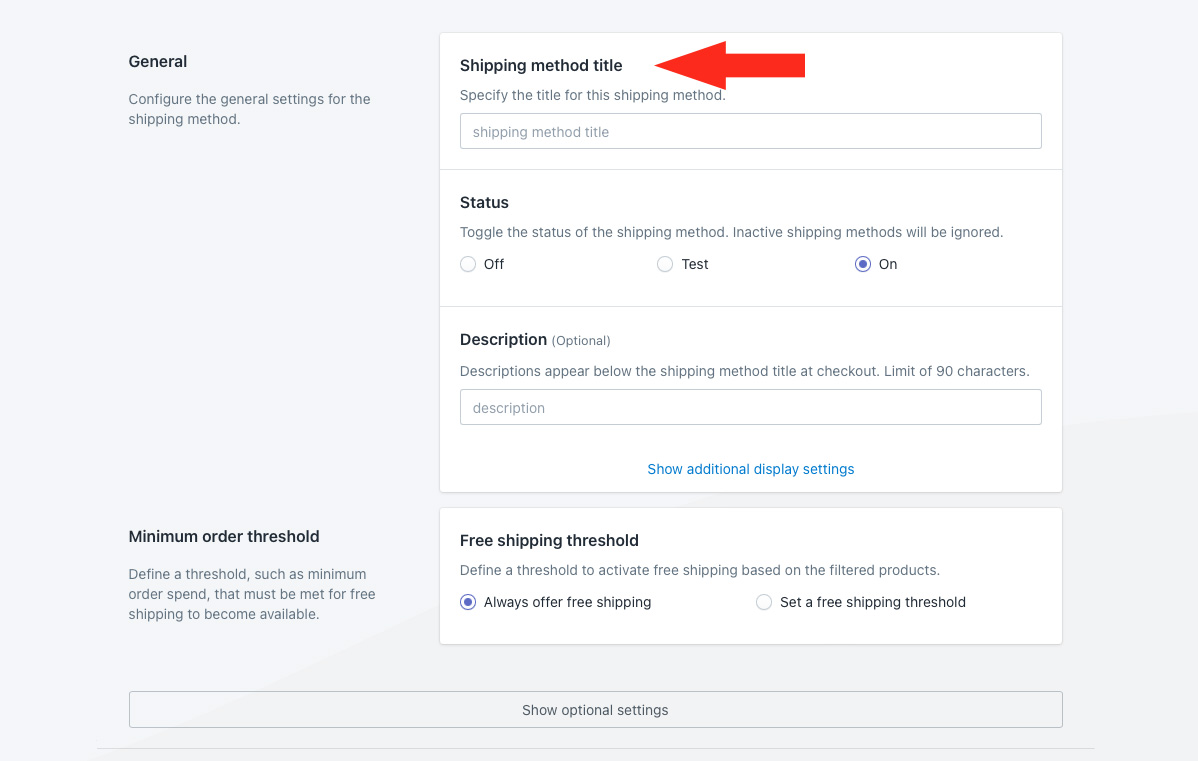
For this example, our existing setup was already configured to blend standard shipping costs for frozen food, non-perishables and beverage products when multiple products are in the cart. The shipping method title entered here may be overridden when multiple product types are ordered, depending on your rate blending settings.
2) Choose the shipping method status.
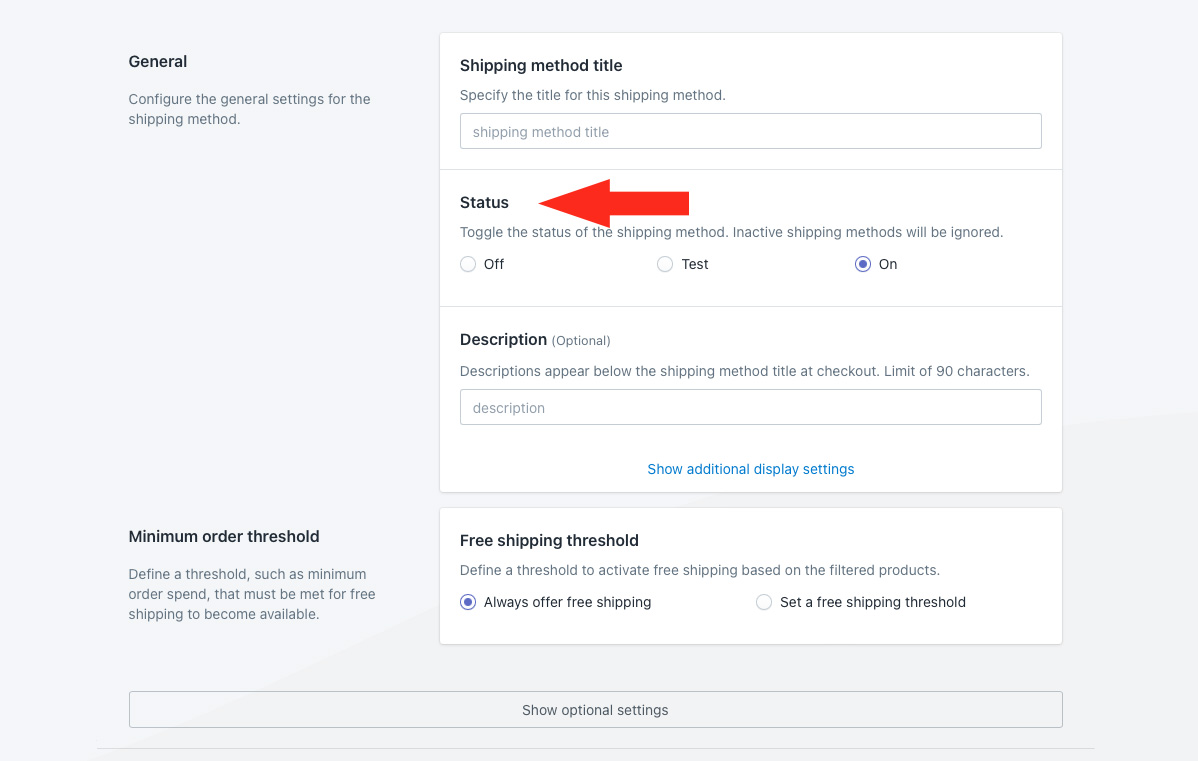
You have three (3) settings to choose from:
Off – The free shipping method will be ignored by the Scenario, even if the Scenario conditions or condition groups are met. The shipping method will not be displayed at checkout, even in Sandbox mode.
Test – The free shipping method will only be visible at checkout when you use the word ‘Intuitive’ as either the customer’s first or last name.
On – The free shipping method will be visible to customers. If the Scenario conditions or condition groups are met, the shipping method will be displayed at checkout. This is the default setting.
3) If desired, enter a description for your free shipping method, such as ‘Free shipping for beverage products’. We recommend limiting your description to 90 characters or less to ensure it displays properly on the checkout page.
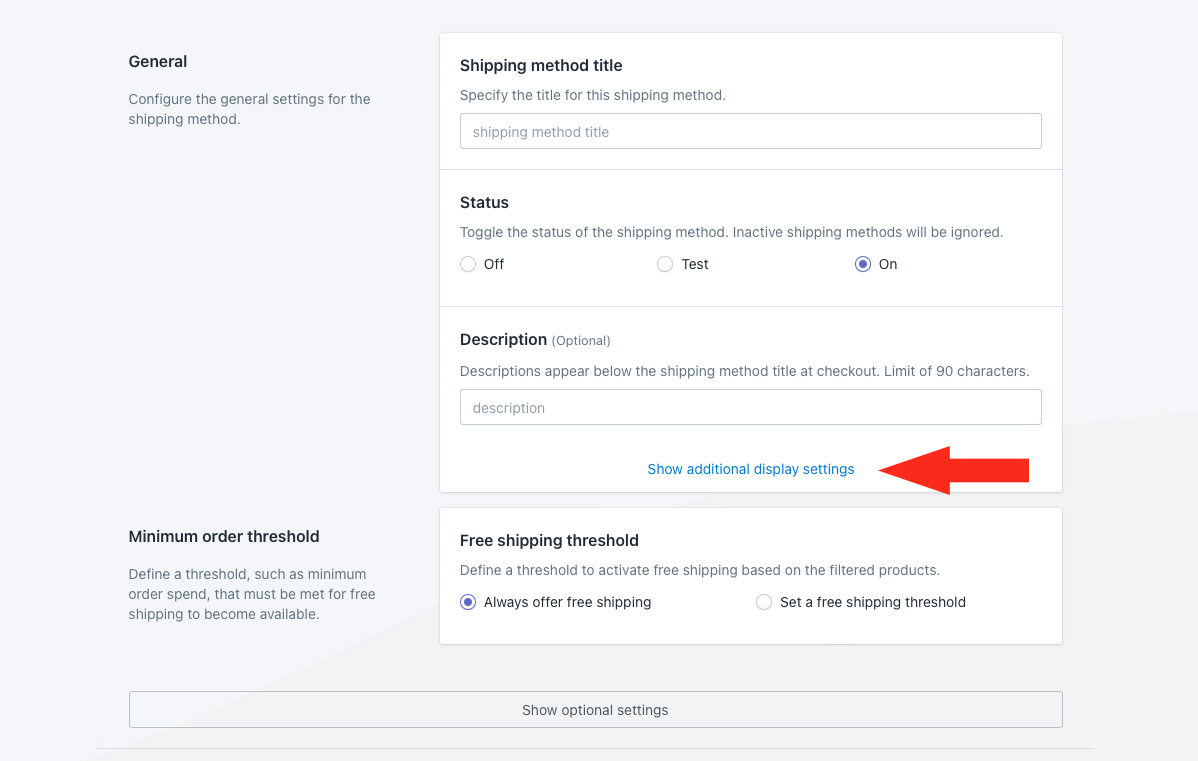
Additional display settings are available for delivery times and service codes. If you do not need to adjust these settings, skip ahead to Minimum Order Threshold. Otherwise, continue to Step 4.
4) Click Show additional display settings, then adjust the settings for custom delivery time and service code as needed.
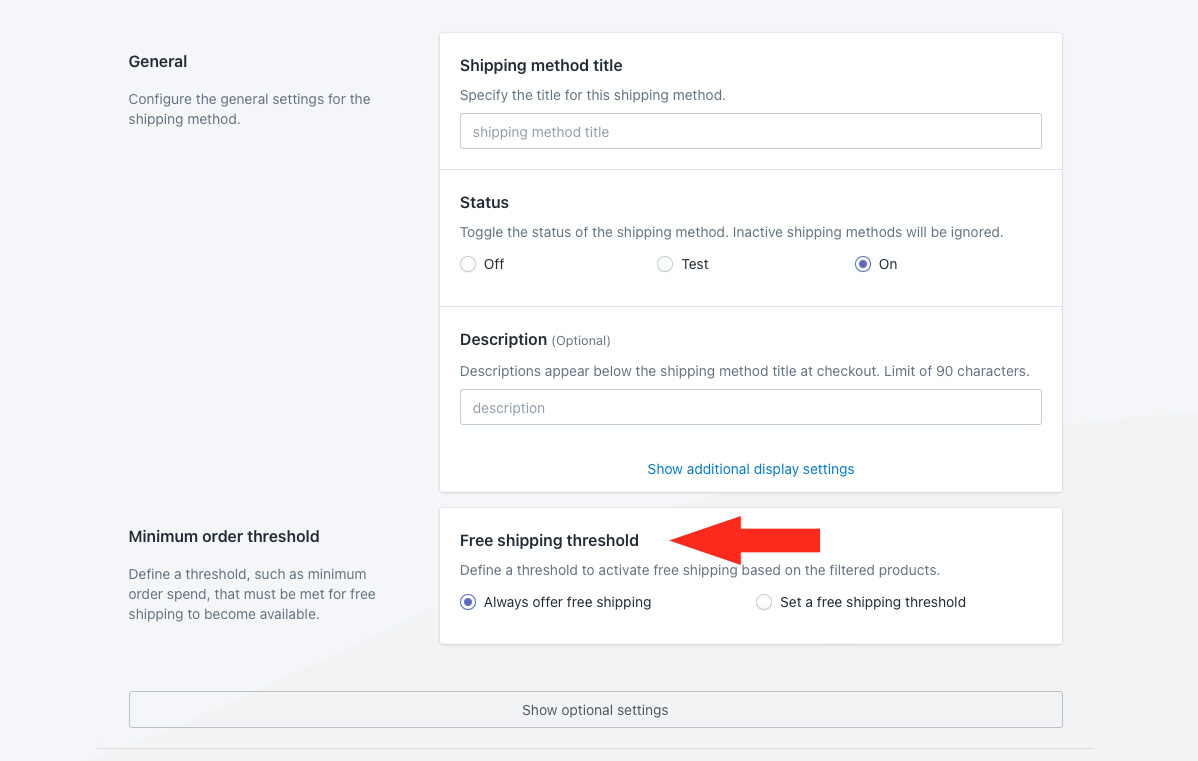
Minimum Order Threshold
1) Leave Free shipping threshold set to ‘Always offer free shipping’. That’s because the condition groups in the Scenario already have a minimum threshold, which means the free shipping method will only be activated when either of the condition groups is satisfied.
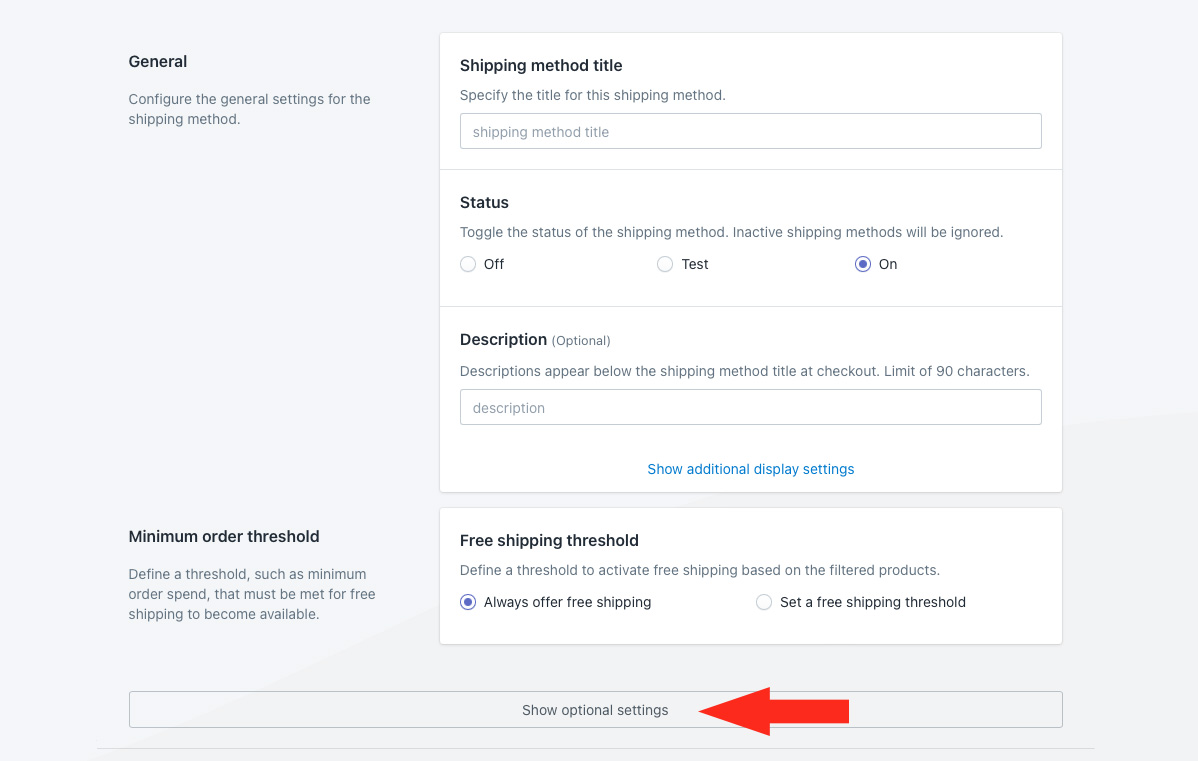
Optional settings are available for custom shipping blending and rate blending. If your existing setup uses rate blending to blend standard shipping rates from multiple product types together, you will need to adjust the rate blending settings here.
1) Click Show optional settings.
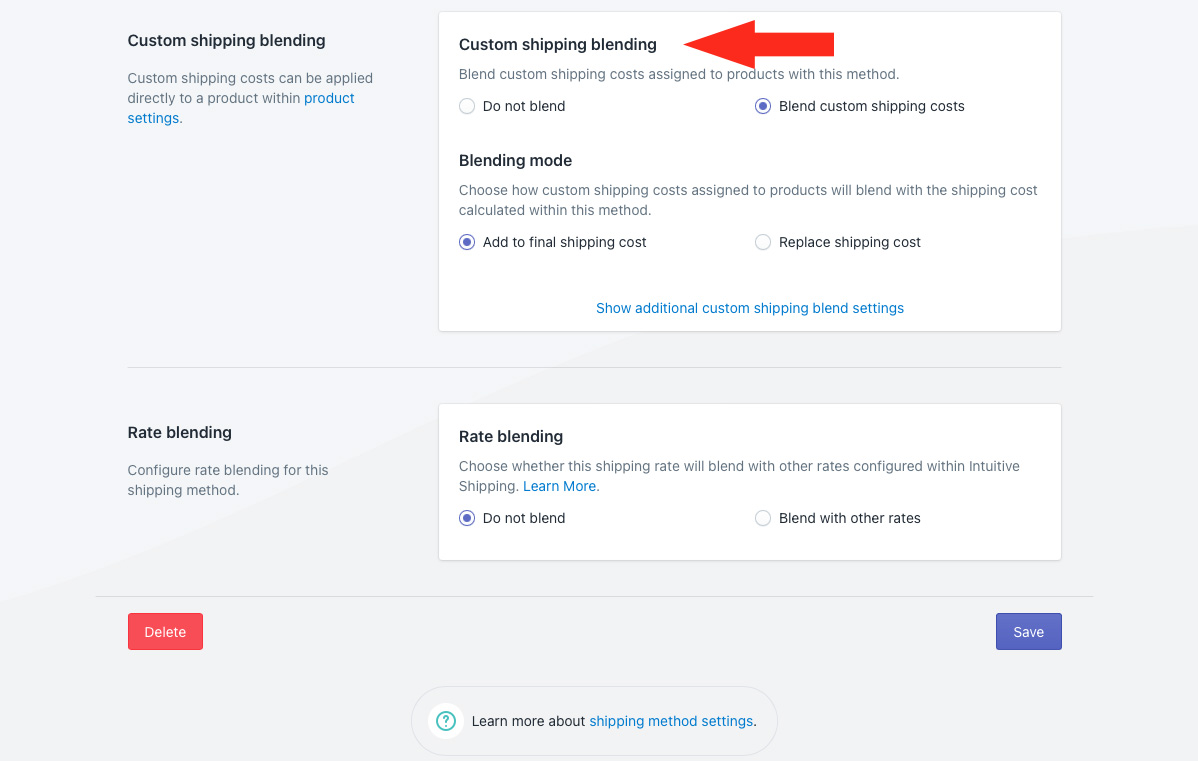
Custom Shipping Blending (Optional)
1) If desired, configure custom shipping blending.
If you don’t have products with custom shipping costs, these settings are ignored regardless of how they’re set. Skip ahead to Rate Blending.
If you have products with custom shipping costs, those special costs can be blended with your beverage free shipping and your other paid rates, whether rate blending is activated or not.
Let’s say you have a custom shipping cost of $35.00 for gift baskets – meaning it always costs $35.00 to ship a basket, regardless of what else is in the order. If a VIP customer orders more than $25.00 of beverage, resulting in free shipping, and a gift basket, the customer will be charged $35.00 for shipping at checkout (free shipping + $35.00). If a customer also orders frozen food activating rate blending, the customer will be charged $53.00 for shipping at checkout (free shipping + $35.00 + $18.00).
Rate Blending (Optional)
1) Set Rate blending to ‘Blend with other rates’.
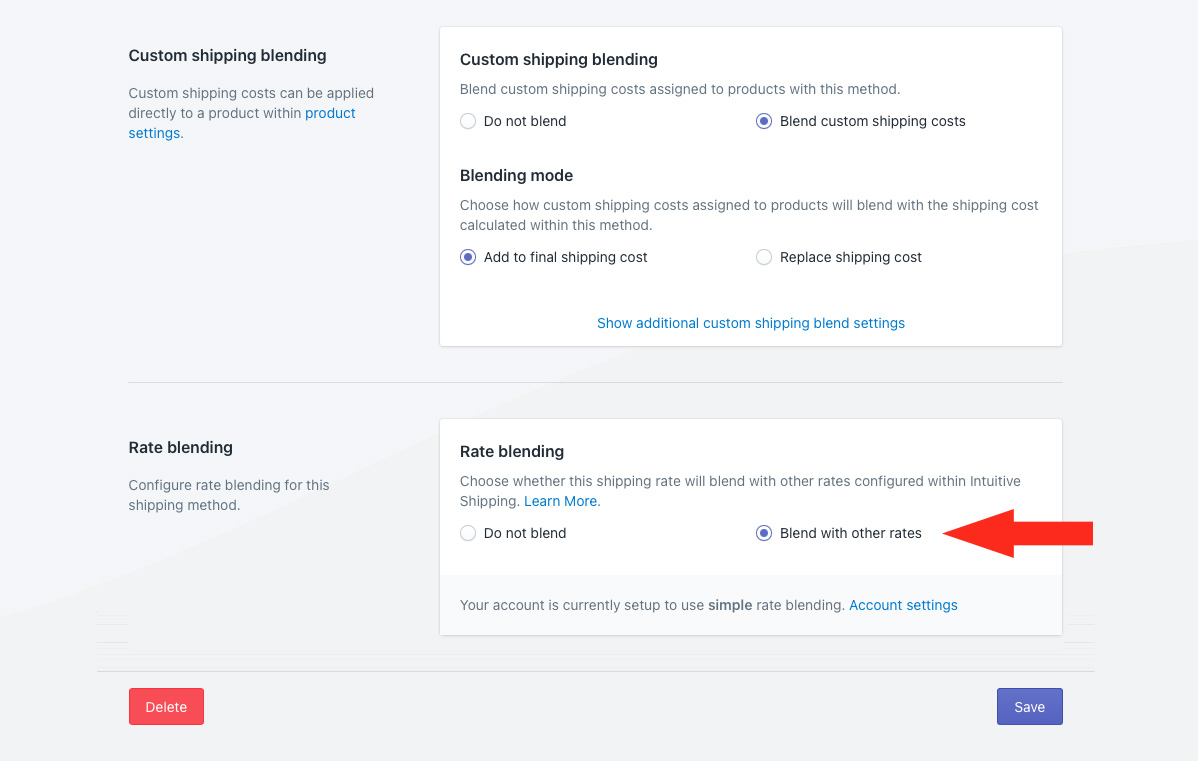
That means, when the Beverage free shipping method is enabled, it will be blended with other paid shipping rates that have rate blending enabled. For example, if a customer from Dallas orders frozen food, non-perishables and less than $75.00 worth of beverage, they will be charged $40.00 for shipping at checkout ($18.00 + $10.00 + $12.00). If they increase their beverage products to more than $75.00, they’ll be charged $28.00 for shipping at checkout ($18.00 + $10.00 + free shipping).
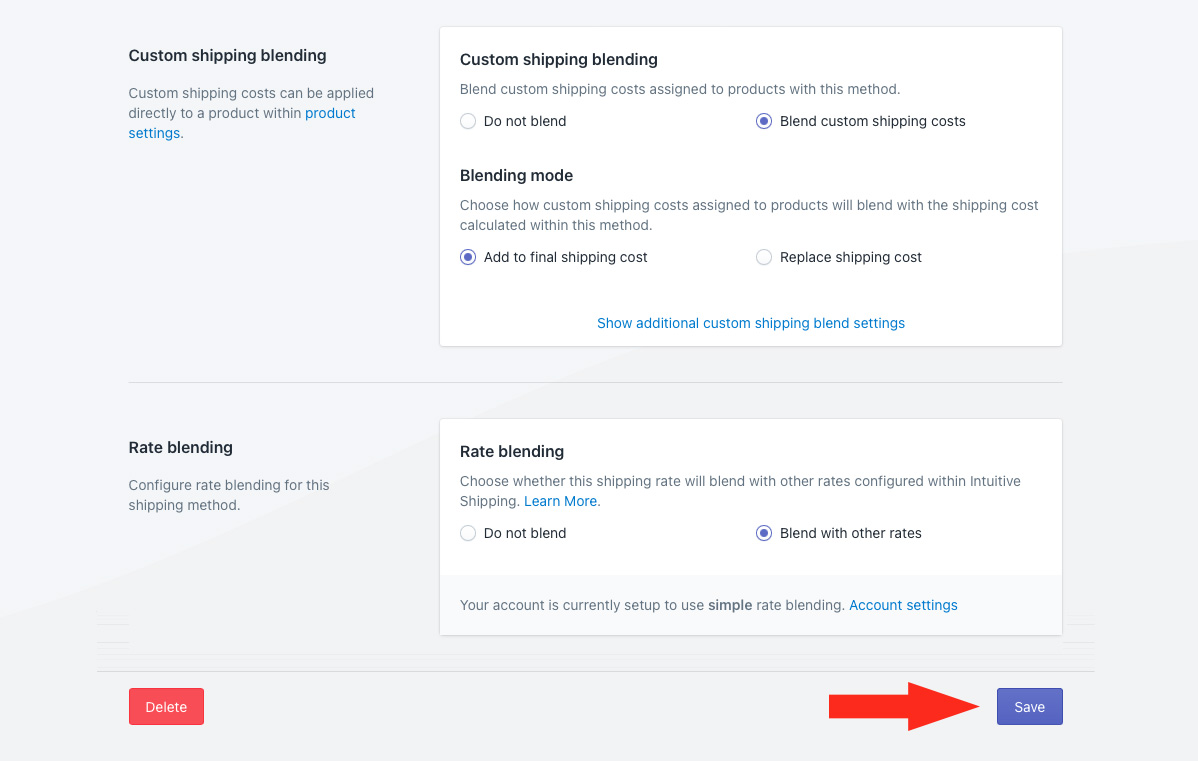
Save Your Settings
1) Click the Save button to save your free shipping method.
Edit The Existing Beverage Scenario
Because free shipping on beverage products is offered when VIP customers order more than $25.00 or when customers from your home city order more than $75.00, you need to temporarily edit the existing ‘beverage’ Scenario so that paid shipping for beverage products is only charged when those promo condition groups are not met.
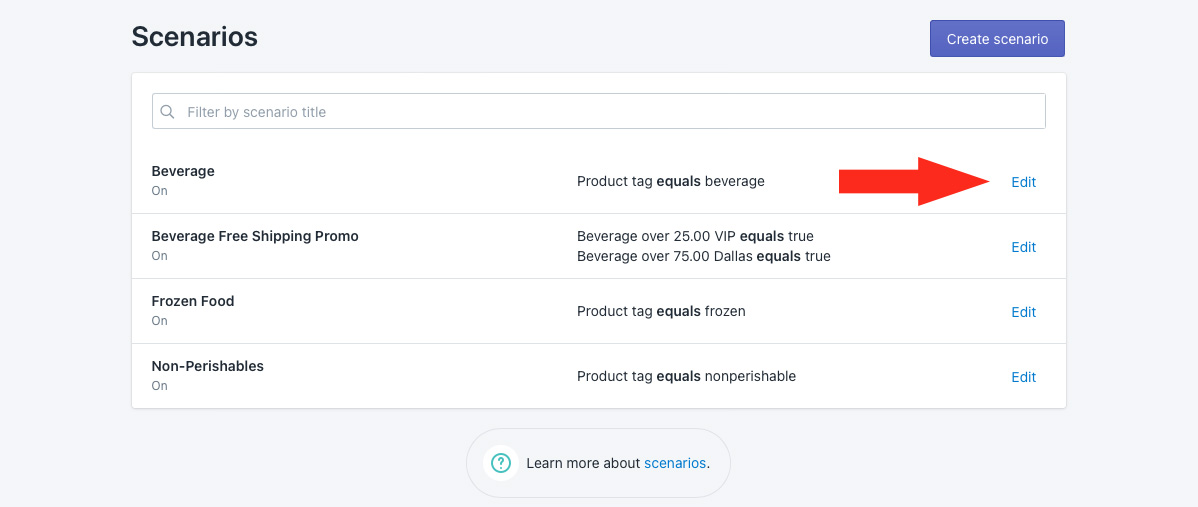
1) Click Shipping on the sidebar menu, then select Scenarios from the drop-down list.
2) Click Edit beside the original product Scenario with standard shipping rates. For this example, we’re editing ‘Beverage’.
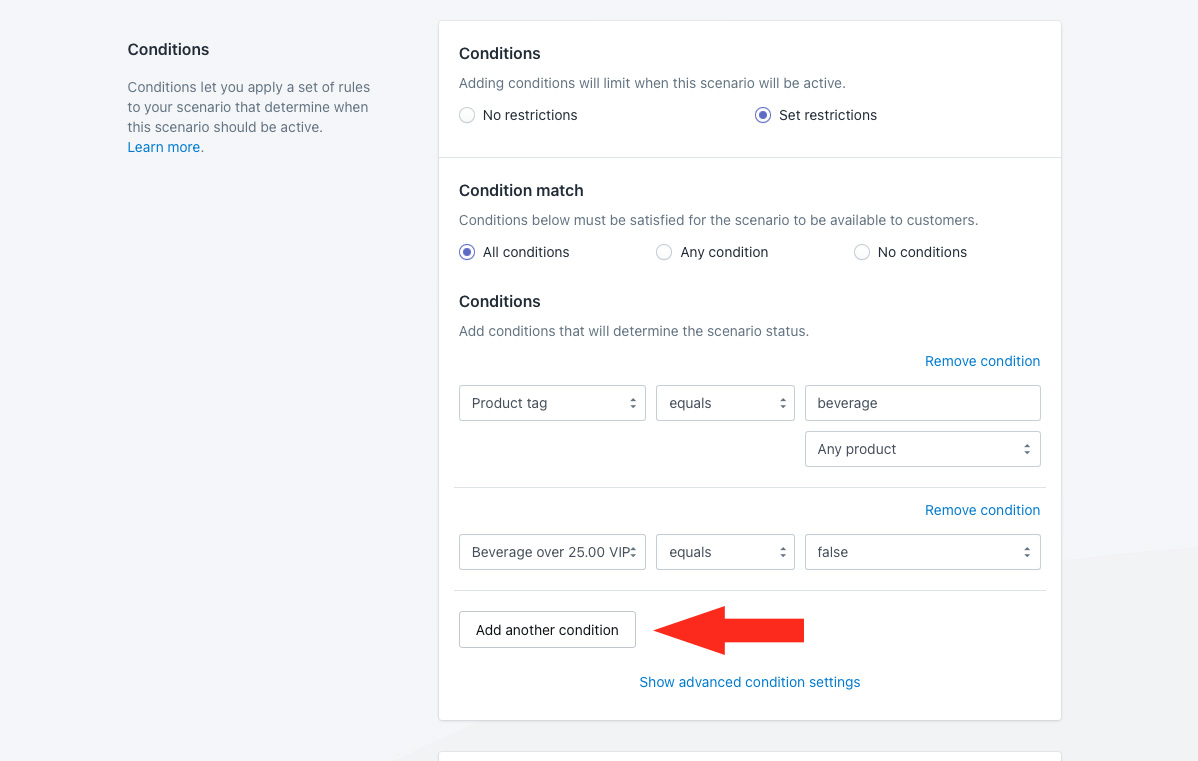
3) Leave the existing product condition as-is.
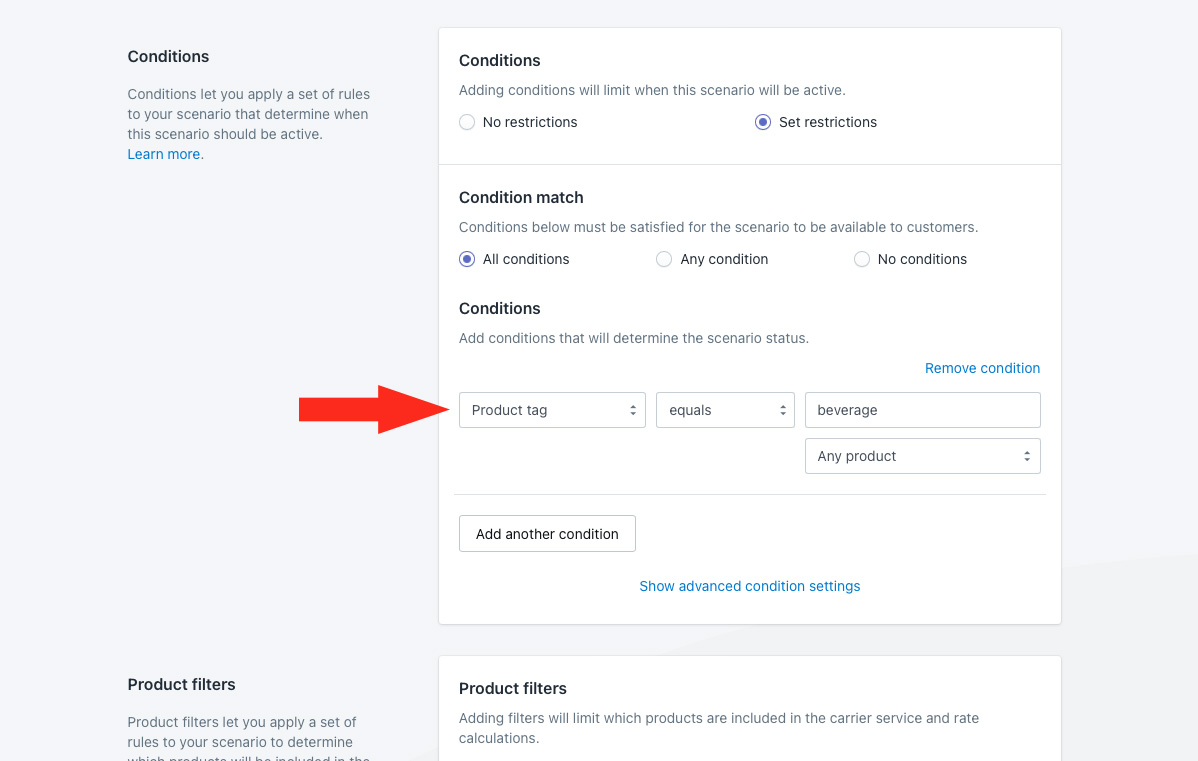
4) Click the Add another condition button.
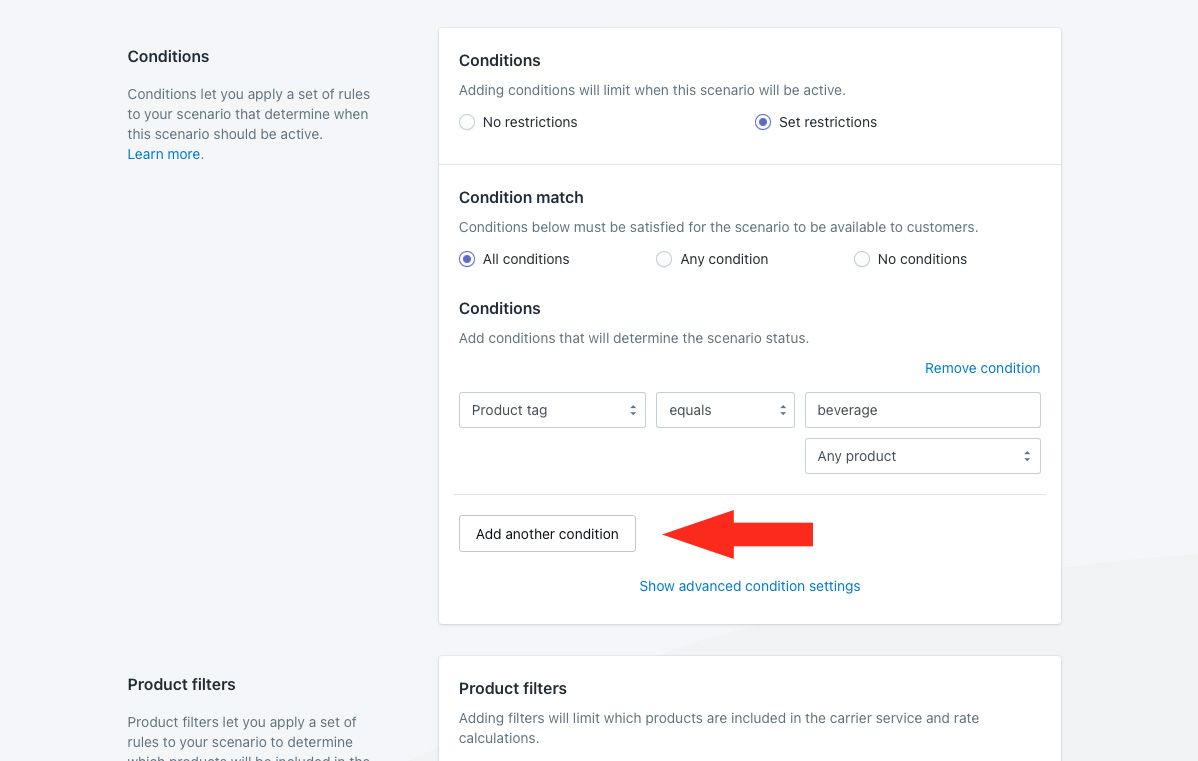
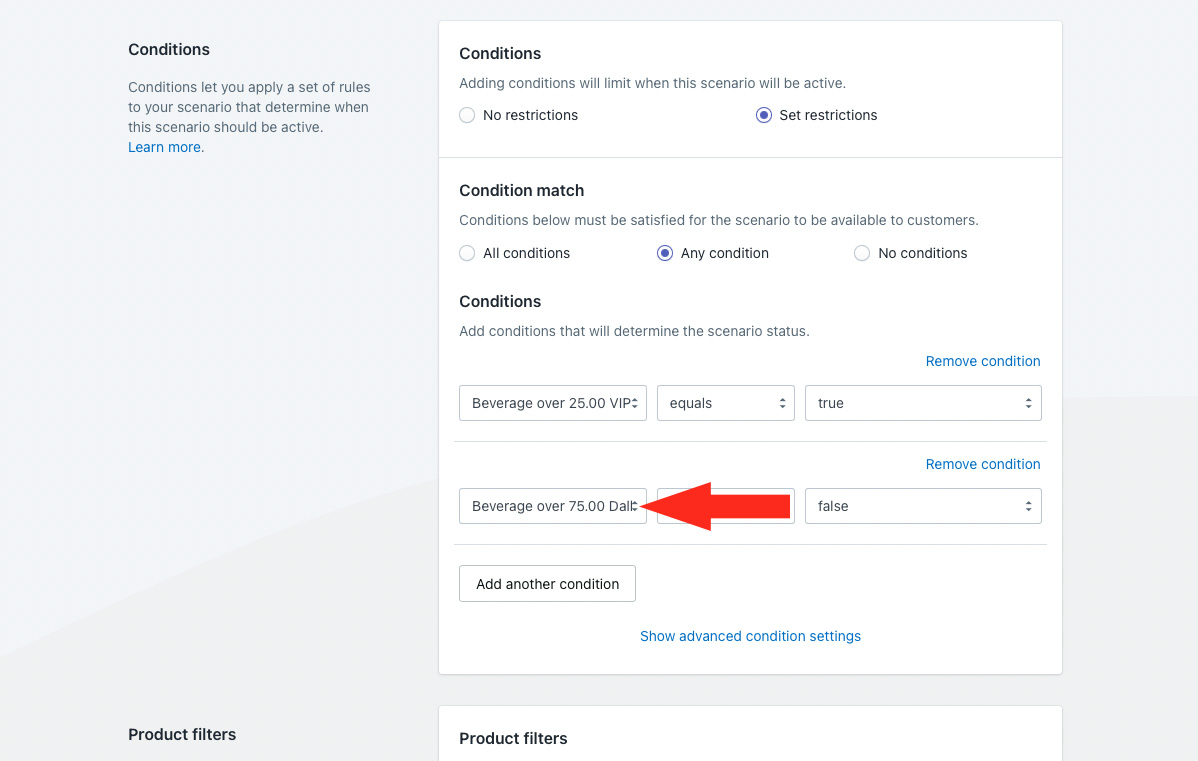
5) Select the first condition group you created earlier as the condition type. For this example, we’re selecting ‘Beverage over 25.00 VIP’ which includes a minimum threshold of $25.00 for VIP customers.
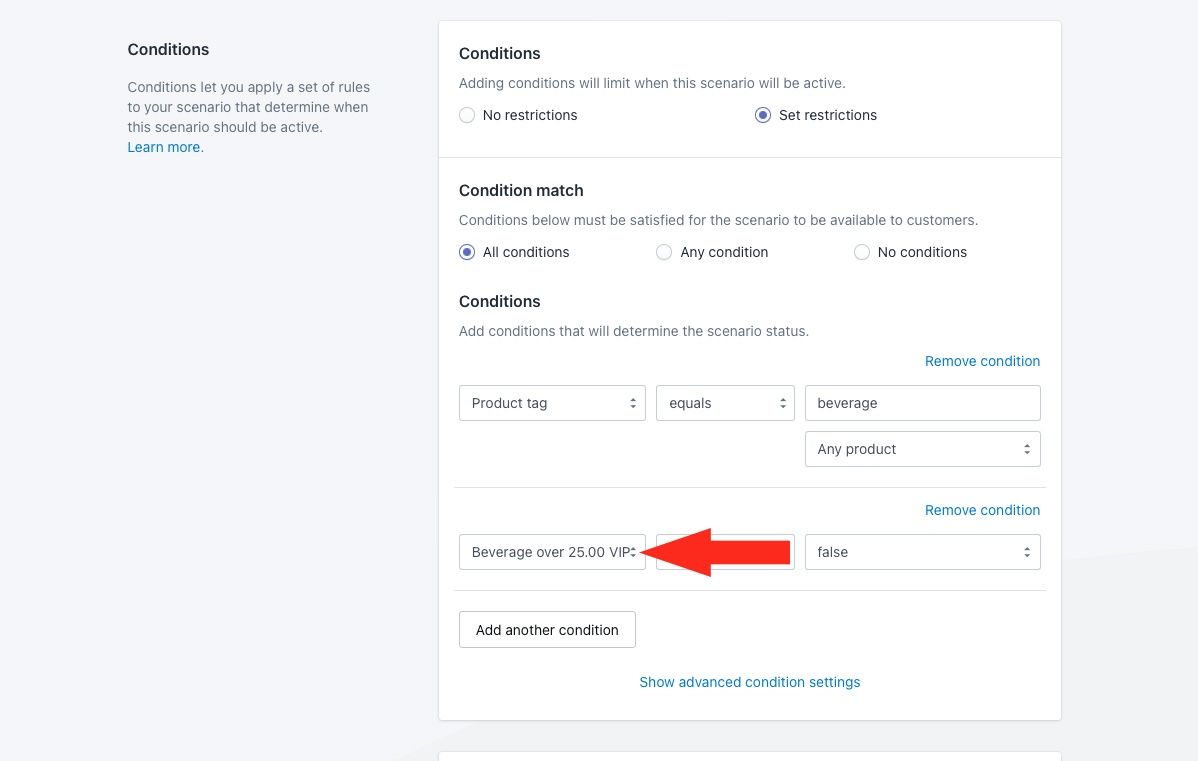
6) Leave the condition logic set to ‘equals’ and leave the condition value set to ‘false’.
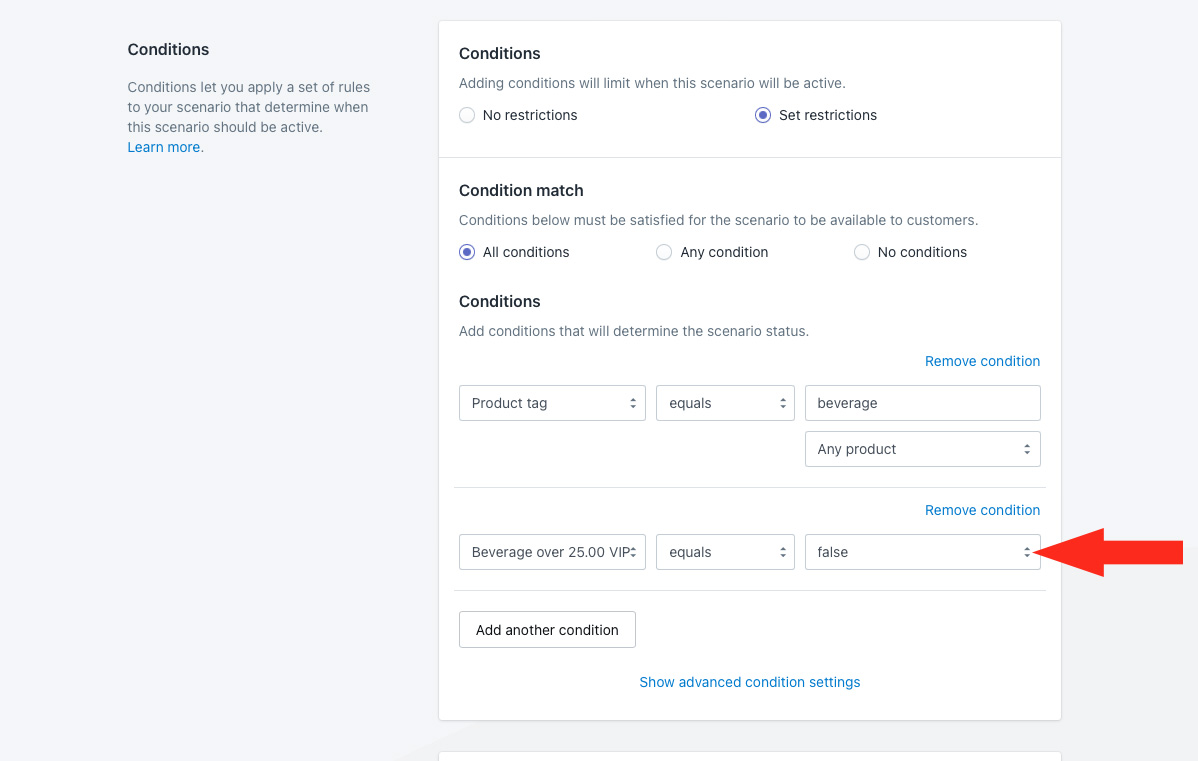
7) Click the add another condition button.
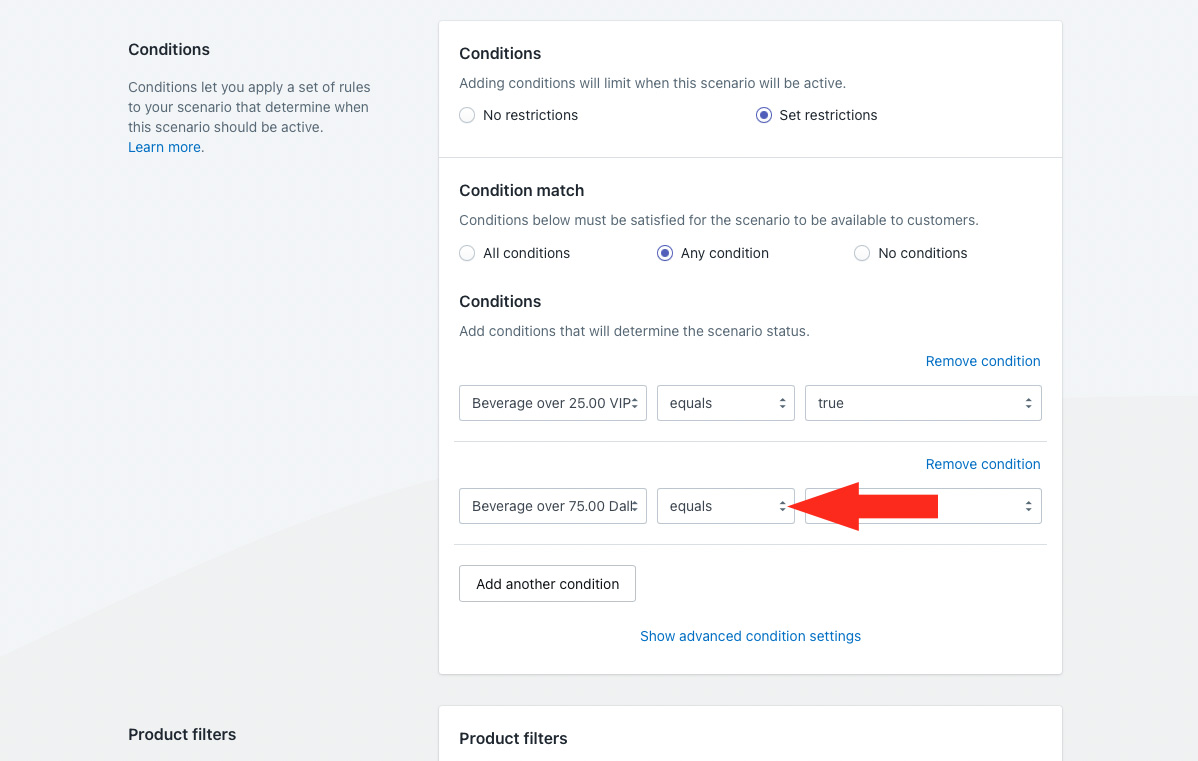
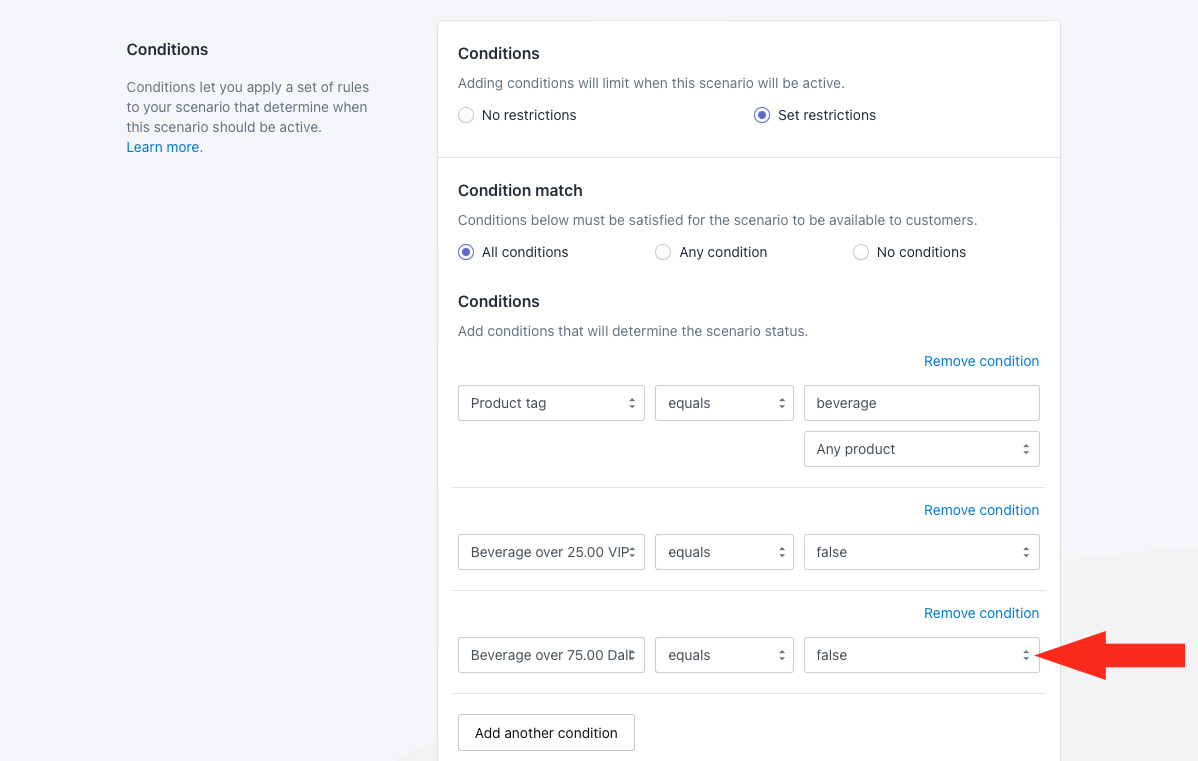
8) Select the second condition group you created earlier as the condition type. For this example, we’re selecting ‘Beverage over 75.00 Dallas’ which includes a minimum threshold of $75.00 for customers who live in Dallas.
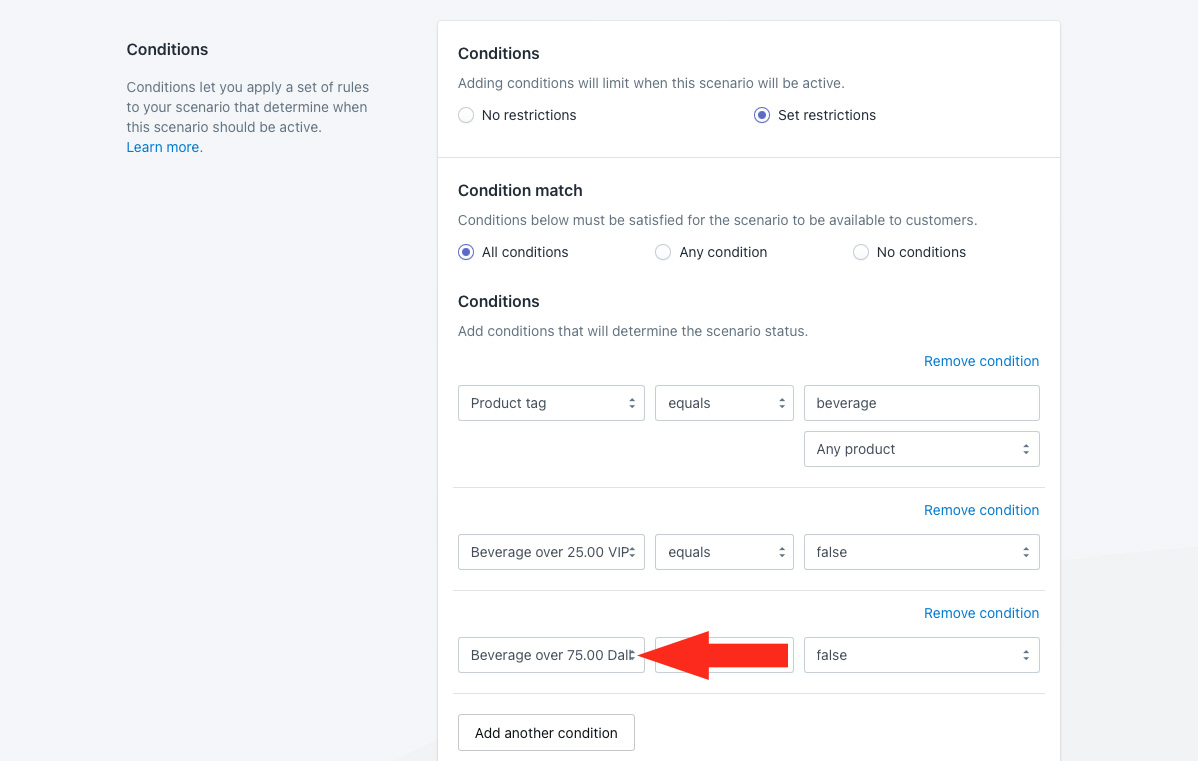
9) Leave the condition logic set to ‘equals’ and leave the condition value set to ‘false’.
10) Leave Product filters set to ‘Match product conditions.
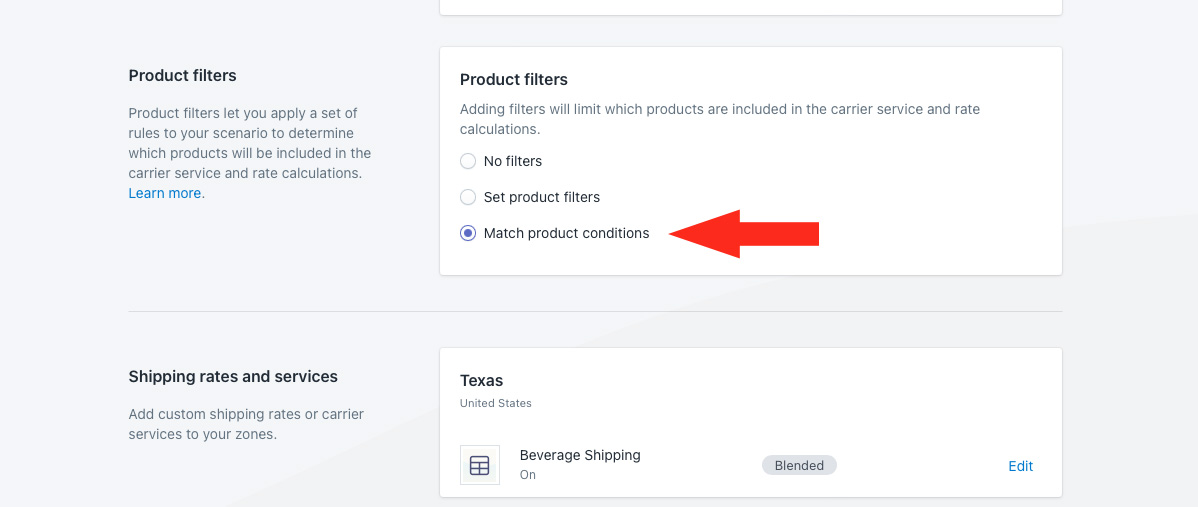
11) Click the Save button to save changes to your modified Scenario.
Using this example, paid shipping for beverage products will only be displayed at checkout or be included in rate blending with frozen food and non-perishables when customers who are not VIP, or are not from Dallas, or are VIP customers from anywhere but order less than $25.00 of beverage products, or are from Dallas but order less than $75.00 of beverage products.
Check out more additional setups or look at common setups.