This guide will show you how to connect your UPS account to Intuitive Shipping. To learn how to connect other carrier accounts, go here.
If you have an account with UPS, you can connect your account to Intuitive Shipping. Once your account is connected and you set up a UPS parcel service shipping method, you’ll be able to use rates from your account instead of the standard UPS retail rates.
You can create a parcel service shipping method for UPS without an account. If you create an account with UPS later, you’ll have the opportunity to add your new account credentials directly throught the shipping method later if desired.
Once your account credentials have been saved in Intuitive Shipping, your account will be used automatically each time you add the same carrier to a new shipping method.
Add UPS To Carrier Accounts List
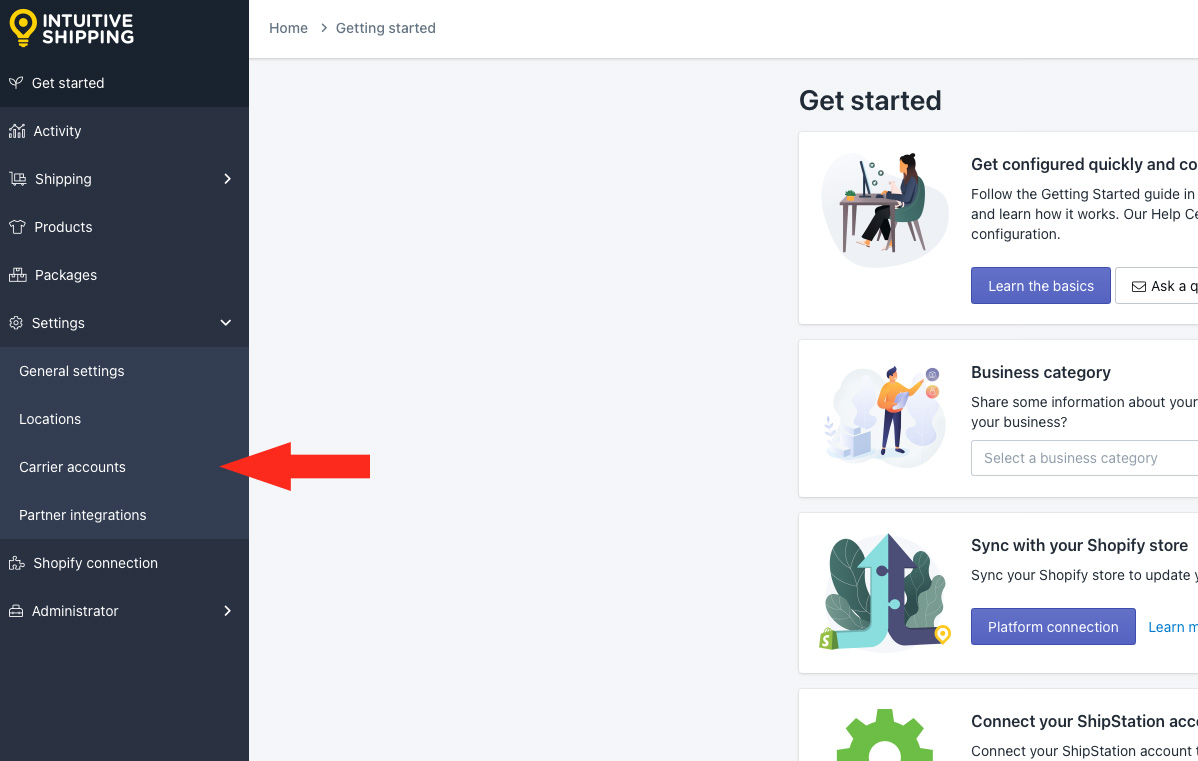
1) Click Settings on the sidebar menu, then select Carrier accounts from the drop-down list.
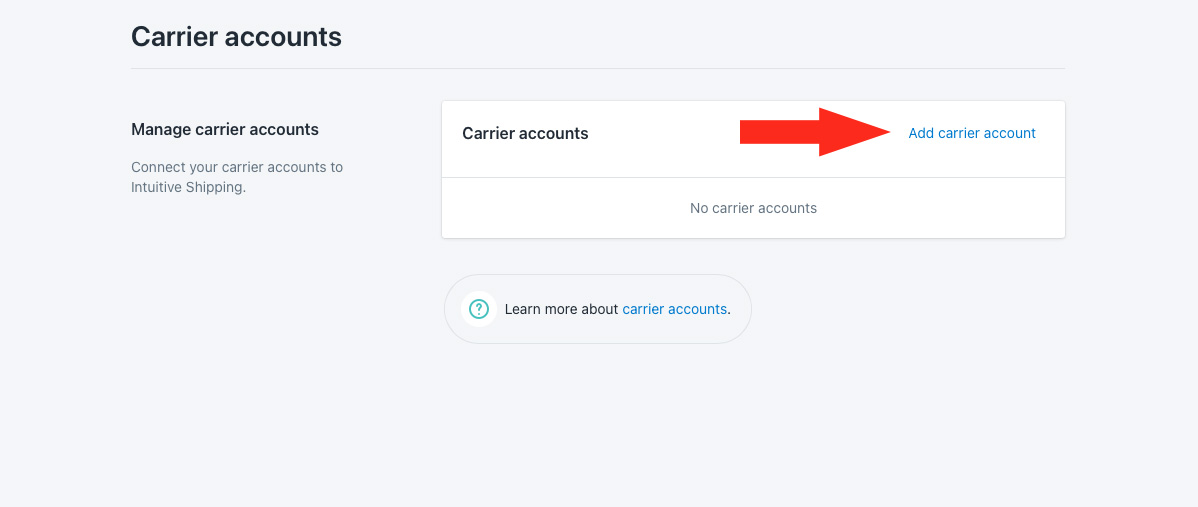
2) Click Add carrier account.
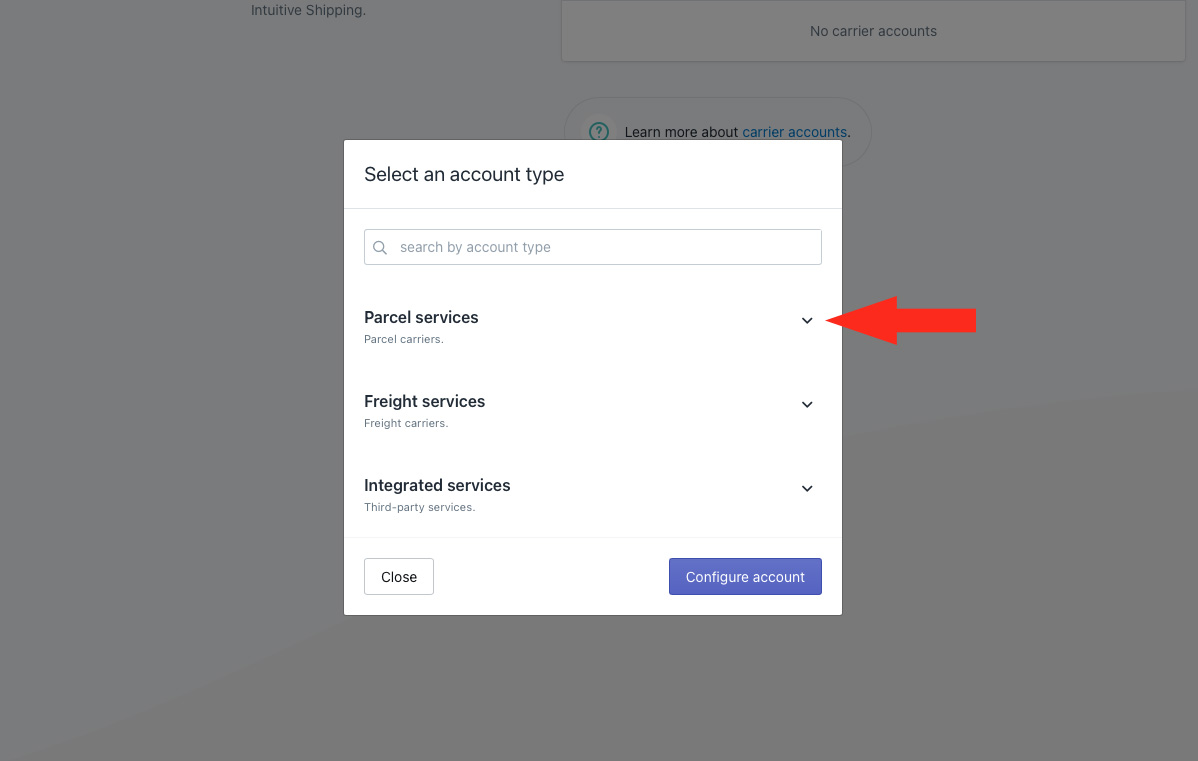
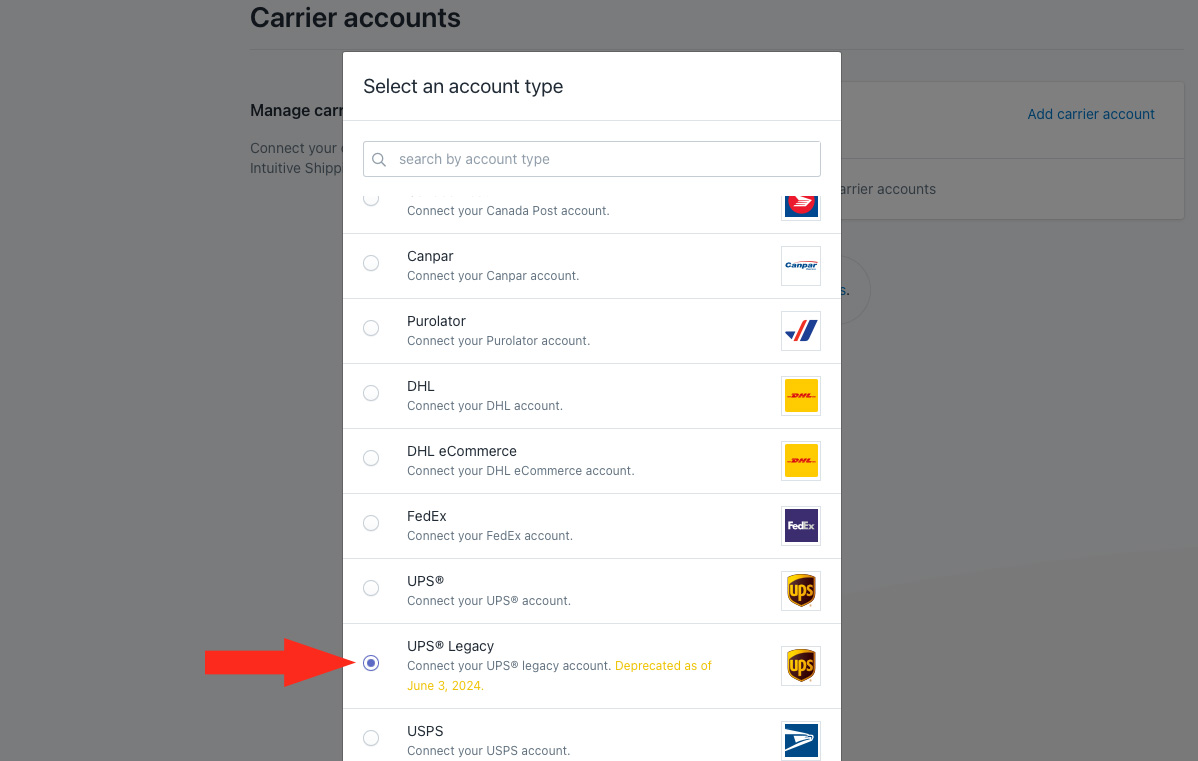
3) Click the drop-down arrow beside Parcel services.
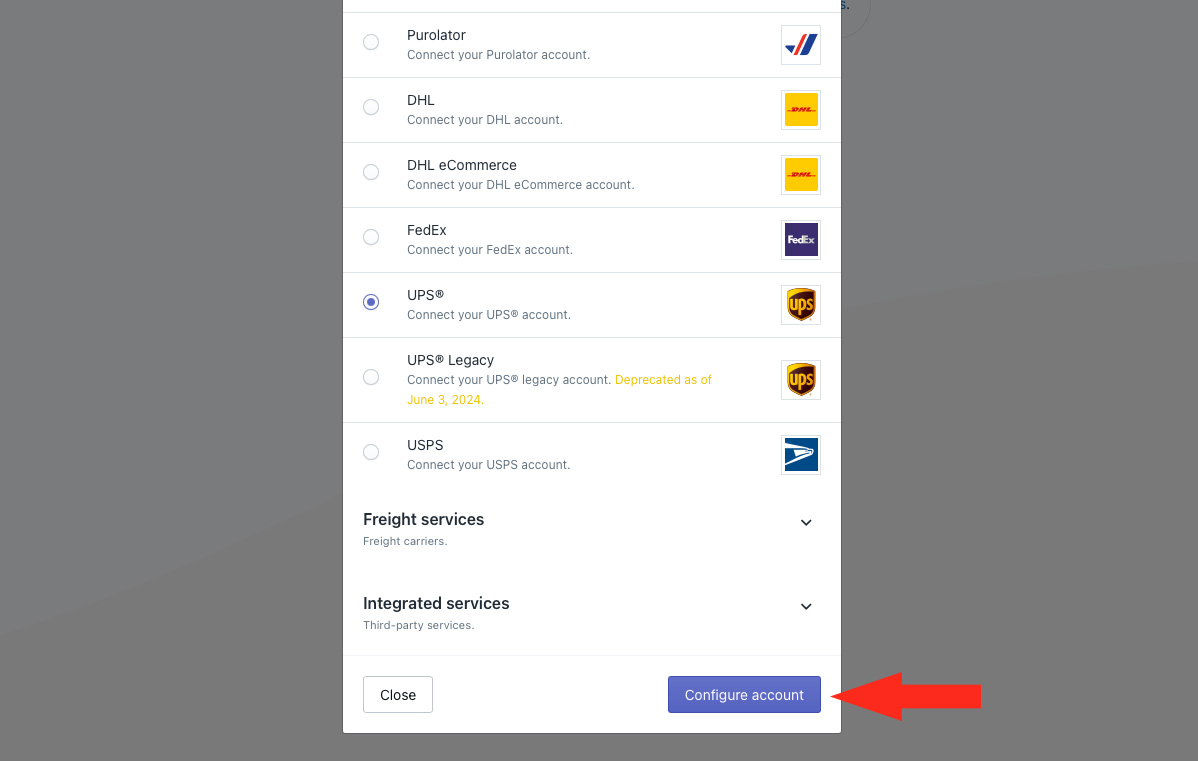
Intuitive Shipping lets you connect your UPS account whether you have a legacy account that uses an XML access key or a new account that uses OAuth 2.0 credentials.
The UPS Legacy account option will be unavailable in Intuitive Shipping after this date.
To connect your UPS Account using OAuth 2.0 credentials, continue to the next section.
To connect your Legacy account with an XML key, skip ahead to Connect Your UPS Legacy Account. This option will not be supported as of June 3, 2024.
Connect Your UPS OAuth 2.0 Account
1) Select UPS from the list of carriers.

2) Click the Configure account button.
Carrier Account Settings
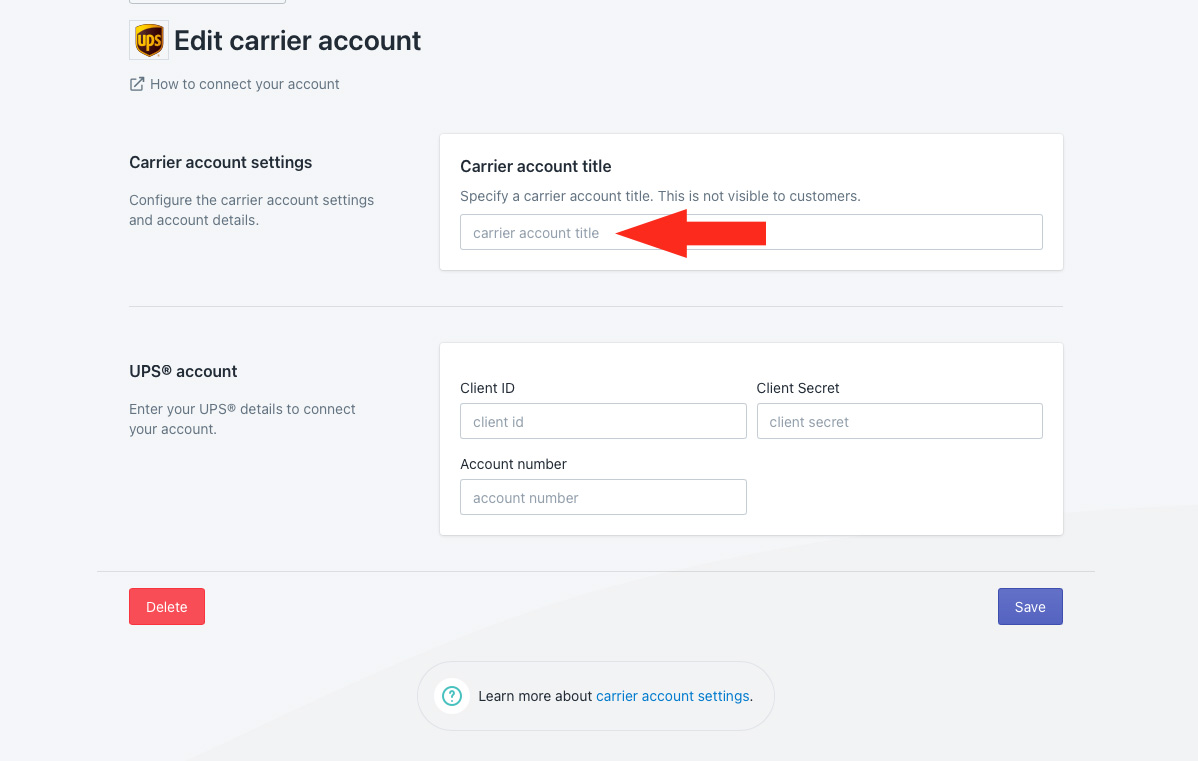
1) Enter a carrier account Title, such as ‘UPS’.
UPS Account
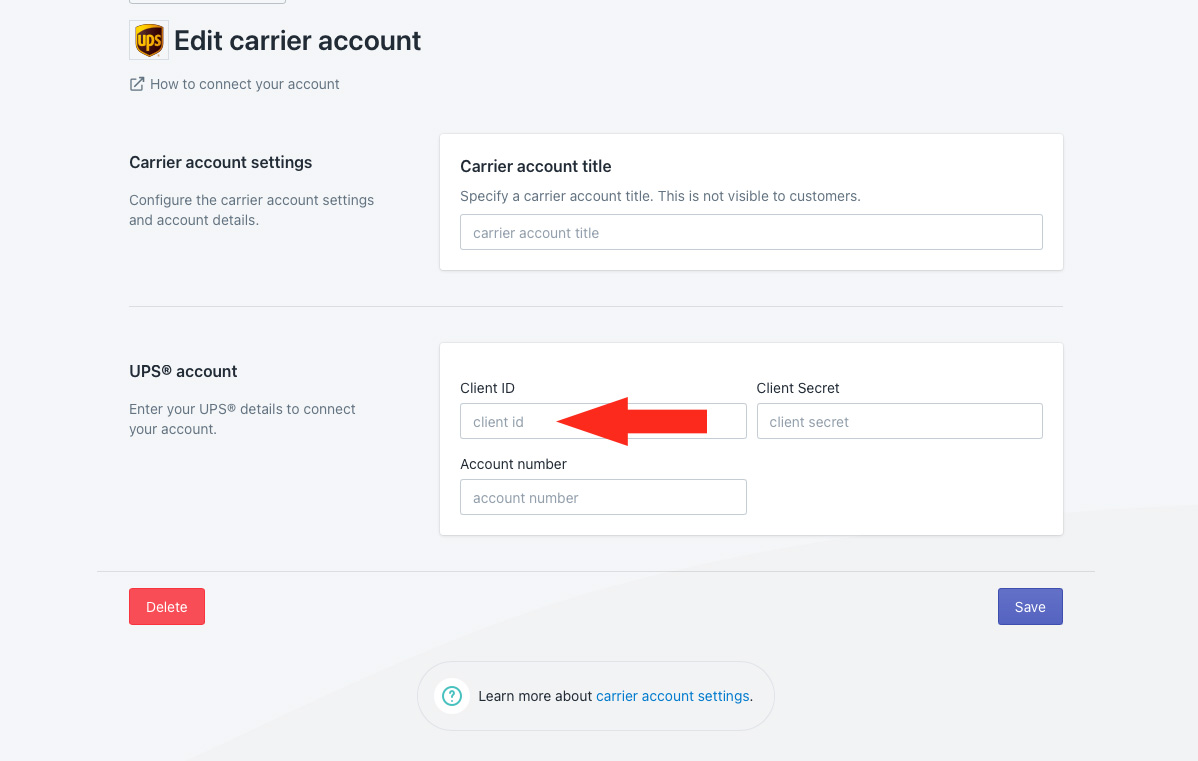
To complete this section, you’ll need your UPS Client ID, Client Secret and Account number.
If you don’t yet have an account with UPS, skip ahead to Create A UPS Account. Or, if you have an account but don’t know your credentials, skip ahead to Retrieve UPS Account Credentials.
Return to this section once you have the required information.
1) Enter your UPS Client ID.
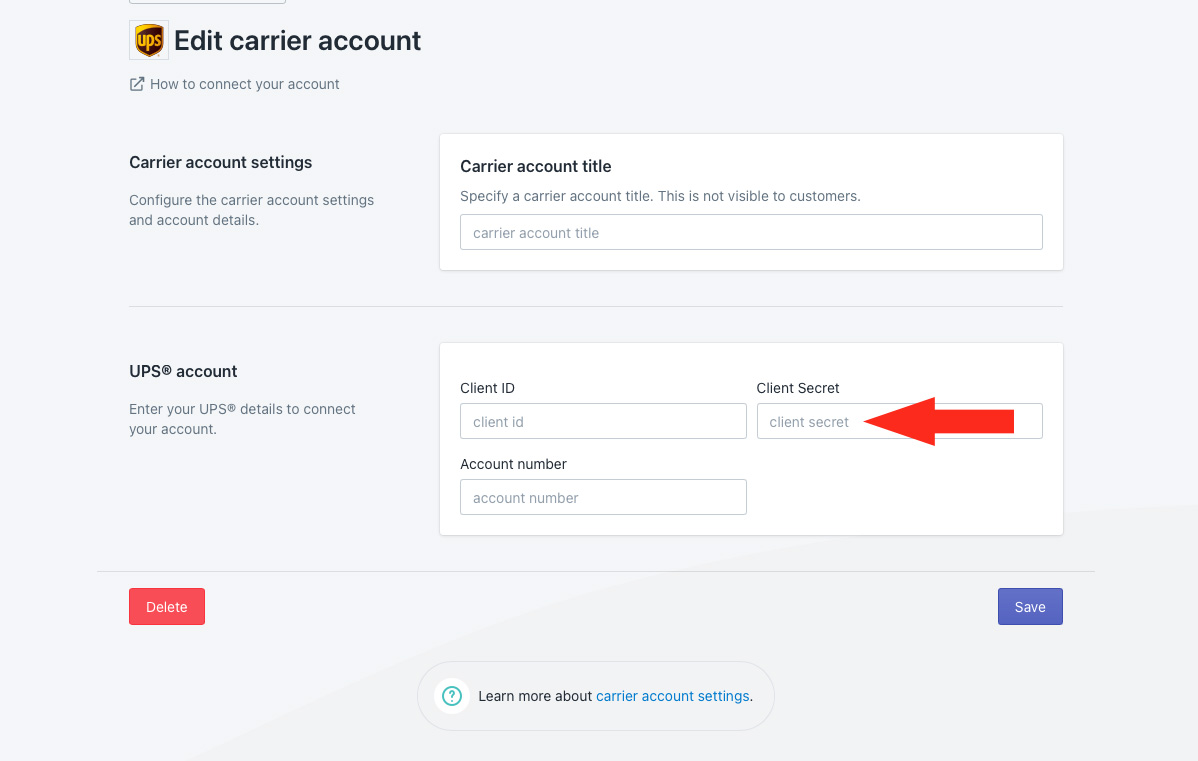
2) Enter your UPS Client Secret.
3) Enter your UPS Account number.
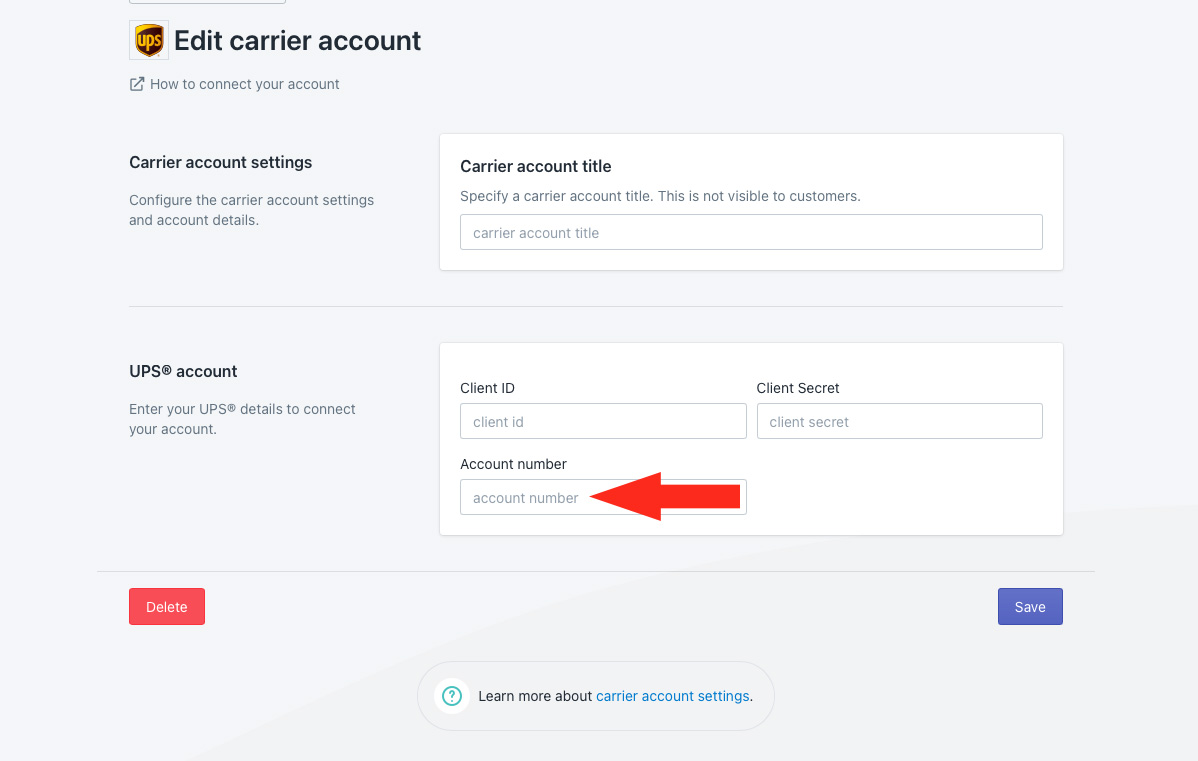
4) Click the Save button to save your account settings.

Connect Your UPS Legacy Account
1) Select UPS Legacy from the list of carriers.
2) Click the Configure account button.

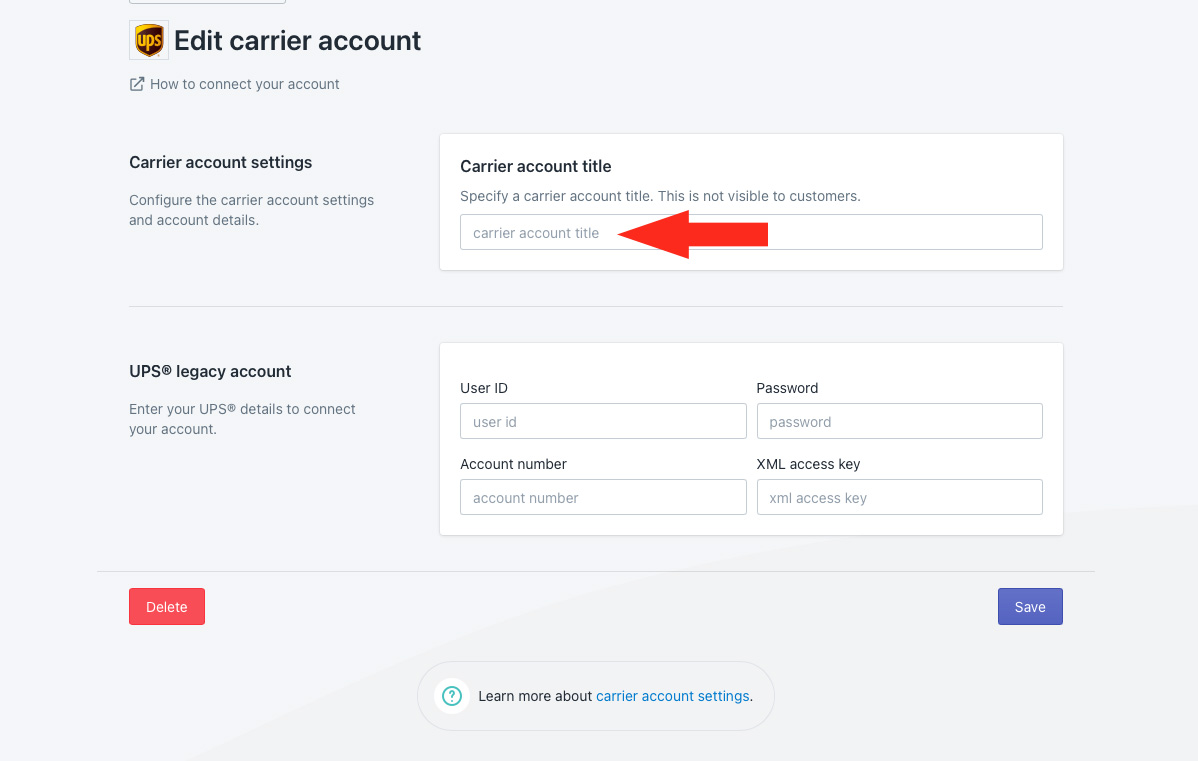
Carrier Account Settings
1) Enter a carrier account Title, such as ‘UPS’.
UPS Account
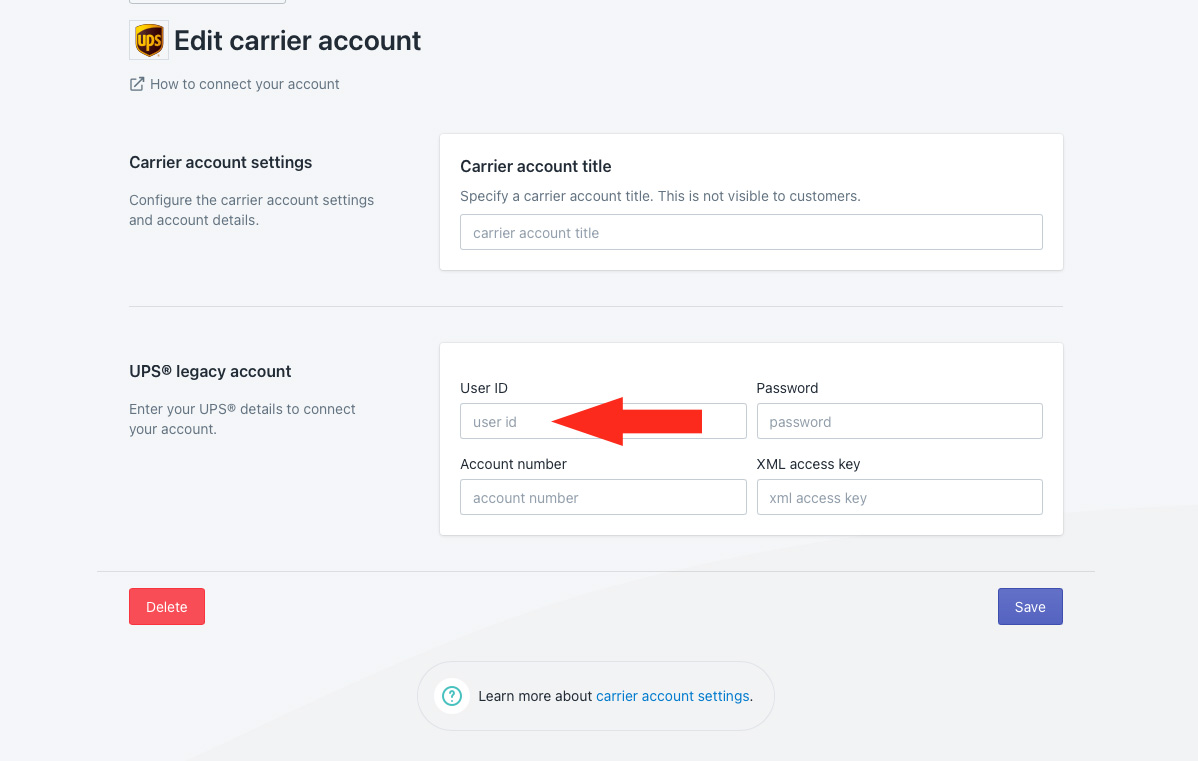
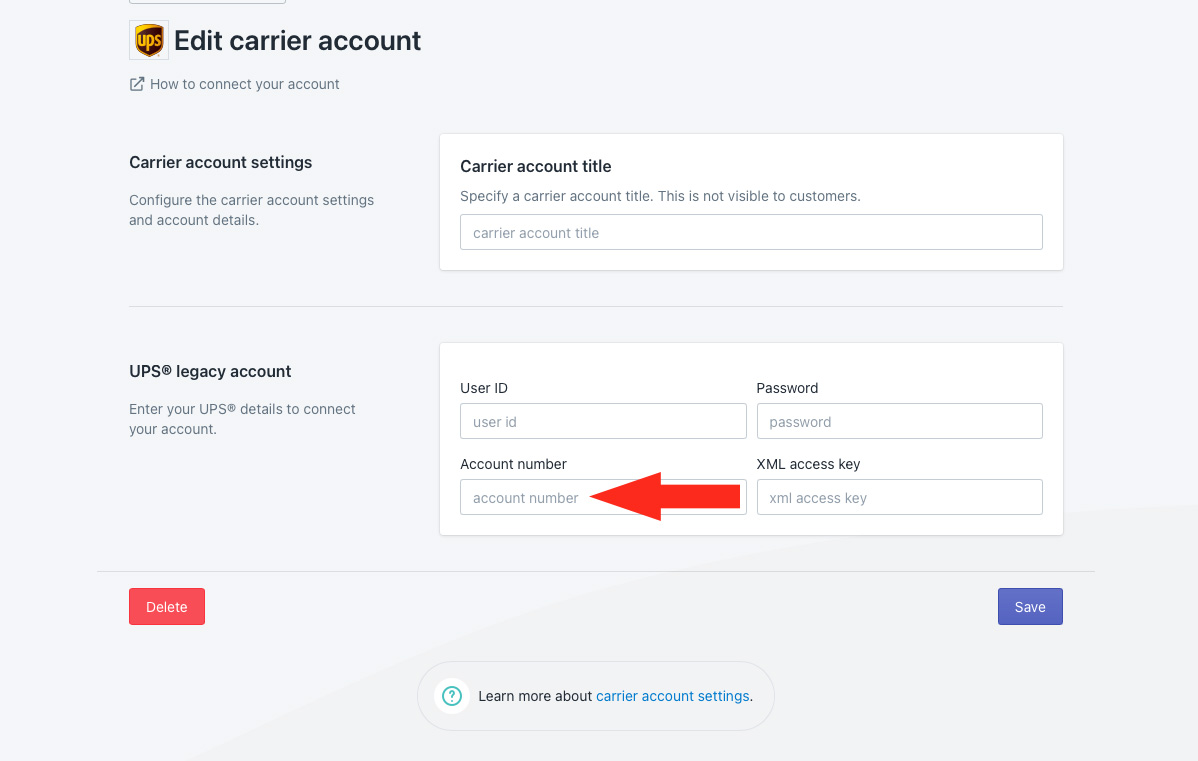
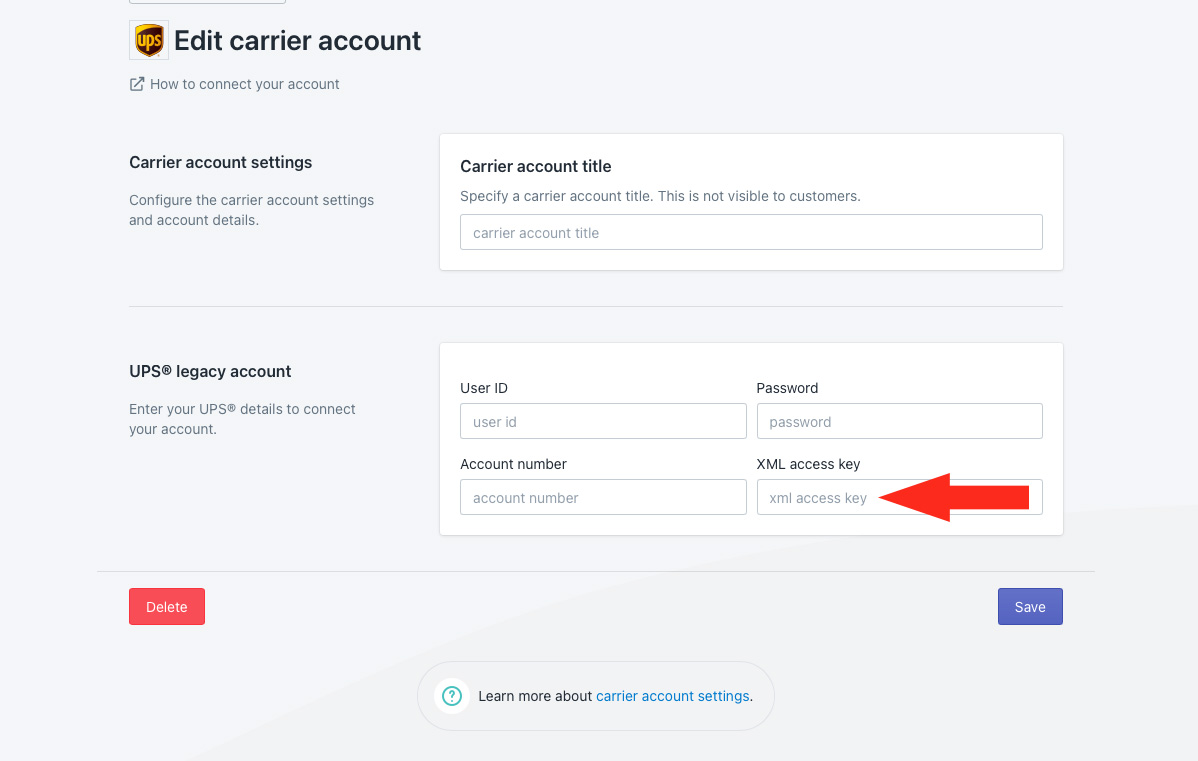
To complete this section, you’ll need your UPS User ID, Password, Account number and XML Access key.
If you don’t yet have an account with UPS, you can only create an account that uses UPS OAuth 2.0 credentials. You will be unable to connect your account using this method unless you have legacy account credentials using an XML access key.
If you have a Legacy UPS account that uses an XML access key, but don’t know your credentials, skip ahead to Retrieve UPS Account Credentials.
Return to this section once you have the required information.
1) Enter your UPS User ID.
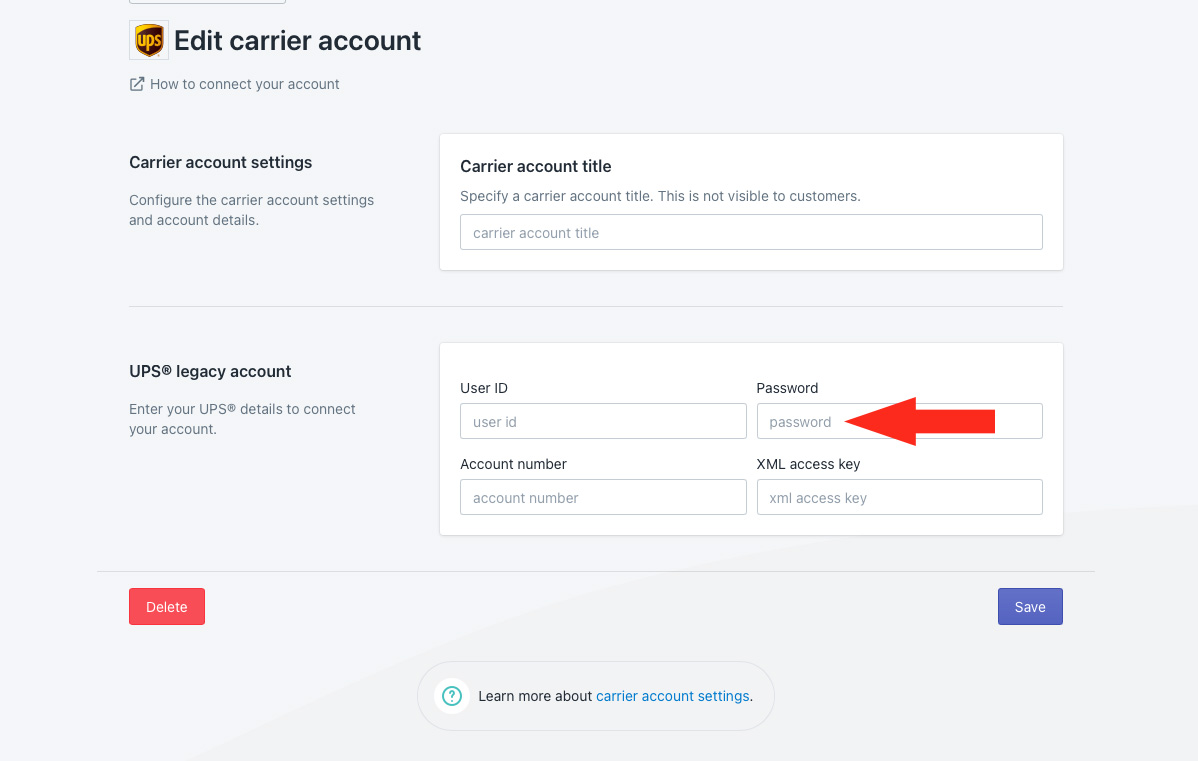
2) Enter your UPS Password.
3) Enter your UPS Account number.
4) Enter your UPS XML access key.
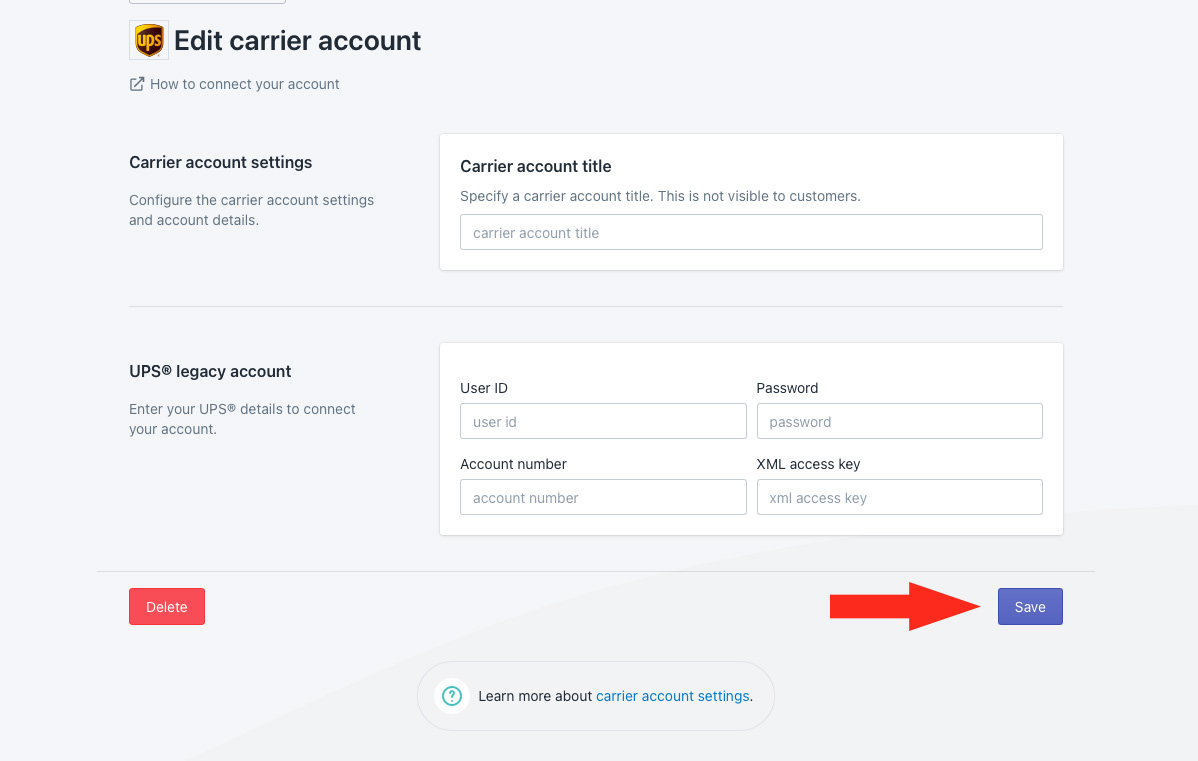
5) Click the Save button to save your account settings.
Create A UPS Account
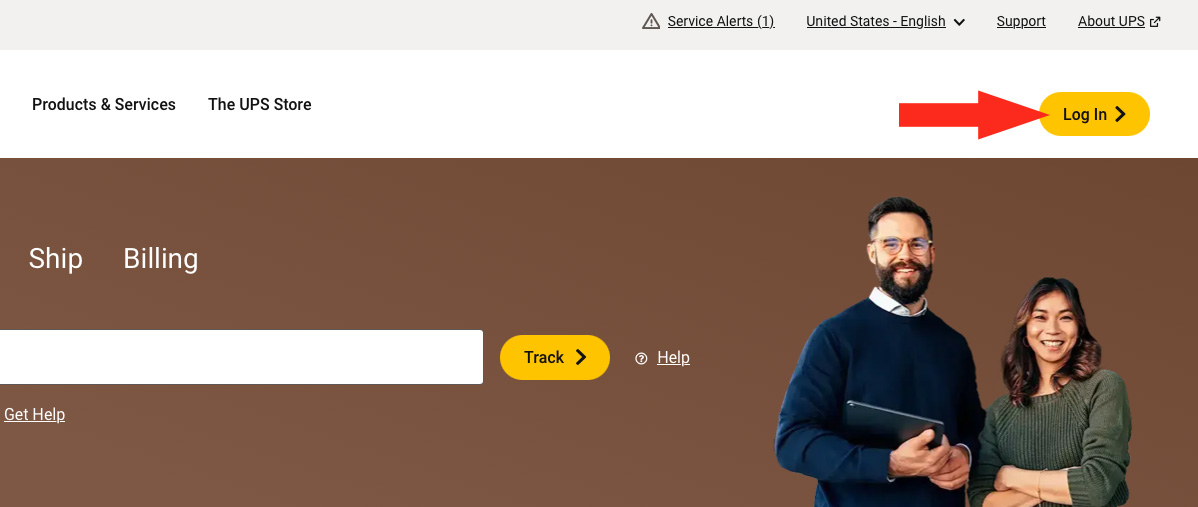
1) Open a new browser tab, then go to the UPS website.
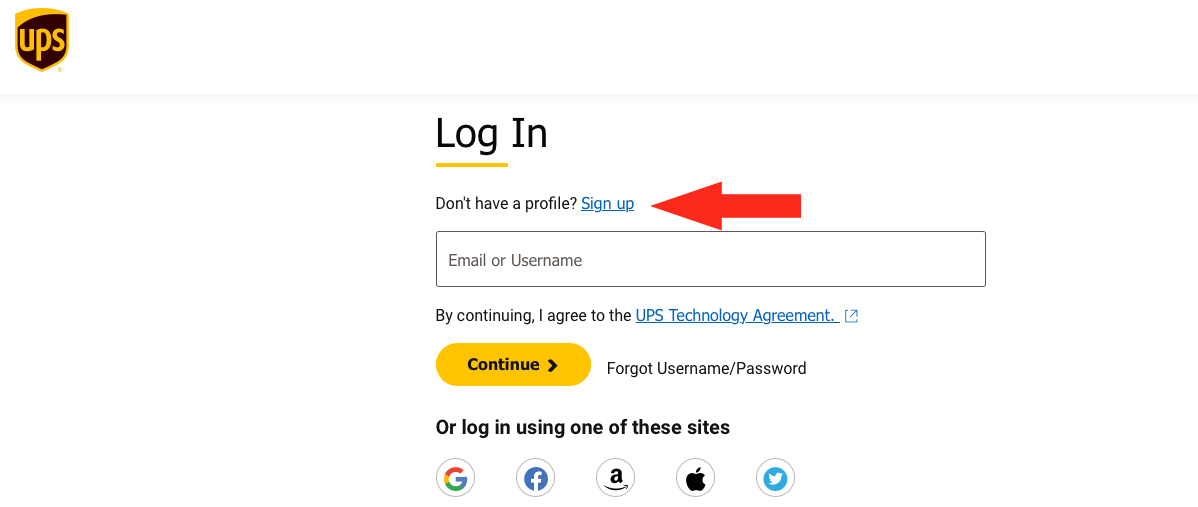
2) Click Log in to begin the account application process.
3) Click Sign up on the Login page.
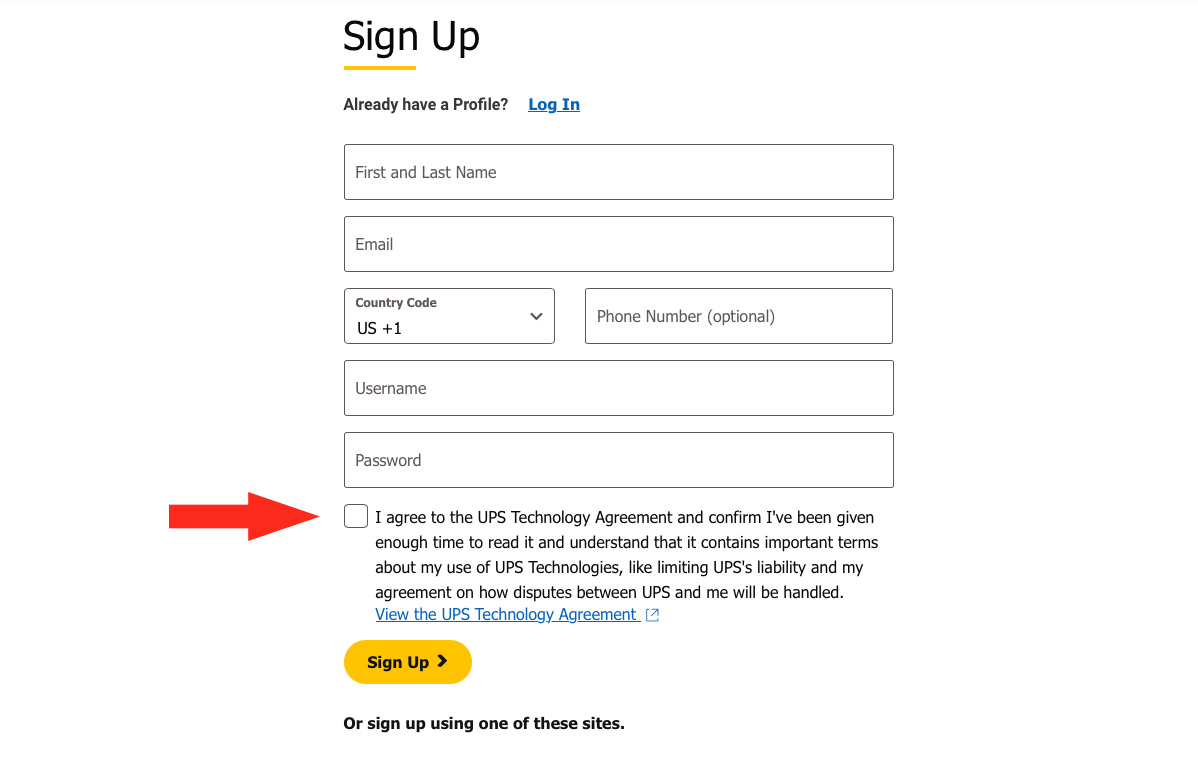
4) Complete the form, then check the box agreeing to the UPS Technology Agreement.
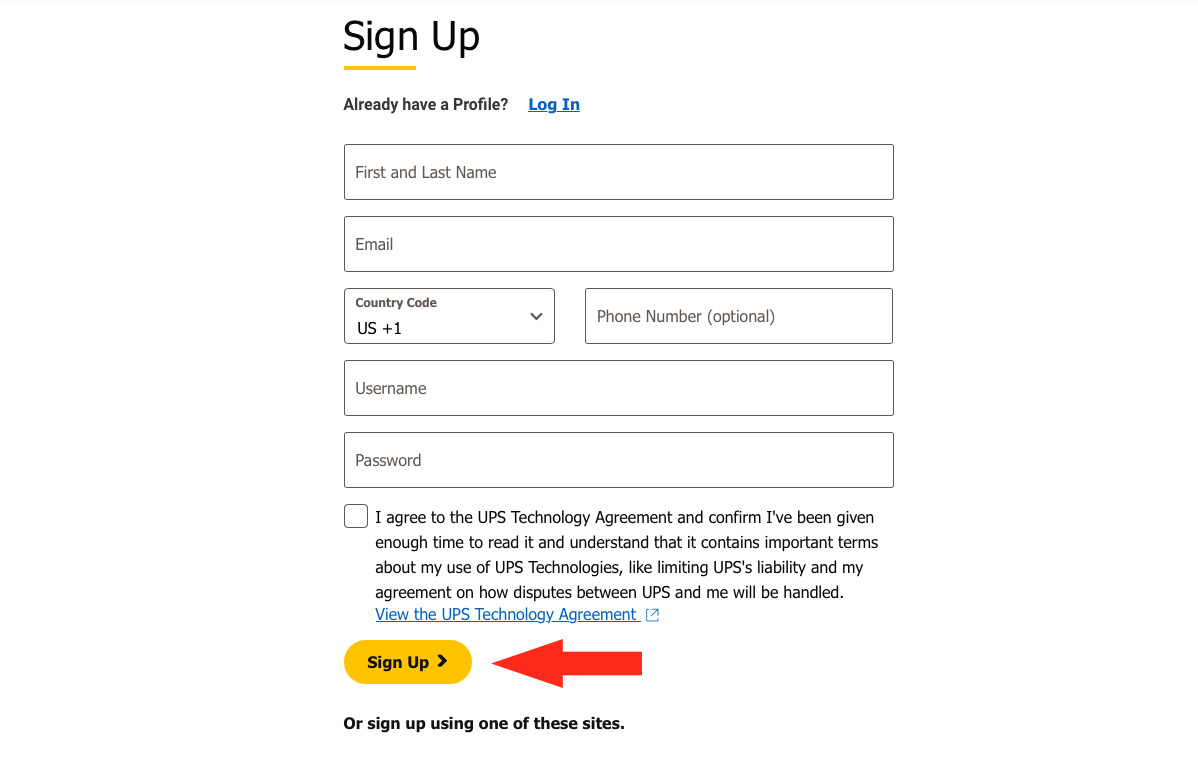
5) After reading the agreement, click the Sign Up button.
6) After completing the application to create your account, navigate to the UPS Developer Portal.
7) Go to My apps.
8) Add an app connection for Intuitive Shipping, then make a note of your Client ID, Client Secret and Account number.
9) Return to Intuitive Shipping and resume connecting your UPS OAuth 2.0 account at Step 1 of UPS Account.
Retrieve UPS Account Credentials
1) Open a new browser tab, then go to the UPS website.
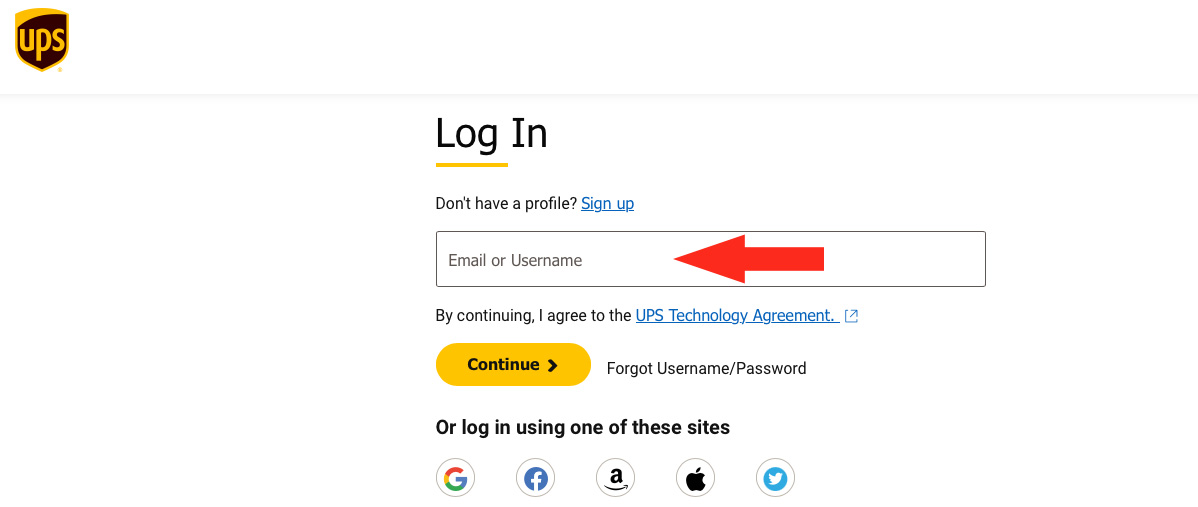
2) Click Log in to access your account.
3) Enter the email or username associated with your UPS account, then continue to your account details.
4) After signing in, navigate to the UPS Developer Portal and go to My apps, then find and make note of your Client ID, Client Secret and Account number.
5) Return to Intuitive Shipping and resume connecting your UPS OAuth 2.0 account at Step 1 of UPS Account.
Restrictions
Each carrier has restrictions that may limit your shipping capabilities or prevent you from making certain shipments. Here are some restrictions to be aware of when using UPS.
- Originating address – Not all UPS services are available in every country. To see which domestic services are available in your country, visit your regional UPS website or go here to select your country.
- Restrictions by country – each country you ship to may have its own trade and import restrictions. Not all UPS delivery services are available to all countries. To learn more about restrictions to specific countries, go here.
- Prohibited items – certain goods, including items considered to be illegal or dangerous, may not be shipped by UPS under any circumstances. To learn more about restricted items, go here.
- Controlled items – items such as tobacco and vaping products, plants and animals, and dangerous goods may be shipped if they meet certain criteria. Other items such as pharmaceuticals may be shipped by UPS under strict regulations in some areas and prohibited in others. To learn more about restricted items, go here.
- Packaging restrictions – some products can only be shipped if they comply with certain packaging standards. To learn more about UPS packaging requirements or for guidance on packaging your items, go here.
- International restrictions – customs and international laws may limit what you ship, how you ship it, and how it can be returned to you. You may also require additional information – e.g. Harmonization codes – documentation and fees to complete your shipment. To learn more about shipping internationally with UPS, go here.
- Size & weight restrictions – all packages shipped by UPS must not exceed a length plus girth of 165 inches (13.5 feet/ 419 cm), or 150 lbs (68 kg). Shipments outside of North America may be subject to dimension and weight restrictions of the origin or destination country. Certain delivery services may have size limitations. Packages exceeding 150 lbs may be suitable for UPS Freight Services.
Troubleshooting
In certain situations, live rates from UPS may not appear at checkout, or they might not be displayed as expected. You may be able to determine why rates aren’t being displayed correctly by reviewing the rate calculation Activity.
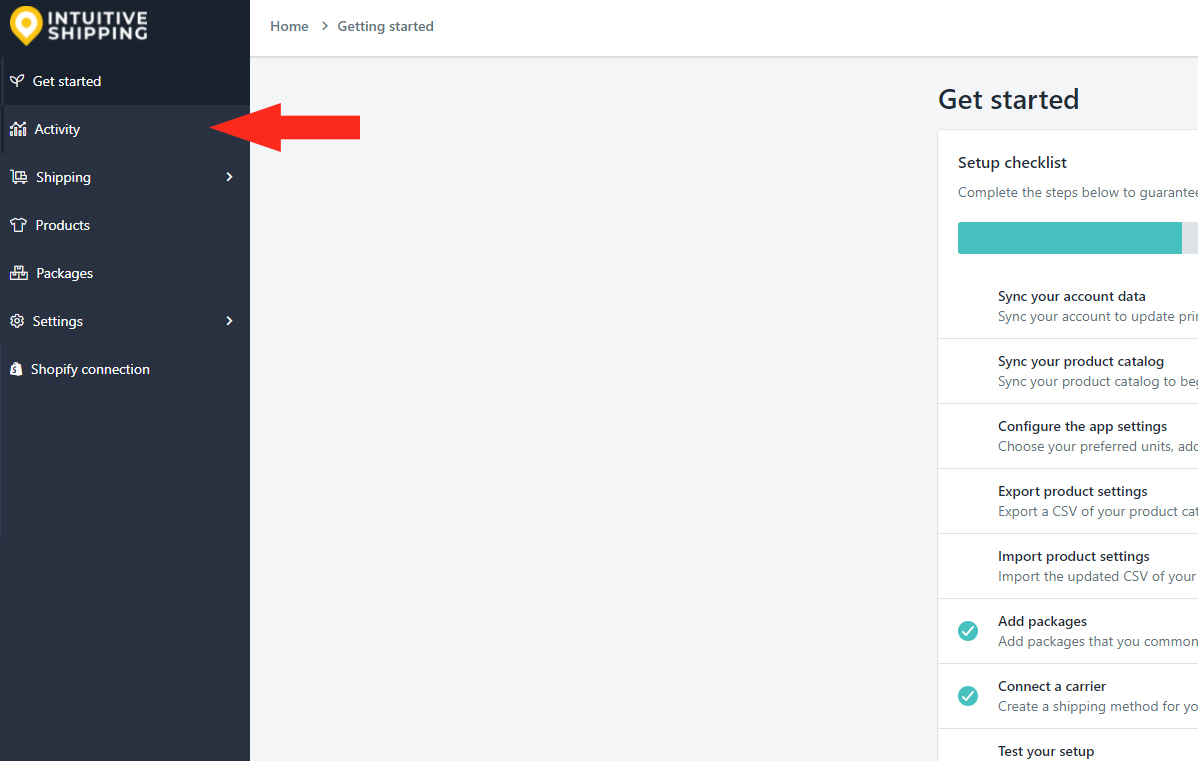
1) Click Activity on the main menu.
2) Select ‘Unsuccessful requests only‘ from the Filter by request status drop-down list. This will list only Activities where rates were not returned.

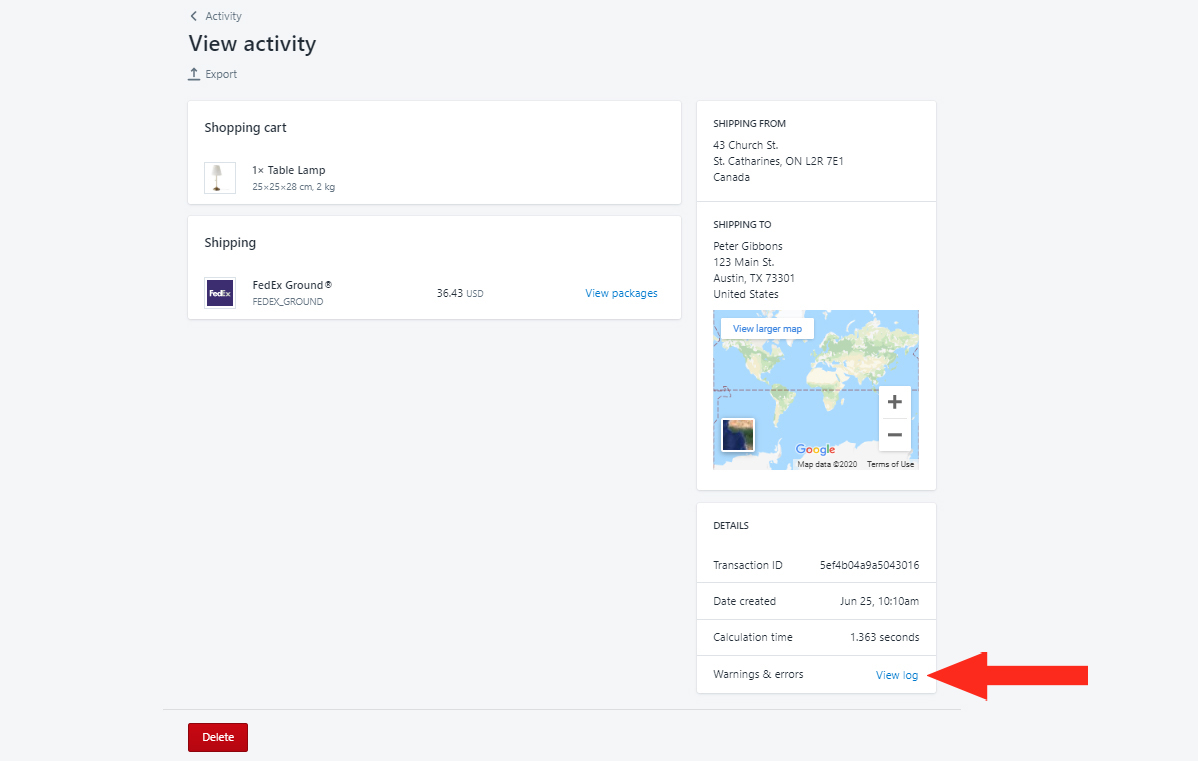
3) Click View beside any ‘unsuccessful’ Activity.
4) In the Details section, click View log beside Warnings and errors, if available.
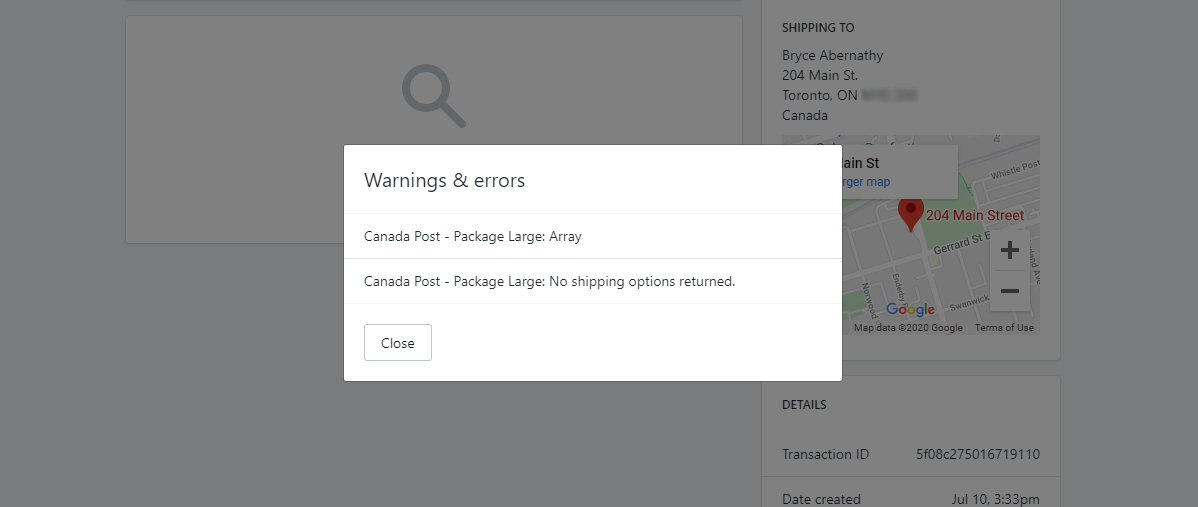
5) Review the warnings for UPS delivery services.
Here are some of the more common reasons why your UPS live rates may not be appearing at checkout.
Setup & Test Mode
While you are in Setup & Test mode, live rates will only appear at checkout when the customer name contains ‘Intuitive’, even when the Scenario status is set to ‘Everyone’. To make your rates available to customers, you will need to activate your account and begin your 14-Day FREE Trial.
Scenario Status
If UPS rates are not appearing, it may be because the Scenario Status is set to either Off (not visible to anyone) or Test (only visible when the customer name contains ‘Intuitive’).
Shipping Method Status
If UPS rates are not appearing, it may be because a shipping method’s Visibility is set to either Off (not visible to anyone) or Test (only visible when the customer name contains ‘Intuitive’).
Carrier-calculated Rates
Shopify’s third-party carrier-calculated shipping rates feature must be enabled on your Shopify account in order to use any third-party shipping rate calculator app, including Intuitive Shipping.
Account Credentials
Double-check to make sure that have entered the correct User ID, Password, Account number and XML access key and that there are no spaces or extra/ missing characters.
Packages
Rates may not appear if suitable package sizes are not available in a carrier service shipping method. For example, when the appropriate package size is either missing completely or is set to Inactive status, the next largest size package will be used. If the larger package exceeds UPS’s size limitations, a rate will not be generated.
When no suitable package is available, Intuitive Shipping will attempt to create a custom package using the dimensions of the product(s) in the cart. Similarly, if the custom package exceeds UPS’s size limitations, a rate will not be generated.
Check to make sure that the packages in your UPS shipping method are suitable for products you’re shipping with UPS and that they do not exceed the size limitations.
Delivery Services
Some UPS delivery services may not be available due to restrictions, such as shipment size & weight or the customer’s address. If some delivery service rates are being generated, but others are not – or, if rates from another carrier rate shipping method (e.g. FedEx) are being generated, but rates from UPS are not – it is most likely due to service restrictions.
Be sure to check that the selected services are compatible with the shipping address. For example, if the customer address is international and only domestic services have been selected, rates will not be displayed.
If some rates were returned at checkout, but others were not, check for Notifications related to UPS.
Product Dimensions & SmartBoxing™
If you are packaging with SmartBoxing™, all products must have dimensions assigned to them in Intuitive Shipping. Product dimensions determine how the SmartBoxing™ system will package the order. When product dimensions are missing, the packing process cannot be completed. Package information cannot be sent to UPS and the calculation fails.
Syncing
While you’re in Setup & Test Mode, any changes you make to your products need to be manually synced in your General Settings. Once you have activated your account, changes to your products are synced automatically with Intuitive Shipping. However, if you make several changes to products at one time, it is possible that the auto-sync was not completed properly. When product information critical to the calculation is missing, the process fails, and package information cannot be sent to UPS.
If you’re using the SmartBoxing™ packing algorithm, product dimensions are required. Be sure to add dimensions to any new products recently synced with Intuitive Shipping.
Cost Adjustments
If rates are returning but appear to be either too high or too low, cost adjustments may have been applied to the shipping method in the Optional Settings section. Check the Cost adjustment section of your UPS shipping method’s Optional Settings.
Migrating from XML Access Key to OAuth 2.0 Account
UPS is transitioning to a new carrier account API connection method. As of June 3, 2024, UPS will no longer support legacy account credentials that use an XML access key and Intuitive Shipping will remove this account connection type.
If you do not yet have a UPS account, you can only create a new account that uses the OAuth 2.0 account type. You are only required to migrate if you have a legacy UPS account that uses an XML access key.
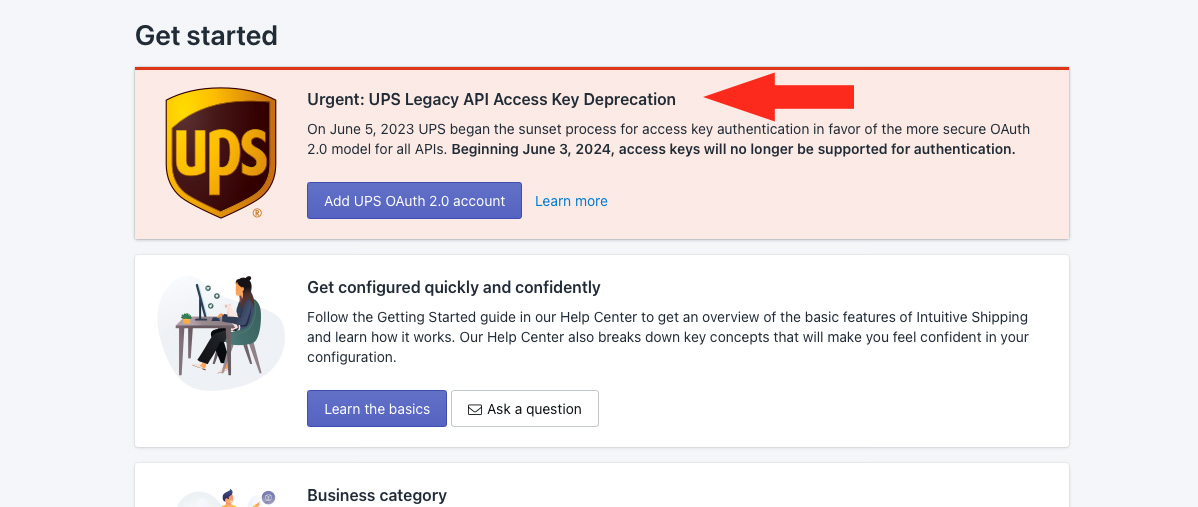
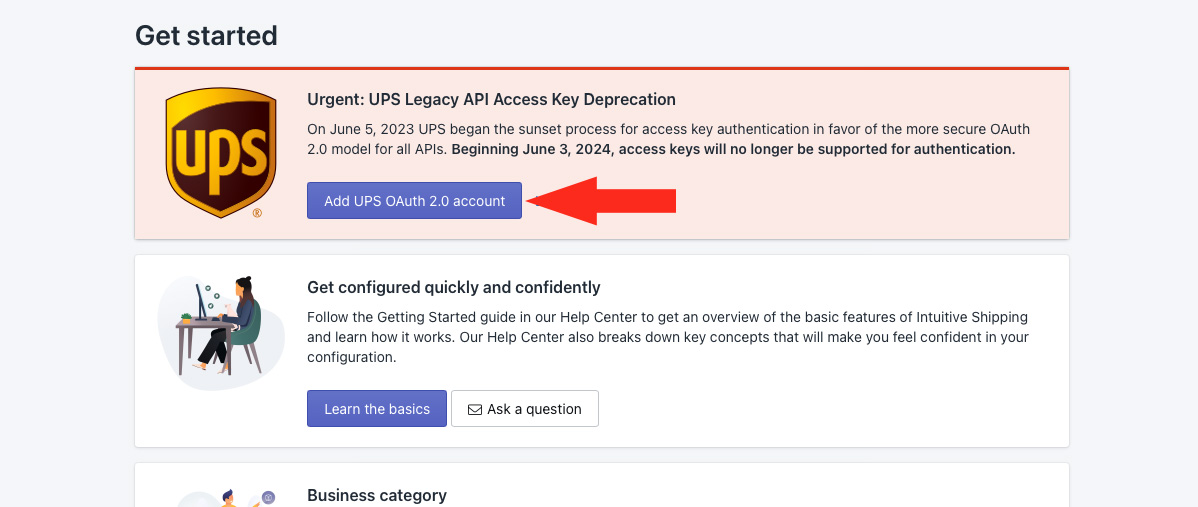
If you have any parcel service shipping methods in Intuitive Shipping that use a legacy UPS account with XML access key credentials, you must migrate to shipping methods that use the OAuth 2.0 account type. You will see a red warning banner displayed on the Get started page in Intuitive Shipping if you are required to migrate.
Test Your OAuth 2.0 Credentials
If you created your UPS OAuth 2.0 account and you have already connected it to Intuitive Shipping, we strongly recommend testing your credentials prior to completing the migration process.
Migration cannot be undone.
If there are validation issues with your OAuth 2.0 account credentials, you may experience errors with your UPS rates after migration.
To test your OAuth 2.0 credentials, we recommend creating a test Scenario with no conditions. Within your test Scenario, add a parcel service shipping method using ‘UPS’ (not ‘UPS Legacy’) as the carrier. In the Carrier accounts section of the shipping method, be sure to add or select your OAuth 2.0 account.
After saving your shipping method to the test Scenario, complete some test checkouts to verify your credentials and ensure rates are being calculated.
Once you have tested and verified your account credentials, return to this section and skip ahead to Step 3 of the next section.
Migrate Your UPS Account
If you do not yet have a UPS OAuth 2.0 account type connected to Intuitive Shipping, you will need to connect it before you can migrate your shipping methods. The warning banner will prompt you to add your OAuth 2.0 account credentials to Intuitive Shipping.
1) Click the Add UPS OAuth 2.0 account button on the warning banner.
2) Complete the steps in the Connect Your UPS OAuth 2.0 Account section of this guide.
After connecting your UPS OAuth 2.0 account to Intuitive Shipping, return to this section and continue to Step 3.
3) Return to the Get started page.
4) Click the Migrate UPS XML accounts button on the warning banner.

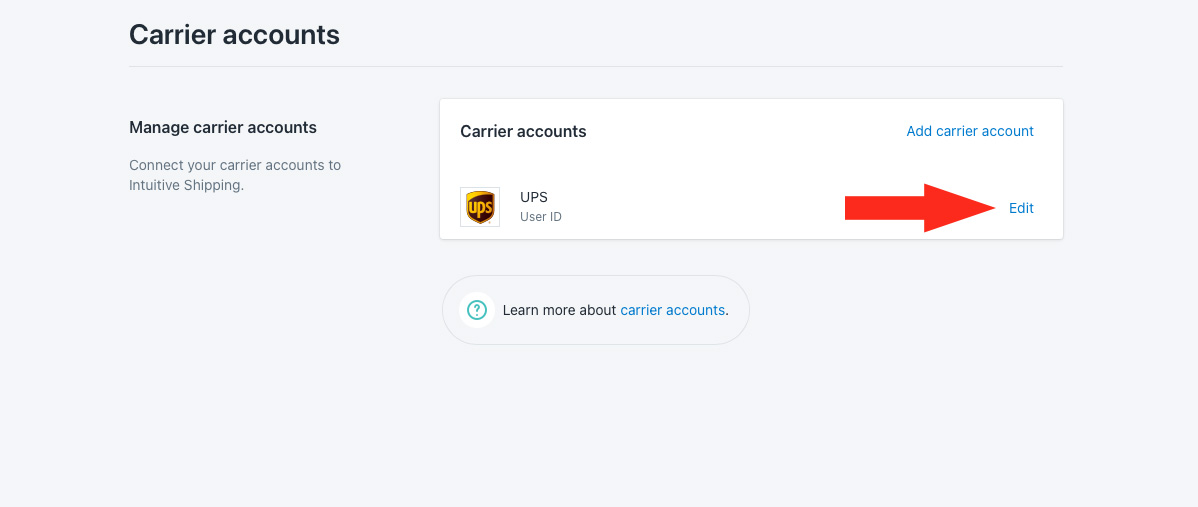
5) Click Edit beside the Legacy UPS account you wish to migrate.
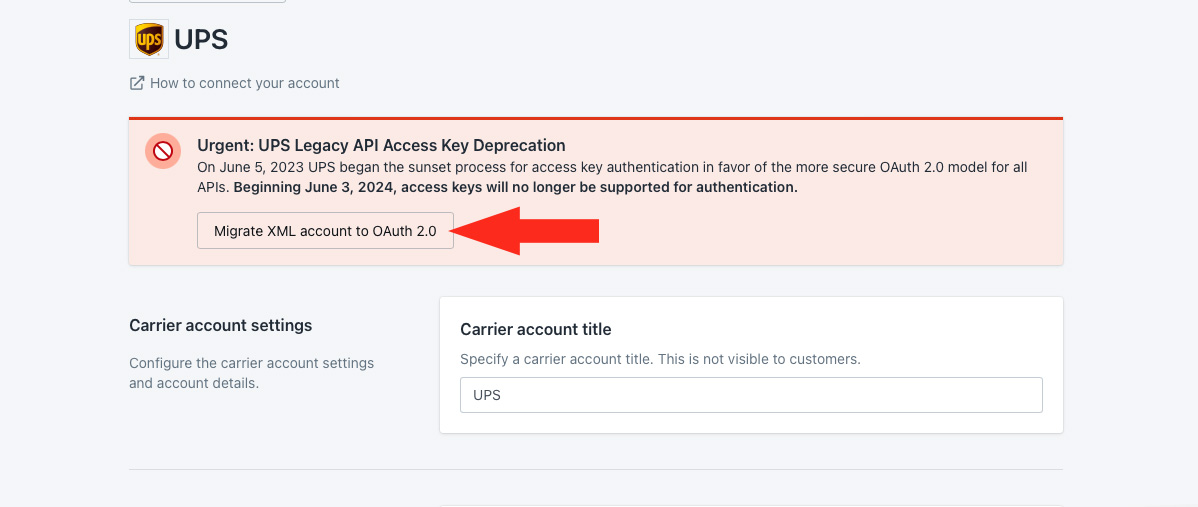
6) Click Migrate XML account to OAuth 2.0 on the warning banner near the top of the page.
7) Select the UPS OAuth 2.0 account you wish to migrate to.
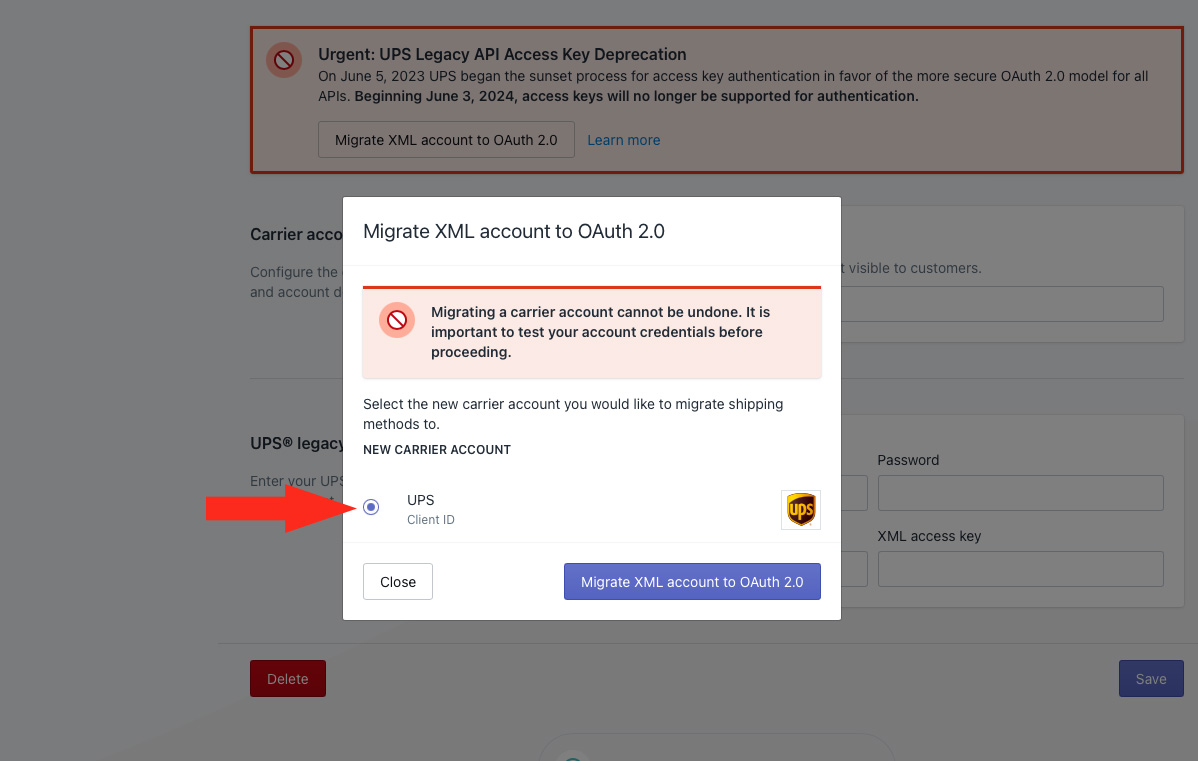
8) Click the Migrate XML account to OAuth 2.0 button.

Any shipping methods using the legacy account credentials will automatically be migrated to the selected OAuth 2.0 account type.
9) Return to the Get started page.
If you no longer see a red warning banner at the top of the page, migration has been completed.
Contact Us
If UPS rates are not being displayed as expected and you are unable to resolve the issue, or, if you are having difficulties migrating your legacy UPS accounts to OAuth 2.0 accounts, please contact us. We’re here to help!