Do you have product-based shipping rates that take priority over other rates? Harness the power of Intuitive Shipping to create a series of prioritized, tiered Scenarios. When certain products are added to the cart, shipping rates from prioritized Scenarios will overrule other rates, so your customers will always be charged the correct pricing tier.
How It Works
Let’s say you have standard shipping rates for your general products. Now you want to introduce a special product type that has 3 different categories, and each category has its own unique flat shipping rate. When any of the special products are in the cart, you want the flat rates to take priority over your general rates, and, you want the 3 categories to be tiered.
You can use product conditions, such as tags to restrict when general shipping rates are displayed, and to establish a hierarchy within the special categories. For example, if a customer orders your general products and a Category 2 product, the shipping rate for Category 2 will take priority and be displayed at checkout. If the customer decides to add a Category 1 product to the cart, which has the highest priority, the shipping rate for Category 1 will be displayed.
First you’ll need to create one Scenario for each of the special product categories, starting with the highest priority.
For this example, we’re using product tags two identify our three (3) special product categories: ‘Large’, ‘Medium’, and ‘Small’. Products tagged ‘Large’ will have the highest priority, followed by products tagged ‘Medium’, followed by products tagged ‘Small’. We’re using tags, but you can use any product identifier condition for this setup.
Once you’ve set up Scenarios with conditions for your special products, you’ll need to add opposing product conditions to your standard Scenario for general products.
Add The Highest Priority Scenario
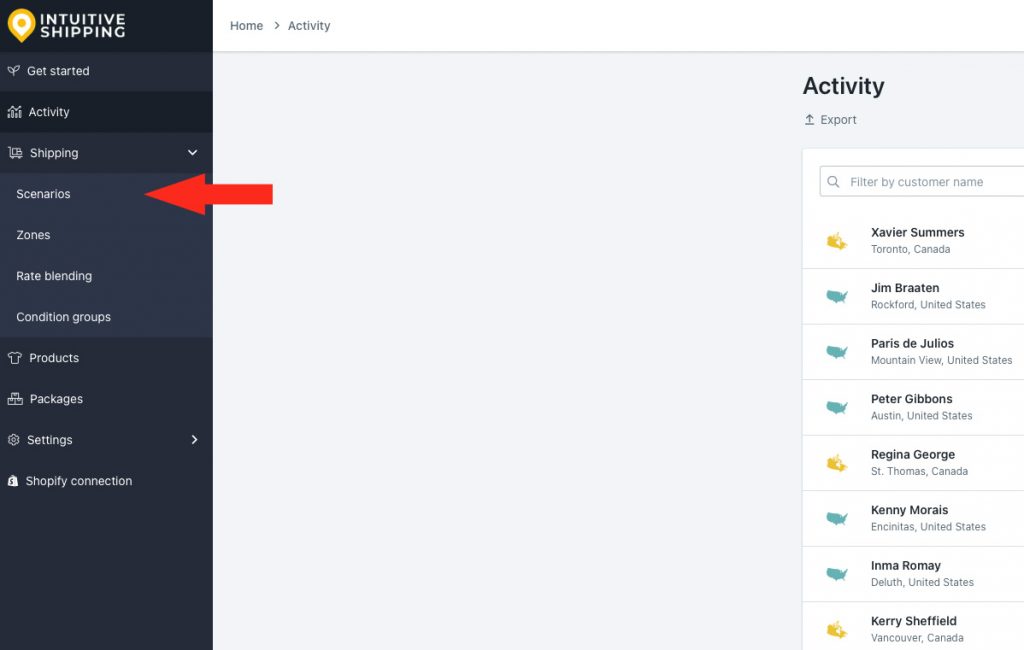
1) Click Shipping on the sidebar menu, then select Scenarios from the drop-down list.
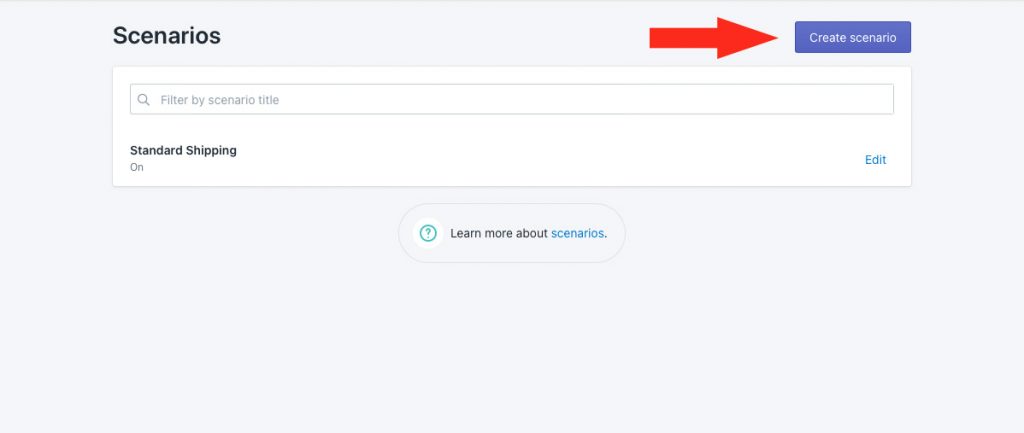
2) Click the Create scenario button.
General Settings
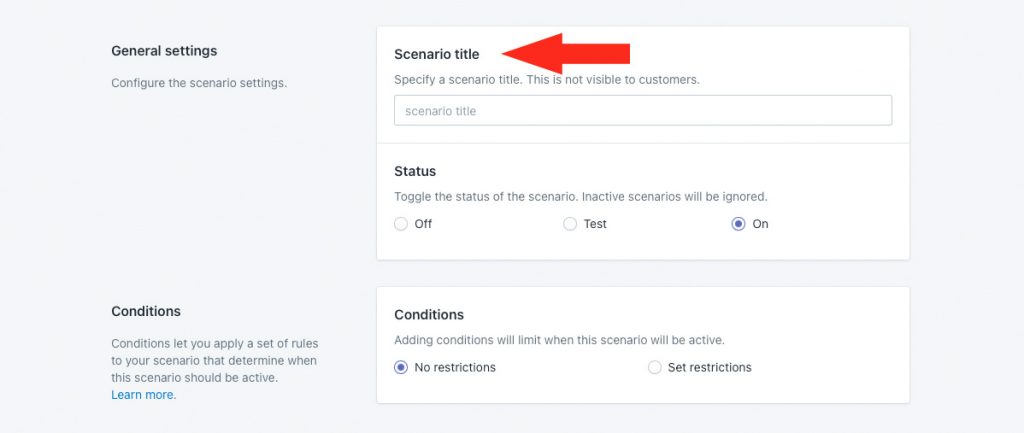
1) Enter a Scenario title like ‘Special Large’.
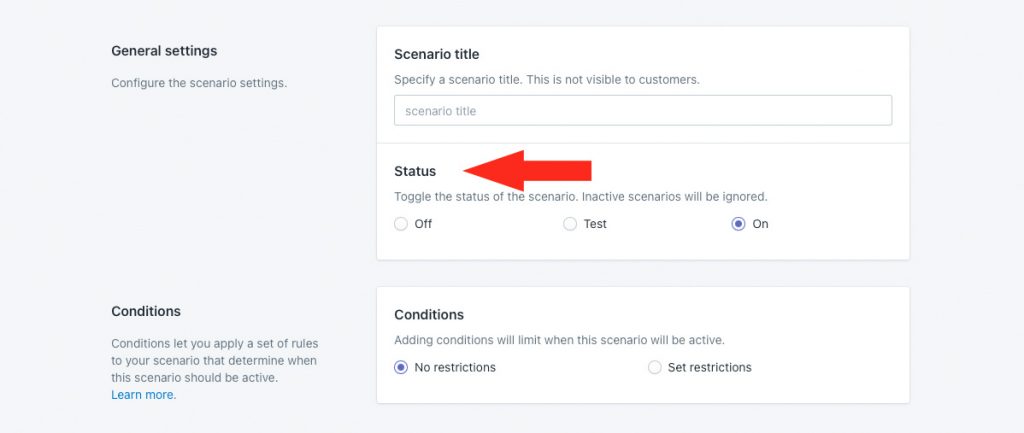
2) Leave the Status set to On.
Conditions
1) Select Set restrictions.
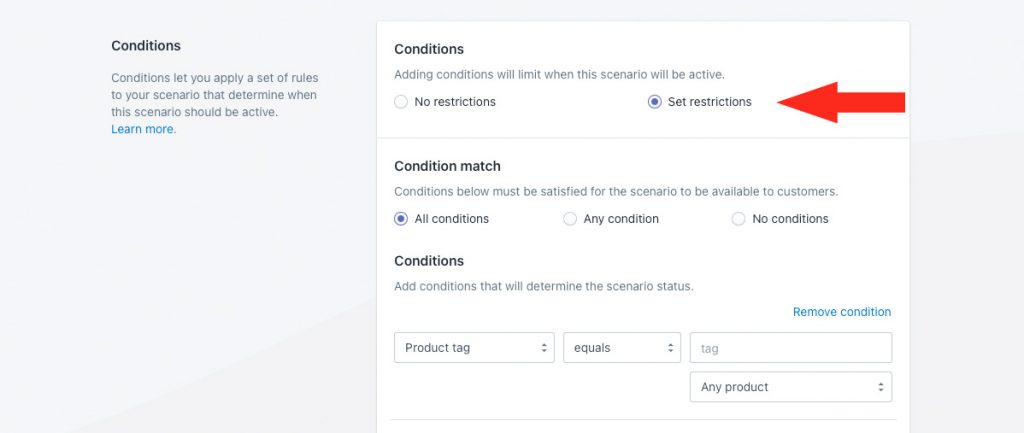
2) Leave Condition match set to ‘All conditions’.
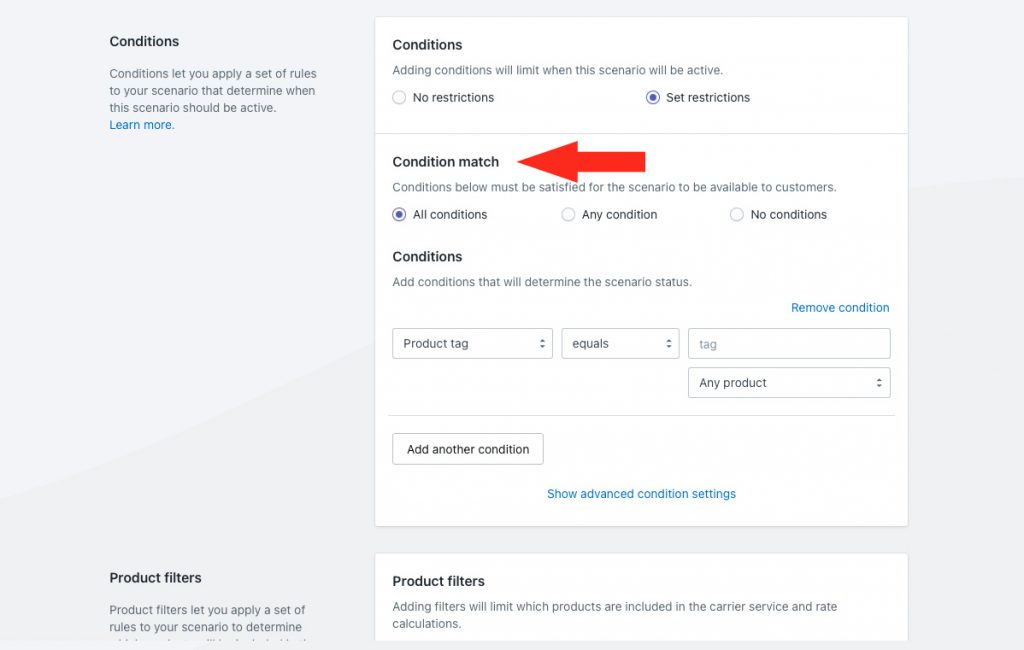
3) Select the product condition type. For this example, we’re using ‘Product tag’. You can use any product condition that identifies the special product with the highest priority.
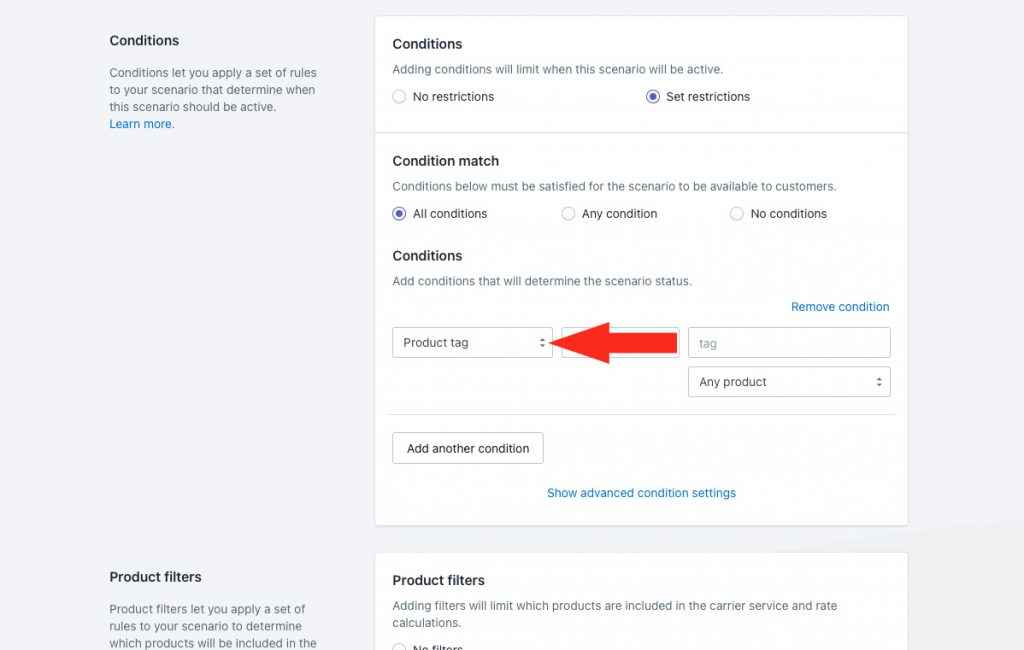
4) Leave the condition logic set to ‘equals’.
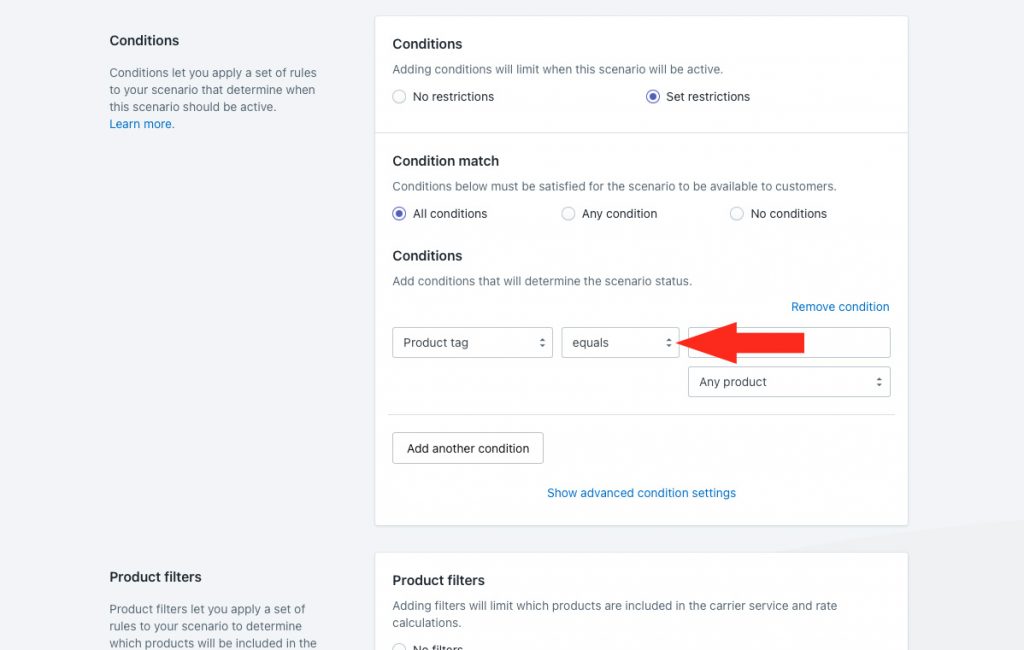
5) Enter the product identifier you assigned to your highest priority products as the condition value. For this example, we’re using the tag ‘large’.
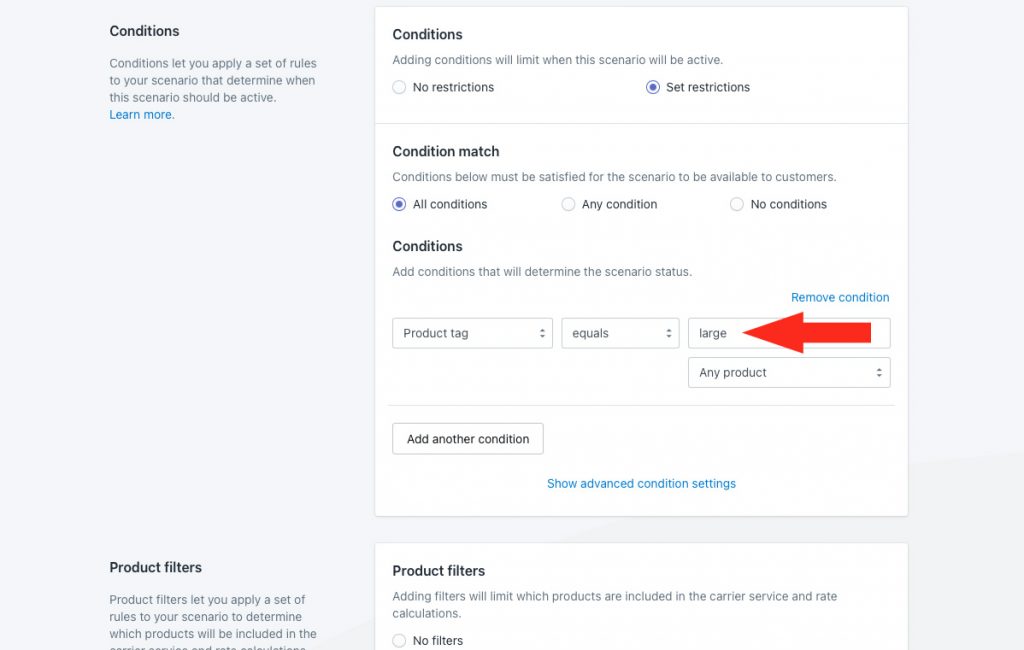
6) Leave the additional product setting set to ‘Any product’.
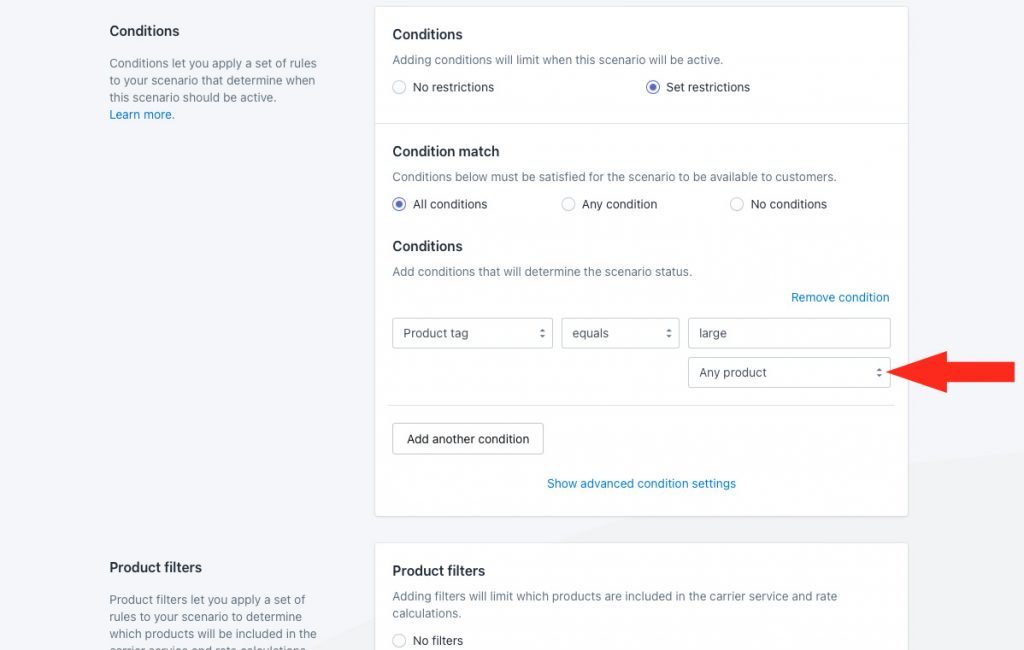
As long as at least one item in the cart is tagged with the value entered in Step 5, the shipping method assigned to this Scenario will be displayed at checkout.
Product Filters
1) Change Product filters to No filters.
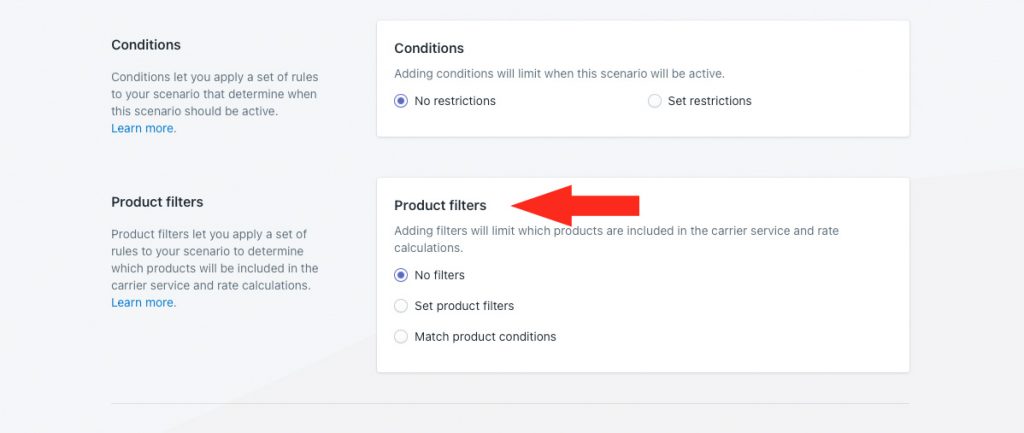
That means, all products in the cart will be calculated by the shipping method assigned to this Scenario, including any products that are not tagged ‘Large’.
Save Your Settings
1) Click the Save button to save your highest priority Scenario.
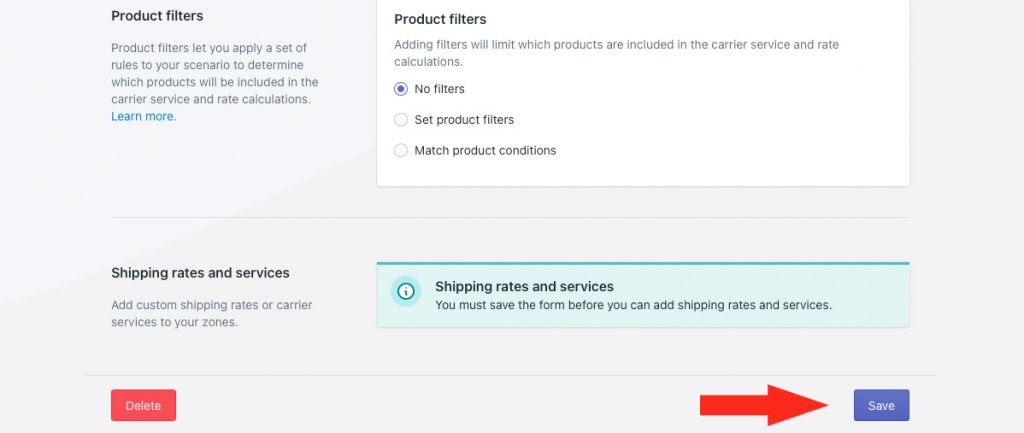
Select A Custom Service
For this example, we’re setting up a single flat rate. If you prefer to set up a rate table for your highest priority products, you can still follow the steps below.
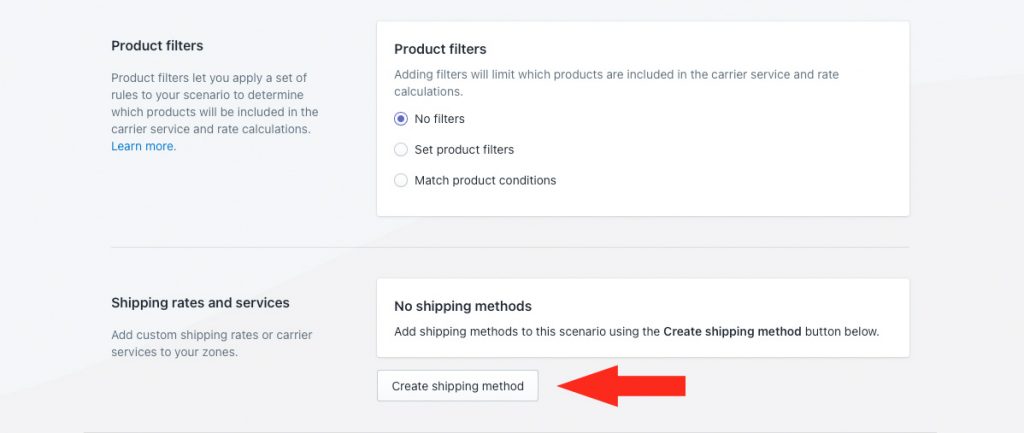
1) Click the Create shipping method button.
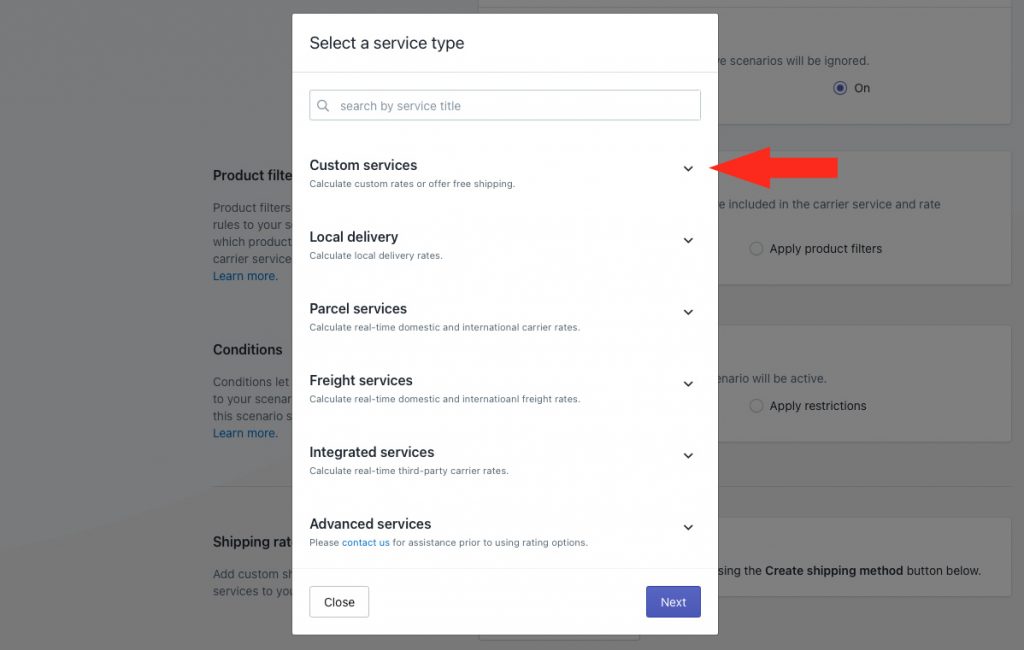
2) Click the downward arrow beside Custom services to display a list of options.
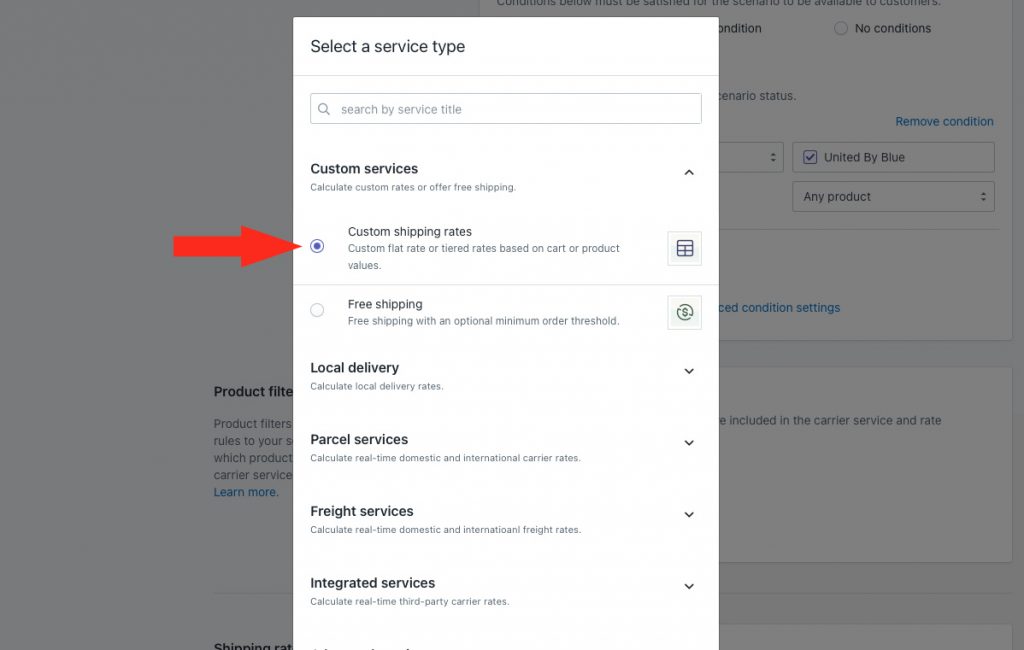
3) Select Custom shipping rates.
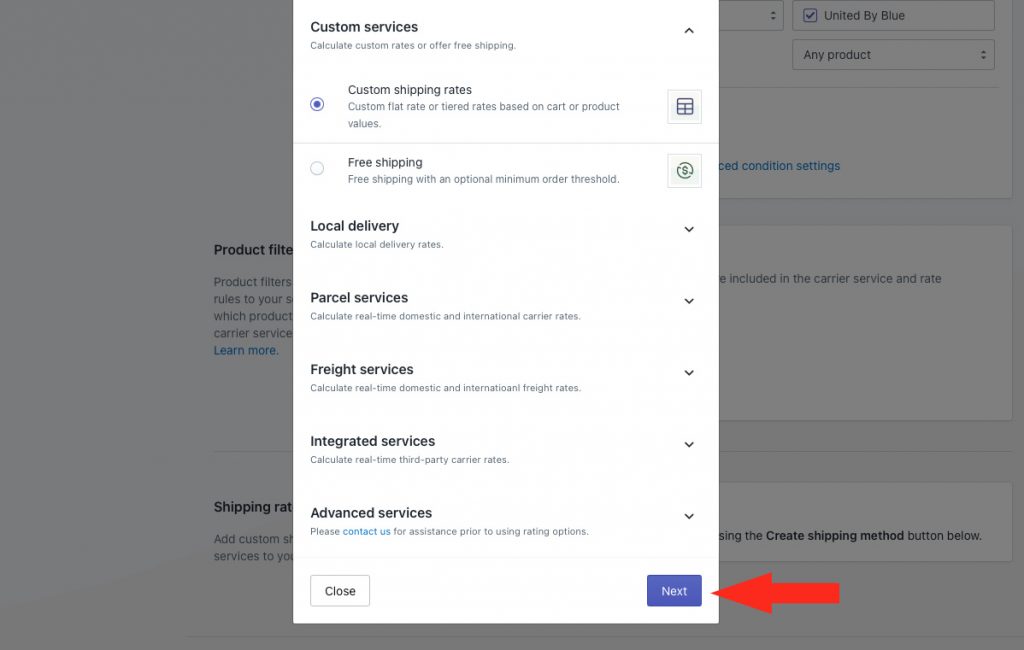
3) Click the Next button.
4) Select a Zone.
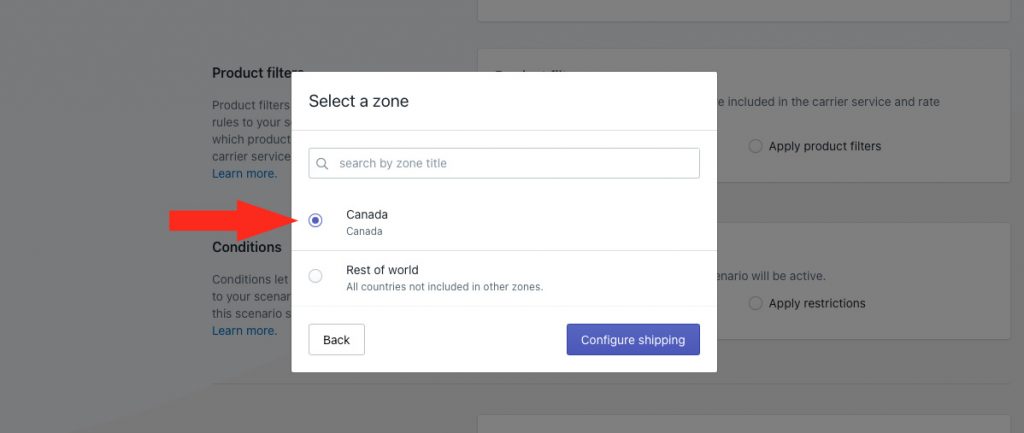
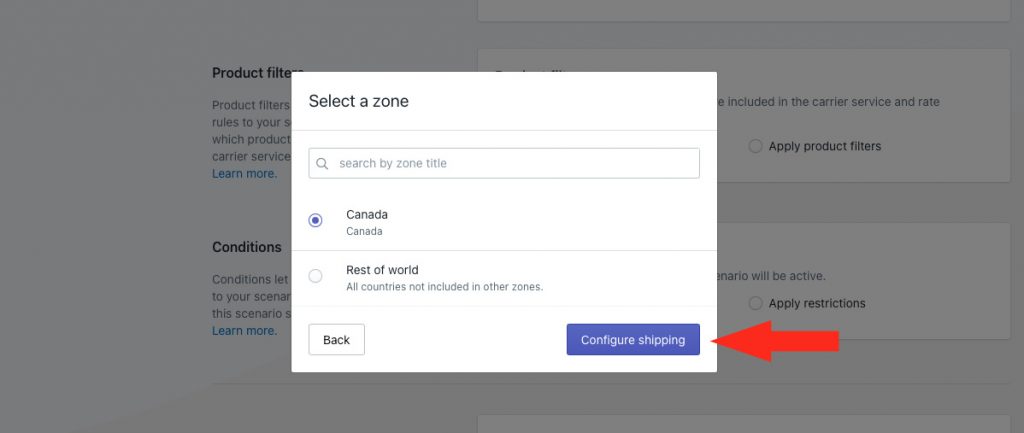
5) Click the Configure shipping button.
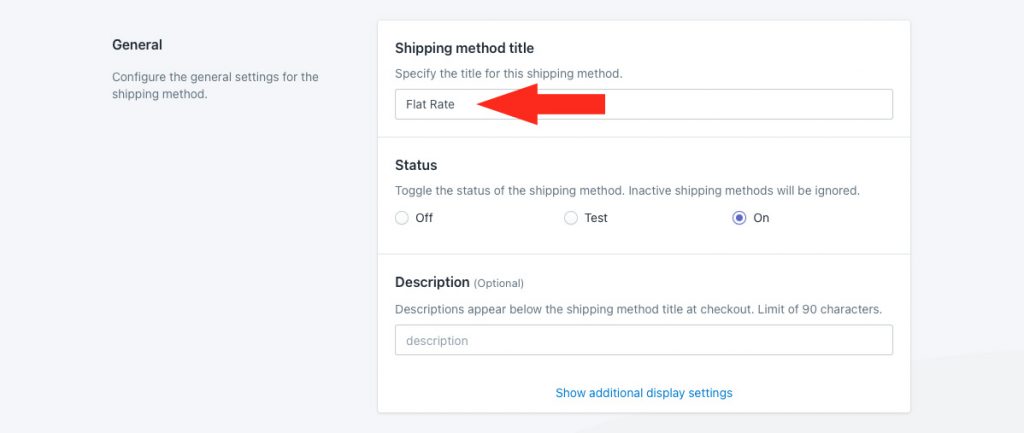
General
Enter a shipping method title, like ‘Flat Rate’. The title entered here will be visible to customers.
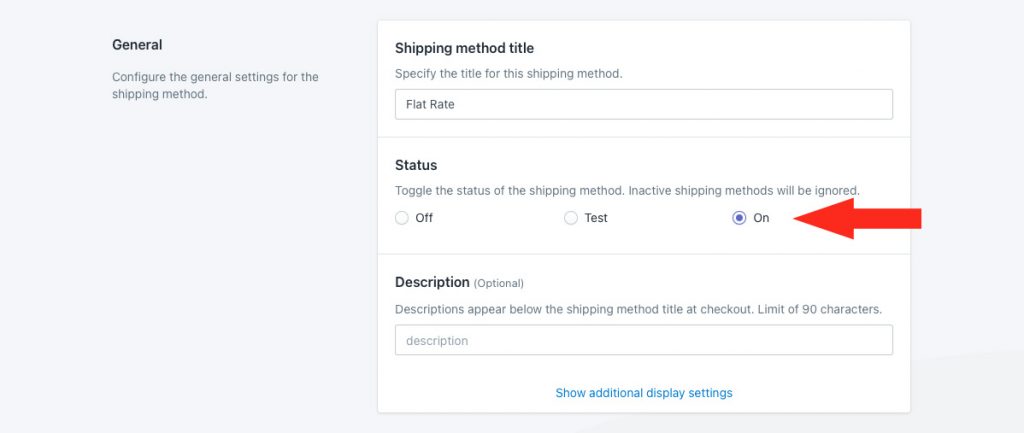
2) Leave the shipping method status set to ‘On’.
3) If desired, enter a description for your highest priority shipping method. We recommend limiting your description to 90 characters or less to ensure it displays properly on the checkout page.
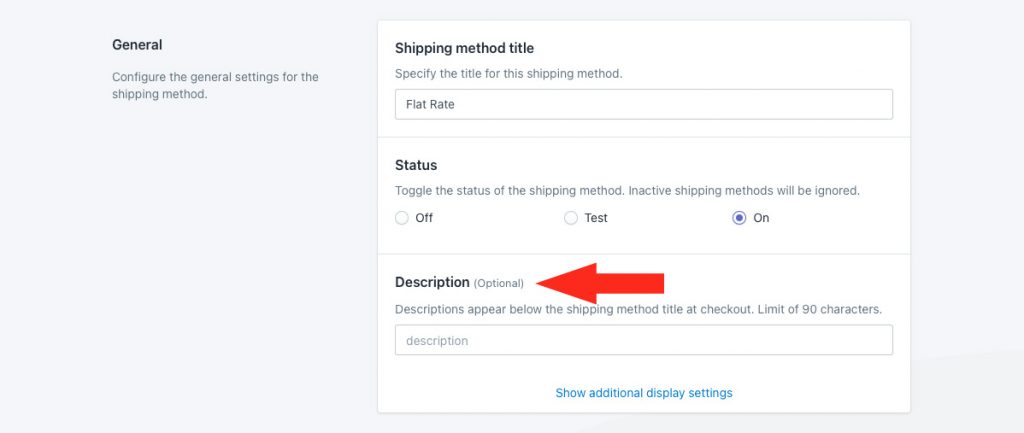
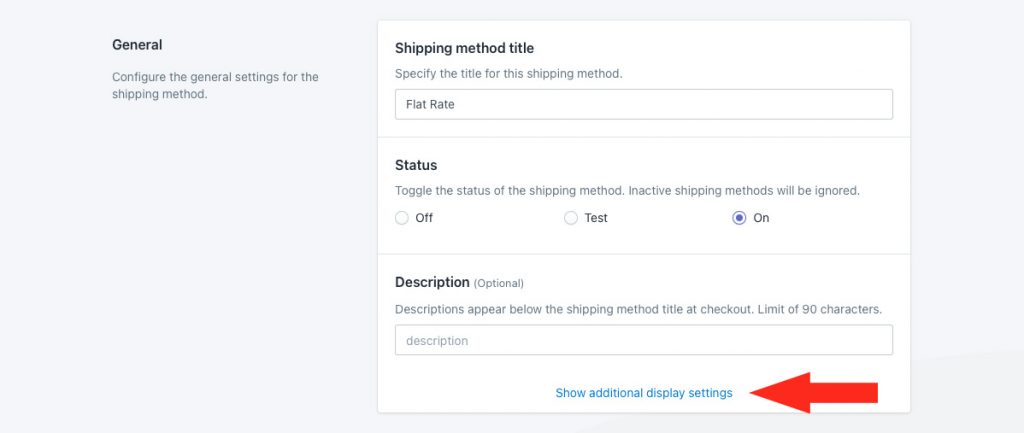
Additional display settings are available for delivery times and service codes. If you do not need to adjust these settings, skip ahead to Shipping Cost. Otherwise, continue to Step 4.
4) If desired, click Show additional display settings, then configure delivery time and service code settings as needed
Shipping Cost
1) Leave rate type set to ‘Quantity’. When setting up a single flat shipping rate, it doesn’t matter which rate type you select.
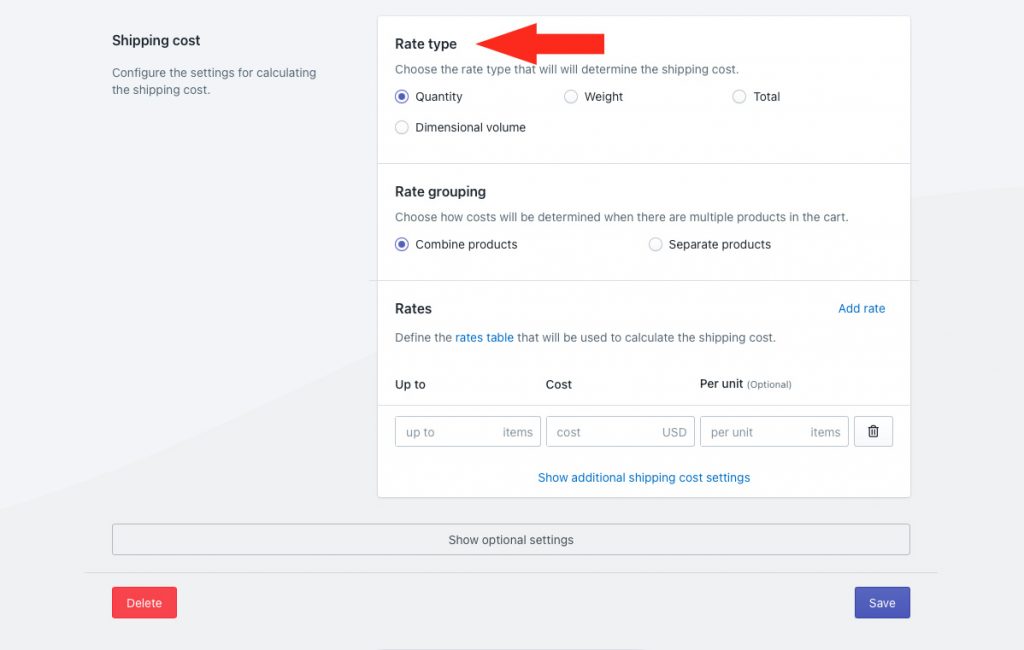
If you are creating a rate table, you will need to select a rate type based on your requirements.
2) Leave Rate grouping set to ‘Combine products’.
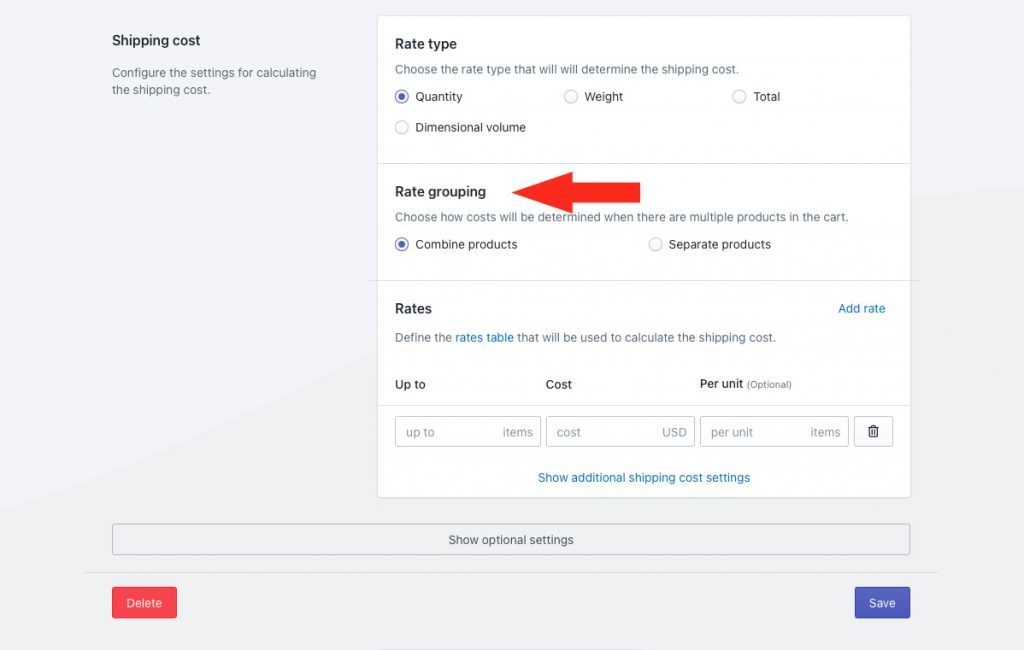
3) Enter the ~(tilde) symbol. In Intuitive Shipping, the tilde symbol means ‘no limit’, and will allow the customer to order any cart value.
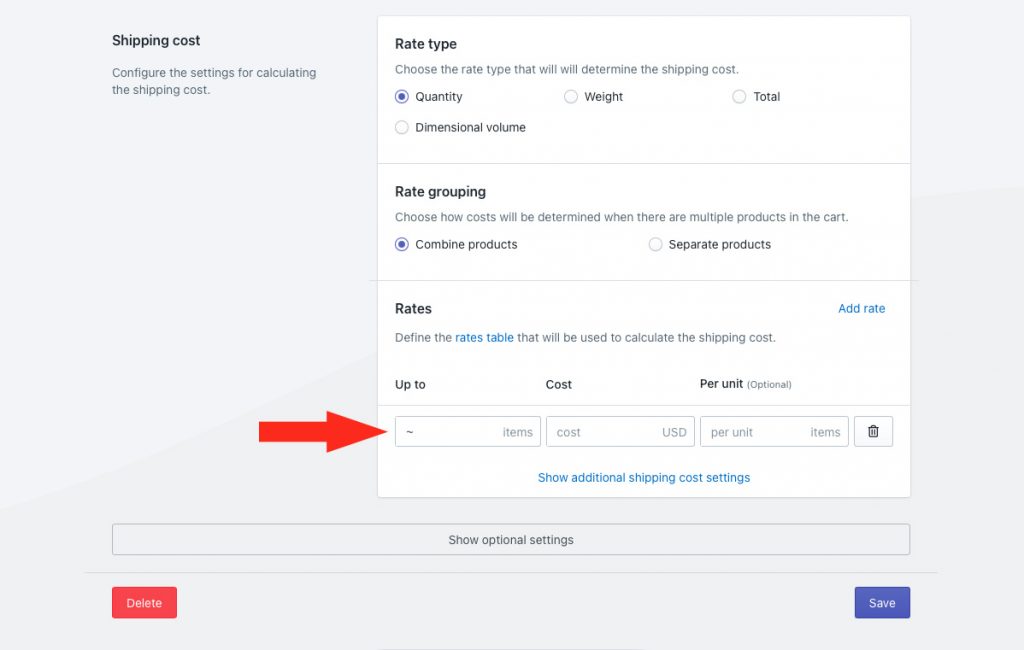
If you are setting up a rate table, enter the up to amount for the lowest rate on your rate table. This will be the limit for the cost entered in Step 4.
4) Enter a cost for your flat shipping rate. For this example, we’re entering ’80’ ($80.00).
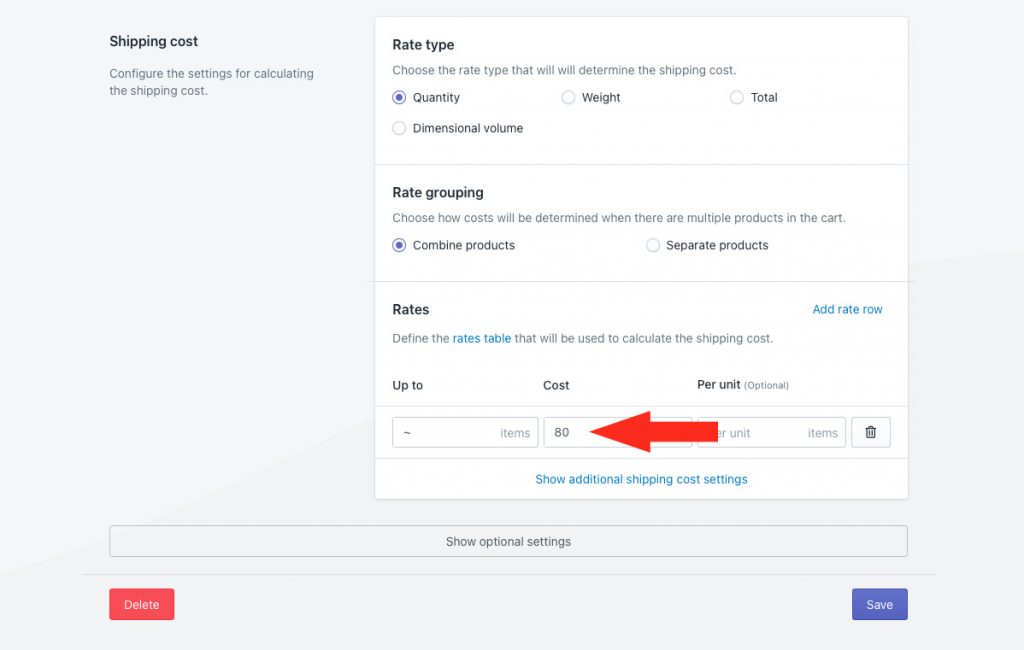
That means, a customer ordering any quantity will be charged a flat rate of $80.00 as long as there is at least one product tagged ‘large’ in the cart.
If you are setting up a rate table, enter the first cost for your rate table.
5) Leave Per unit blank. This is an optional setting and typically not required for this setup.
If you are setting up a rate table, you can add more rows to set up additional shipping costs.
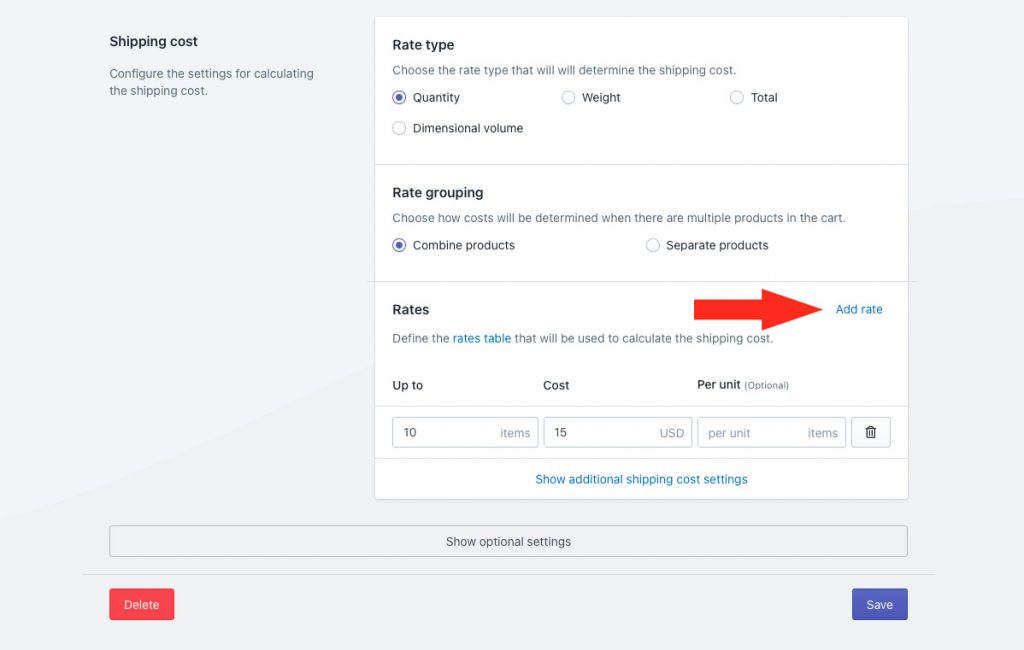
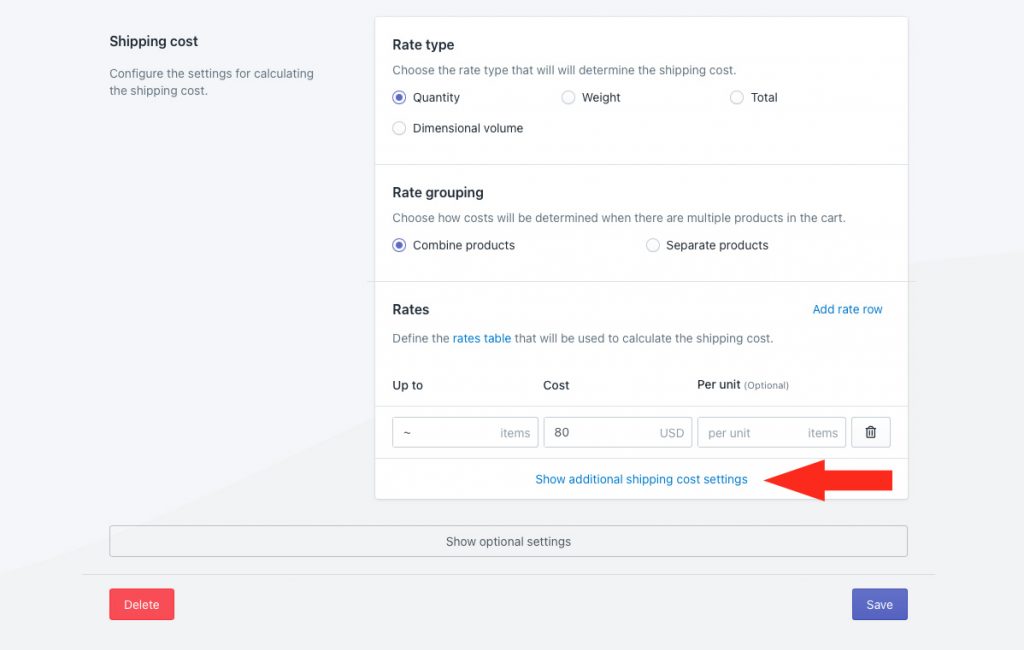
Additional settings are available for cart splitting and rate row blending. Cart splitting can be used for either single flat rates or rate tables. Rate row blending is intended for rate tables and is not required for single flat shipping costs.
7) If desired, click Show additional shipping cost settings, then adjust the settings for cart splitting as needed. Otherwise, continue to Optional Settings.
Optional Settings
Each custom service shipping method includes optional settings for cost adjustments, free shipping thresholds, custom shipping blending and rate blending. Rate blending is not required for this setup.
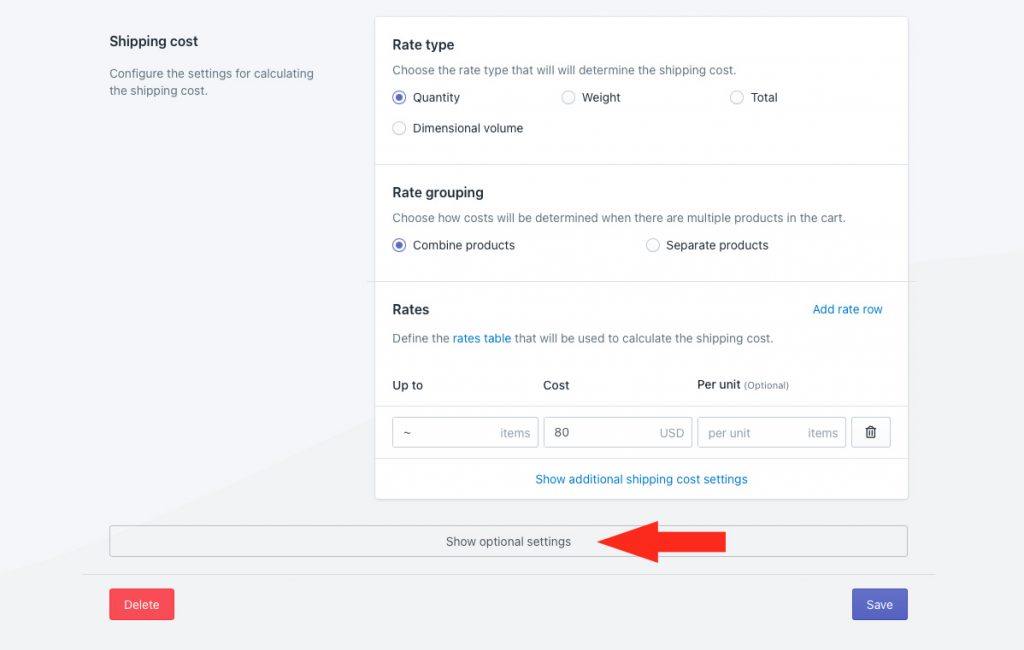
1) If desired, click Show optional settings, then adjust settings for cost adjustments, free shipping thresholds and custom shipping blending as needed.
Save Your Settings
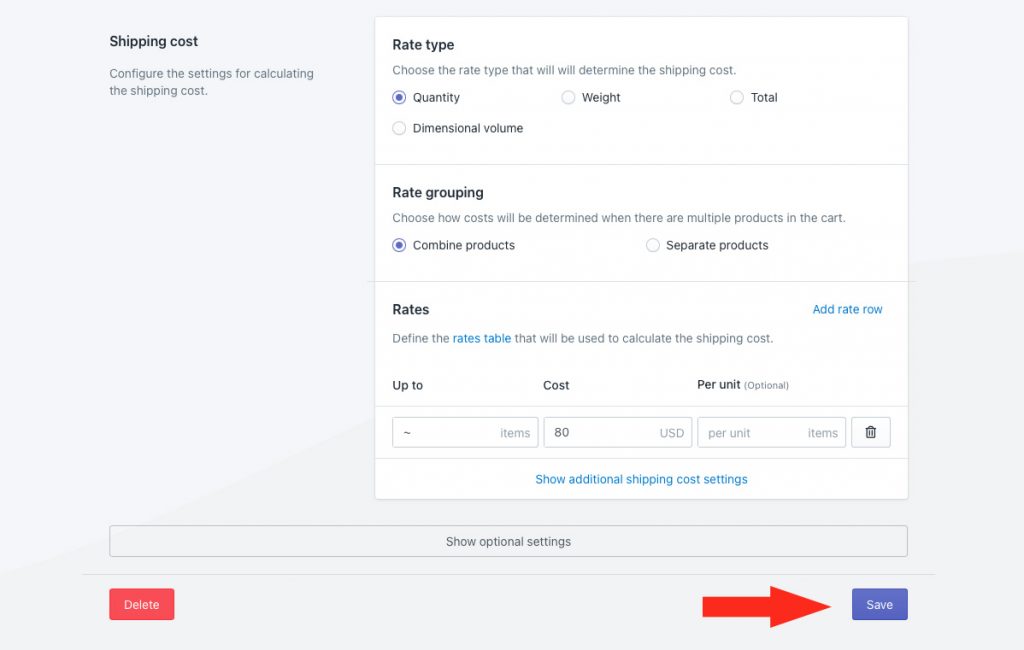
1) Click the Save button to save your highest priority shipping method.
Add The Second Highest Priority Scenario
To simplify the process, you can make a duplicate of your highest priority Scenario, then make minor adjustments to the conditions and the shipping method rather than creating a new Scenario from scratch.
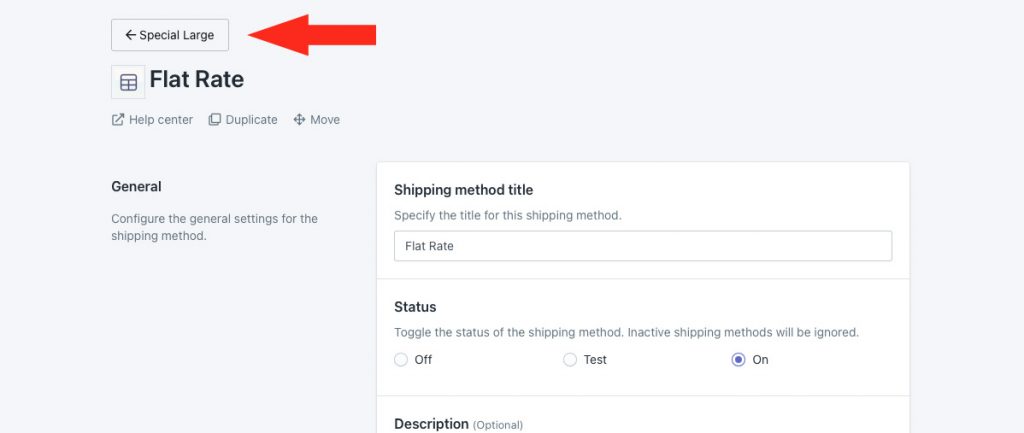
1) After saving the shipping method for the highest priority Scenario, scroll to the top, then click the back button above the shipping method header.
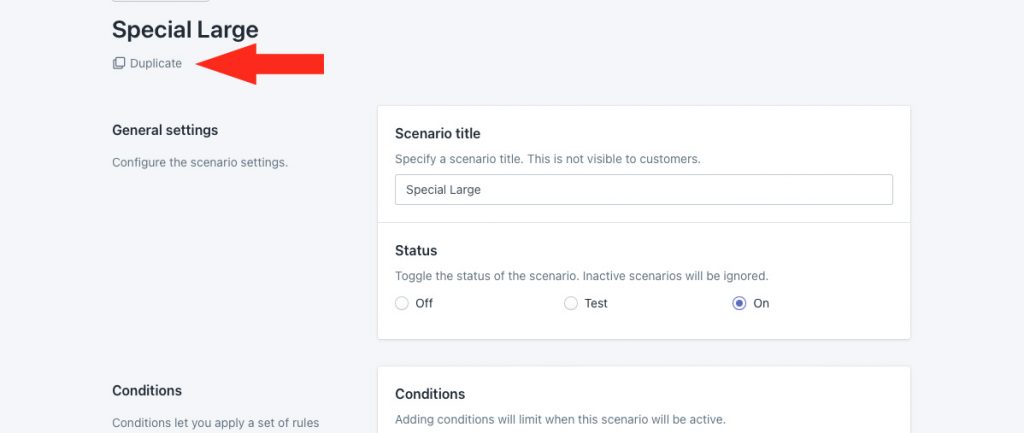
2) Click Duplicate below the Scenario header. This will create an exact copy of the highest priority Scenario, including the shipping method.
3) Change the Scenario title from ‘Copy of [original title] to something else, like ‘Special Medium’.
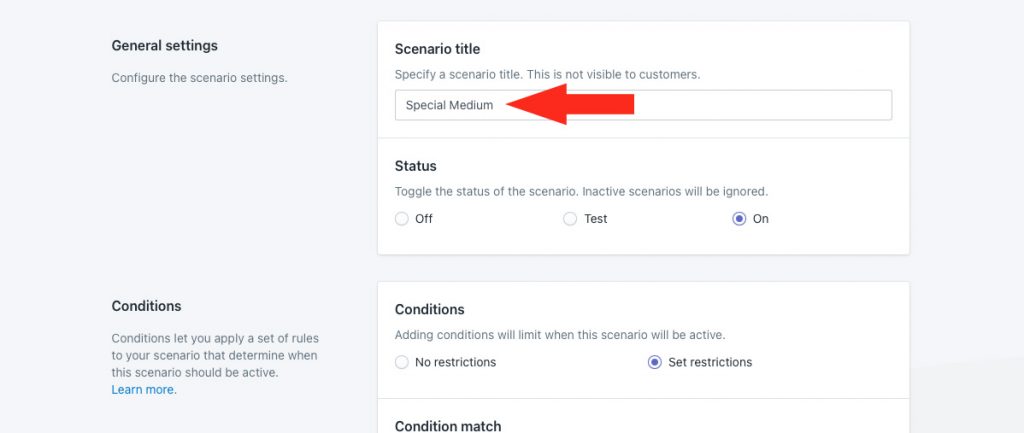
4) Leave the condition type set to whichever product type you used in your highest priority Scenario. For this example, we’re leaving it set to ‘Product tag’.
5) Change the condition logic to ‘does not equal’.
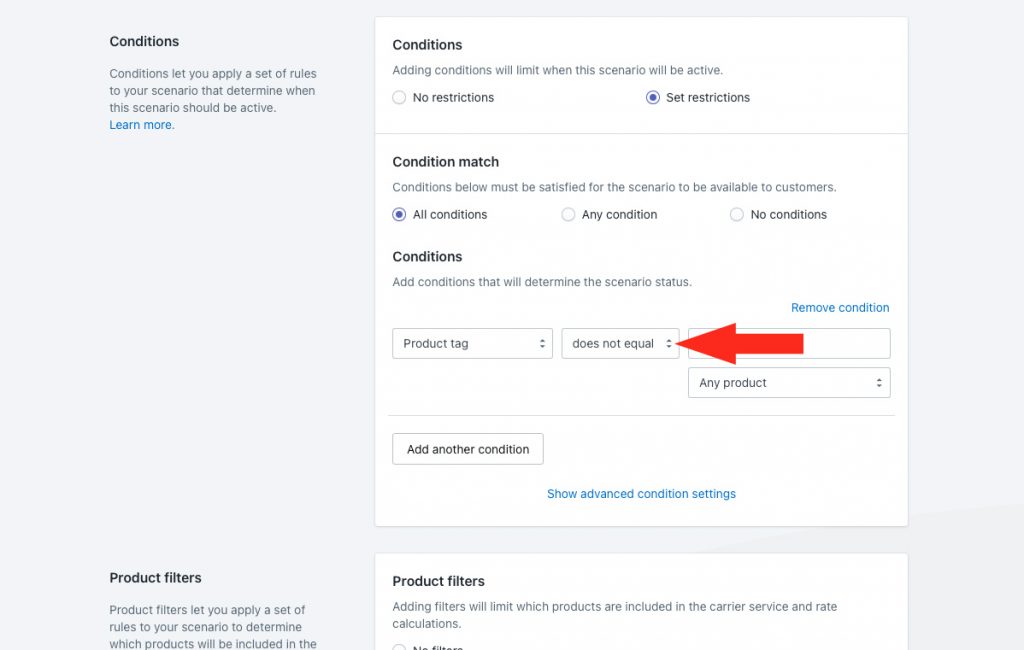
6) Leave the condition value set to whichever product identifier you used in your highest priority Scenario. For this example, we used the tag ‘Large’.
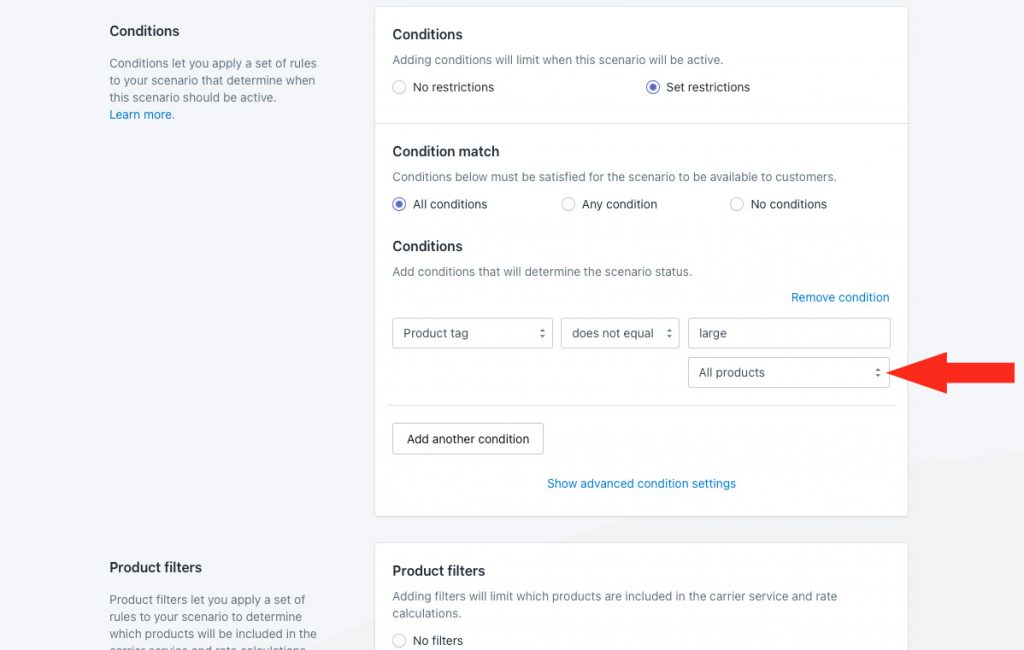
7) Change the additional product setting to ‘All products’. That means there cannot be any products tagged with the value in Step 6.
8) Click the add another condition button.
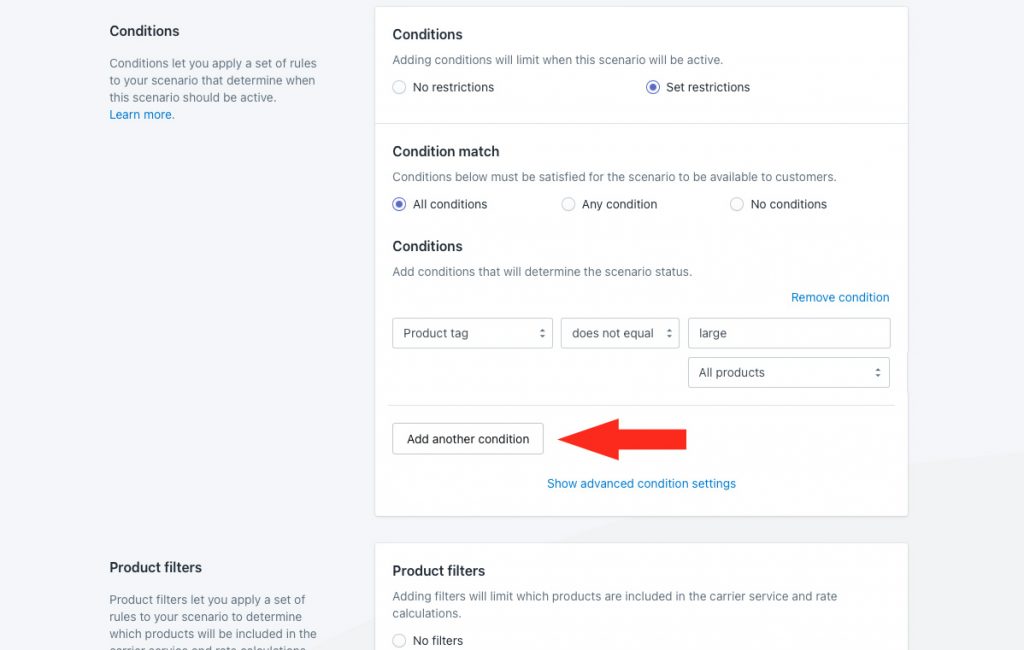
9) Select a product condition type. To simplify things, consider using the same condition type you used for the first condition. For this example, we’re using ‘Product tag’. You can use any product condition that identifies the special product with the second highest priority.
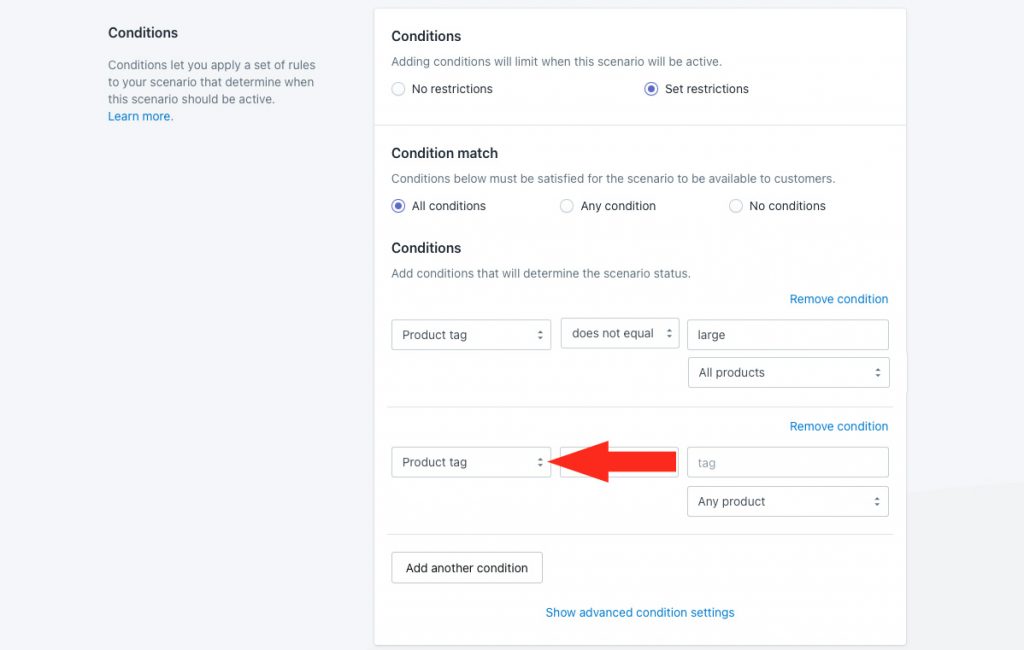
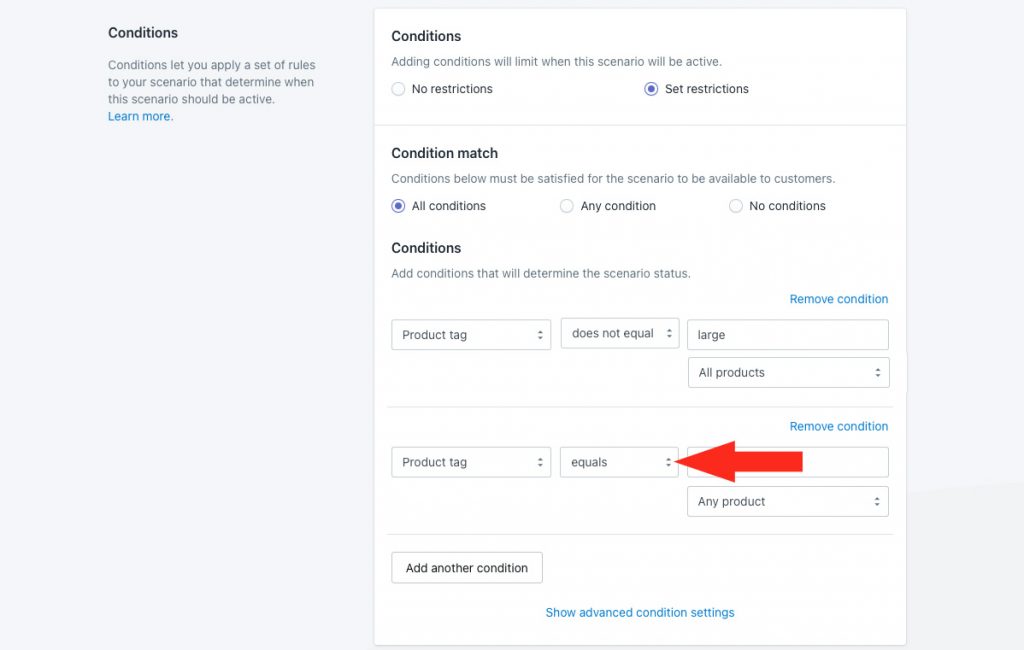
10) Leave the condition logic set to ‘equals’.
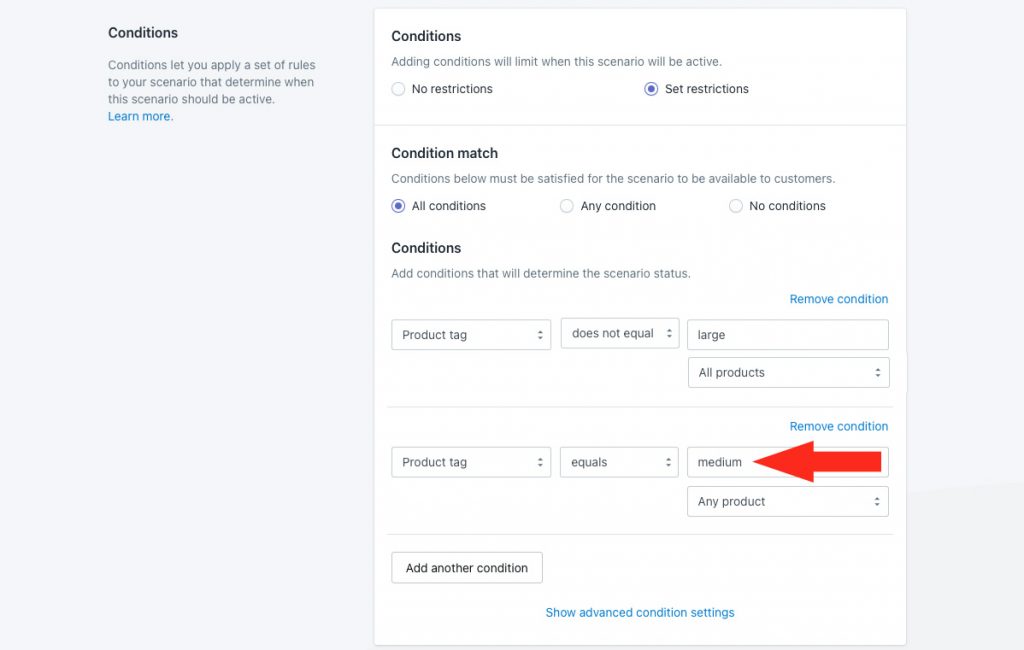
11) Enter the product identifier you assigned to your second highest priority products as the condition value. For this example, we’re using the tag ‘medium’.
12) Leave the additional product setting set to ‘Any product’.
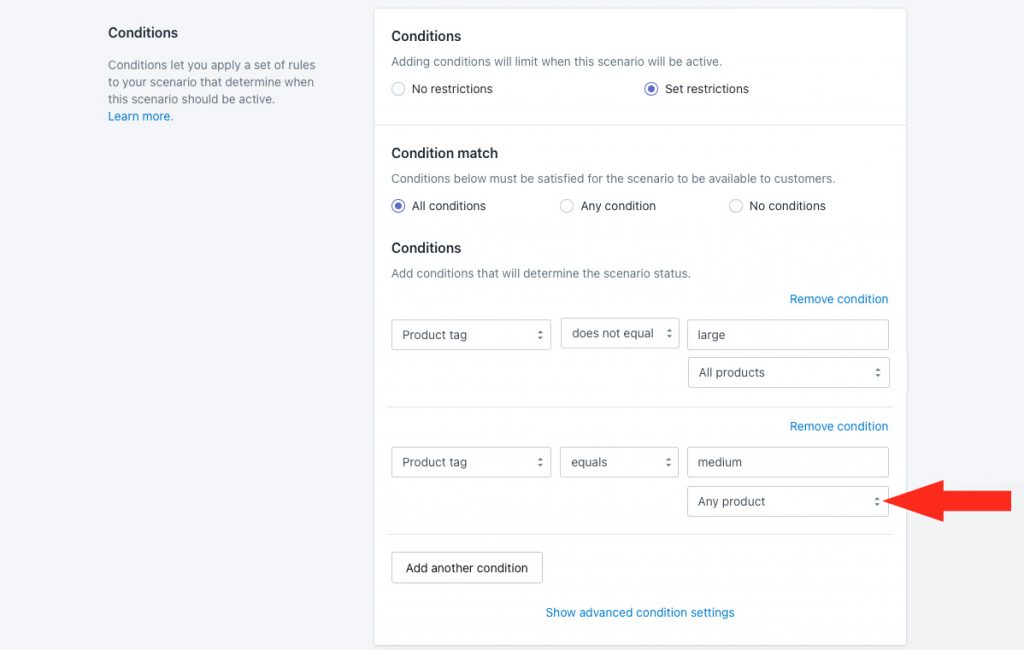
As long as at least one item in the cart is tagged with the value entered in Step 11, and there are no products tagged with the value in the other condition, the shipping method assigned to this Scenario will be displayed at checkout.
13) Scroll to the bottom, then click the Save button to save your second highest priority Scenario.
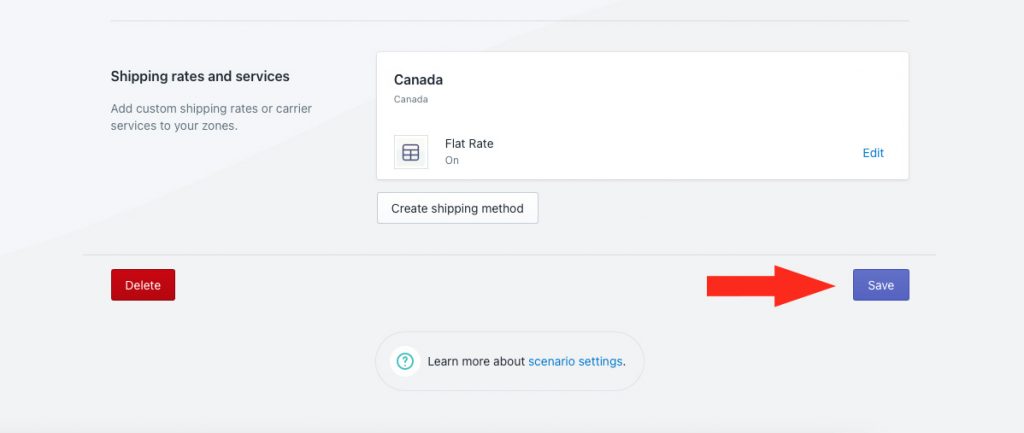
Edit The Shipping Method
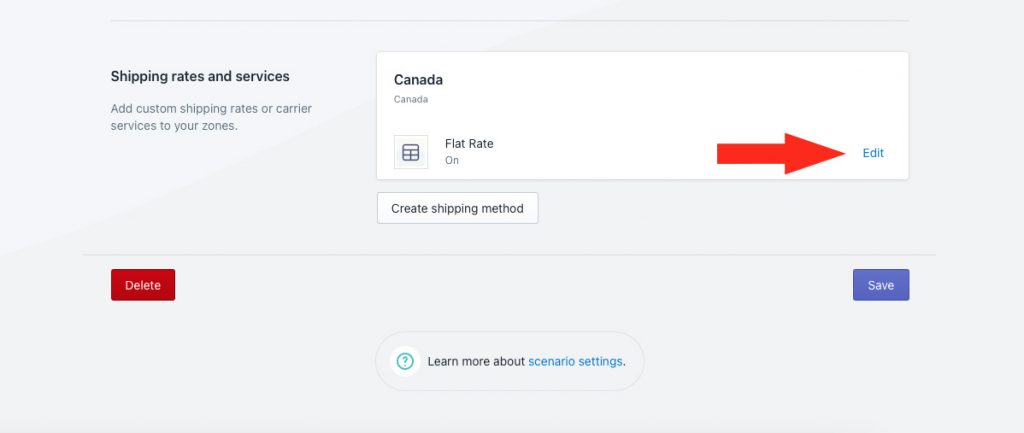
When you duplicated the highest priority Scenario, it created an exact copy, including the shipping method. You’ll need to edit the shipping cost for your second highest priority Scenario.
1) In Shipping rates and services, click Edit beside the shipping method.
2) If you want to keep the shipping method title consistent for all special products, regardless of the tier, leave the title as-is Or, if desired, change the title to make it unique to your second highest priority shipping method. For this example, we’re leaving it set to ‘Flat Rate’ to keep it consistent with our other tiered shipping method titles.

3) Scroll down to Shipping cost.
4) Leave Up to set to ~, then change the cost of your flat shipping rate. For this example, we’re changing it to ’50’ ($50.00).
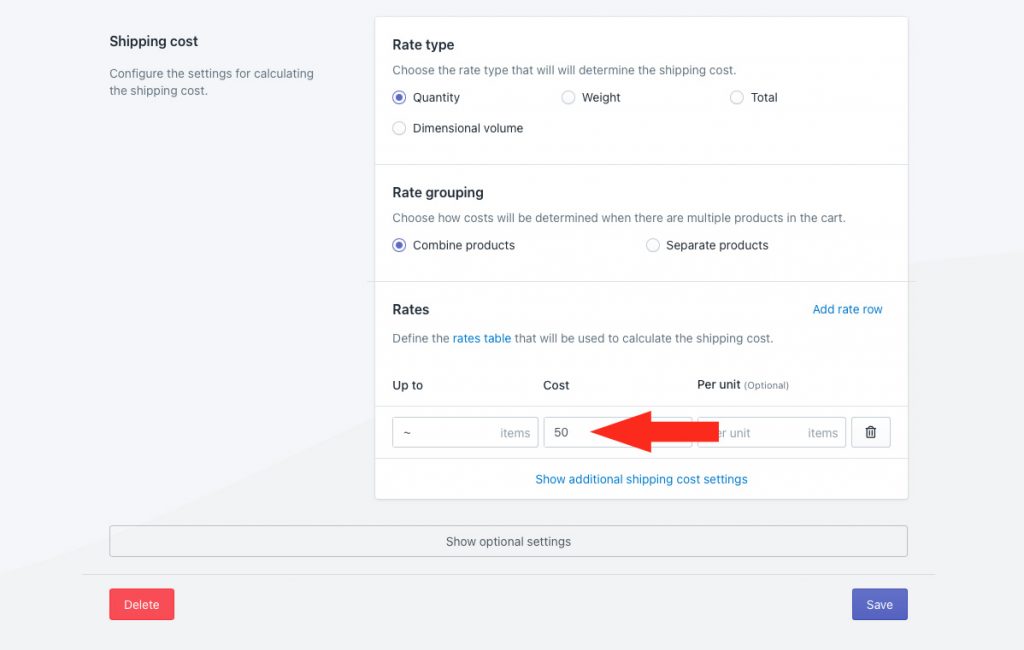
That means, a customer ordering any quantity will be charged a flat rate of $50.00 as long as there is at least one product tagged ‘medium’ and no products tagged ‘large’ in the cart.
If you set up a rate table for your highest priority shipping method, change the cost in each row as needed.
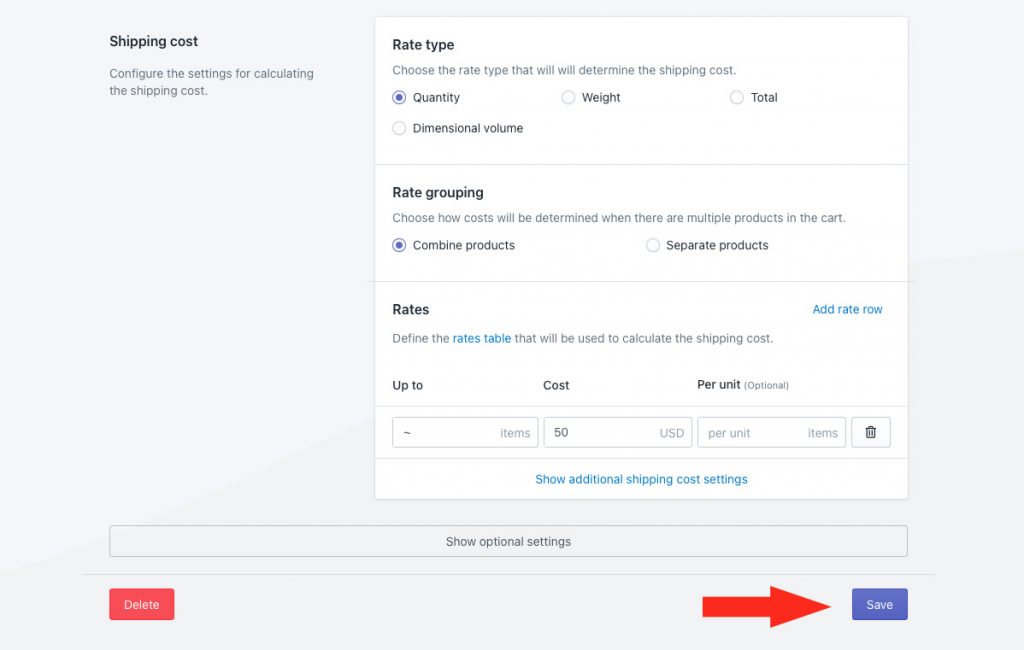
1) Click the Save button to save your second highest priority shipping method.
Add The Third Highest Priority Scenario
As with the previous Scenario, you can make a duplicate of your second highest priority Scenario, then make minor adjustments to the conditions and the shipping method rather than creating a new Scenario from scratch.
1) After saving the shipping method for the second highest priority Scenario, scroll to the top, then click the back button above the shipping method header.
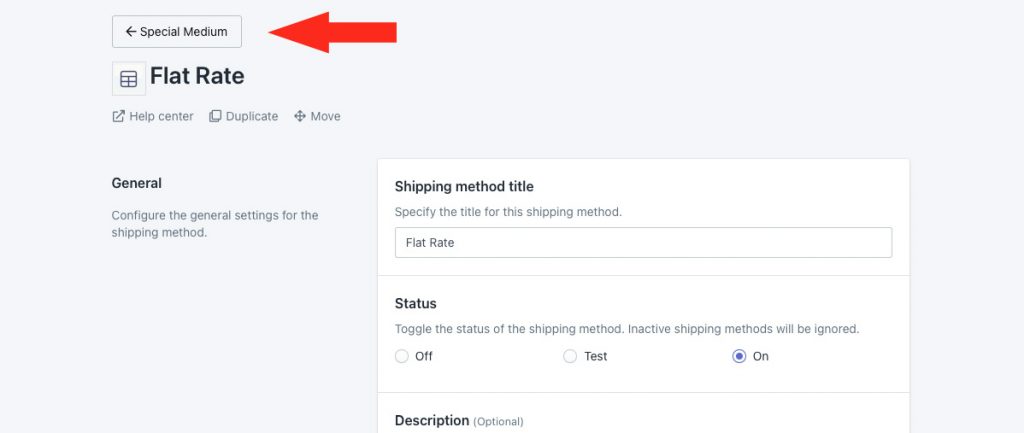
2) Click Duplicate below the Scenario header. This will create an exact copy of the second highest priority Scenario, including the shipping method.
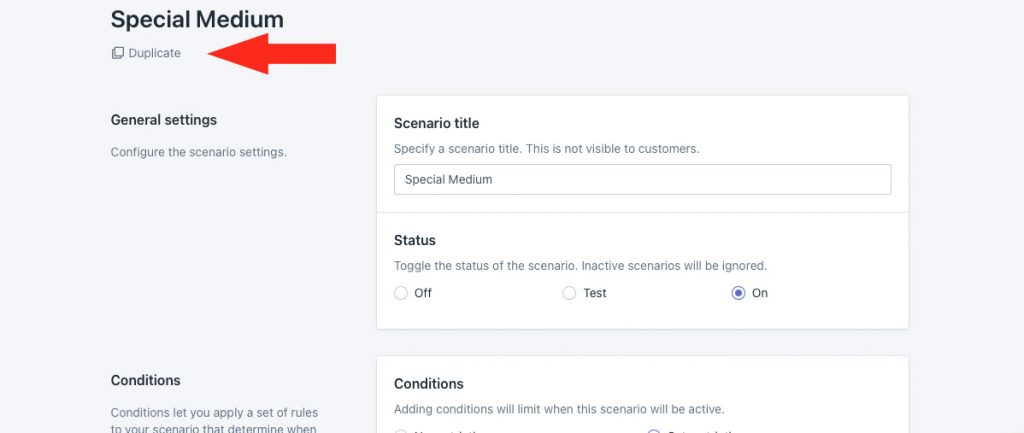
3) Change the Scenario title from ‘Copy of [original title] to something else, like ‘Special Small’.
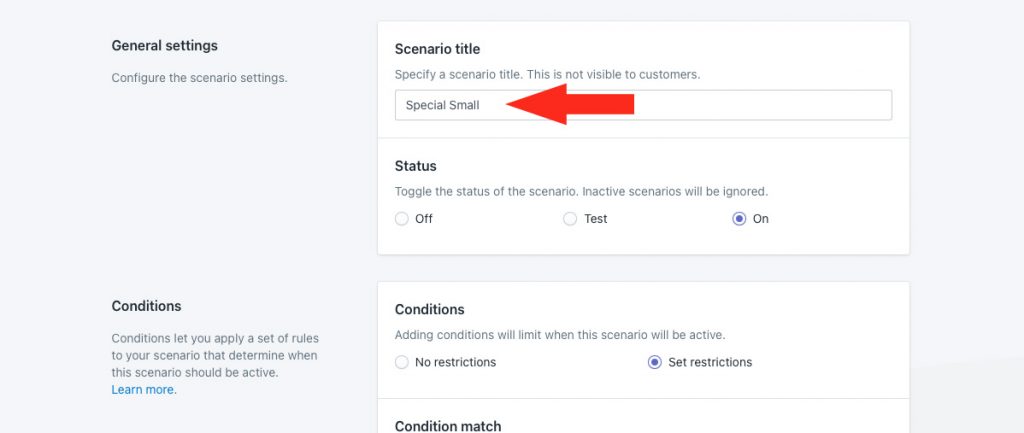
4) Leave the first condition as-is.
5) Leave the condition type for the second condition set to whichever product type you used in your highest priority Scenario. For this example we’re leaving it set to ‘Product tag’.
6) Change the second condition logic to ‘does not equal’.
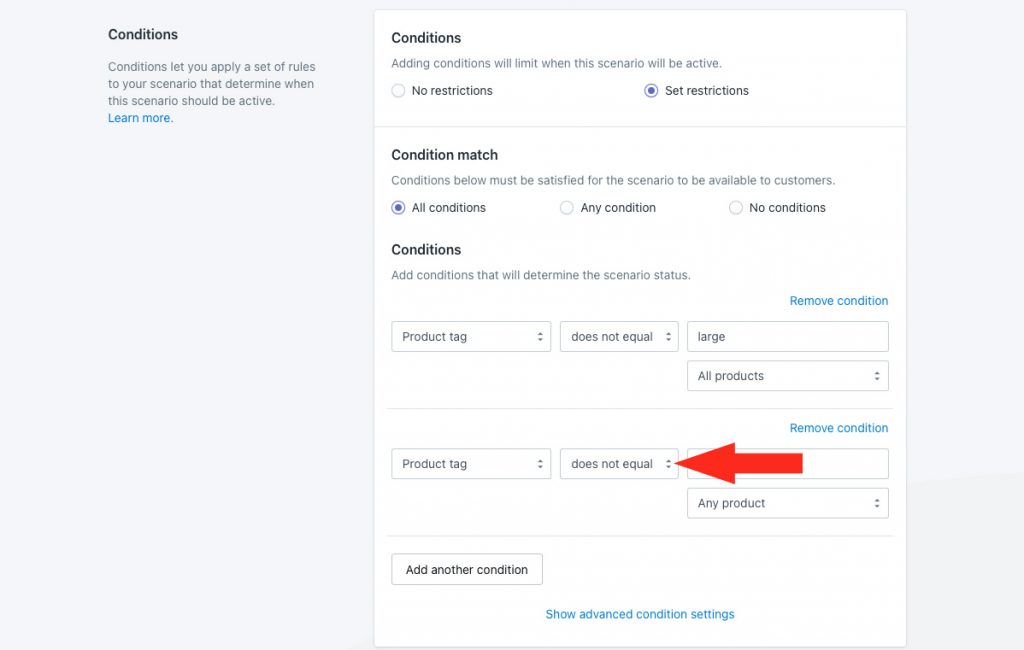
7) Leave the condition value set to whichever product type you used in your highest priority Scenario. For this example, we used the tag ‘Medium’.
8) Change the additional product setting to ‘All products’. That means there cannot be any products tagged with the value in Step 7.
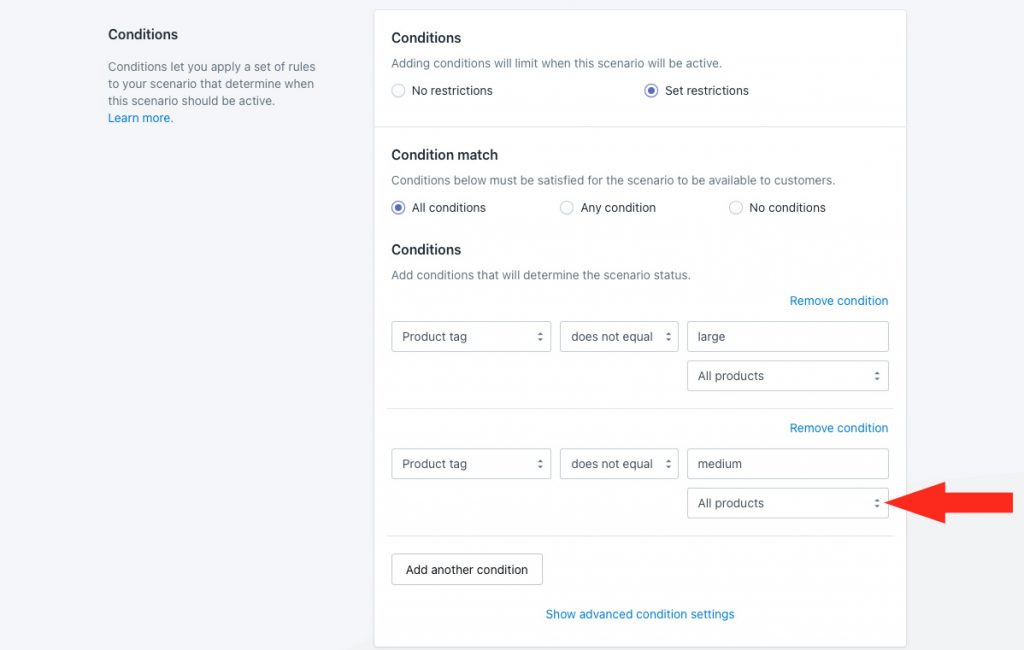
9) Click the add another condition button.
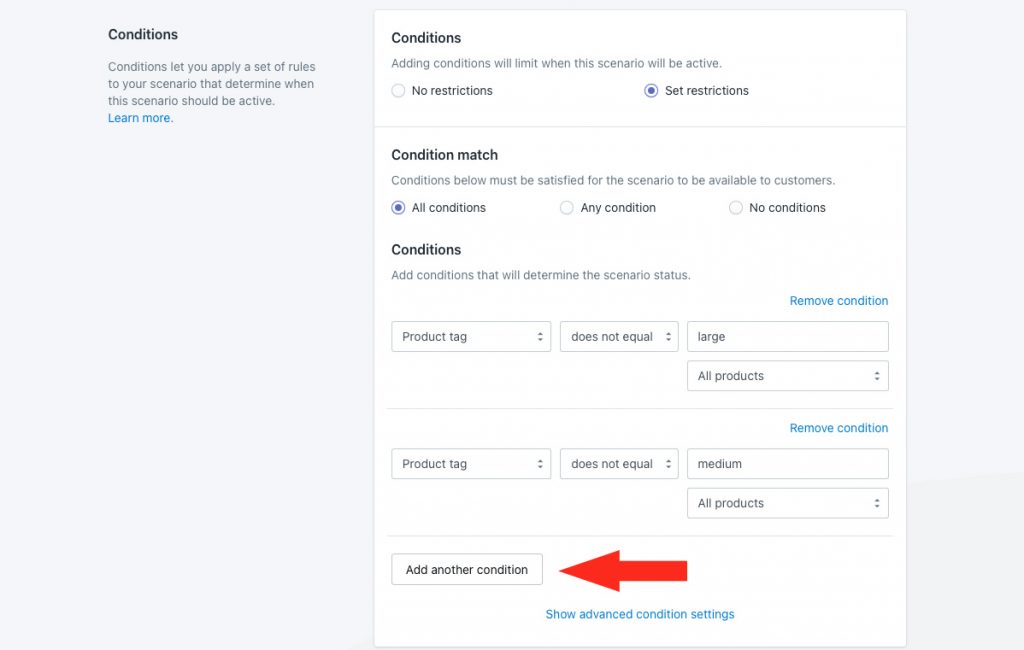
10) Select a product condition type. To simplify things, consider using the same condition types you used for the first and second conditions. For this example, we’re using ‘Product tag’. You can use any product condition that identifies the special product with the second highest priority.
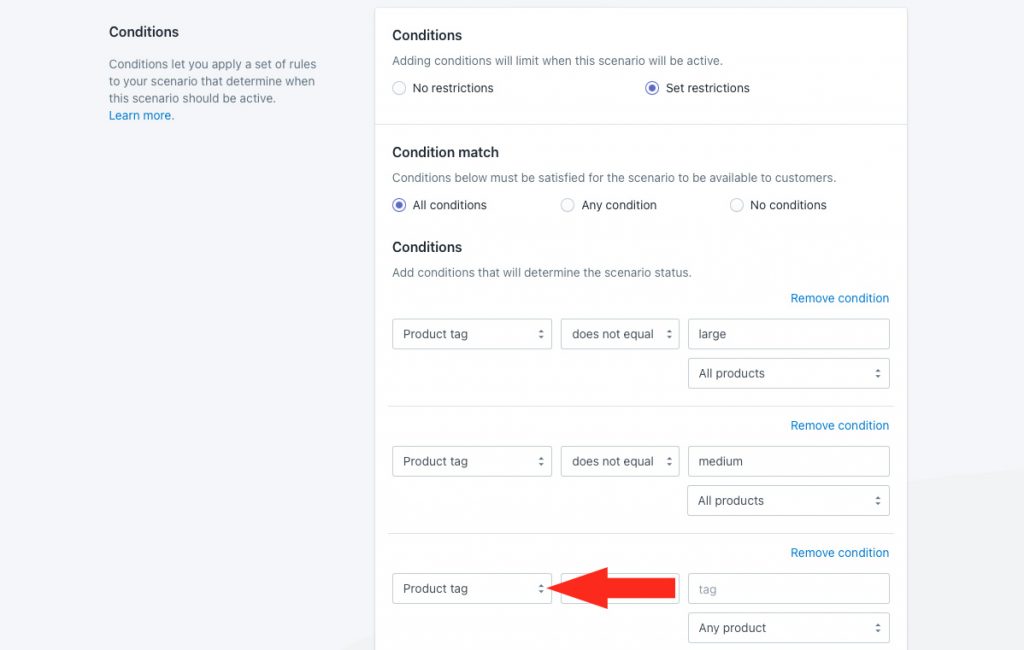
11) Leave the condition logic set to ‘equals’.
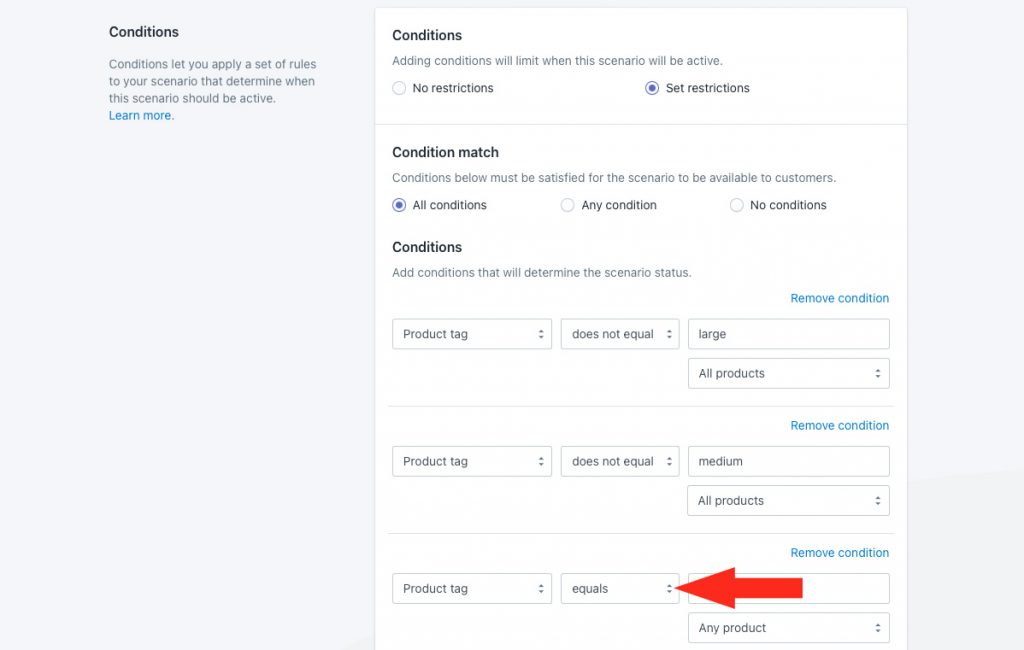
12) Enter the product identifier you assigned to your third highest priority products as the condition value. For this example, we’re using the tag ‘small’.
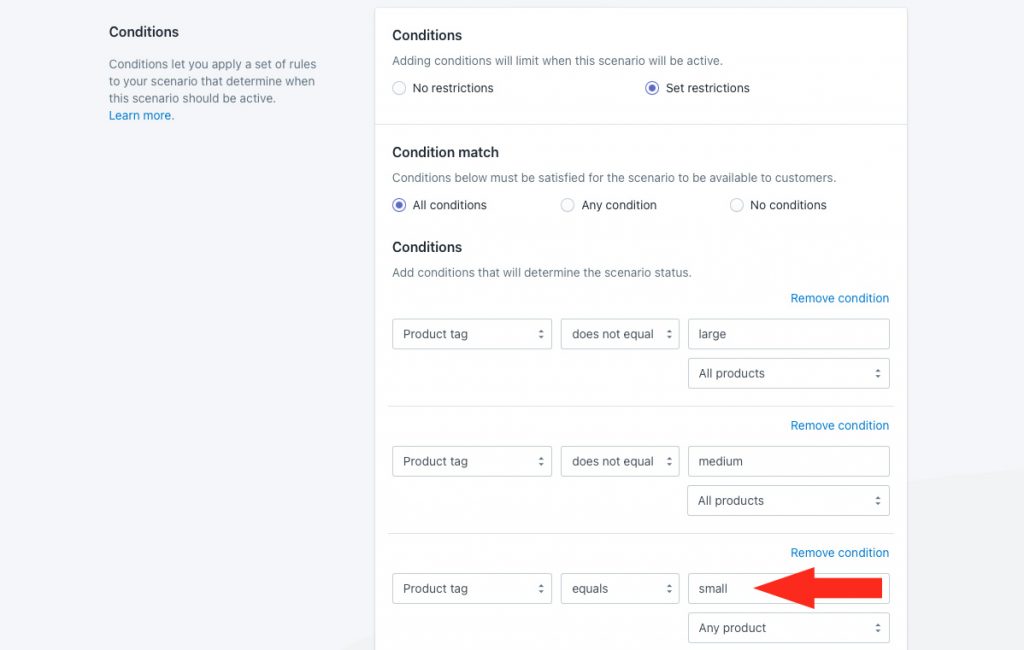
13) Leave the additional product setting set to ‘Any product’.

As long as there is at least one item in the cart is tagged with the value entered in Step 12, and there are no products tagged with the values in the first two conditions, the shipping method assigned to this Scenario will be displayed at checkout.
14) Scroll to the bottom, then click the Save button to save your third highest priority Scenario.

Edit The Shipping Method
When you duplicated the second Scenario, it created an exact copy, including the shipping method. You’ll need to edit the shipping cost for your third highest priority Scenario.
1) In Shipping rates and services, click Edit beside the shipping method.

2) If you want to keep the shipping method title consistent for all special products, regardless of the tier, leave the title as-is Or, if desired, change the title to make it unique to your third highest priority shipping method. For this example, we’re leaving it set to ‘Flat Rate’ to keep it consistent with our other tiered shipping method titles.

3) Scroll down to Shipping costs.
4) Leave Up to set to ~, then change the cost of your flat shipping rate. For this example, we’re changing it to ’30’ ($30.00).
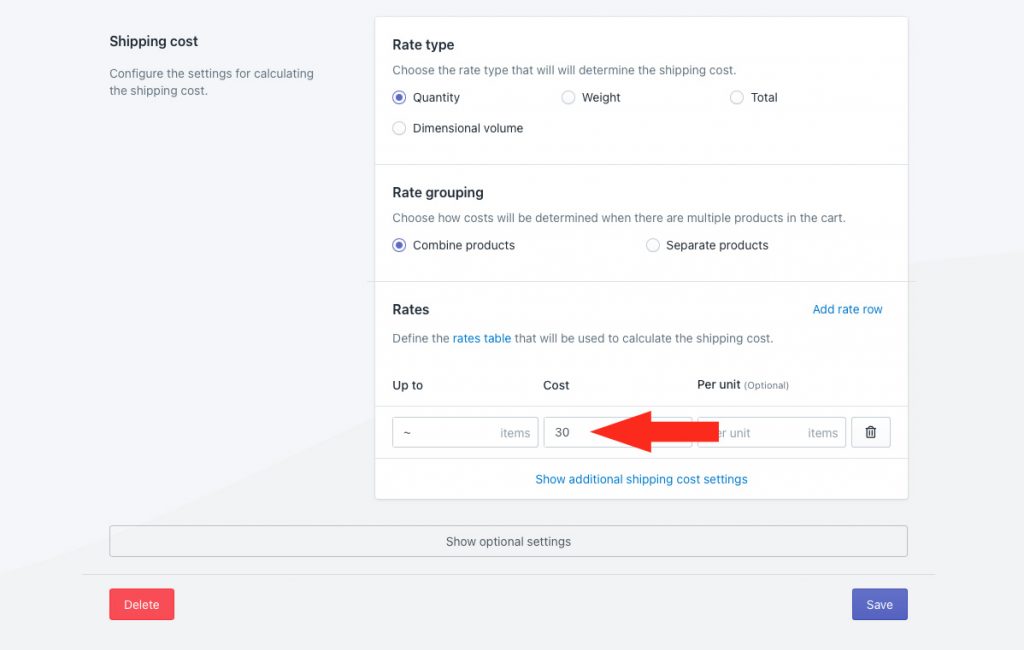
That means, a customer ordering any quantity will be charged a flat rate of $30.00 as long as there is at least one product tagged ‘small’ and no products tagged either ‘medium’ or ‘large’ in the cart.
If you set up a rate table for your second highest priority shipping method, change the cost in each row as needed.
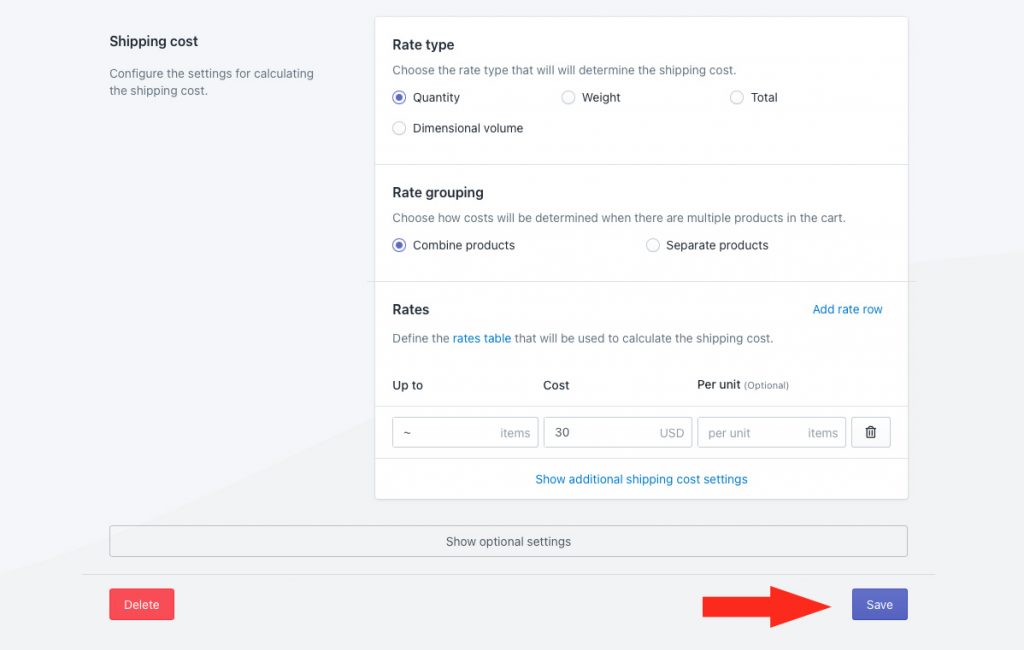
5) Click the Save button to save your third highest priority shipping method.
Edit The Standard Scenario
Now that priority Scenarios for each category of your special products are set up, you’ll need to add opposing product conditions to your existing standard Scenario. This will restrict shipping rates for your general products from appearing whenever a customer adds any of your special products to the cart.
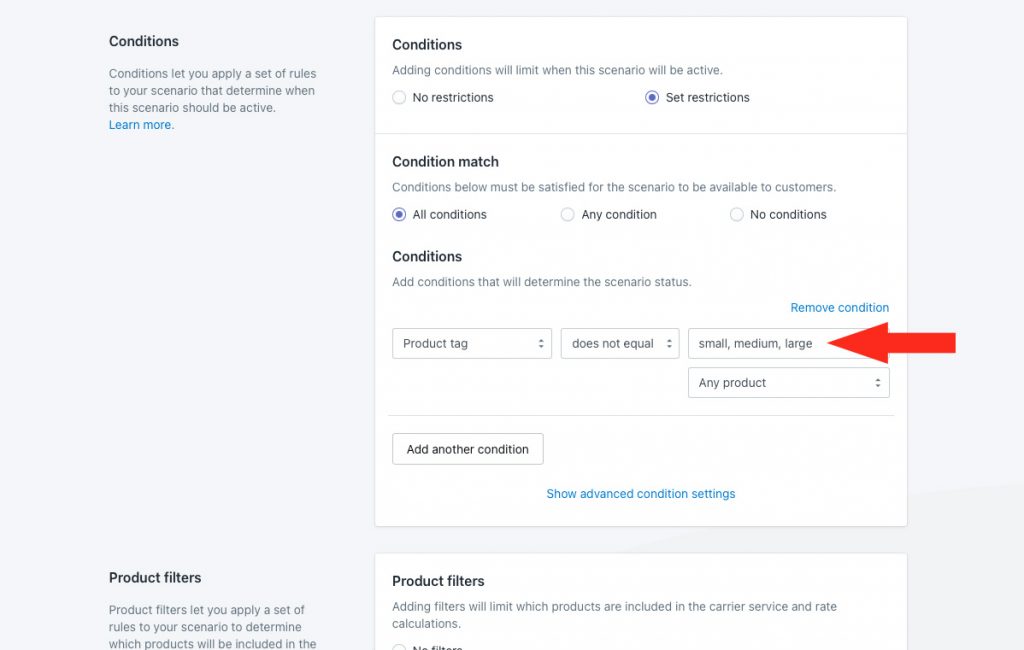
For this example, we only need to add one product condition with multiple tag values.
1) Click Shipping on the sidebar menu, then select Scenarios from the drop-down list.

2) Click Edit beside your standard Scenario.
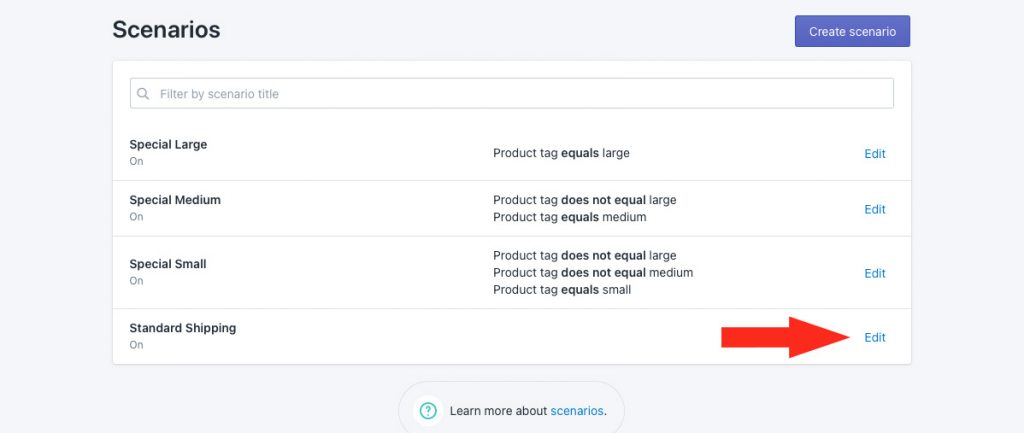
3) In the Conditions section, select ‘Set restrictions’.

4) Leave Condition match set to ‘All conditions’.
5) Select the product condition type. For this example, we’re using ‘Product tag’ because this is the condition type we used for each of our priority Scenario conditions.

6) Change the condition logic to ‘does not equal’.

7) Enter the product identifier you assigned to each category of products as the condition value, separated by comma. For this example, we’re using the tags ‘large, medium, small’.
8) Leave Product filters as-is.
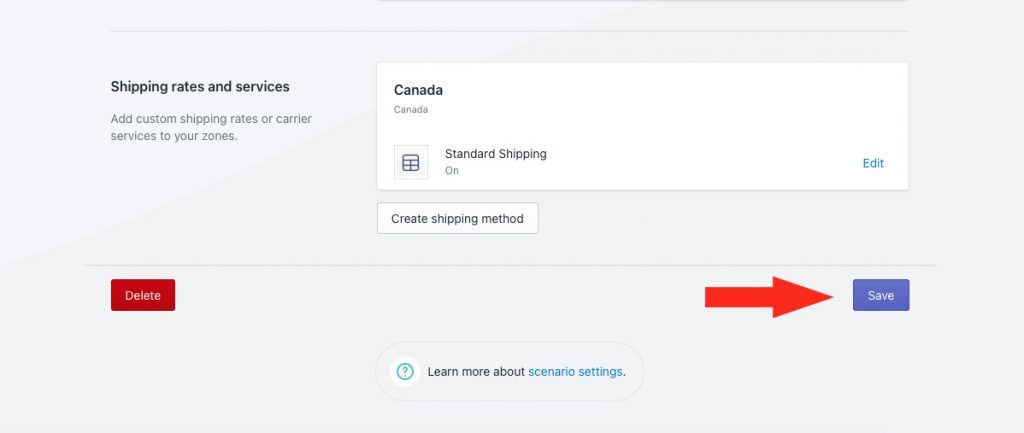
9) Click the Save button to save changes to your standard Scenario.
When a customer orders only general products, your standard shipping rates will be displayed at checkout.
If the customer adds a product from your third-tier category – for this example, a product tagged ‘small’ – only the flat rate from your third highest priority Scenario will be displayed at checkout.
If the customer adds a product from your second-tier category – for this example, a product tagged ‘medium’ – only the flat rate from your second highest priority Scenario will be displayed at checkout.
If the customer adds a product from your first-tier category – for this example, a product tagged ‘large’ – only the flat rate from your highest priority Scenario will be displayed at checkout.
