ShipStation gives you instant access to many major carriers and lets you manage them all from one central location. You can connect your own carrier accounts to ShipStation or access their negotiated rates.
Intuitive Shipping lets you quickly and easily connect your ShipStation account so you can access all of your rates from ShipStation.
And, Intuitive Shipping automatically pushes the package information from the completed order to your ShipStation account for a seamless experience.
If you don’t have an account with ShipStation, go here to start your free trial.
Be sure to complete this guide and test your ShipStation setup to ensure carrier rates are working as expected.
Connect A ShipStation Account
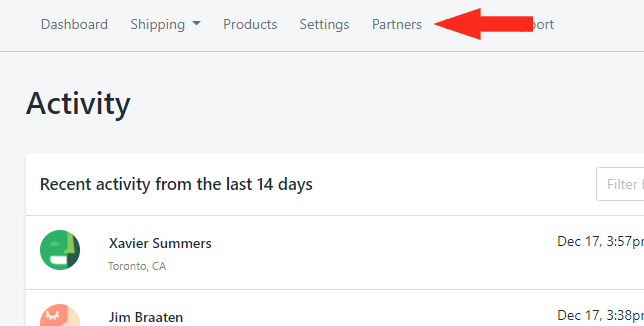
1) Click Partners on the main menu.
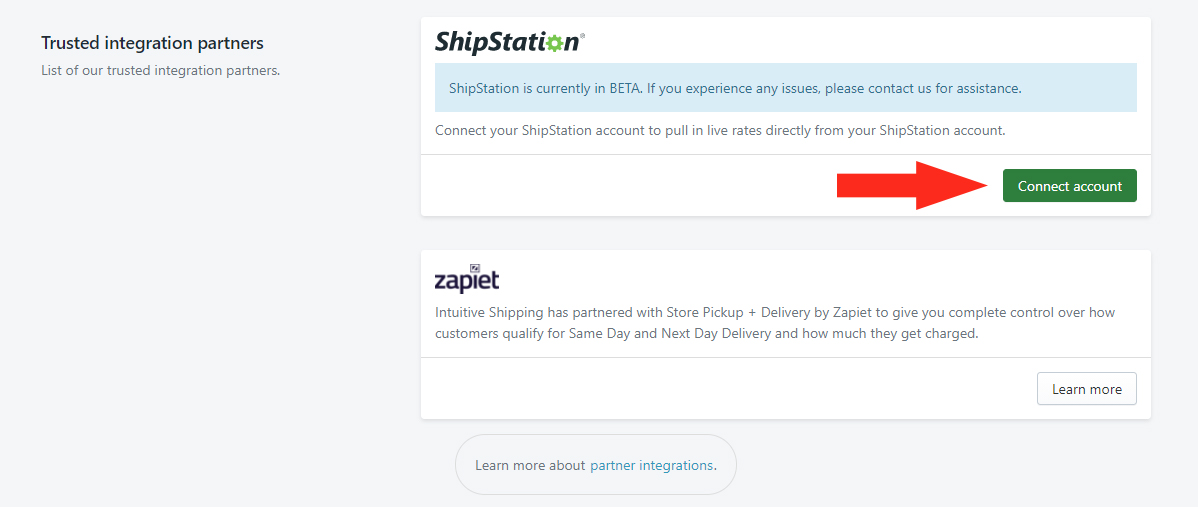
2) Click the Connect account button under ShipStation in the Trusted integration partners section.
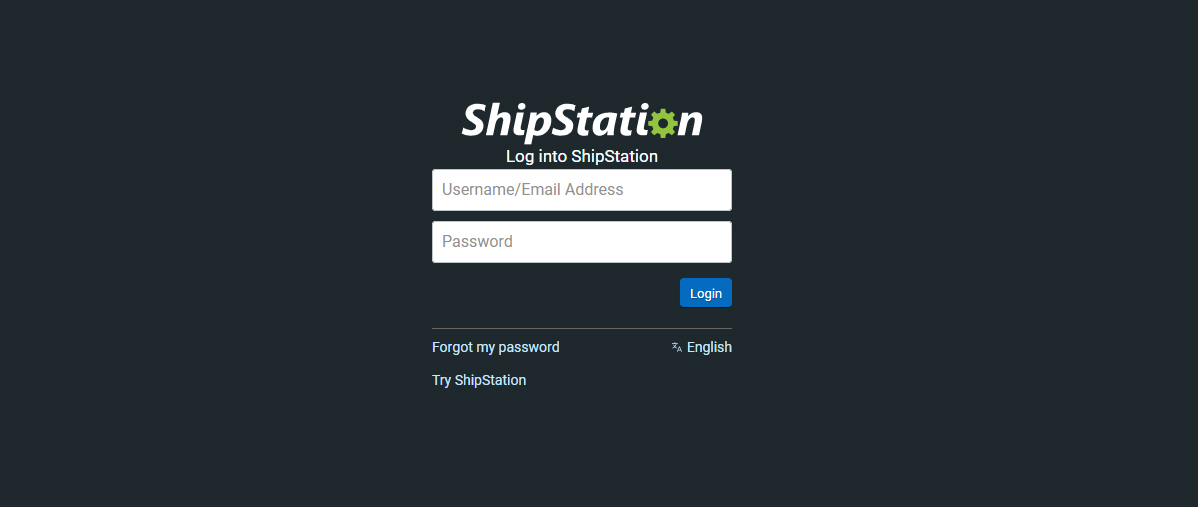
3) When prompted, enter your ShipStation username and password, then click the Login button.
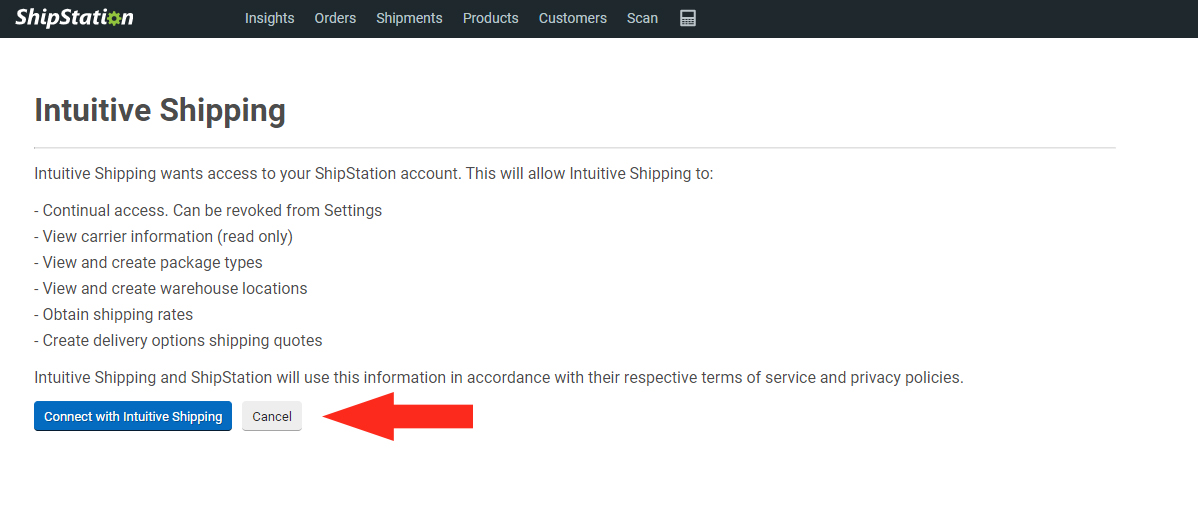
After successfully logging in, you will be redirected to an access permission screen.
4) Review the access permission screen, then click the Connect with Intuitive Shipping button.
Once connected, you’ll be shown a ‘success’ page before being redirected back to Intuitive Shipping.

If your connection experience is different from what is shown above or if you have any difficulty connecting your ShipStation account to Intuitive Shipping, please contact us for assistance.
Create A ShipStation Shipping Method
Once you have connected your account to Intuitive Shipping, you can set up a Live Rate shipping method with ShipStation as the carrier.
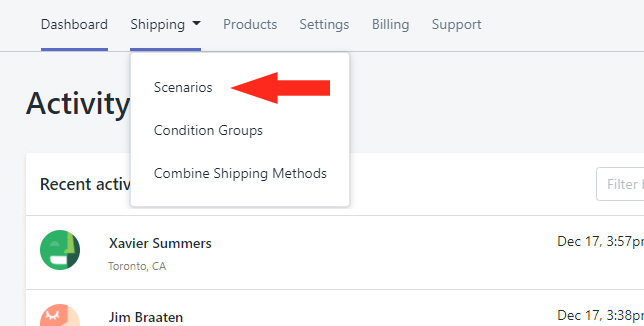
1) Click Shipping on the main menu, then select Scenarios from the drop-down list.
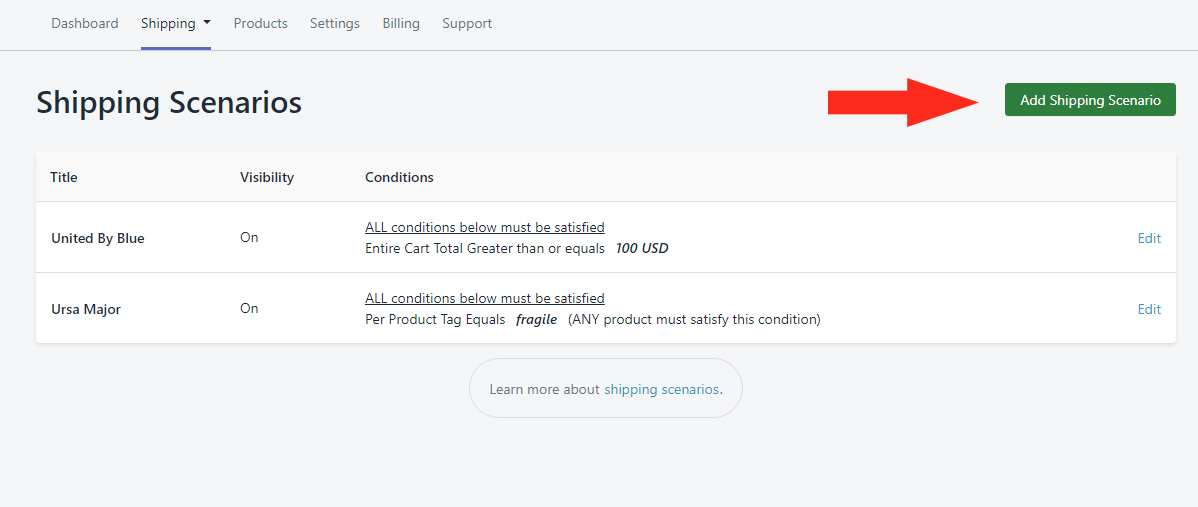
2) Click Edit beside an existing Scenario or click the Add Shipping Scenario button to create a new Scenario.
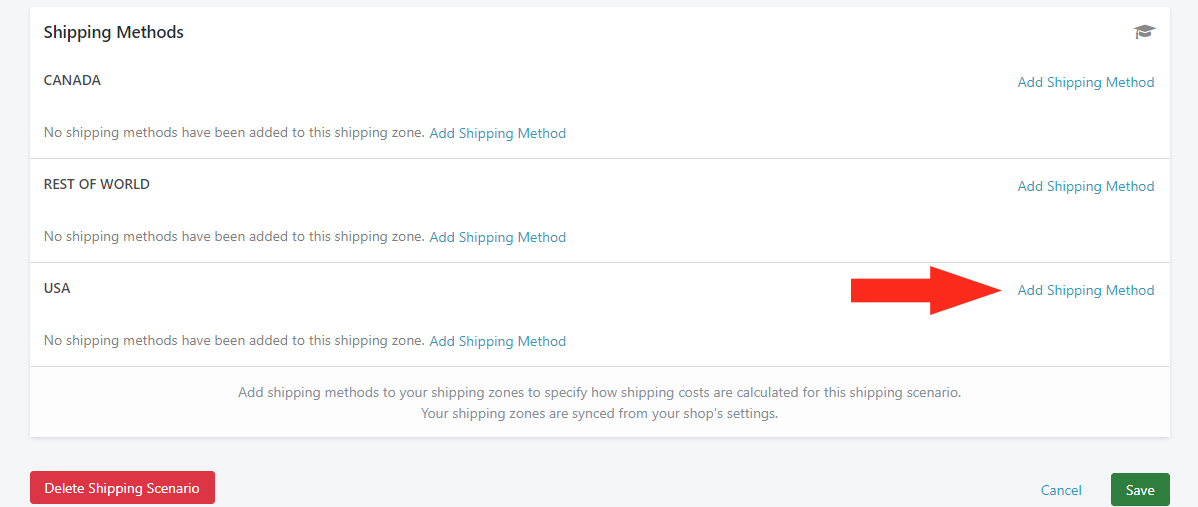
3) Scroll to the bottom of the Edit Shipping Scenario page, then click Add Shipping Method beside the shipping Zone you want to add ShipStation to.
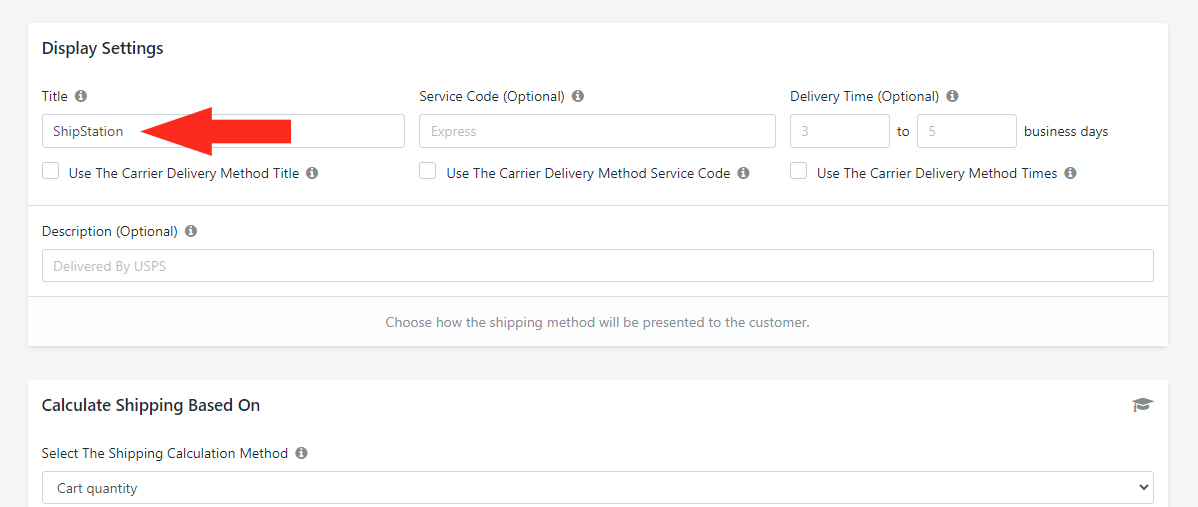
Dispay Settings
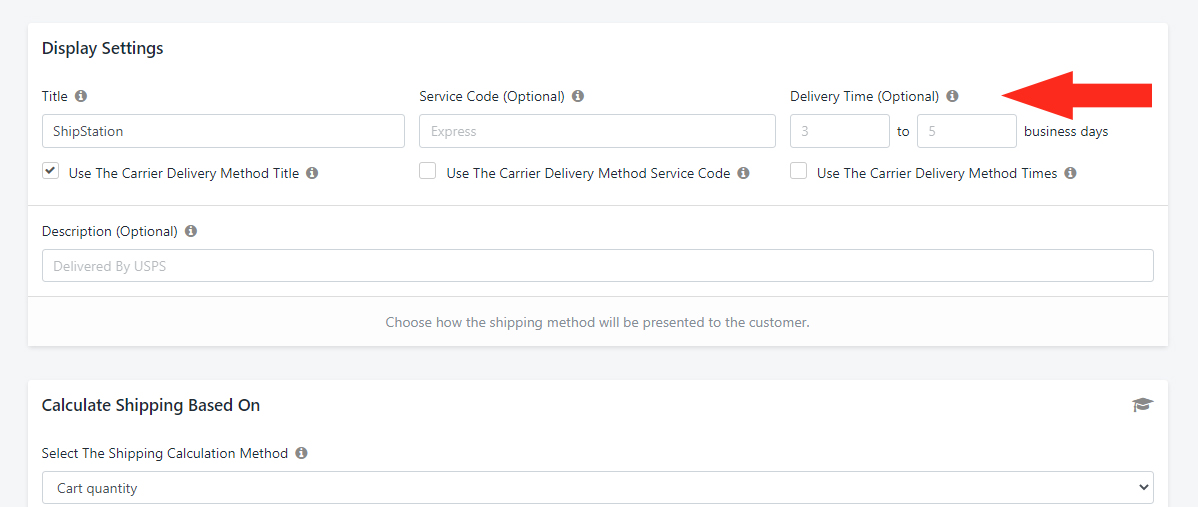
1) Create a Title, such as ‘ShipStation’, for your shipping method.
2) Check the box beside Use The Carrier Delivery Method Title. This will display the actual carrier service title at checkout instead of the custom title from Step 1.
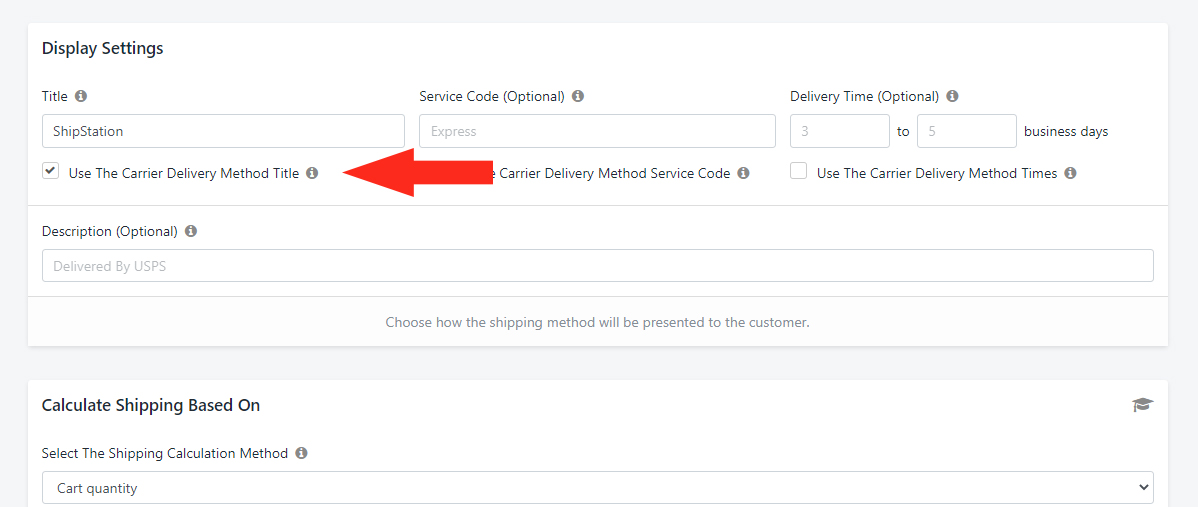
3) If desired, complete the optional settings for Service Code, Delivery Time and Description.
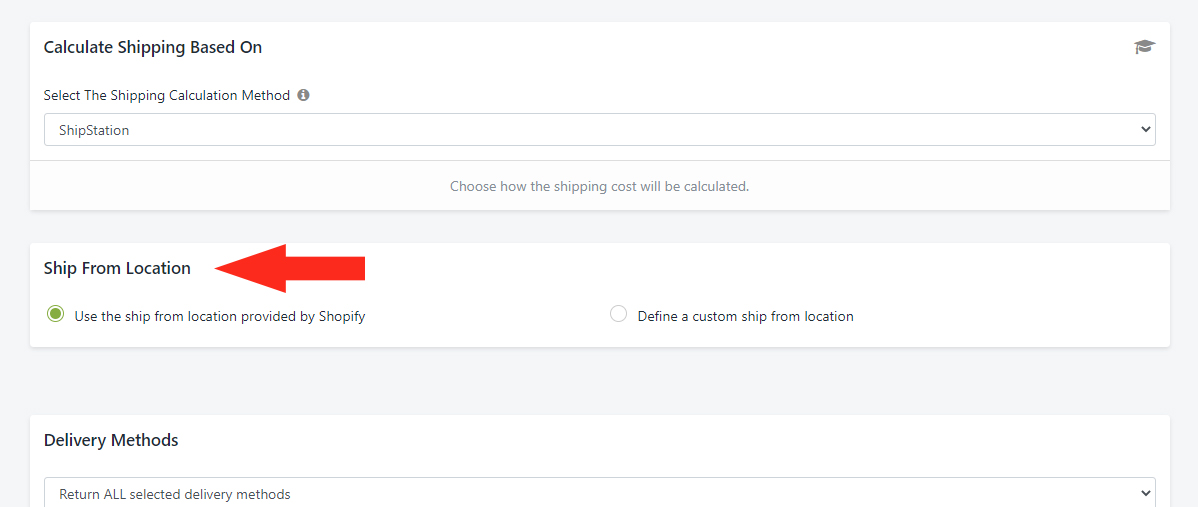
Calculate Shipping Based On
1) Select ShipStation from the Live Rates section of the drop-down list.
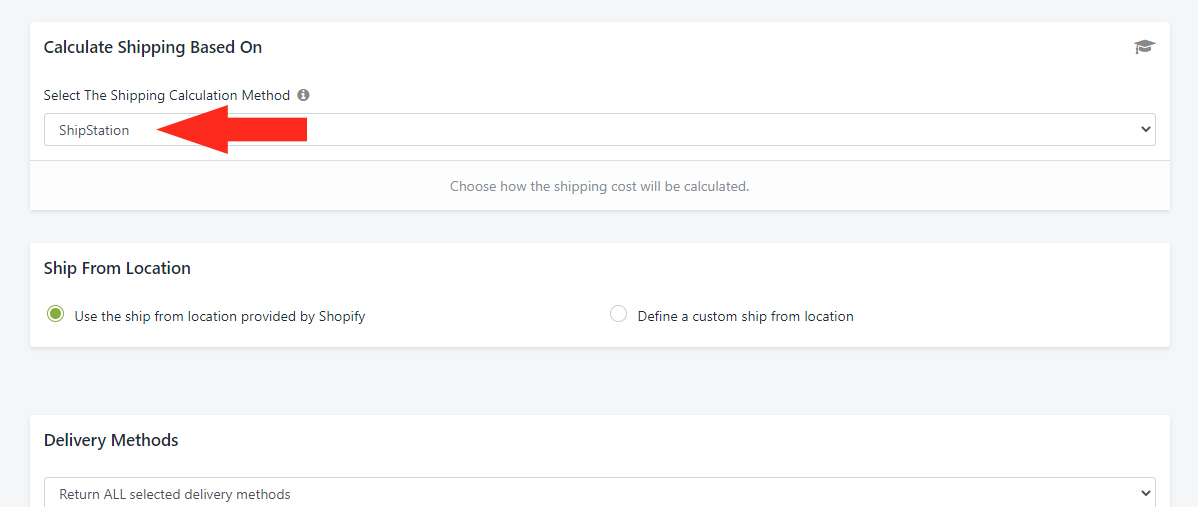
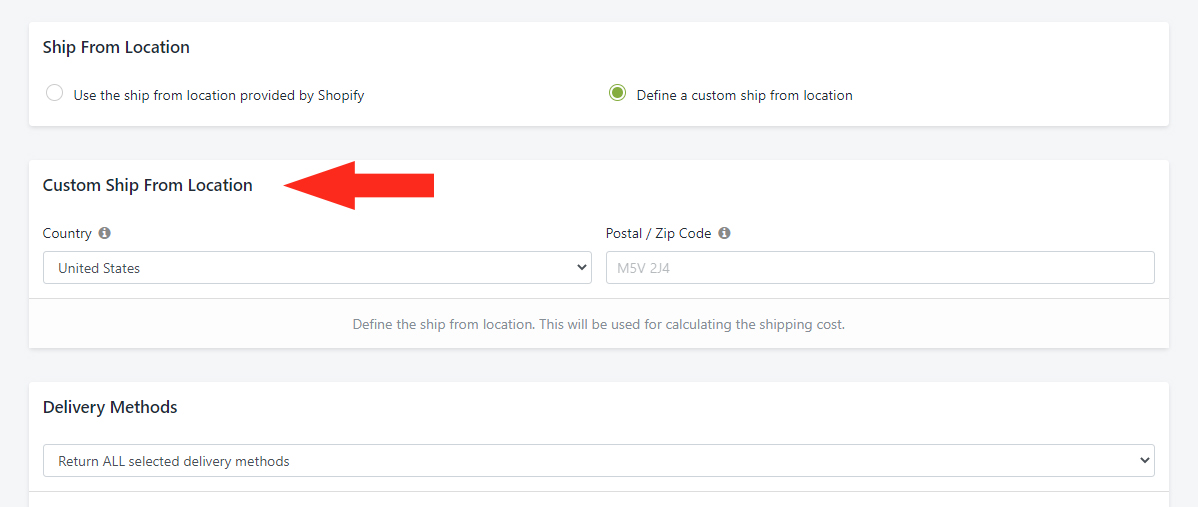
Ship From Location
1) Select whether the shipping origin location will be your default Shopify location or if you will define a custom ship-from location.
2) If you selected Define a custom ship from location in Step 1, the Custom Ship From Location section will be displayed. Enter the country and postal code or zip code for your custom location.
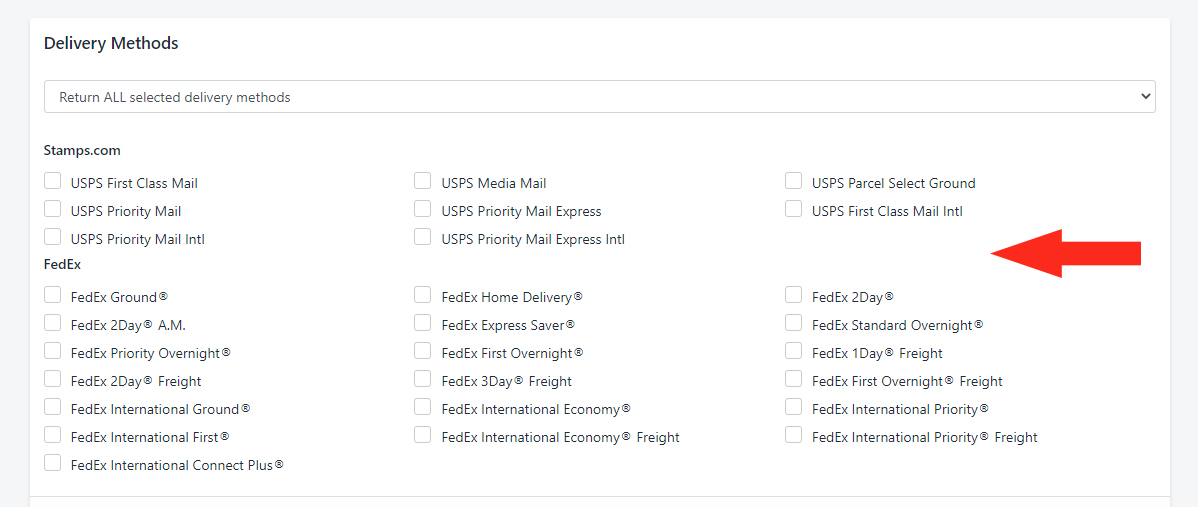
Delivery Methods
1) Select how delivery methods will be returned.
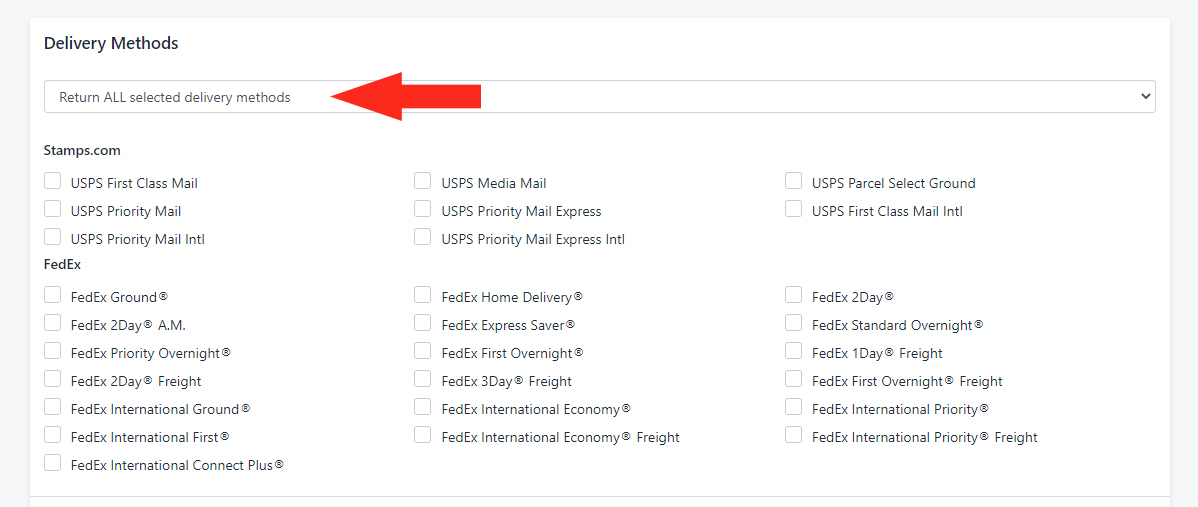
You have three (3) settings to choose from:
Return ALL selected delivery methods – all of the delivery methods selected in Step 2 will be displayed to the customer at checkout, if available.
Return only the CHEAPEST selected delivery method – all of the delivery methods selected in Step 2 will be filtered by Intuitive Shipping, and only the cheapest available option will be displayed to the customer at checkout.
Return only the most EXPENSIVE selected delivery method – all of the delivery methods selected in Step 2 will be filtered by Intuitive Shipping, and only the most expensive available option will be displayed to the customer at checkout.
Let’s say you select FedEx Ground and FedEx Priority Overnight. FedEx may not offer Ground service to a customer’s postal code or zip code. Only Priority Overnight will be displayed at checkout.
2) Check the boxes beside each delivery method you want to be displayed to customers at checkout, if available.
Be sure to select options that are suitable for the Zone your shipping method is being added to. For example, if you’re adding a shipping method to an international Zone, be sure to select international delivery methods.
Carrier Service Fallback Rate (Optional)
The Carrier Service Fallback Rate allows you to set up a flat shipping rate that is displayed to your customer as a fallback in the event that the rate request sent to ShipStation times out.
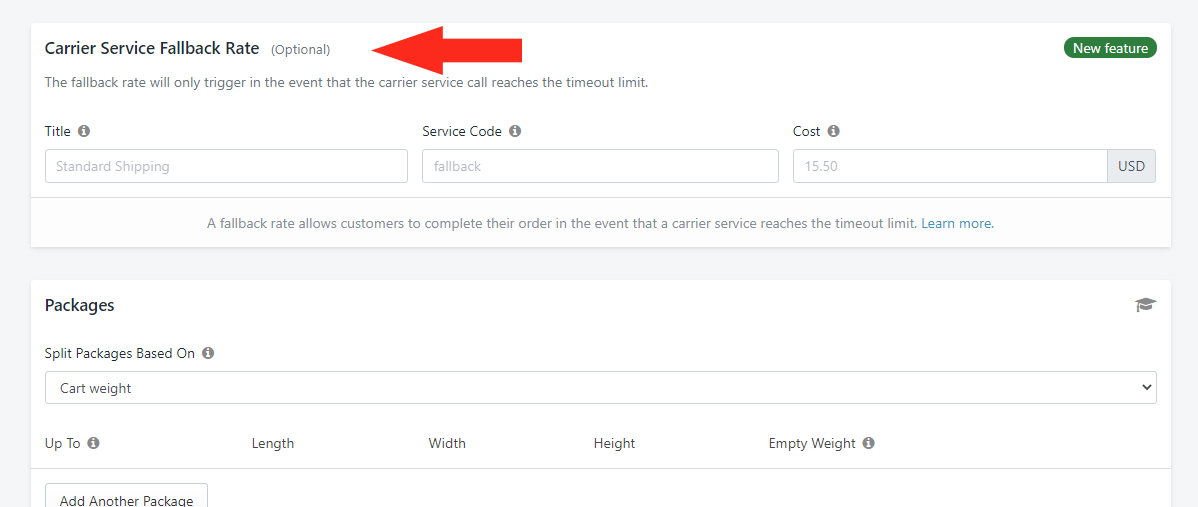
If your ShipStation account is connected to more than one carrier, and one of those carriers time out, the Fallback Rate will not be displayed.
We recommend basing your fallback rate on either a minimum shipping cost or average shipping cost.
Packages and Other Optional Settings
1) Add Packages for your ShipStation live rates, then complete the optional shipping method settings as desired.
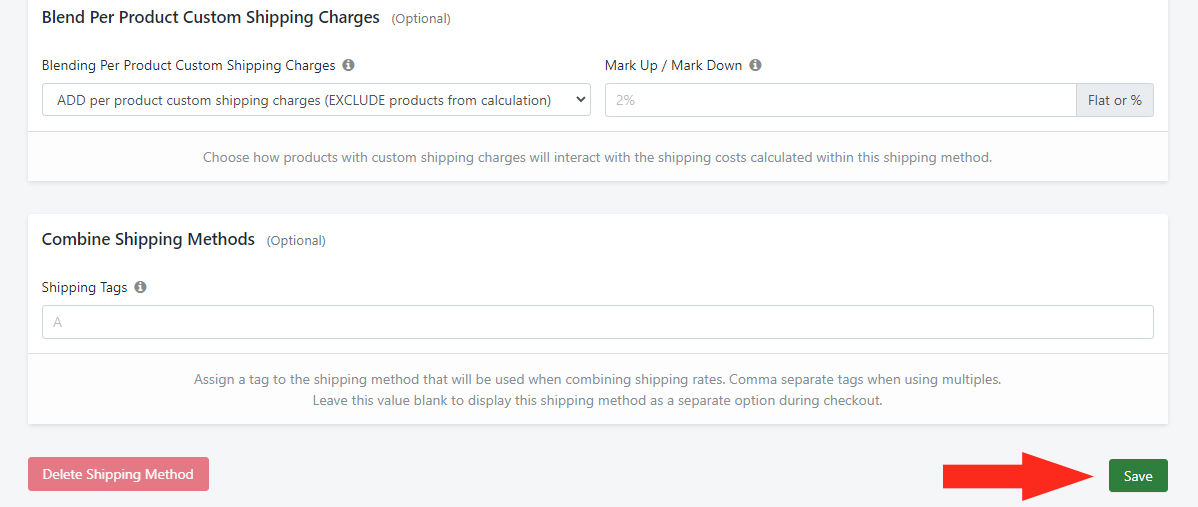
Save Your Settings
1) Click the Save button at the bottom of the screen to save your settings.
Update Carriers
When you first connect ShipStation, carriers linked to your ShipStation account are automatically synced with Intuitive Shipping and their services are listed in the Delivery Methods section of the shipping method.
If you make changes to the carriers linked to your ShipStation account, such as adding or removing carrier options, you will need to update your carriers list in Intuitive Shipping.
1) Click Partners on the main menu.
2) Click the Update carriers list button under ShipStation in the Trusted integration partners section.
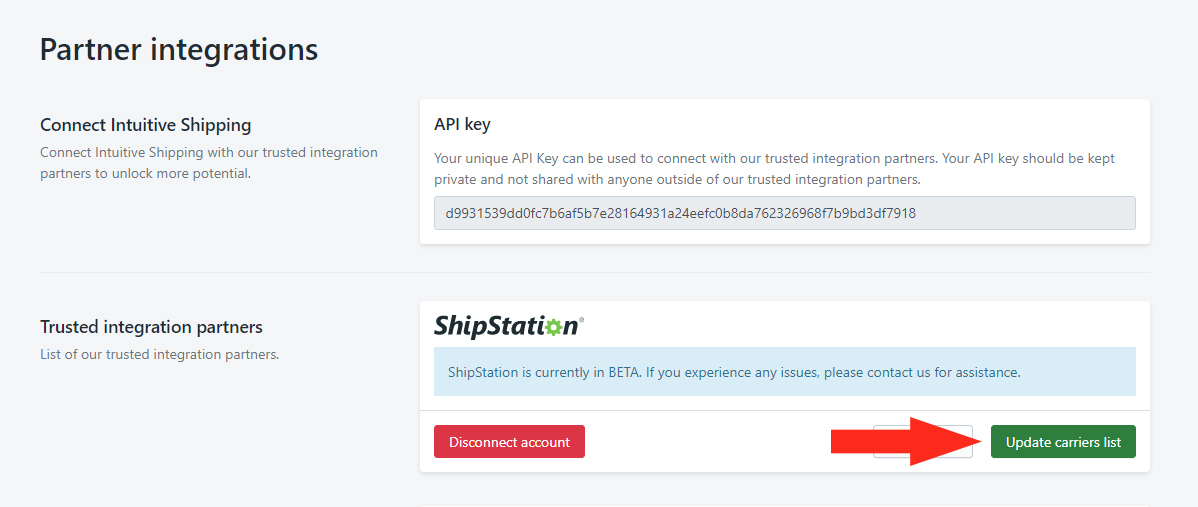
Any new carriers or services you have added to your ShipStation account will now be available in the shipping method Delivery Methods section. Delivery methods for carriers you have removed from your ShipStation account will no longer be available in the Delivery Methods section.
How It Works
Intuitive Shipping will calculate live rates from ShipStation the same way we calculate live rates directly from carriers in other Live Rate Shipping Methods, except that the calls to carriers will be routed through your ShipStation account.
When an order is completed by a customer, Intuitive Shipping will send the package information used by the selected shipping method to your ShipStation account for label printing and fulfillment.
If you run into any issues with rates from ShipStation, please contact us or submit a support request from the Support page in the Intuitive Shipping app.
For account issues such as login credentials and carrier options, please contact ShipStation directly.
Disconnect ShipStation
To disconnect your ShipStation account from Intuitive Shipping, click Partners on the main menu, then click the Disconnect account button under ShipStation in the Trusted integration partners section.
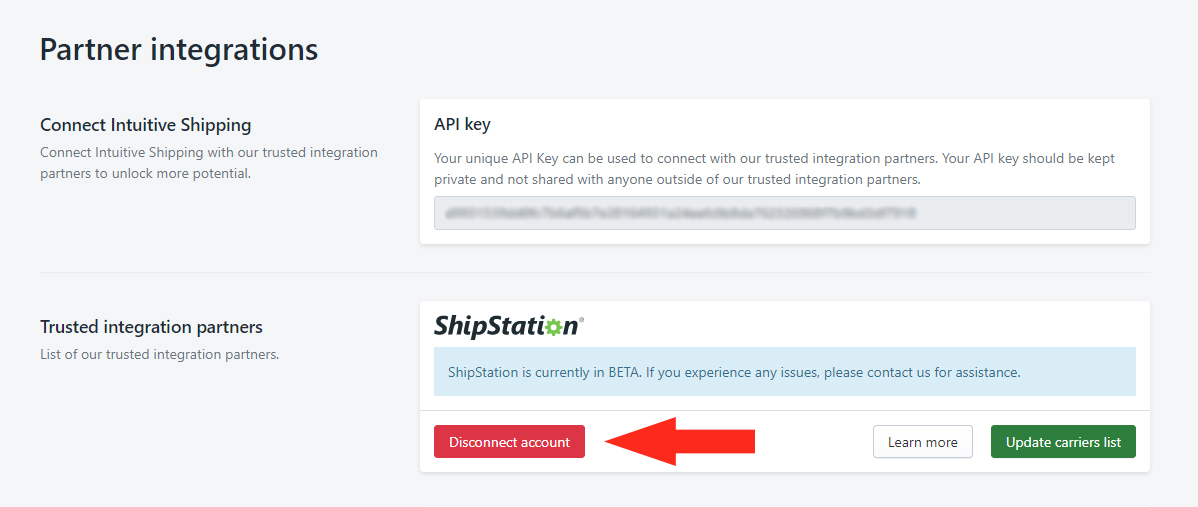
A pop-up warning message will be displayed after you click the Disconnect button.
Additionally, if any of your shipping methods are using ShipStation, a red warning banner will be displayed above each affected shipping method. Intuitive Shipping will no longer be able to call ShipStation for live rates for that shipping method.
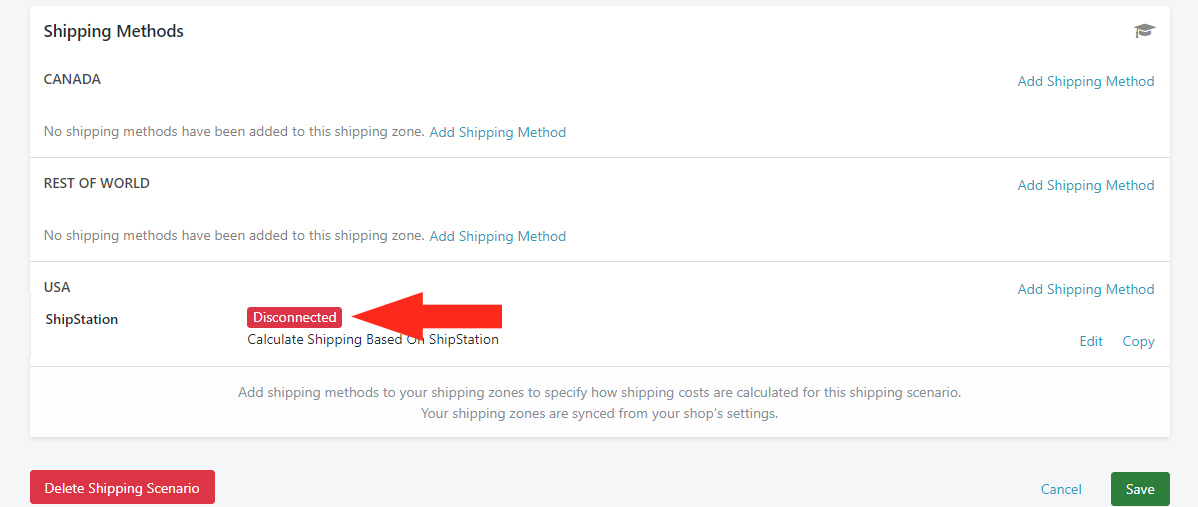
That means you can temporarily disconnect your ShipStation account, then reconnect without having to recreate the same shipping method again.
API Shipments Store Workaround
There is a temporary issue with the ShipStation integration that causes an ‘Api Shipments’ store to be created on your ShipStation account. This issue is resulting in ‘ghost orders’ being created from abandoned carts during the shipping rate lookup, and may not correspond to actual completed orders.
Intuitive Shipping is working closely with ShipStation to resolve this issue quickly. In the meantime, there are two possible workarounds until a permanent fix is rolled out. These workaround will help you to ignore the ghost orders.
Both fixes can be done from within ShipStation.
Follow this guide provided by ShipStation, or follow the steps below.
Option 1 – Rename the ‘Api Shipments’ Store
1) Click the gear icon in the top right corner of ShipStation.
2) Click Selling Channels on the sidebar menu, then select Store Setup from the drop-down list.
3) Under the Store Setup column, click Edit in the row for ‘Api Shipments’.
4) Rename ‘Api Shipments’ to something else lower alphabetically, like ‘ZZApi Shipments’. This will cause the store to appear at the bottom of lists.
Option 2 – Filter the ‘Api Shipments’ store from Orders Grid
1) Click Orders on the ShipStation menu.
2) Click Awaiting Shipment on the sidebar menu.
3) Click Store on the ‘Filter By’ options.
4) Select all stores other than ‘Api Shipment’
5) If desired, click Shipments on the ShipStation menu, then repeat Steps 2 to 4.