Creating a Combined Shipping Method allows you to blend multiple individual shipping rates together. You can use Intuitive Shipping’s Combined Shipping Method feature to blend multiple custom rates or a mix of custom and live rates into a single rate at checkout. This is a great feature when you have product-based shipping rules and rates.
If you have a Live Rate Shipping Method with multiple delivery types selected – e.g. ‘Ground’, ‘2 Day, Priority Overnight’ – and you have included it in a Combined Shipping Method, each of the delivery types will also be added together, resulting in a rather expensive shipping rate.
Typically, this is not the desired outcome. To avoid this situation, you can create a Live Rate Combined Shipping Method by first setting up a Shipping Method for each of your desired carrier delivery services, then using the Combined Shipping Method feature to blend rates for similar service types together.
How It Works
Let’s say you have a Shipping Scenario called ‘Band Tees’ with a Live Rate Shipping Method for FedEx. In the Shipping Method, you’ve selected ‘Ground’ and ‘Priority Overnight’ FedEx delivery services. Additionally, you have a Shipping Scenario called ‘Drum Sticks’ with a Live Rate Shipping Method for USPS. In that Shipping Method, you’ve selected ‘Ground’ and ‘First-Class Package’ USPS delivery services.
You’ve tagged both your FedEx and USPS Shipping Methods with the same shipping tag and added them to a Combined Shipping Method. When your customer orders both a band t-shirt and a set of drum sticks, the Combined Shipping Method will add together all of the delivery services – i.e. FedEx Ground + FedEx 2 Day + FedEx Priority Overnight + USPS Ground + USPS First-Class Package Service.
The resulting shipping cost is going to be very expensive.
To prevent this from occurring, you must first separate each carrier delivery service into its own Shipping Method.
Using the same example from above, you can then create a Combined Shipping Method that blends FedEx Ground with USPS Ground, as well as another Combined Shipping Method that blends FedEx Priority Overnight with USPS First-Class Package. Then, at checkout, a customer ordering both a band t-shirt and drum stick set will have the option to select a blended Ground shipping rate or a blended Priority shipping rate.
Before combining Shipping Methods, we recommend that you understand how to create a Shipping Scenario and a live rate Shipping Method.
Add A Delivery Service Shipping Method
To ensure that multiple carrier delivery services – e.g. Ground, 2 Day, Priority Overnight – are not added together, you’ll need to create a separate Shipping Method for each delivery service.
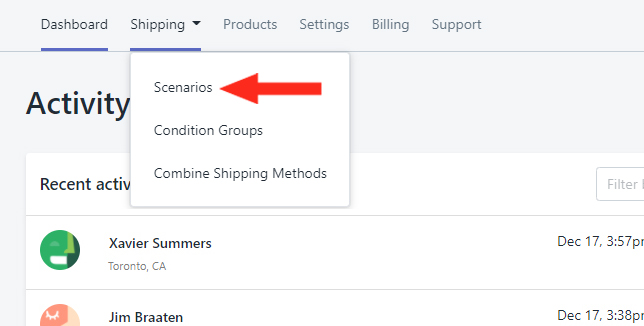
1) Click the Shipping menu button, then select Scenarios from the drop-down list.
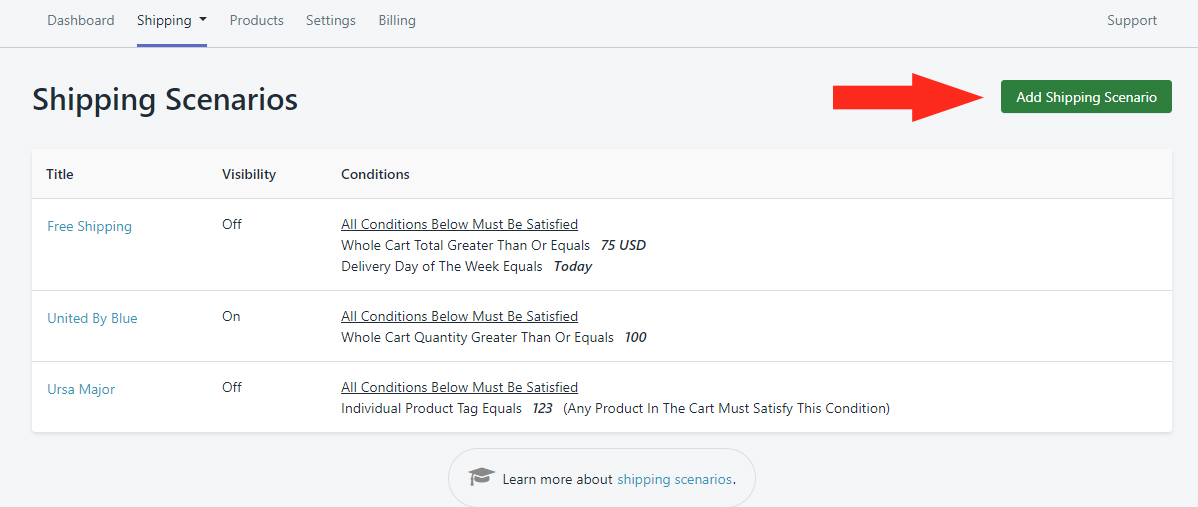
2) Click on an existing Shipping Scenario – one that already has a Shipping Method with multiple delivery services – or add a new one.
After confirming your Scenario Conditions:
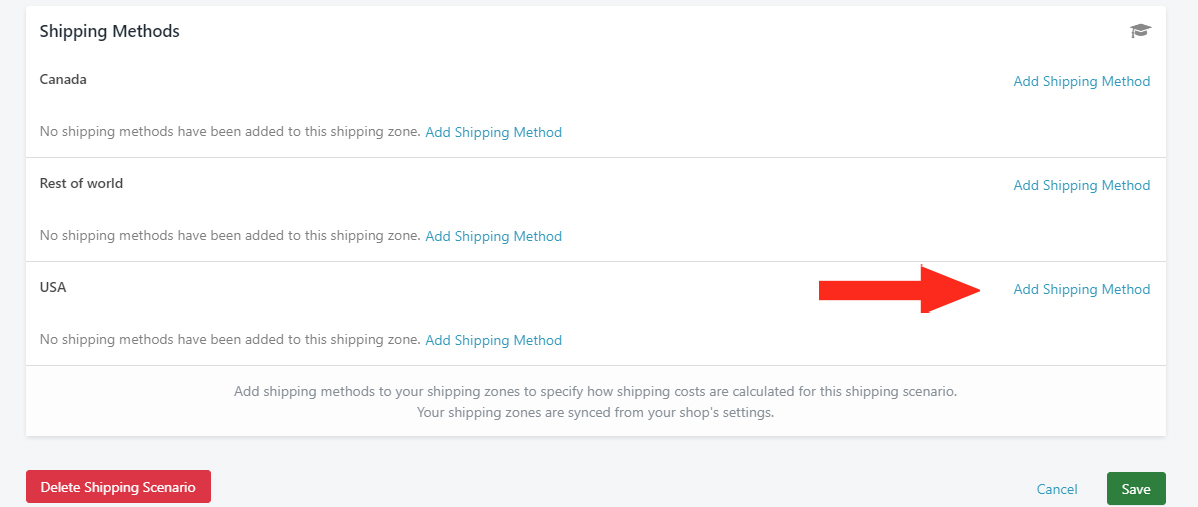
3) Scroll down to Shipping Methods at the bottom of the Edit Shipping Scenario page, then click Add Shipping Method beside one of your Shopify Shipping Zones.
4) Create a Title for your Shipping Method – e.g. ‘Ground’.
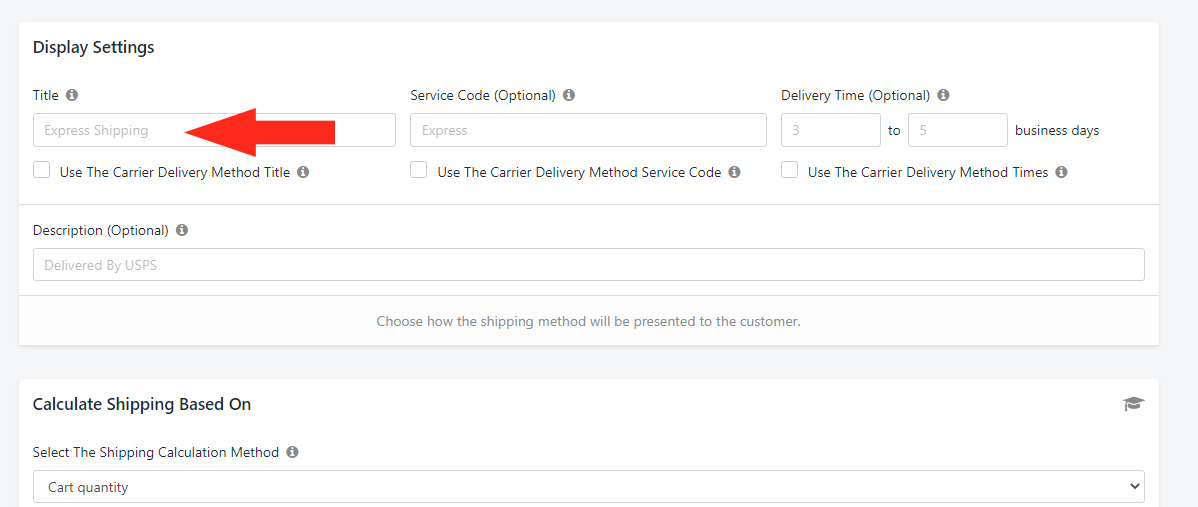
5) If you prefer to use the Title returned by the live carrier rates, check the box ‘Use The Carrier Delivery Method Title’ below the Title field.
6) Enter a Service Code – e.g. ‘GRD’. This setting is optional.
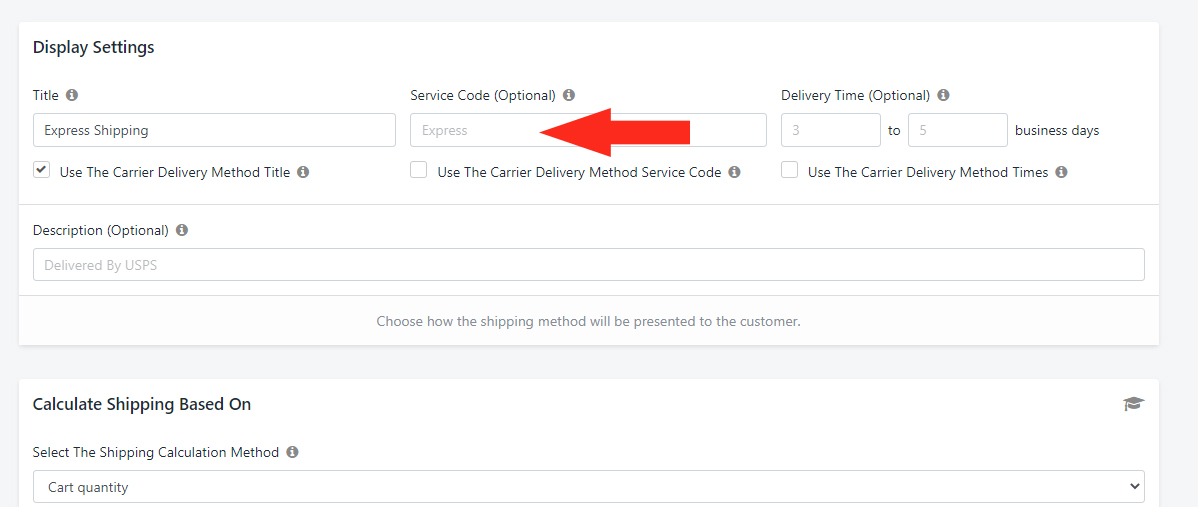
7) If you prefer to use the Service Code returned by the live carrier rates, check the box ‘Use The Carrier Delivery Method Service Code’ below the Service Code field.
8) Enter the Delivery Time (in business days) that will be displayed to your customers during checkout. This setting is optional.
You can enter a single number – e.g. 4 business days – by only entering a number in the first (left) field. Or you can enter a range – e.g. 4-6 business days – by entering numbers in both fields.
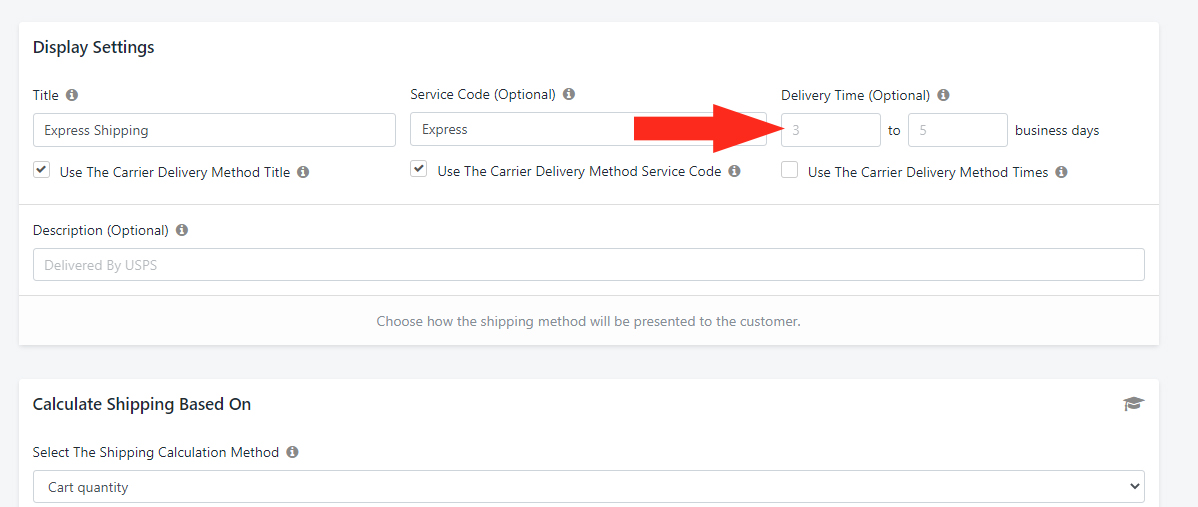
9) If you prefer to use the estimated Delivery Time returned by the live carrier rates, check the box ‘Use The Carrier Delivery Method Times’ below the Deliver Time fields.
For example, if you enter a Delivery Time of 4 business days and the live rate returns a Delivery Time of 1 business day, the Delivery Time will be displayed to the customer as ‘5 business days’ at checkout.
10) Enter a Description for your Shipping Method. This setting is optional. The Description will appear below the Shipping Method Title at checkout.
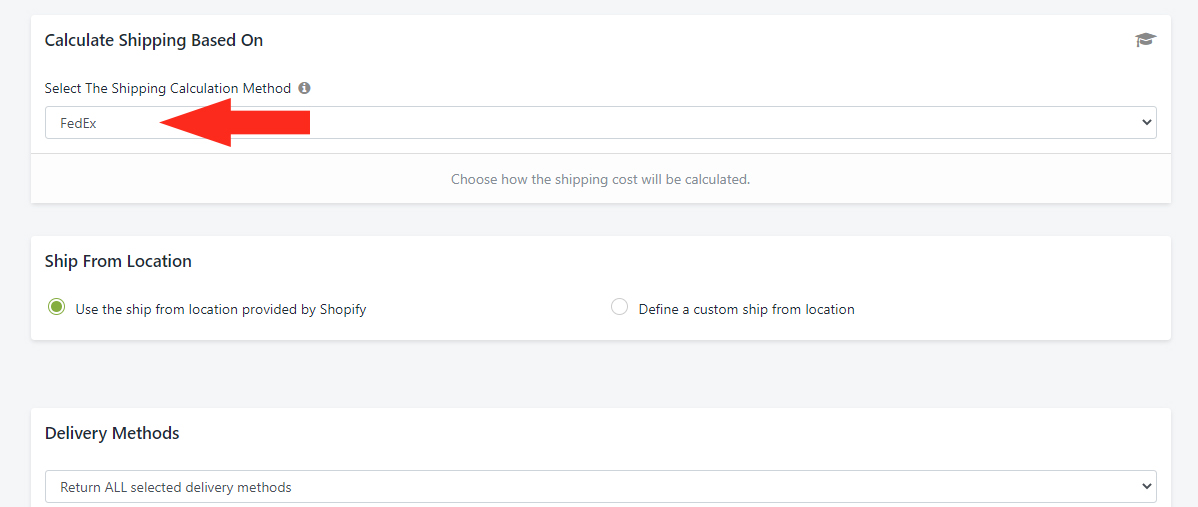
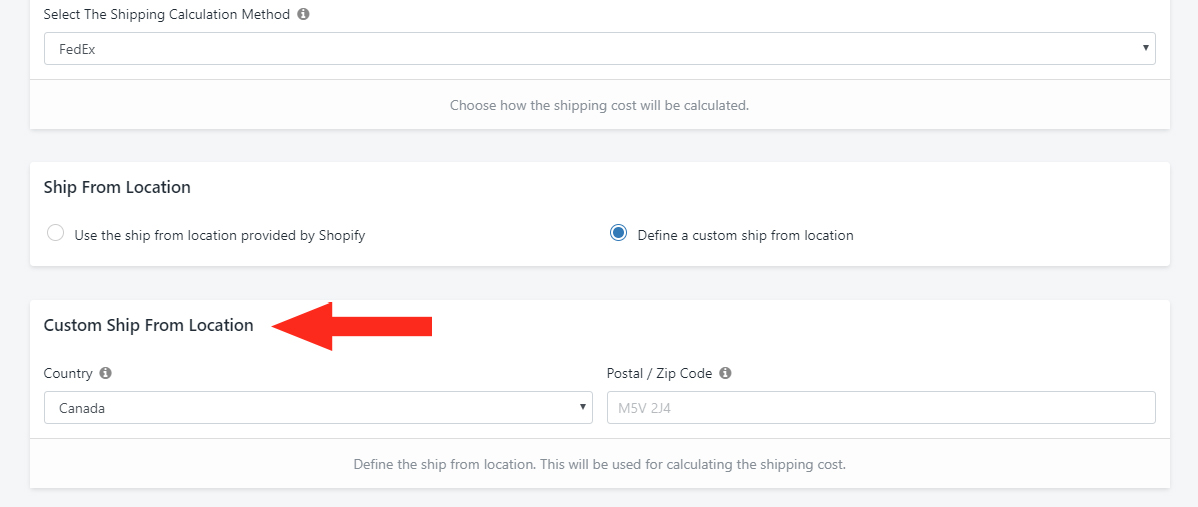
Select The Shipping Calculation Method
1) In the Calculate Shipping Based On section, choose the desired Shipping Carrier from the Live Rates section of the drop-down list. For a list of which Shipping Carriers are supported by Intuitive Shipping, click here.
Enter the Shipping Origin Address
1) In the Ship From Location section, select whether your location will be the one provided by Shopify or if you will define a custom ship from location.
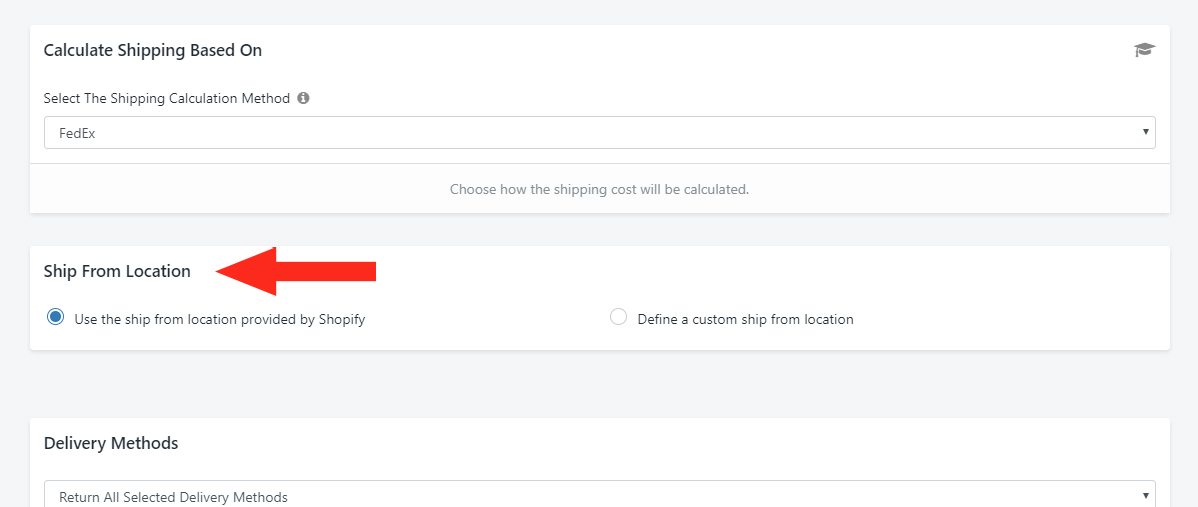
2) If you selected Define a custom ship from location in Step 1, the Custom Ship From Location section will appear on the screen. Enter the Country and Postal/ ZIP Code for your custom location in this section.
Select the Delivery Method
1) In the Delivery Methods section, leave the setting ‘Return ALL selected delivery Methods‘ as-is. This is the default setting.
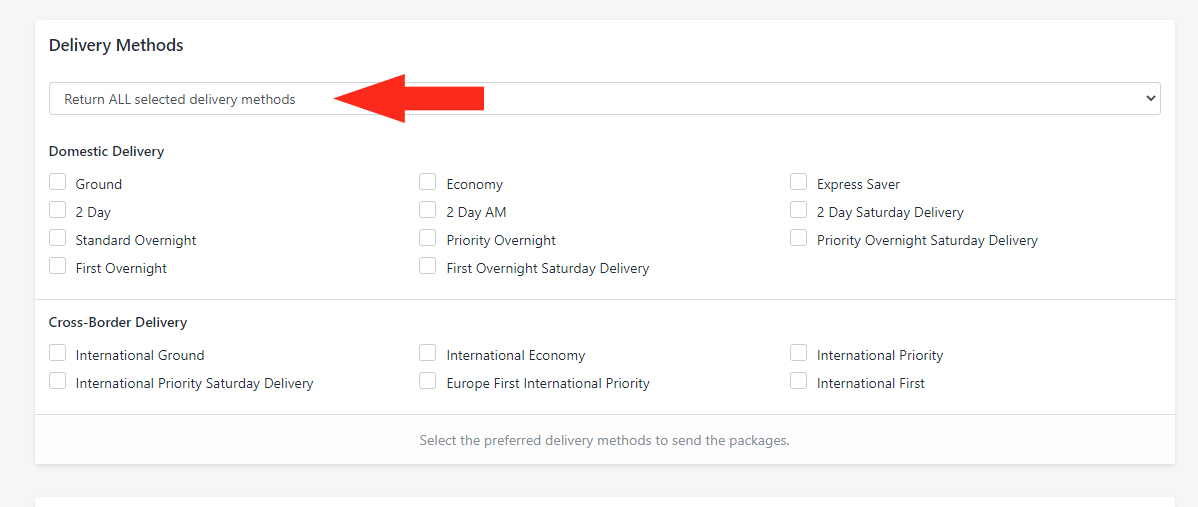
2) Check the box beside one delivery method you would like returned at checkout.
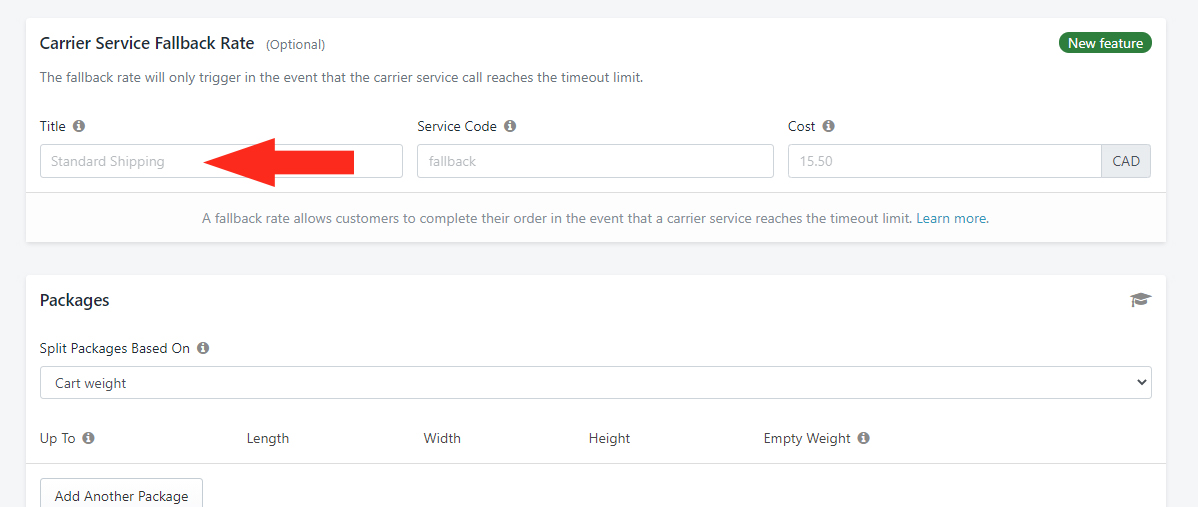
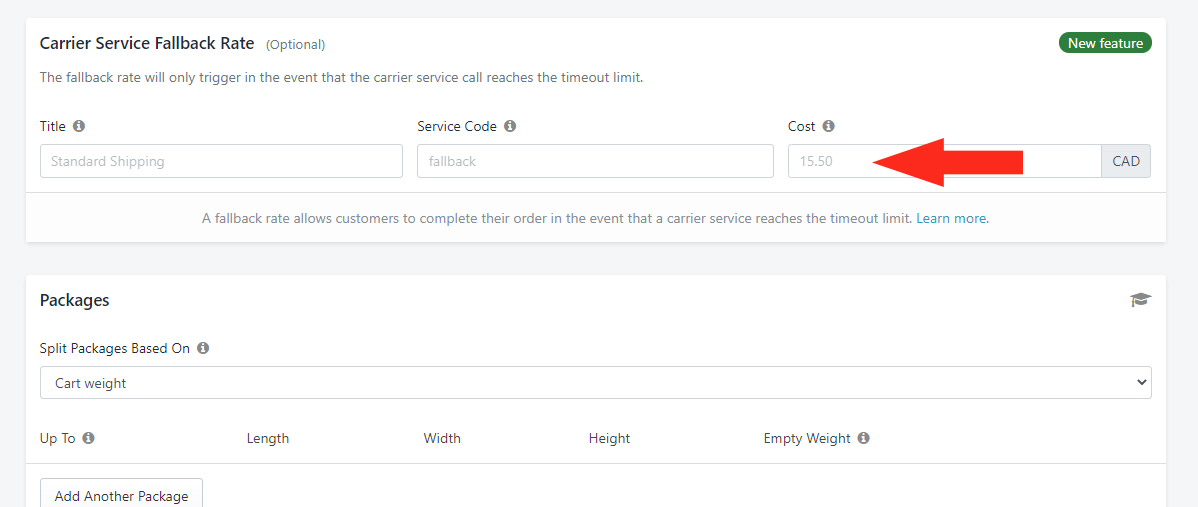
Add Fallback Cost
The Carrier Service Fallback Rate allows you to set up a flat, fallback shipping rate that is displayed to your customer in the event that the rate request sent to the carrier times out. This typically occurs when the carrier rates are not returned to Intuitive Shipping within six (6) seconds or when carrier rates are down and not responding at all.
The Carrier Service Fallback Rate section will only be displayed if you select a carrier in Step 1 of Select The Shipping Calculation Method.
1) Create a Title for your Fallback Rate – e.g. ‘Standard Shipping’. The title will be displayed only if the Fallback Rate is required.
2) Enter a Service Code for your Fallback Rate – e.g. ‘Fallback’. The service code will only be sent to your Order Notes if the Fallback Rate is required.
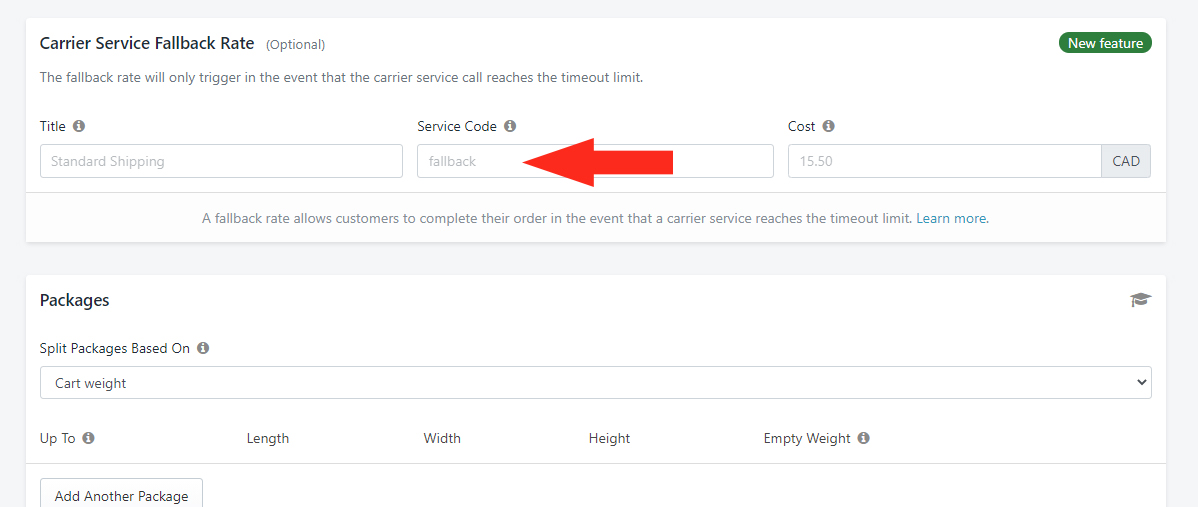
3) Enter a Cost for your Fallback Rate. The cost will only be displayed if the Fallback Rate is required.
Let’s say you’ve set up a Fallback Rate of $15.00, and a customer order results in three (3) packages. If the carrier rates time out and the Fallback Rate is required, the customer will be charged $45.00 for shipping at checkout ($15.00 x 3 packages).
Other Settings Impacted by Carrier Service Fallback Rate
Let’s say you enter a custom Delivery Time of 4 to 6 business days. That is the Delivery Time that will be displayed with your Fallback Rate.
However, if you leave the Delivery Time fields blank and instead select ‘Use The Carrier Delivery Method Times’, no Delivery Times will be displayed if the Fallback Rate is required.
Similarly, if you are combining a custom Delivery Time with the carrier Delivery Time (see Step 9 of Add A Shipping Method), only the custom portion will be displayed if the Fallback Rate is required.
For example, if you enter a Delivery Time of 4 business days and the live rate typically returns a Delivery Time of 1 business day, the Delivery Time will be displayed to the customer as ‘4’ business days’ at checkout instead of ‘5’ because the carrier’s 1 business day is excluded.
Enter Package Details
The Packages section will only be displayed if you select a carrier in Step 1 of Select The Shipping Calculation Method.
1) In the Packages section, select how you would like your packages to be split. Split Packages settings are grouped into three (3) categories:
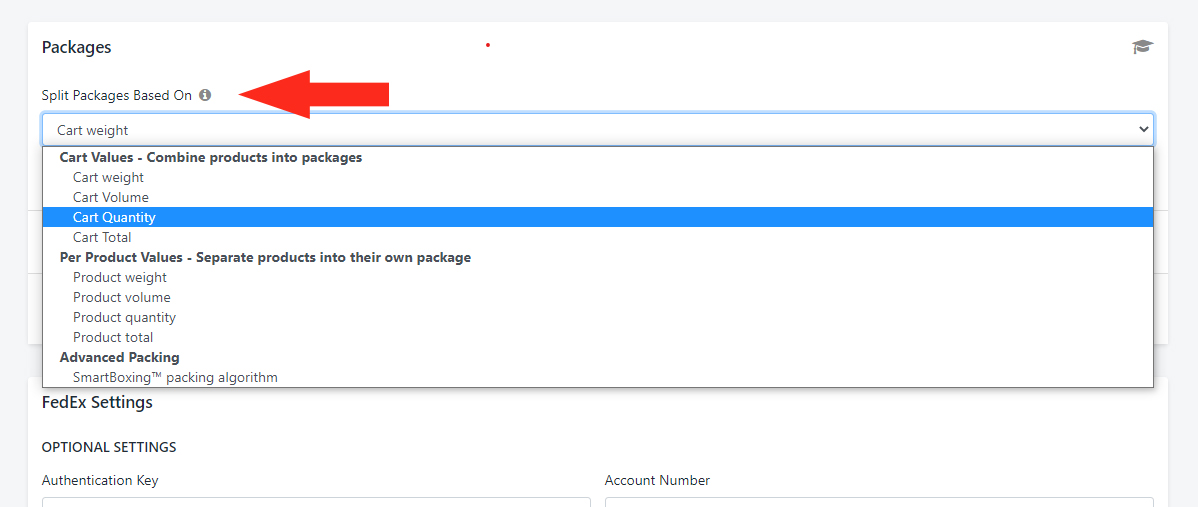
Cart Values – Combine products into packages
These settings determine how packages will be split based on the total contents of the cart.
Cart weight
Packages will be split based on the total weight of the items in the customer’s cart. This is the default setting.
This setting is useful when your packages are limited by how much weight each package can hold.
Cart volume
Packages will be split based on the total volume of the items in the customer’s cart.
This setting is useful when the packages are limited by how much available space each package has.
Cart quantity
Packages will be split based on the total number of items in the customer’s cart.
This setting is useful when your packages are limited by how many items each package can hold.
Cart total
Packages will be split based on the total price of items in the customer’s cart.
This setting is useful when your packages have no physical restrictions and you want to split packages based on the value of the items being packed.
Per Product Values – Separate products into their own package
These settings determine how packages will be split based on each unique product in the cart.
For example, if you sell three (3) types of T-shirts – red, purple and yellow – and each color has four (4) size variants – S, M, L and XL – the system will consider that to be twelve (12) unique products.
Product weight
Packages will be split based on the total weight of each unique product in the customer’s cart.
This setting is useful when product-specific packages are limited by the weight each package can hold.
Product volume
Packages will be split based on the total volume of each unique product in the customer’s cart.
This setting is useful when product-specific packages are limited by how much available space each package has.
Product quantity
Packages will be split based on the total number of each unique product in the customer’s cart.
This setting is useful when product-specific packages are limited by how many items each package can hold.
Product total
Packages will be split based on the total price of each unique product in the customer’s cart.
This setting is useful when your product-specific packages have no physical restrictions and you want to split packages based on the value of the unique products being packed.
Advanced Packing
SmartBoxing™ Packing Algorithm
Packages will be split using Intuitive Shipping’s proprietary SmartBoxing™ system which determines the most efficient packaging method for all of the items in the cart.
This setting is useful when you have a variety of products and package sizes and need to ensure your live rates are as accurate as possible.
2) To add your first package, click the Add Another Package button.

3) Enter the Up To value that will be used to determine when packages will be split.
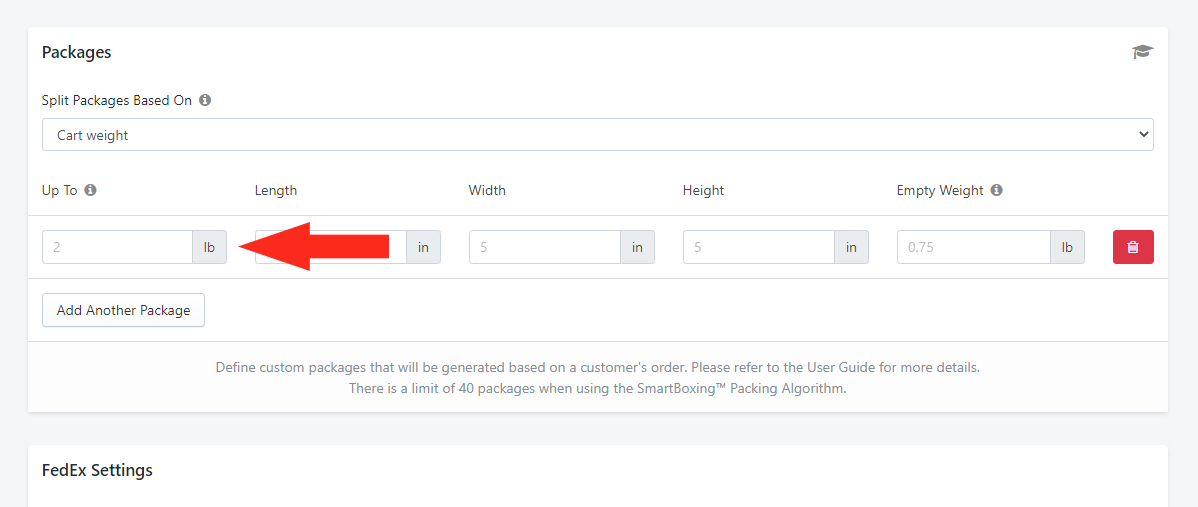
For example, if you split packages based on Cart Total, the Up To value will be a dollar amount and the unit of measure will be based on the default currency in your Shopify settings. Similarly, if you split packages based on Cart Weight, the Up To value will be a weight amount and the unit of measure will be based on the weight settings in Intuitive Shipping.
4) Enter the Length (or Depth), Width and Height dimensions for your first package.
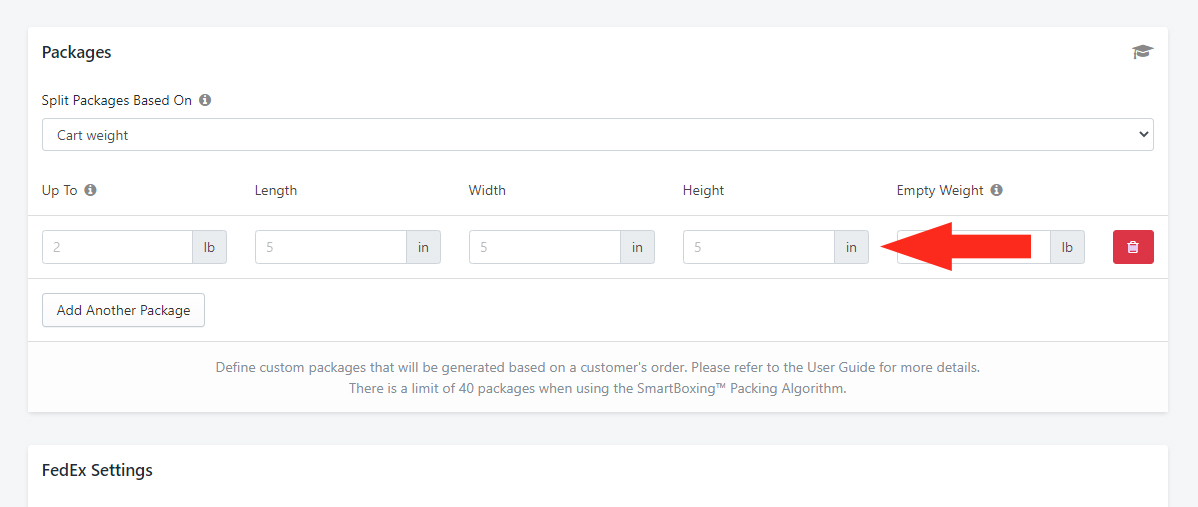
5) If desired, enter a value for the Empty Weight of the package. When present, this weight will be added to the total weight of the products in the package.
This setting is useful when your additional packaging material affects the total weight of the package. This value is optional.
6) Repeat Steps 1 to 5 to add as many packages as you need.
Single Packages vs. Multiple Packages
When you enter a single package and the Up To value is exceeded, Intuitive Shipping will add a second identical package to the shipping calculation.
Let’s say you have a single package that is 6 x 6 x 6 inches. You’ve set Split Packages Based On to ‘Cart Quantity’, you’ve entered an Up To value of ’10’ (10 items), and you’ve entered Length, Width and Height as ‘6’, ‘6’, and ‘6’ respectively.
When a customer orders 4 items, Intuitive Shipping will calculate the rate based on 1 package with dimensions 6 x 6 x 6 inches plus the total weight of all 4 items.
However, when a customer orders 13 items, Intuitive Shipping will calculate the rate based on 2 packages, each with dimensions 6 x 6 x 6 inches. The weight of the first package will be based on 10 items (the maximum per package) and the weight of the second package will be based on 3 items.
When you add multiple packages, the system will select the package (or packages) best suited for the order based on the Up To value.
Let’s say you have one package that is 3 x 3 x 3 inches. You’ve set Split Packages Based On to ‘Cart Weight’, you’ve entered and Up To value of ‘6’ (6 lbs), and you’ve entered Length, Width and Height as ‘3’, ‘3’ and ‘3’ respectively. And you have another package that is 8 x 12 x 10 inches. For that package, you’ve entered an Up To value of ’15’ (15lbs), and you’ve entered Length, Width and Height ‘8’, ’12’ and ’10’ respectively.
When a customer orders items totalling 5 lbs, Intuitive Shipping will calculate the rate using the first package, with dimensions 3 x 3 x 3 inches plus a total weight of 5 lbs because the actual weight is within the package limit of 6 lbs.
However, when a customer orders items totalling 9 lbs, Intuitive Shipping will calculate the rate using the second package, with dimensions 8 x 12 x 10 inches plus a total weight of 9 lbs because the actual weight exceeds the first package limit of 6 lbs but is within the second package limit of 15 lbs.
Finally, when a customer orders items totalling 20 lbs, Intuitive Shipping will calculate the rate using both packages: package #1, with dimensions 8 x 12 x 10 plus a total weight of 15 lbs (the maximum per package), and package #2, with dimensions 3 x 3 x 3 plus a total weight of 5 lbs (because it is within the package limit of 6 lbs).
Since the product dimensions are ignored by the calculation – unless you’re splitting packages based on volume or using SmartBoxing™ – be sure that the package dimensions are suitable for the items being ordered. In other words, if you have a single package that is 3 x 3 x 3 inches, and you’re splitting packages based on ‘Cart Weight’ up to 15 lbs, a customer ordering a product that measures 8 x 4 x 5 inches – but weighs 3 lbs – will be calculated using the 3 x 3 x 3-inch package, even though the product won’t fit. Why? Because only the weight of the product is being considered in the calculation.
Once you have completed your Packages settings, you can add your carrier account settings and make adjustments to the final shipping costs
Carrier Settings
The Carrier Settings section will only be displayed if you select a carrier in Step 1 of Select The Shipping Calculation Method.
1) If you have an account with one of our carrier partners, enter your account credentials to access your negotiated rates.
Most carriers do not require an account to access rates. If you do not have an account with a carrier, leave the Carrier Settings blank. When the Shipping Method is triggered, rates will be calculated using the carriers’ standard retail rates when possible.
Adjust Final Shipping Cost (Optional)
Intuitive Shipping gives you complete control of your shipping rates. Even with Live Rates, you have the final say on how your rates are displayed to the customer at checkout.
For more detailed information on how to adjust the final shipping cost, click here.
COST LIMITS
1) If desired, enter a Minimum Cost. If the actual shipping cost is less than this value, it will be adjusted up to the Minimum Cost. For example, if the actual calculated rate is $7.25, and you’ve put $10.00 as the Minimum Cost, the customer will be shown $10.00 at checkout.
2) If desired, enter a Maximum Cost. If the actual shipping cost is greater than this value, it will be adjusted down to the Maximum Cost. For example, if the actual calculated rate is $32.50, and you’ve put $20.00 as the Maximum Cost, the customer will be shown $20.00 at checkout.
3) If desired, enter an amount of Mark Up or Mark Down to be applied to the final shipping cost. The final shipping cost (after any Handling Fees – see below) will be marked up or marked down by this amount.

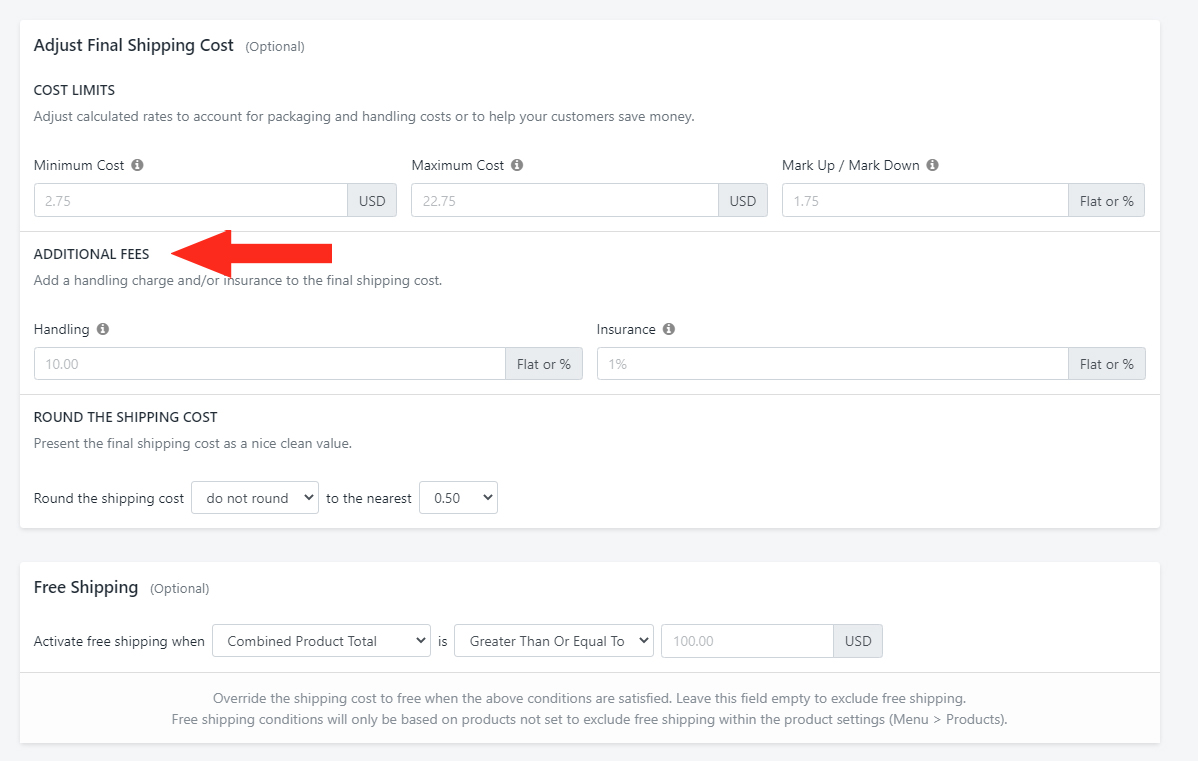
ADDITIONAL FEES
1) If desired, enter any miscellaneous Handling costs – e.g. packaging material costs. Handling is applied to the shipping cost before Mark Up or Mark Down. For example, if the calculated live rate is $100.00 and you add a 10% handling fee, the total shipping cost will be $110.00.
2) If desired, enter any Insurance fees. Insurance fees as a percentage are based on the whole cart amount. For example, if the whole cart amount is $50.00 and the shipping cost is $100.00 – then you add a 10% insurance fee – the total shipping cost will be $105.00 (10% of $50.00 = $5.00; $100.00 + $5.00 = $105.00).
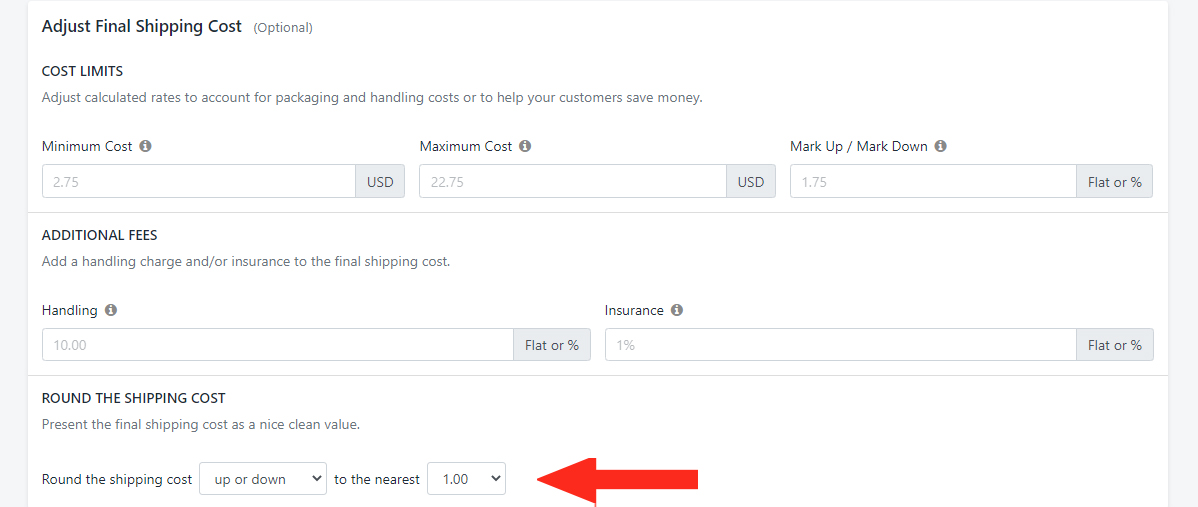
ROUND THE SHIPPING COST
1) If desired, select whether or not to Round the Shipping Cost Up or Down. By default, this is set to ‘do not round’. You can choose to only round up, only round down, or round up or down (whichever is closer to the rounding amount).
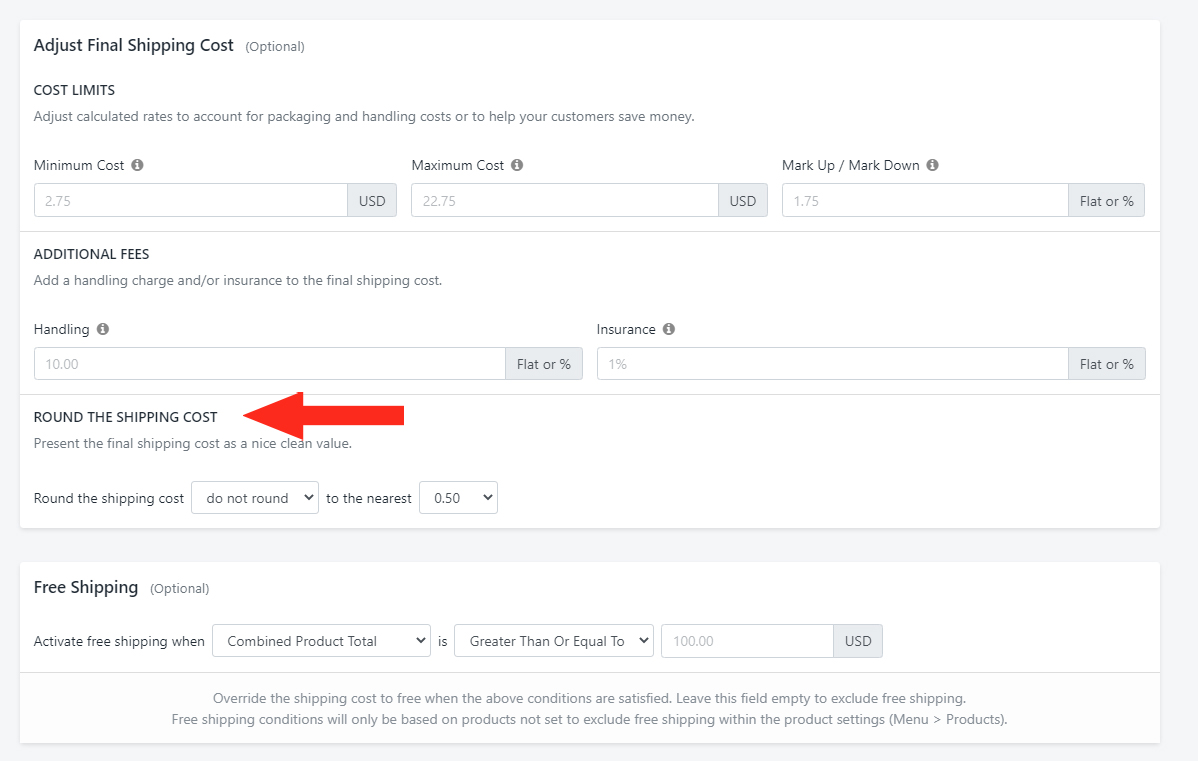
2) If you chose to Round in Step 1, select the amount of rounding from the drop-down. You can round to the nearest $0.50, $1.00, $5.00 or $10.00. For example, if the calculated rate is $3.53 and you choose to round up to the near the nearest $0.50, the rate will be rounded to and displayed as $4.00. If you choose to round up or down, the same rate will be rounded down and displayed as $3.50.
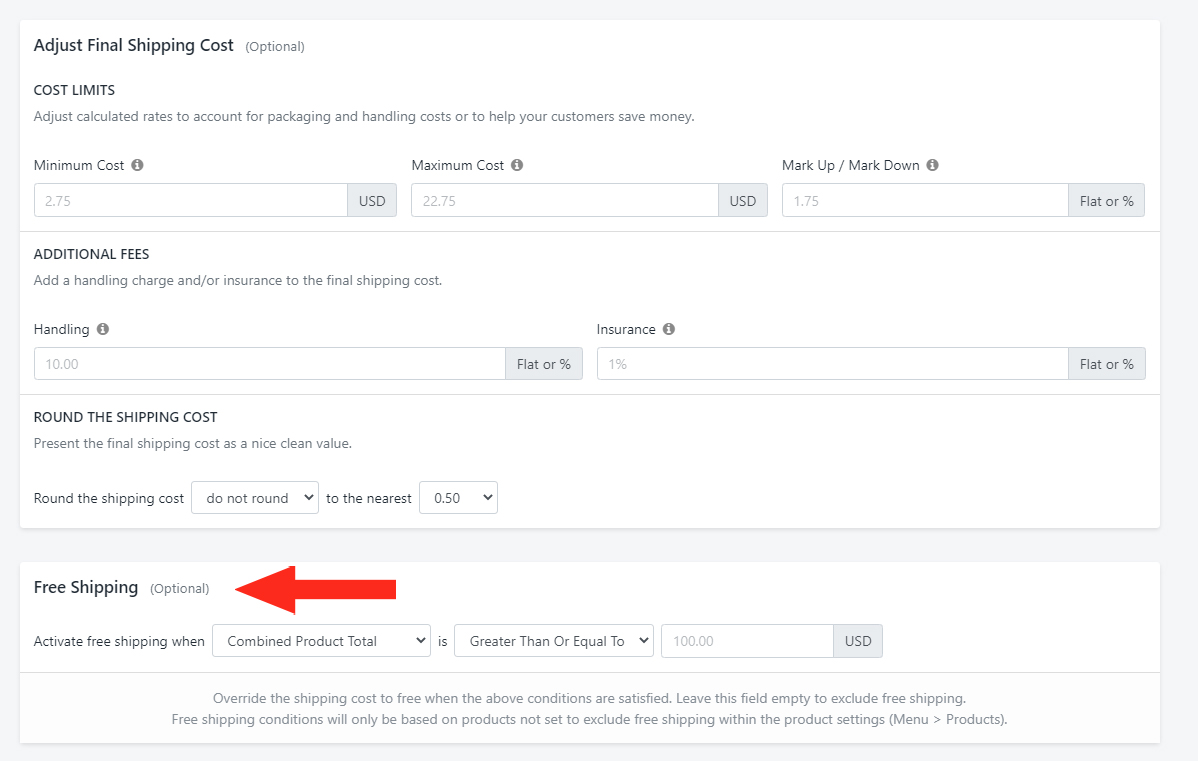
Free Shipping (Optional)
You can use Intuitive Shipping to set a Free Shipping threshold. When this Shipping Method is triggered and the settings in the ‘Activate’ statement are true, the customer will not be charged for shipping at checkout.
For more detailed information on how to set Free Shipping, click here.
1) If desired, select the conditions that must be satisfied for Free Shipping to be activated.
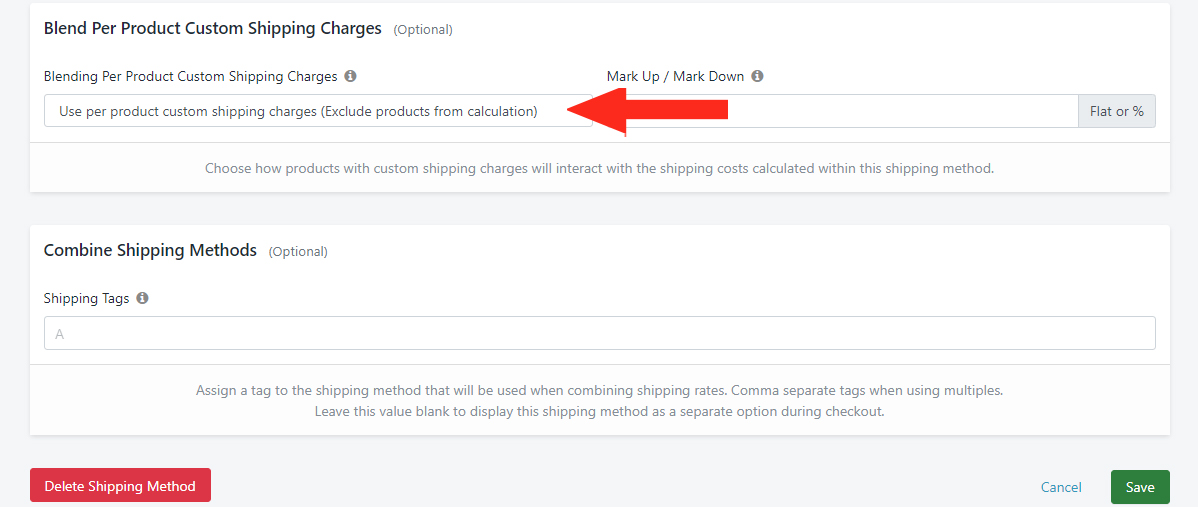
Blend Per Product Custom Shipping Charges
If you have any products with custom shipping charges, you can determine how those charges will be blended with the rates from this Shipping Method.
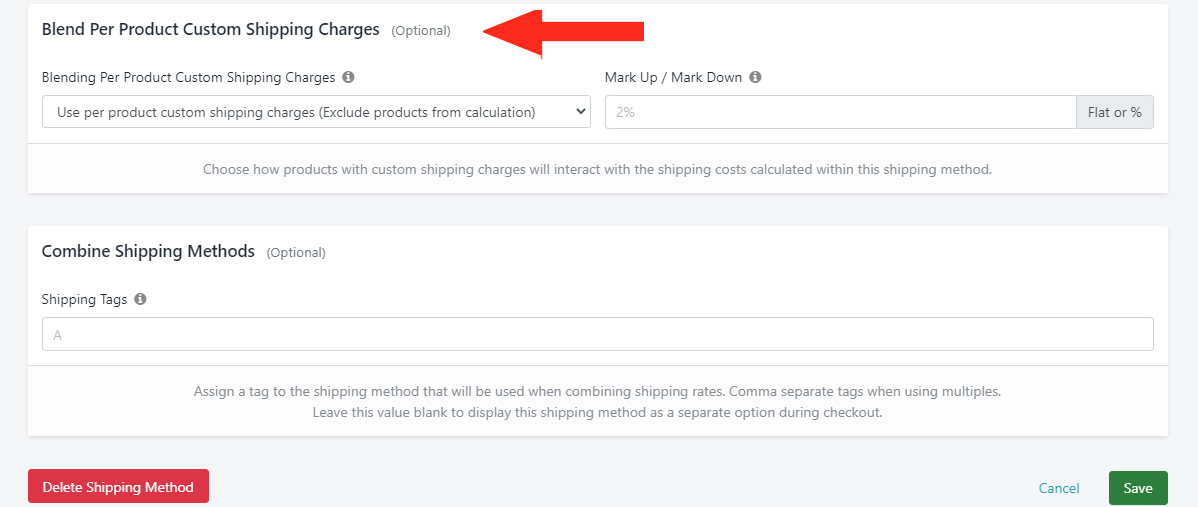
For more detailed information on how to Blend Per Product Custom Shipping Charges, click here.
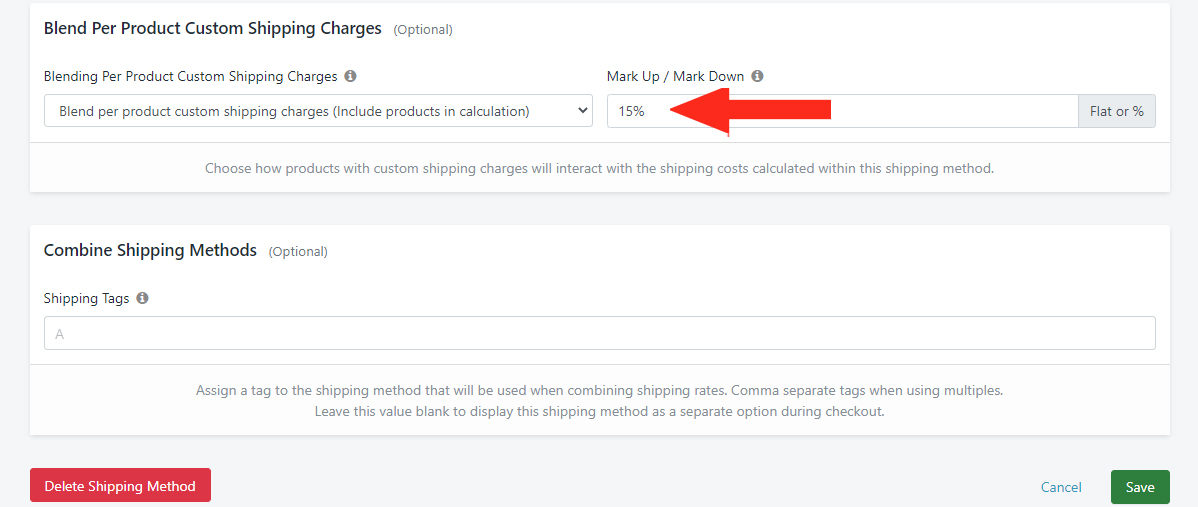
1) If required, select how products with custom shipping charges will interact with the live rates calculated within this Shipping Method.
2) If desired, enter a percentage Mark Up or Mark Down on the blending option.
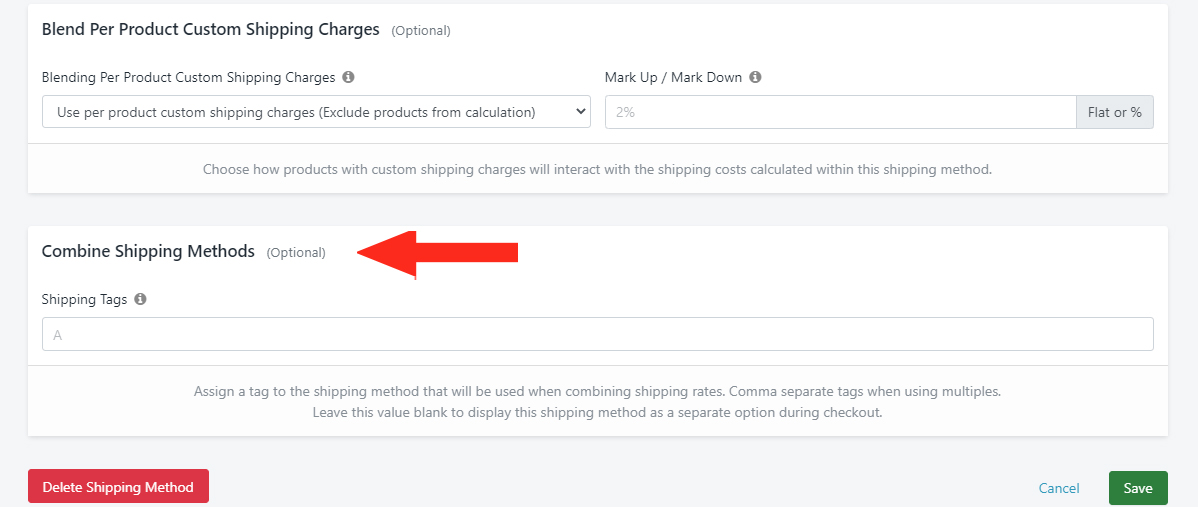
Combine Shipping Methods
Intuitive Shipping uses a tagging system to identify the Shipping Methods that are going to be blended together. Shipping tags can be just about anything you want, though we recommend using something simple and easy to remember.
1) Assign one (1) Shipping Tag that will be used to combine shipping rates. In this case, you will need to assign a different tag to each Delivery Service Shipping Method per carrier.
Save Your Settings
Click the Save button!
Add More Delivery Service Shipping Methods
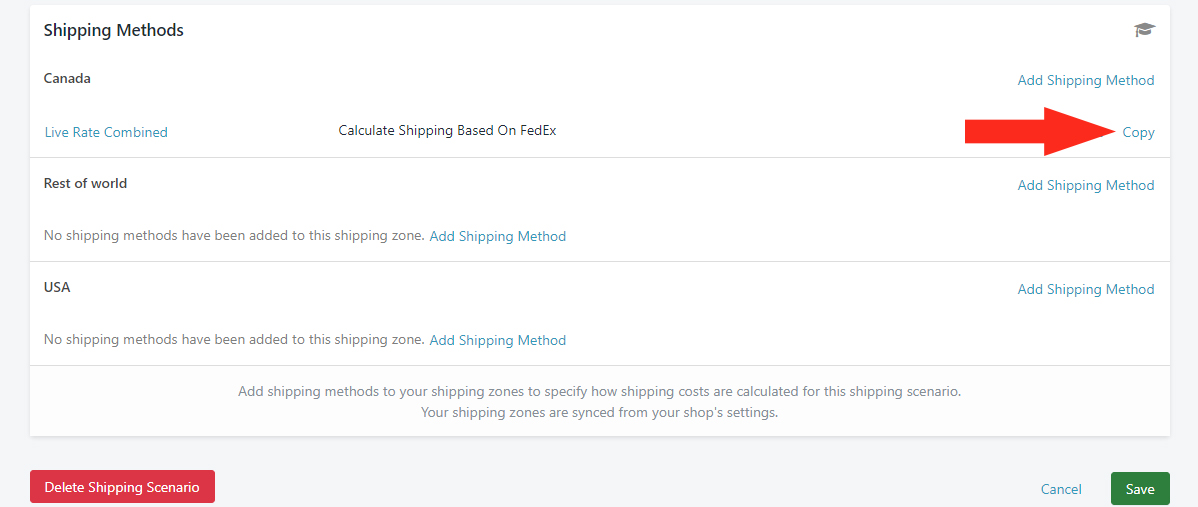
After you save your Shipping Method, you’ll be returned to the Edit Shipping Scenario page.
1) To add another Delivery Service Shipping Method for the same carrier, scroll down to the Shipping Methods section.
2) Click the Copy button beside the Shipping Method you just created.
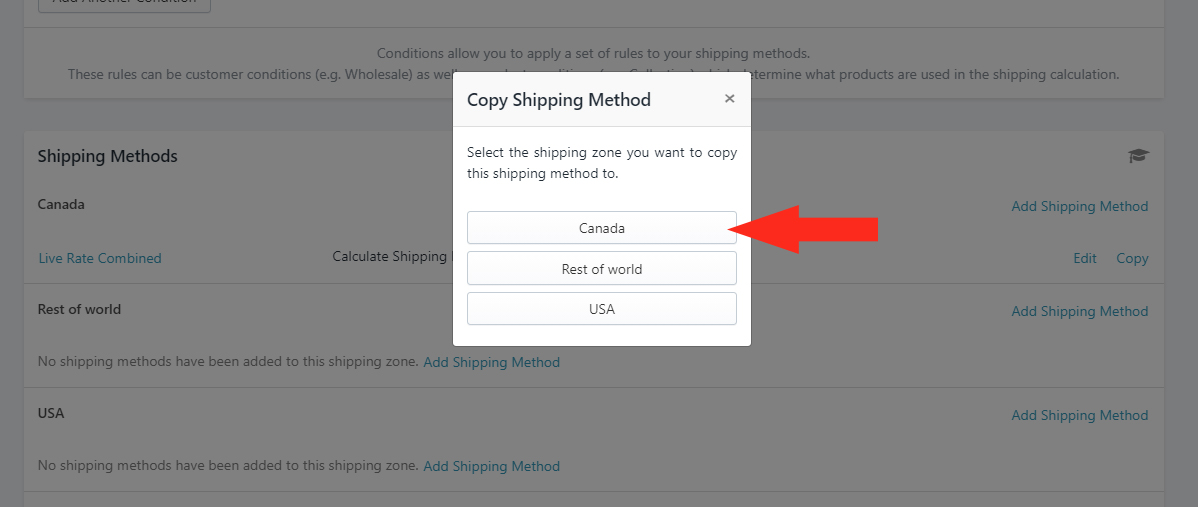
3) Select the same Shipping Zone as the original Shipping Method.
4) Click on the newly copied Shipping Method, then repeat all of the steps to Add A Delivery Service Shipping Method. Be sure to make any necessary changes to the second Shipping Method, such as:
- Giving your second Shipping Method a different title
- Changing other Display Settings if required
- Selecting a different delivery service (again, only one!)
- Assigning a different shipping tag
5) Save your settings!
Once you have added a unique Shipping Method for each carrier delivery service, you can then add another set of Delivery Service Shipping Methods for additional carriers to the same Scenario or other Scenarios.
6) Repeat all of the above steps to add Delivery Service Shipping Methods for additional carriers. Be sure to make a note of all the shipping tags you assign to each Shipping Method so you can easily reference them in the next stage of the setup.
For example, if you have a FedEx Ground Shipping Method for Product ‘X’ and a USPS Ground Shipping Method for Product ‘Y’, you can tag both with the shipping tag ‘A’. When you set up your Combined Shipping Method, both rates will be blended together so that a customer ordering both products will have a single (blended) Ground option at checkout.
Combine Shipping Methods
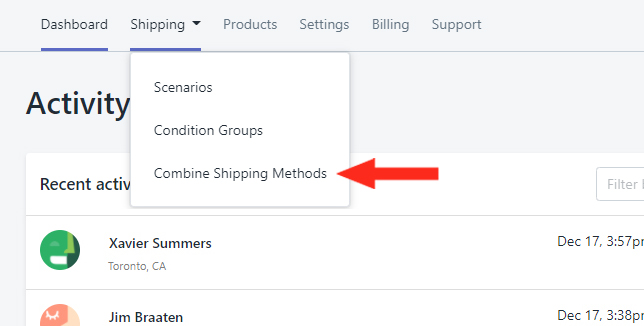
Combined Shipping Methods are managed separately from Shipping Scenarios, so you’ll have to navigate to a different page on the app.
1) Click the Shipping menu button, then select Combine Shipping Methods from the drop-down list.
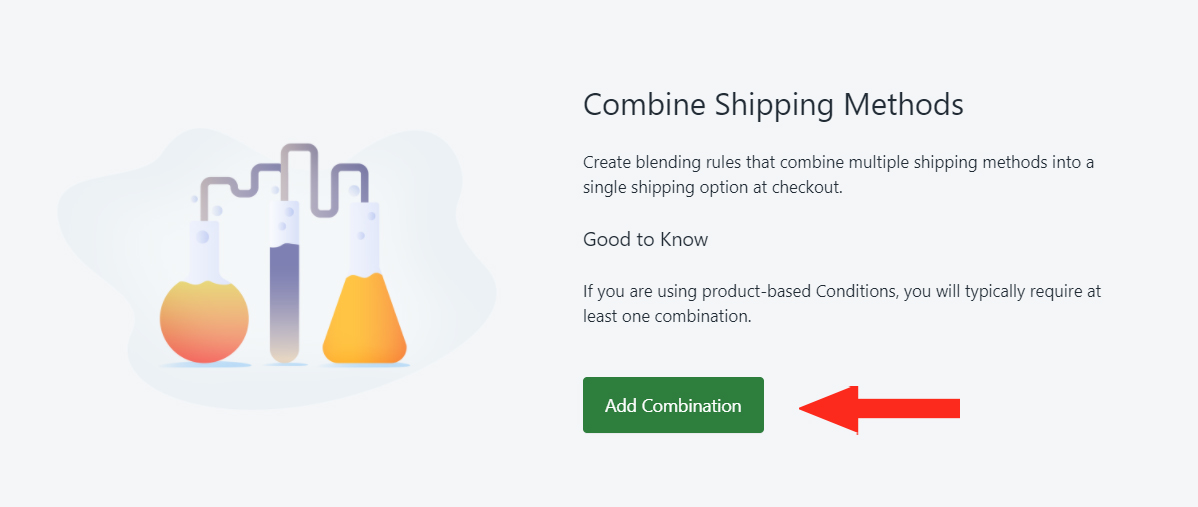
2) Click the Add Combination button.
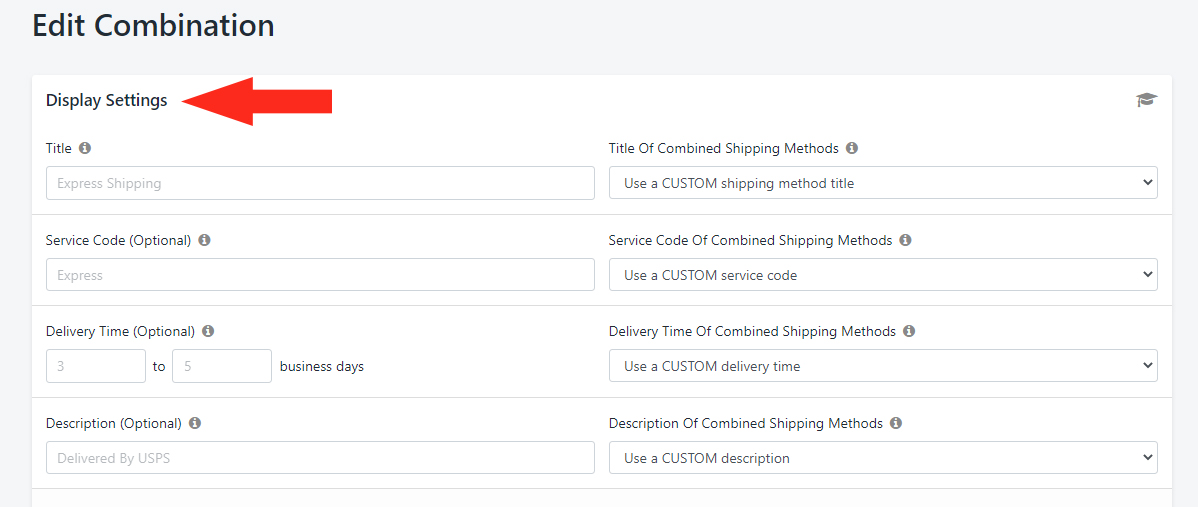
Configure Display Settings
Display Settings let you choose how the Combined Shipping Method will be presented to your customers.
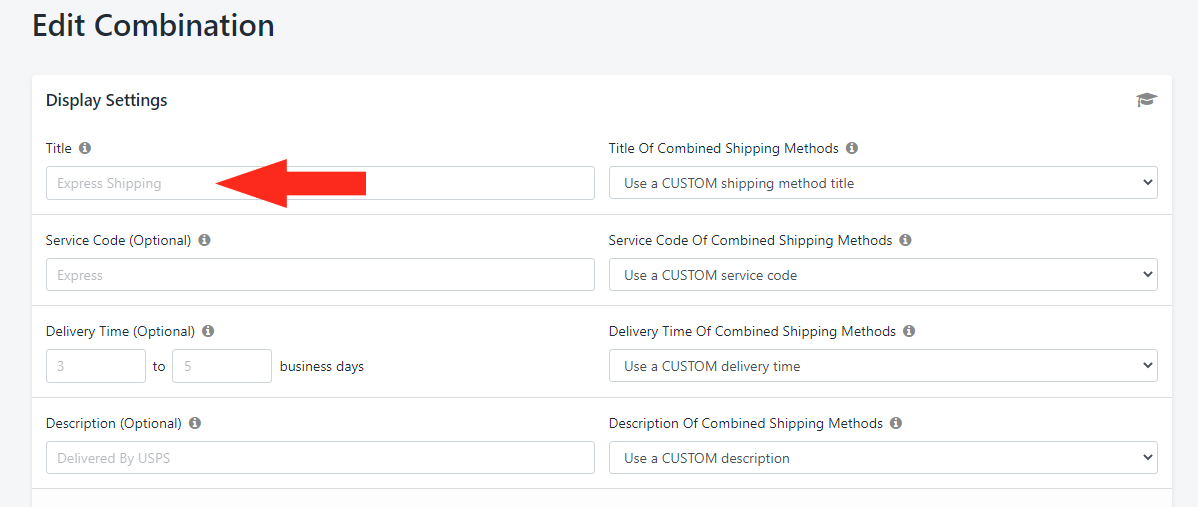
1) Enter the Title of the Combined Shipping Method. Depending on which setting you choose in Step 2, this may be the title that customers see at checkout.
2) Select how the Title of Combined Shipping Methods will be displayed in situations when the Combined Shipping Method is triggered. You have five (5) settings to choose from, though we recommend using either the CUSTOM option, the COMBINE WITH COSTS option or the COMBINE WITHOUT COSTS option for Live Rate Combined Shipping Methods:
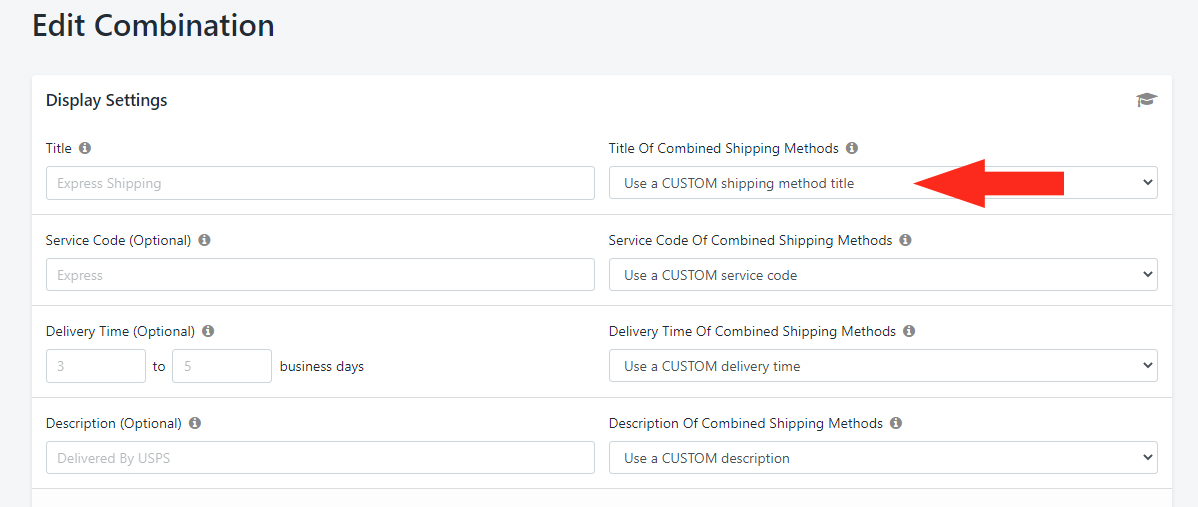
Use a CUSTOM shipping method title – this setting means the Title you enter in Step 1 will be displayed to the customer when the Combined Shipping Method is triggered. This is the default setting.
Let’s say you’re combining rates from two Scenarios – one called ‘Snack Foods’ and another called ‘Beer and Wine’. Both Scenarios have Shipping Methods titled ‘Ground’.
You’ve then created a Combined Shipping Method with the custom title ‘Ground Combined’. When this setting is selected, the title will always be displayed as ‘Ground Combined’ even if the customer only orders a ‘Snack Foods’ product.
In the above example, consider changing the CUSTOM shipping method title from ‘Ground Combined’ to just ‘Ground’ to match the individual shipping method titles.
Use the FIRST shipping method title – this setting means that the title of the first Shipping Method in the combination will be displayed to the customer when the Combined Shipping Method is triggered.
Let’s say you’re combining rates from a Scenario called ‘Dress Shirts’ – which has a Delivery Service Shipping Method titled ‘UPS Ground’ – and a Scenario called ‘T-Shirts’ – which has a Delivery Service Shipping Method titled ‘FedEx Ground’. When this setting is selected and the combination is triggered, the title will be displayed as ‘UPS Ground’ at checkout because the Scenario title ‘Dress Shirts’ comes ahead of ‘T-Shirts’ alphabetically.
Use the LAST shipping method title – this setting means that the title of the last Shipping Method in the combination will be displayed to the customer when the Combined Shipping Method is triggered.
Let’s use the same example – a Scenario called ‘Dress Shirts’ – which has a Delivery Service Shipping Method titled ‘UPS Ground’ – and a Scenario called ‘T-Shirts’ – which has a Delivery Service Shipping Method titled ‘FedEx Ground’. When this setting is selected and the combination is triggered, the title will be displayed as ‘FedEx Ground’ at checkout because the Scenario title ‘T-Shirts’ comes after ‘Dress Shirts’ alphabetically.
COMBINE the shipping method titles WITHOUT COSTS – this setting means that all the titles of the Shipping Methods in the combination – without their respective individual costs – will be displayed to the customer when the Combined Shipping Method is triggered.
Let’s say you’re combining rates from a Scenario called ‘Fishing Rods’ – which has a Delivery Service Shipping Method titled ‘FedEx 2 Day’ – and a Scenario called ‘Tackle’ – which has a Delivery Service Shipping Method titled ‘Canada Post Priority’. When this setting is selected and the combination is triggered, the title will be displayed as ‘FedEx 2 Day + Canada Post Priority’ at checkout because of the alphabetical order of the Scenarios (‘Fishing Rods’, ‘Tackle’).
COMBINE the shipping method titles WITH COSTS – this setting means that all the titles of the Shipping Methods in the combination – with their respective individual costs – will be displayed to the customer when the Combined Shipping Method is triggered.
Let’s use the same example – a Scenario called ‘Fishing Rods’ – which has a Delivery Service Shipping Method titled ‘FedEx 2 Day’ and a Scenario called ‘Tackle’ – which has a Delivery Service Shipping Method titled ‘Canada Post Priority’. A customer order for both products generates a FedEx 2 Day rate of $33.20 and a Canada Post Priority rate of $21.10. When this setting is selected and the combination is triggered, the title will be displayed as ‘FedEx 2 Day ($33.20) + Canada Post Priority ($21.10)’ at checkout because of the alphabetical order of the Scenarios.
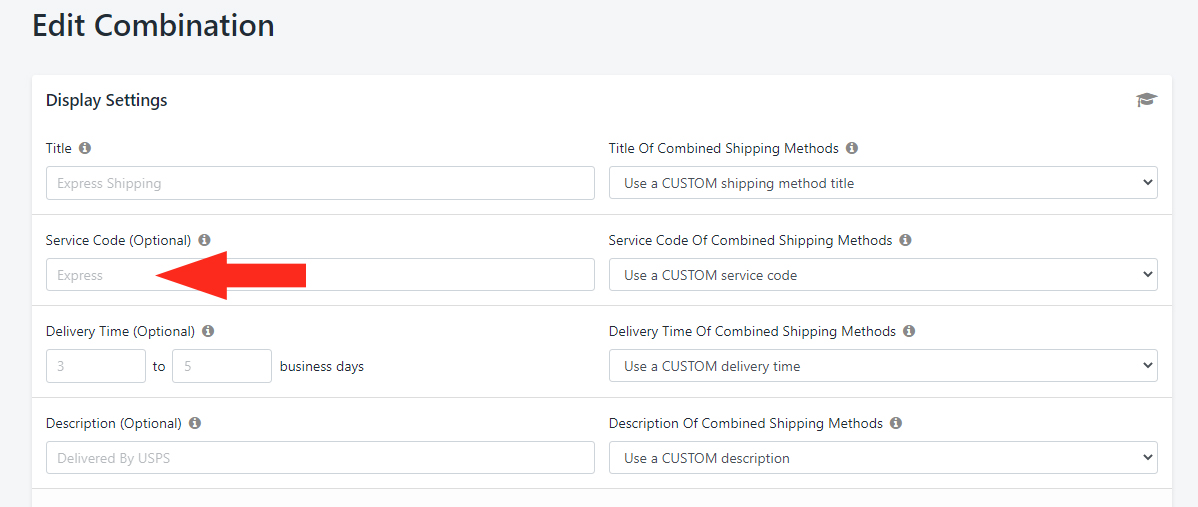
3) Enter a Service Code – e.g. ‘Priority’. This is optional and can be left blank if you are not using a custom Service Code (see Step 4).
4) Select how the Service Code of Combined Shipping Methods will be displayed in the Order details in situations when the Combined Shipping Method is triggered. You have four (4) settings to choose from:
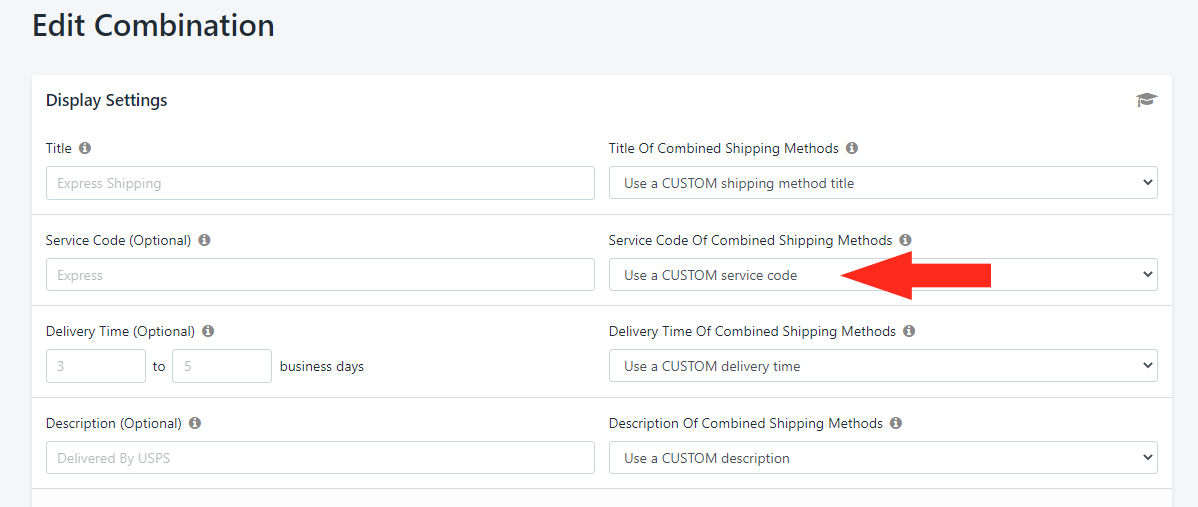
Use a CUSTOM service code – this setting means the Service Code you enter in Step 4 will be displayed in the Order details when the Combined Shipping Method is triggered.
Use the FIRST shipping method service code – this setting means that the service code of the first Shipping Method in the combination will be displayed in the Order details when the Combined Shipping Method is triggered.
Let’s say you’re combining rates from a Scenario called ‘Spring Collection’ – which has a UPS service code ’08’ – and a Scenario called ‘Summer Collection’ – which has a FedEx service code ’06’. When this setting is selected and the combination is triggered, the service code will be displayed as ’08’ in the Order details because ‘Spring Collection’ comes ahead of ‘Summer Collection’ alphabetically.
Use the LAST shipping method service code – this setting means that the service code of the last Shipping Method in the combination will be displayed in the Order details when the Combined Shipping Method is triggered.
Let’s use the same example – a Scenario called ‘Spring Collection’ – which has a UPS service code ’08’ – and a Scenario called ‘Summer Collection’ – which has a FedEx service code ’06’. When this setting is selected and the combination is triggered, the service code will be displayed as ’06’ in the Order details because ‘Summer Collection’ comes after ‘Spring Collection’ alphabetically.
COMBINE the shipping method service codes – this setting means that all the service codes of the Shipping Methods in the combination will be displayed in the Order details when the Combined Shipping Method is triggered.
Let’s say you’re combining rates from a Scenario called ‘Hats’ – which has a DHL service code ‘CX’ – and a Scenario called ‘Jerseys’ – which has a FedEx service code ’01’. When this setting is selected and the combination is triggered, the service code will be displayed as ‘CX + 01’ in the Order details.
5) Enter the Delivery Time of the Combined Shipping Method that the customer will see at checkout. This is optional and can be left blank if you are not using a custom Delivery Time (see Step 6).
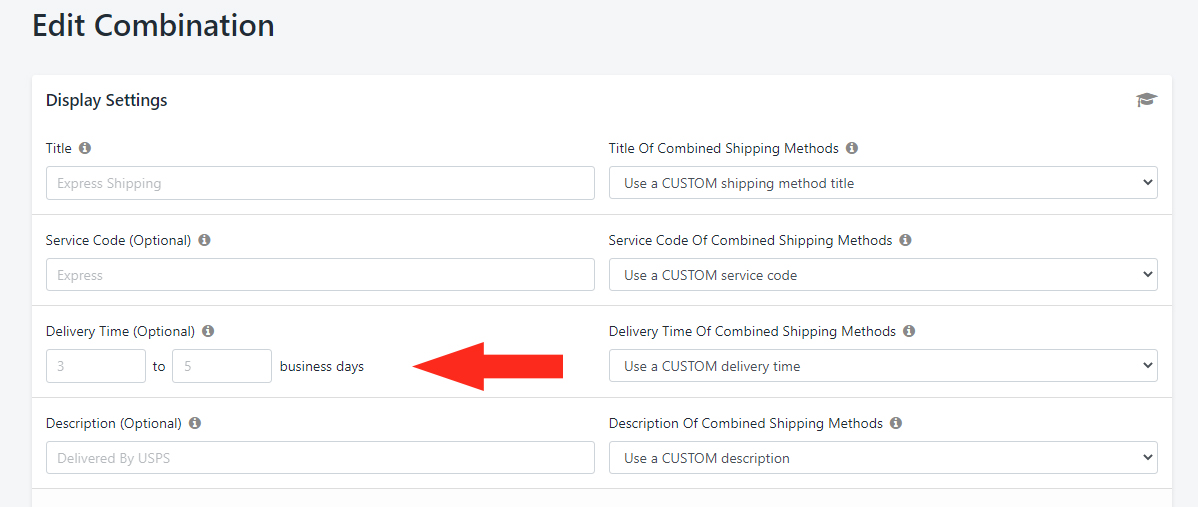
6) Select how the Delivery Time of Combined Shipping Methods will be displayed to the customer in situations when the Combined Shipping Method is triggered. You have four (4) settings to choose from:
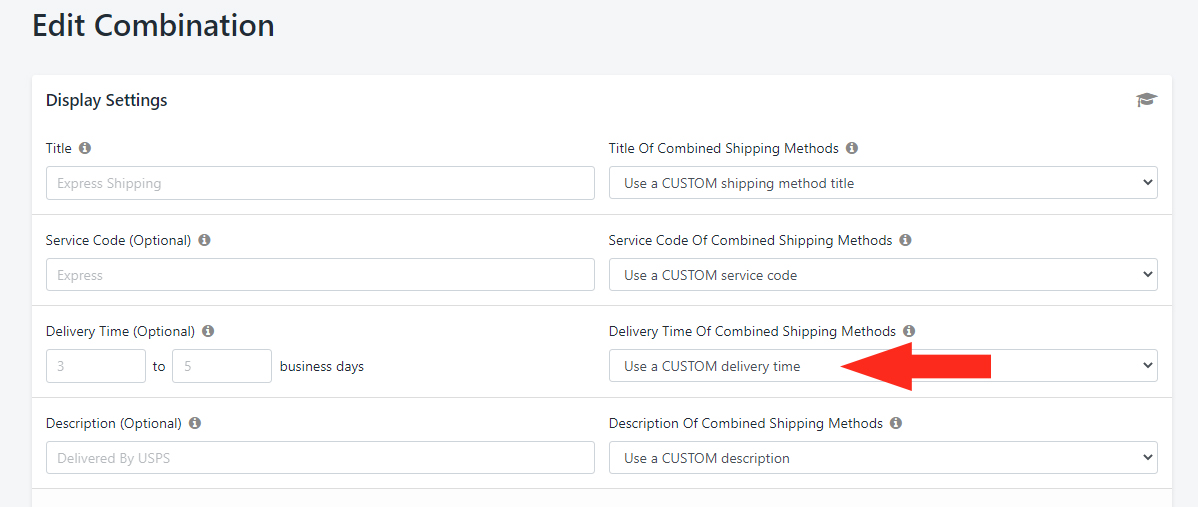
Use a CUSTOM delivery time – this setting means the Delivery Time you enter in Step 5 will be displayed to the customer when the Combined Shipping Method is triggered.
Use the FASTEST shipping method delivery time – this setting means that the fastest delivery time of the Shipping Methods in the combination will be displayed to the customer when the Combined Shipping Method is triggered.
Let’s say you’re combining rates from a Scenario called ‘Clothing’ – which typically has an Australia Post delivery time of 4 business days – and a Scenario called ‘Leashes and Collars’ – which typically has a DHL delivery time of 3 business days. When this setting is selected and the combination is triggered, the delivery time will be displayed as ‘3 business days’ at checkout.
Use the SLOWEST shipping method delivery time – this setting means that the slowest delivery time of the Shipping Methods in the combination will be displayed to the customer when the Combined Shipping Method is triggered.
Let’s use the same example – a Scenario called ‘Clothing’ – which typically has a DHL delivery time of 4 business days – and a Scenario called ‘Leashes and Collars’ – which typically has a Shipping Method delivery time of 3 business days. When this setting is selected and the combination is triggered, the delivery time will be displayed as ‘4 business days’ at checkout.
COMBINE the shipping method delivery times – this setting means that all the delivery times from the Shipping Methods in the combination will be added together, and the sum will be displayed to the customer when the Combined Shipping Method is triggered.
Let’s say you’re combining rates from a Scenario called ‘Chew Toys’ – which typically has a Canada Post delivery time of 2 business days – and a Scenario called ‘Pet Beds’ – which typically has a UPS delivery time of 1 business day. When this setting is selected and the combination is triggered, the delivery time will be displayed as ‘3 business days’ at checkout.
7) Enter a Description for your Combined Shipping Method. The Description will appear below the Shipping Method Title at checkout. This is optional and can be left blank if you are not using a custom Description (see Step 8).
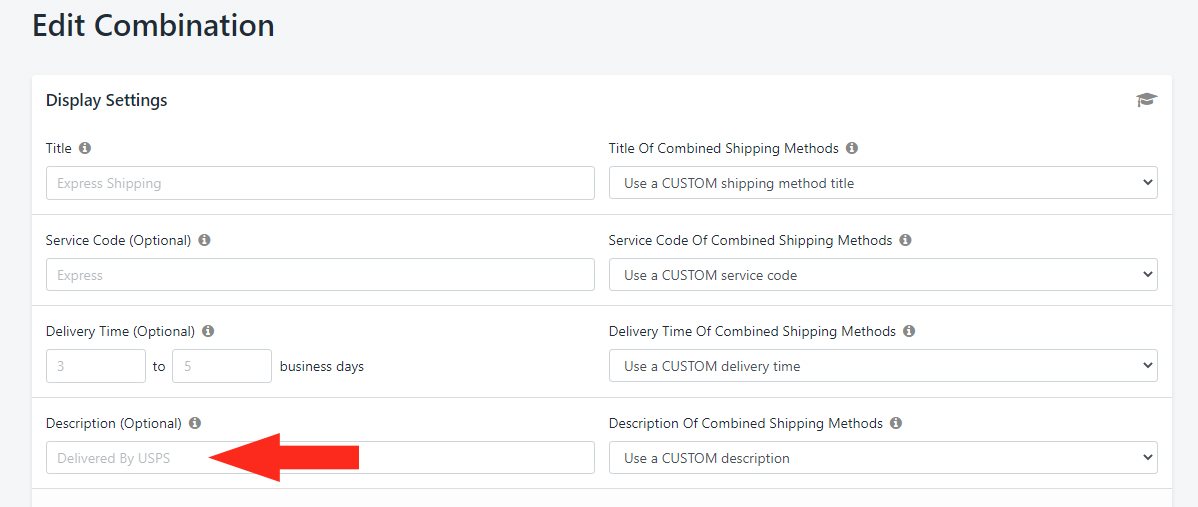
8) Select how the Description of Combined Shipping Methods will be displayed to the customer in situations when the Combined Shipping Method is triggered. You have four (4) settings to choose from:
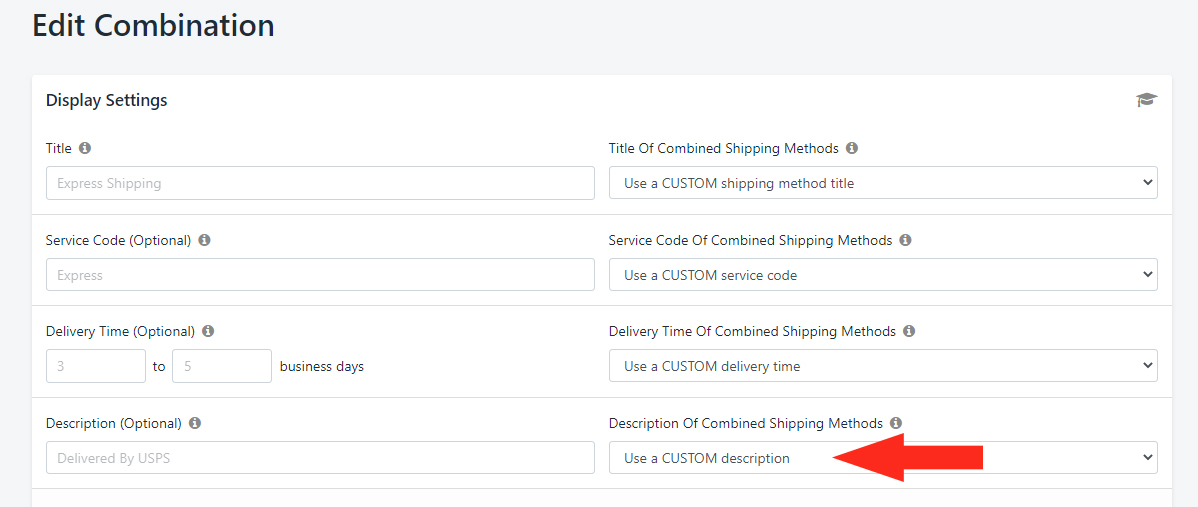
Use a CUSTOM description – this setting means the Description you enter in Step 7 will be displayed to the customer when the Combined Shipping Method is triggered.
Use the FIRST shipping method description – this setting means that the description of the first Shipping Method in the combination will be displayed to the customer when the Combined Shipping Method is triggered.
Let’s say you’re combining rates from a Scenario called ‘Decorations’ – which has a Shipping Method description ‘Carrier Pickup Mon-Fri’ – and a Scenario called ‘Greeting Cards’ – which has a Shipping Method description ‘Ships Wed and Fri Only’. When this setting is selected and the combination is triggered, the description will be displayed as ‘Carrier Pickup Mon-Fri’ at checkout because the Scenario title ‘Decorations’ comes ahead of ‘Greeting Cards’ alphabetically.
Use the LAST shipping method description – this setting means that the title of the last Shipping Method in the combination will be displayed to the customer when the Combined Shipping Method is triggered.
Let’s use the same example – a Scenario called ‘Decorations’ – which has a Shipping Method description ‘Carrier Pickup Mon-Fri’ – and a Scenario called ‘Greeting Cards’ – which has a Shipping Method description ‘Ships Wed and Fri Only’. When this setting is selected and the combination is triggered, the description will be displayed as ‘Ships Wed and Fri Only’ at checkout because the Scenario title ‘Greeting Cards’ comes after ‘Decorations’ alphabetically.
COMBINE the shipping method descriptions – this setting means that all the descriptions of the Shipping Methods in the combination will be displayed to the customer when the Combined Shipping Method is triggered.
Let’s say you’re combining rates from a Scenario called ‘Cables and Accessories’ – which has a Shipping Method description ‘Allow 1-2 Days Processing – Duty & Taxes Excluded’ – and a Scenario called ‘Monitors’ – which has a Shipping Method titled simply ‘Duty & Taxes Extra’. When this setting is selected and the combination is triggered, the description will be displayed as ‘Allow 1-2 Days Processing – Duty & Taxes Excluded + Duty & Taxes Extra’ at checkout.
Whatever Display Settings you decide to use, we recommend making things as simple to understand as possible to prevent customer confusion during checkout.
Calculation
Calculation settings let you choose how the shipping rates in the Combined Shipping Method will be calculated.
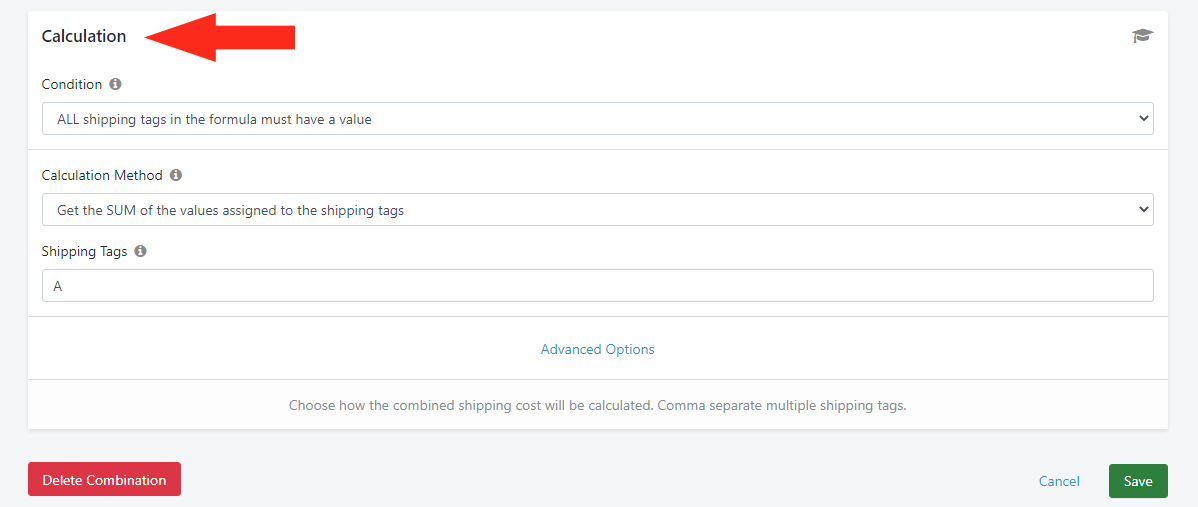
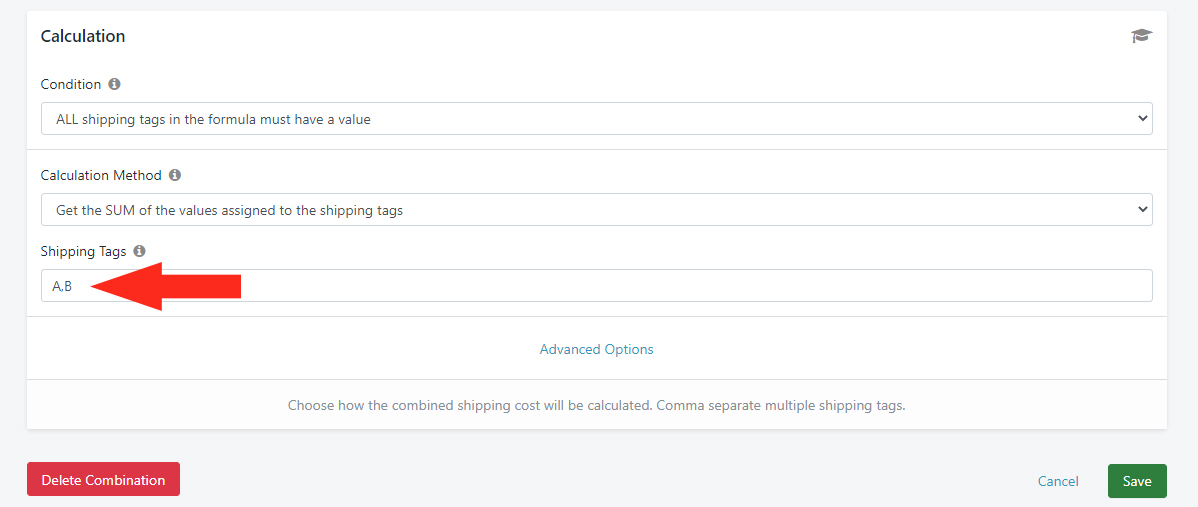
1) Under Condition, select whether or not all of the shipping tags in the formula must have a value. You have two (2) settings to choose from:
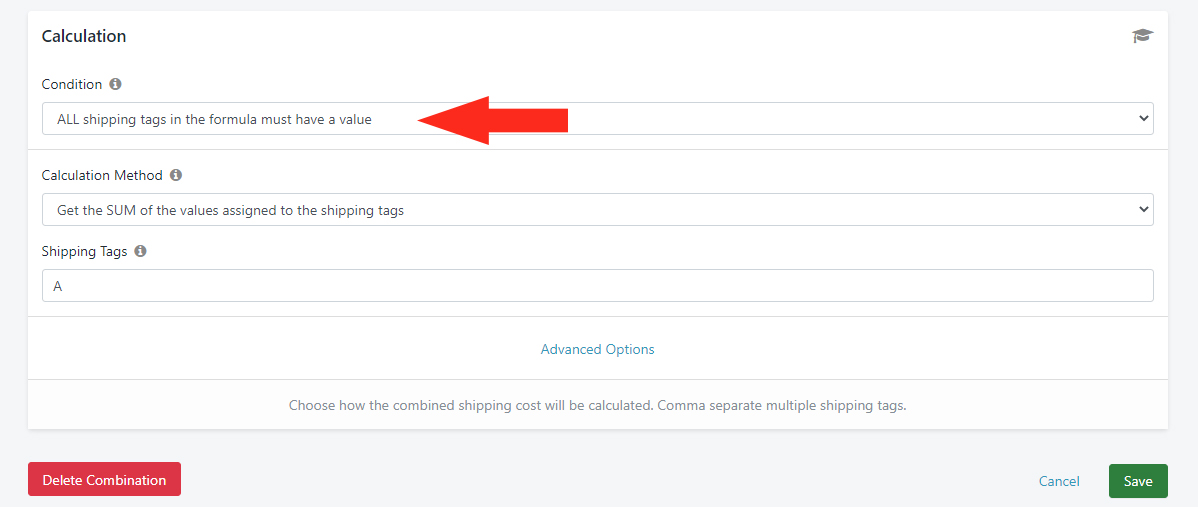
ALL shipping tags in the formula must have a value – this setting means that all of the shipping tags referenced under the Shipping Tags heading (see examples below) must be included in the calculation.
Let’s say you’re combining rates from a Scenario called ‘Ice Cream Containers’ – which has a Shipping Method that has generated a live shipping rate of $16.70 and has the shipping tag ‘A’ – and a Scenario called ‘Candy Containers’ – which has a Shipping Method that generated a live rate of $24.20 and also has the shipping tag ‘A’.
In your Combined Shipping Method, you’ve set the Calculation Condition to ‘ALL shipping tags in the formula must have a value’, and you have referenced Shipping Tag ‘A’.
When a customer orders an ‘Ice Cream Containers’ product and a ‘Candy Containers’ product, the Combined Shipping Method will be triggered because both individual Shipping Methods were tagged ‘A’. The customer will be charged $40.90 for shipping at checkout.
Now, let’s say you have the same two Scenarios and Shipping Methods, each generating the same live rates ($16.70 and $24.20 respectively) and tagged with the shipping tag (‘A’).
In your Combined Shipping Method, you’ve left the Calculation Condition set to ‘ALL’, but you’ve instead referenced shipping tag ‘B‘.

When a customer orders an ‘Ice Cream Containers’ product and a ‘Candy Containers’ product, the Combined Shipping Method will not be triggered because neither of the individual Shipping Methods was tagged ‘B’. The Shipping Methods for each product will be displayed separately and the customer will have the option to be charged either $16.70 or $24.20 at checkout.
Finally, let’s say you have the same Scenarios set up the same way.
In your Combined Shipping Method, you’ve left the Calculation Condition set to ‘ALL’, but now you’ve referenced two shipping tags – ‘A‘ and ‘B‘.
When a customer orders an ‘Ice Cream Containers’ product and a ‘Candy Containers’ product, the Combined Shipping Method will be triggered because both individual Shipping Methods were tagged ‘A’, however, because neither was tagged ‘B’ – which is required – the customer will not be able to check out.
ANY shipping tags in the formula must have a value – this setting means that any one of the shipping tags referenced under the Shipping Tags heading (see examples below) can be included in the calculation.
Let’s say you’re combining rates from a Scenario called ‘Seafood’ – which has a Shipping Method that generated a live shipping rate of $12.12 and has the shipping tag ‘A’ – and a Scenario called ‘Canned’ – which has a Shipping Method that generated a live rate of $9.72 and also has the shipping tag ‘A’.
In your Combined Shipping Method, you’ve set the Calculation Condition to ‘ANY shipping tags in the formula must have a value’, and you have referenced Shipping Tag ‘A’.

When a customer orders a ‘Seafood’ product and a ‘Canned’ product, the Combined Shipping Method will be triggered because both individual Shipping Methods were tagged ‘A’. The customer will be charged $21.84 for shipping at checkout.
Now, let’s say you have the same two Scenarios and Shipping Methods, each generating the same live rates ($12.12 and $9.72 respectively) and tagged with the shipping tag ‘A’.
In your Combined Shipping Method, you’ve left the Calculation Condition set to ‘ANY’, but you’ve instead referenced shipping tag ‘B‘.

When a customer orders a ‘Seafood’ product and a ‘Canned’ product, the Combined Shipping Method will not be triggered because neither of the individual Shipping Methods was tagged ‘B’. The Shipping Methods for each product will be displayed separately, and the customer will have the option to be charged either $12.12 or $9.72 at checkout.
Finally, let’s say you have the same Scenarios set up the same way.
In your Combined Shipping Method, you’ve left the Calculation Condition set to ‘ANY’, but now you’ve referenced two shipping tags – ‘A‘ and ‘B‘.

In this situation – unlike when the Calculation Condition was set to ‘ALL’ – when a customer orders a ‘Seafood’ product and a ‘Canned’ product, the Combined Shipping Method will be triggered because both of the Shipping Methods in the calculation included either shipping tag ‘A’ or ‘B’ – in this case both were tagged ‘A’. The customer will be charged $21.84 for shipping at checkout.
2) Under Calculation Method, select how the shipping costs in the combination will be calculated. You have four (4) settings to choose from:
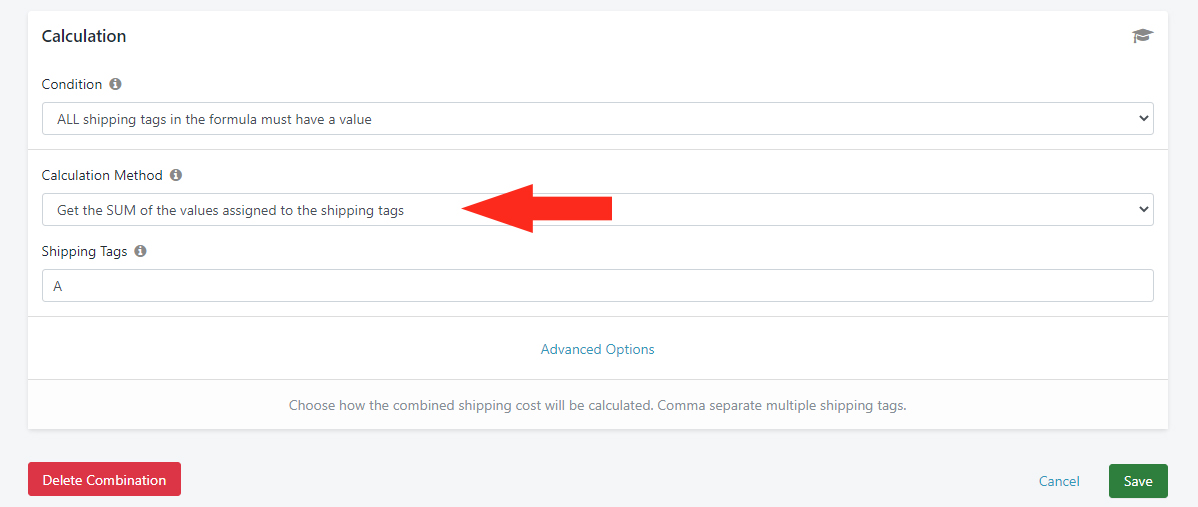
Get the SUM of the values assigned to the shipping tags – this setting means that all of the shipping costs in the combination will be added together for a total cost.
Let’s say you’re combining rates from three scenarios: the first Scenario is called ‘Wine’ – it has a Shipping Method that generates a live shipping rate of $15.05 and has the shipping tag ‘A’. The second Scenario is called ‘Food Local’ – it has a Shipping Method that generates a live rate of $16.90 and also has the shipping tag ‘A’. The third Scenario is called ‘Merch’ – it has a Shipping Method that generates a live rate of $9.98 and also has the shipping tag ‘A’.
You also have a fourth Scenario called ‘Beer’ which has a Shipping Method that generates a live rate of $24.20 but does not have a shipping tag.
In your Combined Shipping Method, you’ve set the Calculation Condition to ‘ALL shipping tags in the formula must have a value’, the Calculation Method to ‘Get the SUM of the values assigned to the shipping tags’, and you have referenced shipping tag ‘A’.
When a customer orders a ‘Wine’ product and a ‘Food Local’ product, the Combined Shipping Method will be triggered because both of the individual Shipping Methods were tagged ‘A’. The customer will be charged $31.95 for shipping at checkout ($15.05 for the ‘Wine’ product + $16.90 for the ‘Food Local’ product).
When a customer orders ‘Food Local’ products and ‘Merch’ products, the Combined Shipping Method will be triggered because both of the individual Shipping Methods were tagged ‘A’. The customer will be charged $26.88 for shipping at checkout ($16.90 for the ‘Food Local’ product + $9.98 for the ‘Merch’ products).
When a customer orders a ‘Wine’ product, a ‘Beer’ product and a ‘Merch’ product, the Combined Shipping Method will be triggered because two of the individual Shipping Methods were tagged ‘A’. However, because the Shipping Method for ‘Beer’ was not tagged, the customer will have the option to be charged either $25.03 ($15.05 for the ‘Wine’ product + $9.98 for the ‘Merch’ product) or $24.20 (for the ‘Beer’ product) at checkout. In order to add ‘Beer’ to the combination, it must also have the shipping tag ‘A’.
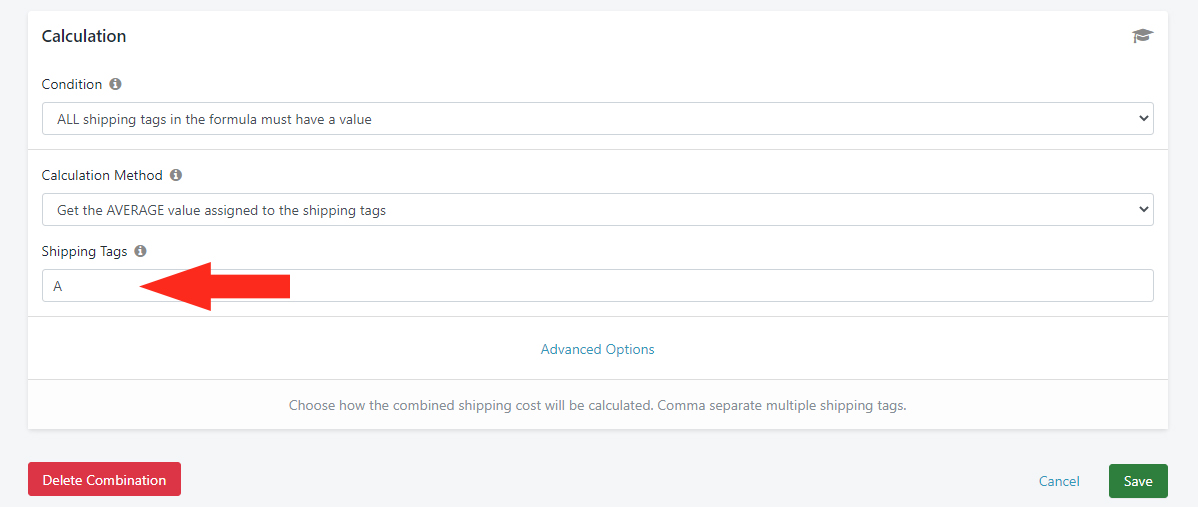
Get the AVERAGE of the values assigned to the shipping tags – this setting means that all of the shipping costs in the combination will be calculated as an average cost.
Let’s say you’re combining rates from three Scenarios. The first Scenario is called ‘Jewelry’ – it has a Shipping Method that generates a live shipping rate of $35.50 and has the shipping tag ‘A’. The second Scenario is called ‘Hair Accessories’ – it has a Shipping Method that generates a live rate of $18.80 and also has the shipping tag ‘A’. The third Scenario is called ‘Bags’ – it has a Shipping Method that generates a live rate of $10.25 and also has the shipping tag ‘A’.
In your Combined Shipping Method, you’ve set the Calculation Condition to ‘ALL shipping tags in the formula must have a value’, the Calculation Method to ‘Get the AVERAGE value assigned to the shipping tags’, and you have referenced shipping tag ‘A’.
When a customer orders just a ‘Bag’ product, the Combined Shipping Method will not be triggered because there is only one live shipping rate. The customer will be charged $10.25 for shipping at checkout.
When a customer orders a ‘Jewelry’ product and a ‘Bag’ product, the Combined Shipping Method will be triggered because both of the individual Shipping Methods were tagged ‘A’. The customer will be charged $22.88 for shipping at checkout (the average of $35.50 for the ‘Jewelry’ product and $10.25 for the ‘Bag’ product).
Get the LOWEST value assigned to the shipping tags – this setting means that all of the shipping costs in the combination will be compared, and the lowest available cost will be displayed.
Let’s say you’re combining rates from three vendor-based Scenarios. The first Scenario is called ‘Winston’ – it has a Shipping Method that generates a live shipping rate of $51.50 and has the shipping tag ‘A’. The second Scenario is called ‘Mayfield’ – it has a Shipping Method that generates a live rate of $19.84 and also has the shipping tag ‘A’. The third Scenario is called ‘Cartwright’ – it includes a Shipping Method that generates a live rate of $8.12 also has the shipping tag ‘A’.
In your Combined Shipping Method, you’ve set the Calculation Condition to ‘ALL shipping tags in the formula must have a value’, the Calculation Method to ‘Get the LOWEST value assigned to the shipping tags’, and you have referenced shipping tag ‘A’.

When a customer orders a ‘Winston’ product and a ‘Mayfield’ product, the Combined Shipping Method will be triggered because both of the individual Shipping Methods were tagged ‘A’. The customer will be charged $19.84 for shipping at checkout because the ‘Mayfield’ product has the lower individual shipping cost.
When a customer orders a ‘Winston’ product, a ‘Mayfield’ product and a ‘Cartwright’ product, the Combined Shipping Method will be triggered because all of the individual Shipping Methods were tagged ‘A’. The customer will be charged $8.12 for shipping at checkout because the ‘Cartwright’ product has the lowest individual shipping cost.
Get the HIGHEST value assigned to the shipping tags – this setting means that all of the shipping costs in the combination will be compared, and the highest available cost will be displayed.
Let’s use the same example we used for the ‘LOWEST’ value setting – the ‘Winston’ Scenario has a live rate of $51.50 and the shipping tag ‘A’; the ‘Mayfield’ Scenario has a live rate of $19.84 and the shipping tag ‘A’; the ‘Cartwright’ Scenario has a live rate of $8.12 and the shipping tag ‘A’.
In your Combined Shipping Method, you’ve set the Calculation Condition to ‘ALL shipping tags in the formula must have a value’, the Calculation Method to ‘Get the HIGHEST value assigned to the shipping tags’, and you have referenced Shipping Tag ‘A’.

In this case, when a customer orders all three of these products, the Combined Shipping Method will be triggered because all of the individual Shipping Methods were tagged ‘A’. The customer will be charged $51.50 for shipping at checkout because the ‘Winston’ products have the highest individual shipping rate.
When a customer orders a ‘Mayfield’ product and a ‘Cartwright’ product, the Combined Shipping Method will be triggered because both of the individual Shipping Methods were tagged ‘A’. The customer will be charged $19.84 for shipping at checkout because the ‘Mayfield’ item has a higher individual shipping rate.
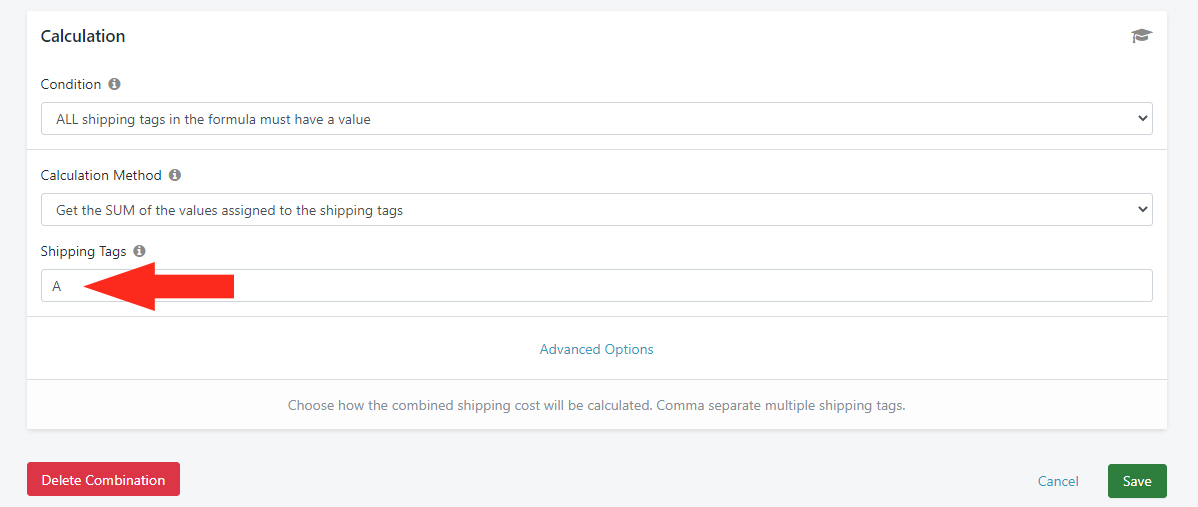
3) Add one of the shipping tags that will be used to combine at least two of your Delivery Service Shipping Methods – e.g. FedEx Ground and UPS Ground.
For example, if you tagged your FedEx Ground Shipping Method with the shipping tag ‘A’ but you tagged your UPS Ground Shipping Method with the shipping tag ‘B’ – and you want them to be combined at checkout – set the Calculation Condition to ‘ANY shipping tag in the formula must have a value’, then add both ‘A’ and ‘B’ to Shipping Tags
Save Your Settings
Click the Save button!
Add More Combinations
1) Repeat the steps to Add A Combination for any additional Shipping Methods you want to combine.
What’s Next: Check out Common Setups